Melting & Felting
As much as I enjoy felting and working with natural fibres I also love mixed media work and getting creative with heat manipulative, man made fabrics. It’s all the more enjoyable when you ask at the start of a class if anyone hasn’t worked with a heat tool or a soldering iron and you see the hands go up. You just know there are going to be some “ooohs and ahhhs” and huge smiles coming from excited students once they get melting their fabrics!
Last week I was invited to teach a group at Stainfield Village Hall, just a half hour from home. The groups organiser, Clare, had attended my Layer, Stitch & Burn workshop a few months previous in Sleaford and had so much fun creating this sea shell inspired piece she asked me to repeat the class with her group.

This technique was developed by the Canadian mixed media textile artist Susan Lenz. It involves layering synthetic fabrics on a background of acrylic felt before adding free motion stitch using cotton, viscose or rayon threads. The last stage involves “melting” the background fabric with a heat gun to create a lace like effect as seen in Susan’s In Box and Stained Glass Series

You would imagine all acrylic felt would melt and therefore be suitable for this process but I’ve discovered the hard way that’s not the case! If you’re going to try this technique I would suggest testing your background felt before stitching as some simply discolours and singes rather than melting! Having been caught out once I now order a sample before purchasing by the metre. My latest supply came from Empress Mills and melts a treat!
In the workshop, although everyone is given the option of working with simple geometric shapes, I like to encourage students to think outside the box (pun intended!) and create a piece that’s unique to them. In the past I’ve had ladies using fossils, gum nuts leaves and all sorts of other motifs as their starting point for a design as you can see from these three examples…..


Working with a more organic design is also great for those who haven’t done free motion before, or maybe are not as confident with it, as your stitching doesn’t have to be precise. In fact a “sketchy” approach, similar to the leaf design, looks great!
At Stainfield not everyone got finished on the day but I’ve been told that, at the groups meeting this week, not only did they finish off what they had started with me but most of the ladies also began working on a second piece! The size we worked to was approximately 23cm square so it fits the square IKEA box frame.


Another heat manipulative workshop I teach is the Lutradur Leaves. This Wednesday evening I loaded the car and drove up to East Ayton near Scarborough, a really beautiful part of the country, ahead of Wednesdays class for Anita Cassidy and the Textile Experimental Group. I knew we were going to get on like a house on fire when I heard the name of the group!
The village hall was very light, airy and spacious, perfect for this type of class.
The group were encouraged to bring some leaves to use as inspiration and I supplied sketches for those that wanted them. Everyone worked with a medium weight 70gsm Lutradur and once again the ladies produced some fabulous work which sits nicely with their current theme of “decay”.


Between my last post and classes starting up again after the Summer I’ve done a bit of dressmaking, or “top” making to be precise. I’ve got a very simple linen, sleeveless, dart-less, top that I really like and I decided to clone it, adding darts to make it more fitted. Not having made anything with darts before I figured YouTube would be a good move….and it was! 
I tried the pattern out with a very cheap floral fabric from Boyes. I think it’s viscose, it’s not silky but it shifted constantly while I was working with it so I’m amazed it turned out wearable!
The “palm tree” fabric is 100% cotton and was so easy to use, it’s definitely the better of the two.


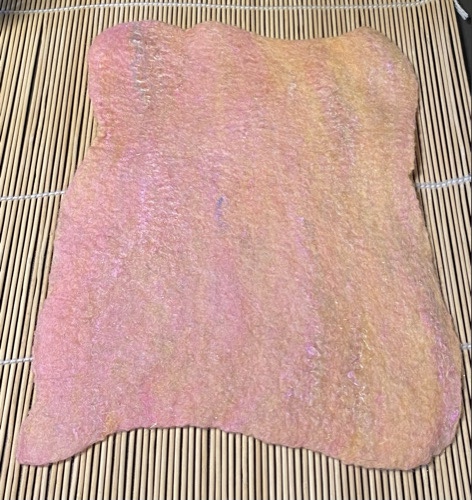
The following week I had to create a wet felted shoulder bag to promote a forthcoming workshop. In the past I’ve sometimes deliberately used colours that I’m not that keen on to ensure I keep a piece as a sample and not be tempted to use the item myself! This time I did the opposite and carded Dream and Granite Corriedale slivers from World of Wool’s Hefty Hues range to make a bag that won’t be living in a box until the workshop in the new year!


…..and Pip has almost finished her Scorpion fish. I’m told there’s just a bit of needle felting detail to add. Producing work like this it’s easy to forget that neither of these ladies have been felting for long.

I haven’t managed to get to the Waltham meetings for quite a while so I’m looking forward to catching up next month and seeing what else the members have been up to.


 1-3 it’s impressive how much wool you can stuff in a Kia Soul!

 4-5 Arriving at the Guild and dropping off the stuff
 6 Tables found and now I can set up!
 7 18 pages of Notes, Foam kneeling pad, A piece of pool noodle, 2 sizes of dowels, finger cots, wooden single needle holder. Still to add will be the needles.
 8 I also had a few needles for them to see what difference a gauge will make.
 9 the books just past the needles
 10 a couple of my sculptural books.
 11 I also brought sustenance and plastic inspiration
 12 Armatures are underway
 13 wool wrapping begins
 14 This thing was being helpful by holding fibre for its creator, even when that was not as helpful as it sounds.
 15 this thing is developing fabulous wings.
 16 Unlike my last octopus this one has 8 arms! The pipe cleaners were found easy to wrap over.
 17 two of these things arms were added to increase its head.
 18 This one still has all four of his arms and is now standing on his own.
 19 the octopus is starting to emerge
 20 the thing with 4 arms has now received a head
 21 the winged thing has temporary eyes and looks like he is looking forward to getting wings.

 1 large clear bag of little bags of wool, separated sort of by colour. There are also small dog brushes, scissors for paper and mettle rulers ready to use in the workshop.
 2 student supplies pile sitting on the table; foam pad, picture frame, notes and photos, needles, name tag stuff, project bag, cheap craft felt, 100% wool felt and thick 100% wool felt for name tag.
 3 the tables, with the supplies, sitting in a C shape so I could sit in the center and see what each student was working on.
 4 Samples of different types of works surfaces; wool pads, wool ironing pad, cellulose sponge, foam cushion
 5 Two of the students getting started, cutting a window in cardstock, used to check the size of your image so it will fit in the mat when you’re done felting. The table is cluttered with their supplies including photo references and tiny chocolate bars.
 6 three of the students started their pictures. There were 2 students per 6-foot table.
 7 two of the students, now a bit further along, working on their pictures
 8 using the original photo of 3 sheep and a round hay bale in snow and replacing the sheep with her own goats. She had emailed me the goat photos and I had shrunk them to a size similar to the sheep. I also made mirror copies so she could rotate them if she wanted in the composition.
 9 The sheep are gone and the goats are almost done!
 10 students’ hands trying out the 100% wool felting mat with her picture. She Liked the darker grey mat better.

 11-12 another interpretation of the sheep and hay bales picture.
 13 one student holds up her picture and she and two other students look at her progress.
 14 close-up of the tree with fence felt picture now in a black frame.
 15 matted pictures of sheep with hay bales held by the artist and admired by a fellow student. She used small locks to create curls on the sheep. It was very cute!
 16 the finished framed hay bale with goats! Also very cute!
 17 one student framing her picture while one keeps working on hers.
 18 the picture of sheep and hay bales framed