You may remember I did a post about dyeing silk hankies for a workshop at Pinhey’s Point. https://wp.me/p1WEqk-j91 Sunday was the class.
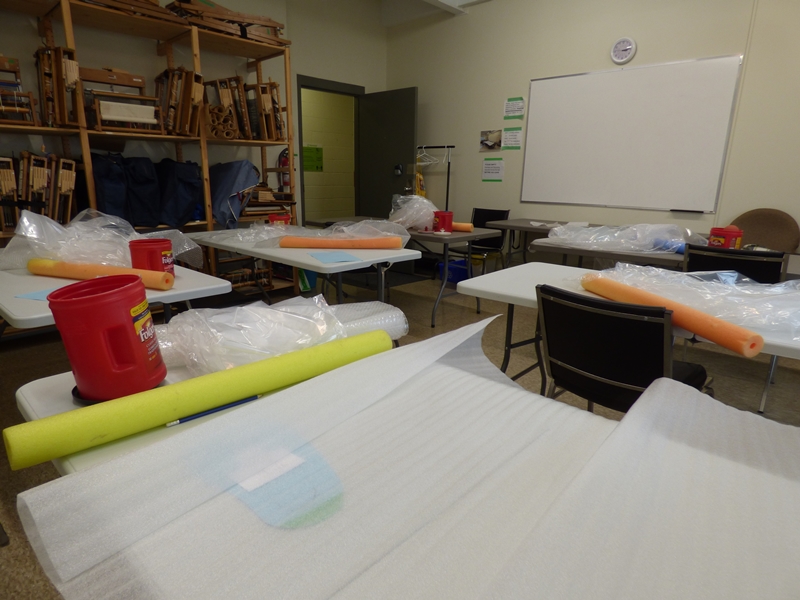
I was set up in what was originally the dining room of the house. It was a bit tight with 10 people around 2 tables,
But everyone did fine. Everyone kept thier elbows down and we had a great time.
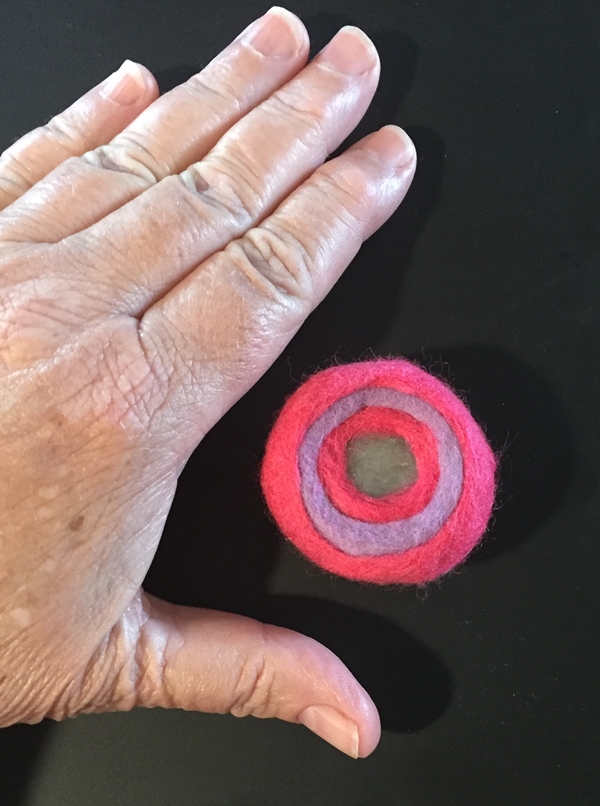
First, we did a petunia/morning glory. More in general shape than reality. This is a nice, simple flower for people who have never felted anything before. Not a great picture, but it was the only one I could find that I had uploaded before. I used to be terrible at naming my pictures. I am much better now. Makes it much easier to find what you’re looking for.
Once everyone had their flower done, we had a break. The museum provided a great snack table for our break. We all felt very spoiled.
Then we moved on to the silk hanky flower. I explained about what they were and how they were made, and everyone had to pick a colour. It was so hard to choose.
They learned how to make the stems and the stamens for a more complete flower. Here they are doing the dry rolling to compact it before wetting.
Then it got busy, and I was running around the tables helping people. It is always tricky getting the stem and stamen centred on opposite sides. But everyone managed. The biggest problem was with stems not sticking. We had 3 with stems totally detached and one partial detachment. I think it was a combination of felting the base of the stem too hard at first and pulling it away when moving the stem to a different position to rub the flower. All but one had felting needles at home with instructions on reattaching the stem after it’s dry. I gave a needle to the last person and explained how to use it to fix the small area that was not attached properly.
No more pictures until the end. All in all, a great day. Everyone seemed happy, and there are definitely some new addicts in the making.
I have no idea what the white spot is. It is on the original in my phone.
School is almost finished, this is the last week. I hope that school ending will let me get back to my felting life. I have managed to finish the first part of my planned book resistance workshop, but haven’t had time for much else. I want to get your opinions on the best background to take the pictures for the next part of the workshop. I can’t use my tabletop as it is much to reflective.
I will be using pink wool for the workshop. Please ignore the fold lines, I will wash and iron the cloth before using it for taking pictures. Here are the choices
Grey
Blue stripes
multi coloured stripes
and Poka dots
I am leaning towards the grey. The white resist shows up well, and the pink does too. I kinda like the blue stripes (they look grey on my screen)as it gives me something to line up with.
I will need to add something to the background to let me know I am in the frame properly. I think just some painter’s tape will do it. This is the view from the tripod, right now.
Jan bought me this doohickey to extend my camera further away from the tripod. It works with the ring light, but the ring light is too tall. The screw on the tripod is to short to add the ring light I have. I will have to find out the name of this thing and see if I can find one with a hole at one end and a screw at the other. It adds about 2.5 inches of reach for the phone/camera.
Back to the original question, which background do you like best?
Before talking about felt, I just wanted to share with our friends who have mild winters. It is March here in Central Canada, and there is very little snow left. But as I said, it’s March, and March is a fickle month. This is what I woke up to last Saturday.
March 29 snowfall.
Followed by freezing rain overnight Sunday.
March 30, freezing rain on top of snow.
Do not be feeling sorry for me. This is fairly normal here. We expect it, but I am envious of you sitting out in your gardens enjoying the spring flowers.
Now some felt. I finished up the pink sample for the book-resist workshop. I finished the pages 2 different ways just to show them. I think it might look nice with a light inside.
I made a second sample using a football shape. It is smaller.
The resist was fiddley to get out because I didn’t want a hole in it. So, didn’t want to cut a hole in the end.
After removing the resist, I sewed up the hole.
Stitching up the hole Stitching after fulling.
Here is how it looks finished. I am really pleased with it. The stitching was resistant to being pulled out, but I did get it out.
I may have to make another one. I may just have to stitch on this one. I have the wool ready for the next sample. I hope to have it done for you to see next time.
Sorry For the late post, I thought today was tomorrow.
Last weekend I had four ladies for a techniques class. This is not an advanced class, but it is also not a beginner class. People had to already know how to make felt.
First, we did inclusions. They used a piece of thicker prefelt and elastics to enclose some large glass beads (the kind they are used in the bottom of vases for decoration) and a felt ball. Then laying out a base and top they enclosed some glass beads, a felt ball, a circular resist with a hole and a squashed tasimo pod with a resist over it. Sorry, I forgot to grab the camera until they were at the rubbing stage. Part way through they cut some holes on top of the beads and pod.
When they were laying out I had them cover a pebble with 2 layers in different colours. I had them put a resist on top of the first layer and wrap it with the second colour. They popped them into a piece of nylon stocking to contain it all and make it easier to felt. You can see the first sample on the table in the picture below. They mostly felted the pebbles during lunch while eating and chatting. Once it was mostly done they cut a hole in the top and after healing the cut edge removed the resist and cut a smaller hole to reveal the pebble. Similar to the one below that I made a few years ago.
Next was cracked mud. I had them layout two 10×10 pieces( top and bottom) they added painter’s tape in 2 widths and then added the top
Naturally, because it was a wet felting class, they had to do some rolling.
I had them cut the mud sections at different stages of felting, prefelt, mostly done and done. so they could see how that affects it. I think they could have used more felting before the fulling but we had limited time and had to move on to book resists. I had them make a four-page book resist using half circles. they managed to get it laid out and wet down but then we were out of time so they had to take them home to finish.
3 students sent me pictures of the finished pieces. The first one she manipulated to look like origami.
And this one, She says it needs more fulling but wanted to get me the picture.
The third student got creative and combined her samples into a tea cozy.
All in all a good class. I just wish I could squeeze more techniques in. But no matter how fast you want to be felting takes time.
It’s the time of year when thoughts turn to warm woolly sweaters( jumpers). So, where do they get all that wonderful wool in amazing colours? Why for colourful sheep of course. Dyed in the wool as it were. And where do you get those? Well, you make them of course. They can really spruce up a manger scene for Christmas or you can add them to the scenery of your model railroad or add a pin and wear them.
I had 8 lovely ladies to make some cute little sheep. There should have been 9 but one couldn’t make it so her sister who was there paid her materials fee and took some supplies to her so she could make a sheep at home.
After this point, once the students arrive, I forget to take pictures. We start with the legs. I show them how to make them with needle felting. It is long and tedious to make them dense enough to hold the sheep up. Then I show them how to make wet felted snakes to cut up for legs. You can see a plastic bag on the table it has the sheep samples and all the snakes I made so they could have legs and move on the the rest of the sheep. they make bodies, heads, and ears and then they needle felt them all together. they usually look a little wonky at this point and everyone has a good laugh at them and worries there sheep will not look right.
Most of them look like they are on stilts at this point. It is better to start that way and then do some hoof trimming at the end, to get the length you want.
Next is the best part, giving them their colourful ( or natural) coats. we used Bluefaced Leicester curls. they are small nice curls.
As they have all their wool, their personalities emerge.
Everyone seems happy, I will need to find out if I had any comments on the evaluation forms. Fingers crossed there are no complaints. When you teach with our guild we have the student fill out an anonymous evaluation. It helps to head off problems before they really start and sometimes you get good ideas for your next class. Students pop them into an envelope and it’s sealed. Someone else opens it and has a look and you get the feedback later.
This is my last post for the year so I hope you all have a
A couple of Sundays ago I had a Slipper Workshop. I had 4 ladies that had not felted before. There were no crazy toes in this group.
As usual, I was too busy talking to take all the pictures I should. So we start with everyone finishing the wool layout for their slippers. I have them do both sides dry, and then put them together. 2 were doing a reg slipper and 2 the ear template. You can see them on the front 2 tables.
After they had everything together and wet they added some embellishments.
Then there was rubbing(no picture). I am definitely too busy talking during that, to help distract them so it doesn’t seem so long. And then rolling, Usually by this time I have them all chatting.
Then it’s time to cut them open and see how they look. The faces say these don’t look right, it’s never going to work, and they will never shrink enough to fit. We change how they are folded
And then …..Oh no, not more rolling
once they have mostly shrunk it’s time to make them fit, just the way they want them to. Some like them a little big, some like them to fit like a glove. the glove people have to do some fulling on their own personal slipper blocks, better known as their feet.
I managed to make a short video of one of the ladies fulling her slippers on her feet. Not only that, I uploaded it to YouTube and managed to embed it here. Thank you Leonor for the help on that front. At least I think it was Leonor, I can’t find the email anymore. Edit: It turns out it was Terry that helped me, Sorry Terry. Thank you for the help.
And lastly, 2 ladies shared their finished slippers.
Everyone seemed to have a great time and be happy with their slippers, You can’t ask for better than that.
Not very long ago I taught a felt slipper workshop. There were 6 students including Jan. Here is the set-up in my guilds classroom It holds 6 tables reasonably well. You can see the table looms waiting for class on the left.
After we discussed the different styles of slippers, everyone traced their foot and sized up to make their template. We used floor underlay for the templates.
Everyone laid out both sides of their resist and got them nicely wrapped around
Then started embellishing them
Then it was time for felting. Start gently with some rubbing
Then rolling. No rolling pictures, you would think with everyone busy rolling I would have lots of time to take pictures but I guess I was too busy talking.
then more rubbing to heal the cut and on to fulling and shaping
And don’t forget to try them on to see where they need more work and in which directions. I brought new bread bags so they could try their slippers on without getting wet feet or socks.
Getting there
Here are some of the finished slippers.
Now you are probably thinking that at the top I said Jan was in the class but I haven’t seen her. Well, that is because Jan is the problem child of the class. She can’t just do what everyone else wants to do, and so she gets a section all of her own. Jan wants boot-style slippers. Ok, that’s no problem and you are wondering what’s the problem with that? Well, she wants really tall rear entry boot, style “slippers”.
I had her come to class early so we would have time to discuss the how of making rear entry extra tall slippers. She says they are slippers and not boots. You can see Jan’s diagram of what she wants in the first picture. I was explaining how the resists would work. This was best explained with a mini paper example.
Jan’s foot pattern and then her mane resist drawn out.
Jan started laying out wool about the same time as the others but she had much more wool and resist to cover.
she did a lot of rubbing but I didn’t get a picture of that and then she started rolling. By the end of class, the slippers had started to felt well but were not up to fulling yet. So now the next step is for her to visit me over the holidays and finish the slippers. I think this means I need to sweet-talk one of my men to bring the dryer into the studio. I am not sure where it got stored. I am sure letting the dryer do some of the manual work is a good idea. Maybe we can work on the dinosaur bag while it rolls around and around. These slippers should be good for sorting out what needs to be tweaked to make some more solid boots. These are Corriedale but we would both like to make some good boots out of Finnish wool. Have you made booths? What wool did you use?
As a measure of how much effort and concentration went into these, Jan only had about 20 or so pictures to share with me. All the pictures of Jan’s work are hers except the last one of Jan rolling.
I had 6 lovely ladies. All but one ad not felted before. This is a short class 7:00-9:00 in the evening. so it moves quickly and I didn’t get a lot of pictures. I often forget to take pictures until someone else takes out their phone to snap a few. the first thing we talk about is the legs. I show them how to go about needle felting them. then I explain how to wet felt them. Then I showed them the snakes I made so they could all have legs without making them. everyone is thrilled. It is a boring and surprisingly time-consuming job even wet felting them.
sorry no pictures of any of that.
First, they have to make the bodies. We are using corriedale wool. It felts up quicker than merino.
and then onto the heads
And attaching them
They added the legs and the ears. Sorry, no pictures of that.
And then they start adding curls. s o this was the end of the class. some finished and some went home with a needle and a handful of curls so they could finish them up later.
and lastly this cute one with a heart on his hip.
Everyone seemed to have a good time and I may have a few new addicts.
I am getting ready to teach a group how to make felted sheep, Like these I used for a post, quite a while ago.
The class is this evening( Wednesday) so freshly made cute sheep will be next week. I like to use Blue Faced Leicester sheep curls for this as they are nice small curls. I had a few colours but not enough variety.
I had a couple hundred grams of the white so it was time to dye. My usual dye pot is really big. a stock pot. Much too big for this job. YOu will have to trust me on the next part as I forgot to take pictures. I was doing too many things at once. I have a nice large stew pot that isn’t too deep but I want to use it for stew again so I got a metal bowl that could be sacrificed and created a double boiler. I placed handfuls of soaked white locks into a medium freezer bag. I made up a small amount of dye poured it on top of the locks and topped it up with water until everything was submerged. I squeezed most of the are out and popped the bag into the water on the top of the double boiler. I did the next colour the same and popped it in as well. I could do 2 at a time. I made up 3 more colours. the aim was to have dark purple, lilac, lime green, pink and magenta. this method was great. the top edge of the bag was above the water so I could easily pick it up to see if the water was clear. Once clear I took it out and put it aside to cool. this is also a good idea when you dye. to leave the wool in the dye bath until cool, especially if it refuses to take up all the colour. You will usually find that when cooled it often has taken up the extra dye. I have to admit I seldom do this as I need to get the next batch of wool into the dye pot, reusing the dye water. With the small bags, it was easy to put them aside to cool.
This is the result.
Now, you are probably thinking that there seems to be more than one dark purple. That is because I used way too much lilac in the lilac dye bag. I ended up with the 2 purples in the middle. the top one in truth is quite vibrant and the bottom one more deep with a little lilac leaning wool on one edge. I had hoped it would split giving me a purple and blue mix. There is even a warning on the Dharma chart saying it can split. No such luck, isn’t that always the way? They looked so much the same when they were wet I did another batch and although it looks kind of dark here on my screen, it is pretty much lilac. I tried to adjust the colour but then the green started to look kinda funky.
So that’s my prep for the class. This is an easy class for me because everything I need fits in one small bin.
As much as I enjoy felting and working with natural fibres I also love mixed media work and getting creative with heat manipulative, man made fabrics. It’s all the more enjoyable when you ask at the start of a class if anyone hasn’t worked with a heat tool or a soldering iron and you see the hands go up. You just know there are going to be some “ooohs and ahhhs” and huge smiles coming from excited students once they get melting their fabrics! Last week I was invited to teach a group at Stainfield Village Hall, just a half hour from home. The groups organiser, Clare, had attended my Layer, Stitch & Burn workshop a few months previous in Sleaford and had so much fun creating this sea shell inspired piece she asked me to repeat the class with her group.
This technique was developed by the Canadian mixed media textile artist Susan Lenz. It involves layering synthetic fabrics on a background of acrylic felt before adding free motion stitch using cotton, viscose or rayon threads. The last stage involves “melting” the background fabric with a heat gun to create a lace like effect as seen in Susan’s In Box and Stained Glass Series
You would imagine all acrylic felt would melt and therefore be suitable for this process but I’ve discovered the hard way that’s not the case! If you’re going to try this technique I would suggest testing your background felt before stitching as some simply discolours and singes rather than melting! Having been caught out once I now order a sample before purchasing by the metre. My latest supply came from Empress Mills and melts a treat! In the workshop, although everyone is given the option of working with simple geometric shapes, I like to encourage students to think outside the box (pun intended!) and create a piece that’s unique to them. In the past I’ve had ladies using fossils, gum nuts leaves and all sorts of other motifs as their starting point for a design as you can see from these three examples…..
Working with a more organic design is also great for those who haven’t done free motion before, or maybe are not as confident with it, as your stitching doesn’t have to be precise. In fact a “sketchy” approach, similar to the leaf design, looks great!
At Stainfield not everyone got finished on the day but I’ve been told that, at the groups meeting this week, not only did they finish off what they had started with me but most of the ladies also began working on a second piece! The size we worked to was approximately 23cm square so it fits the square IKEA box frame.
Another heat manipulative workshop I teach is the Lutradur Leaves. This Wednesday evening I loaded the car and drove up to East Ayton near Scarborough, a really beautiful part of the country, ahead of Wednesdays class for Anita Cassidy and the Textile Experimental Group. I knew we were going to get on like a house on fire when I heard the name of the group! The village hall was very light, airy and spacious, perfect for this type of class. The group were encouraged to bring some leaves to use as inspiration and I supplied sketches for those that wanted them. Everyone worked with a medium weight 70gsm Lutradur and once again the ladies produced some fabulous work which sits nicely with their current theme of “decay”.
Between my last post and classes starting up again after the Summer I’ve done a bit of dressmaking, or “top” making to be precise. I’ve got a very simple linen, sleeveless, dart-less, top that I really like and I decided to clone it, adding darts to make it more fitted. Not having made anything with darts before I figured YouTube would be a good move….and it was! I tried the pattern out with a very cheap floral fabric from Boyes. I think it’s viscose, it’s not silky but it shifted constantly while I was working with it so I’m amazed it turned out wearable! The “palm tree” fabric is 100% cotton and was so easy to use, it’s definitely the better of the two.
The following week I had to create a wet felted shoulder bag to promote a forthcoming workshop. In the past I’ve sometimes deliberately used colours that I’m not that keen on to ensure I keep a piece as a sample and not be tempted to use the item myself! This time I did the opposite and carded Dream and Granite Corriedale slivers from World of Wool’s Hefty Hues range to make a bag that won’t be living in a box until the workshop in the new year!
I’ll finish with a quick update on the Making Waves fish. Jane has made this fun Pink Punk fish complete with studs, chain and wire specs…..
…..and Pip has almost finished her Scorpion fish. I’m told there’s just a bit of needle felting detail to add. Producing work like this it’s easy to forget that neither of these ladies have been felting for long.
I haven’t managed to get to the Waltham meetings for quite a while so I’m looking forward to catching up next month and seeing what else the members have been up to.