Browsed by
Category: Repurpose

Resurrecting Silk Paper Bowl

Resurrecting Silk Paper Bowl

Last month I wrote about doing more experiments with UFOs and my silk paper bowl disaster.  https://feltingandfiberstudio.com/2016/06/20/more-experiments-with-ufos/

20160429_160708

Fortunately, Lyn suggested I try Ruth’s Felt Scrap Bowl method.  https://feltingandfiberstudio.com/2011/12/11/felt-scrap-bowl-tutorial/

I was hesitant at first because it required free motion stitching. Something I haven’t mastered. But I needed the practice, so this was a good opportunity to do just that.

The first thing I did was to tear it apart.

20160430_112154

Then I laid it out in a round shape.

20160623_151719

I could have left it plain, but decided I had some hand dyed yarns that would add some texture and interest and complimented the silk.

20160623_153215

I proceeded to cover it on both sides with the Sulky water soluble stabilizer on top before pinning and stitching.  I know I should have put down the Sulky before designing, but I’m getting good at flipping projects.

Then came the fun part — stitching it.  I had a lot of trouble with the thread breaking, the tension being picky and a lot of stops and starts but I finally got it finished.  Although I didn’t use fancy designs, it’s pretty much straight lines up and down and around.

Following Ruth’s directions, I wet down the package leaving it a little sticky and draping it over a jar then adding folds.

20160707_150652 20160707_151147

It looks a little droopy and sad. I let it dry overnight and was surprised in the morning to find a very pretty textured and dimensional vase.

20160708_142732 20160708_142758 20160708_142742

While it’s not strong enough to hold anything, I could put in a glass or clear plastic to be able to set something inside.  I even toyed with getting a small battery type light and making it a little lamp.  There are plenty of holes and it’s very thin.  It might work.  If I can find such a light, I’ll post pictures on the forum.

Thanks Lyn and Ruth!  I’m pleased with the results and the fact I was able to reuse the silk. Oh, I have some left but not enough for a vase.  I’ll have to find something else to make with it and get more free motion practice.


Funky Flower Pins from Fabric Scraps

Funky Flower Pins from Fabric Scraps

I have been continuing to think of what I can do with all the scraps of fabric that are crammed into my studio. (Ann has really gotten me going with her 2nd Quarter Challenge.) I have bags of commercial fabric scraps and then tons of fabric that I have dyed, screen printed, stamped, stenciled or thrown color upon in some manner. I need to start using these up before the studio overflows and the fabric starts to take over. (Not that it hasn’t already but…)

Machine Stitched with Center

So I decided to make some flower pins. I used some of my ugliest screen printed fabric for the centers. I rolled up the fabric and twisted it into a spiral. Then I hand stitched the spiral together. I made a pile of fabric scraps for the petals and leaves and then machine stitched the pile of fabric together.

Blues Scrap Flower

Then I hand stitched the center on to the petals.

Blues Scrap Flower Back

I cut a small circle of felted wool blanket that has been dyed, stamped and a variety of other things which has been in my stash for years. I sewed on a pin backing and hand stitched the circle of felt to the back of the flower.

Here’s another one. As you can see I don’t worry about the scraps being nice and even. It’s nice not to have to worry about if the scrap is flat or ironed and whether the edges are neat. I use the pinking shears on the cotton fabrics.

Both Scrap Flowers

And here are the two finished pins. You can trim the petals a bit if you like after you finish. So I got two done.

Studio after Making Scrap Flowers

And here’s the studio after I finished. I still have a gazillion fabric scraps, the studio is a mess and I’d need to make hundreds more to use up all these scraps. Perhaps I need to increase the scale of my projects to get rid of more scraps?

More experiments with UFOs

More experiments with UFOs

A couple of years ago, I was making silk paper just for practice.  I decided to try to cover a bowl and make some ruffle edges.  But it was a disaster. I used an acrylic medium to help give it substance, but all that did was make it stiff and unmanageable.  I tried soaking it in soapy water for a couple of days, but that didn’t do anything either.  So it went into the “pile.”  I’ve picked it up a couple of times thinking I could use it for something, but nothing came to mind. Sorry about the fuzzy picture.

2014-01-25 16.21.59

Recently, with the Second Quarter challenge to revisit our UFO stash, I pulled it out again. This time as I thought about it I started pulling it apart, peeling off layers.  I wondered if it would still felt, so I looked through my stash and found some yellow batts with unknown fibers.

20160615_121049

It felted just fine, some parts are still stiff, but most of the thinner areas still had the silk shine. This piece will probably be made into a coin purse.

20160617_160642 20160617_160744 20160617_160713

But what to do with the rest?

20160617_161216

Another UFO was a piece of prefelt I had cut for “lace” in Fiona Duthie’s Surface Design class.  I put a piece of habatoi silk under it and felted them together.  I’m not sure what I’ll do with it.  But I like the bubbly effect of the silk through the holes.

20160614_15374220160615_114213 20160615_114326 20160615_114333

Then I found a frame for the cityscape.

20160615_114129

While I haven’t made a big dent in the scraps and UFO pile, I feel good about trying some new things.

Something Different

Something Different

I’m still trying to finish projects and WIPs so I can tidy my summer sewing stuff away. I found an unfinished project from years ago when I was putting some felt offcuts away. Hopefully, this link will show some of the pieces I made, if not search my photostream for ’embellished’. It inspired me to finish it off and make some more. So I had a rummage through my offcuts and found lots of nice ones, so many that I started to think that maybe I wanted to do something a bit bigger, like a notebook cover (surprise, surprise!). I found some thin pieces of felt to use as a base and sewed them together. I really wanted to make something the complete opposite of the carefully measured and carefully and neatly sewn notebook covers I usually make. So after spreading all the felt offcuts out, I got some contrasting sewing thread and set to work attaching the pieces to my felt base. I didn’t expect it to take as long as it did and I got through quite a few episodes of Foyle’s War while I sewed 🙂

When I’d attached all the pieces, I attached a piece of thin blue cotton fabric to hide all the stitching and thread. Then I folded the flaps in, machine stitched them in place, then hand stitched the top and bottom edges. I think you’ll agree, that it’s nothing like what I usually make 🙂  This is the front:

OLYMPUS DIGITAL CAMERAAnd this is the back:

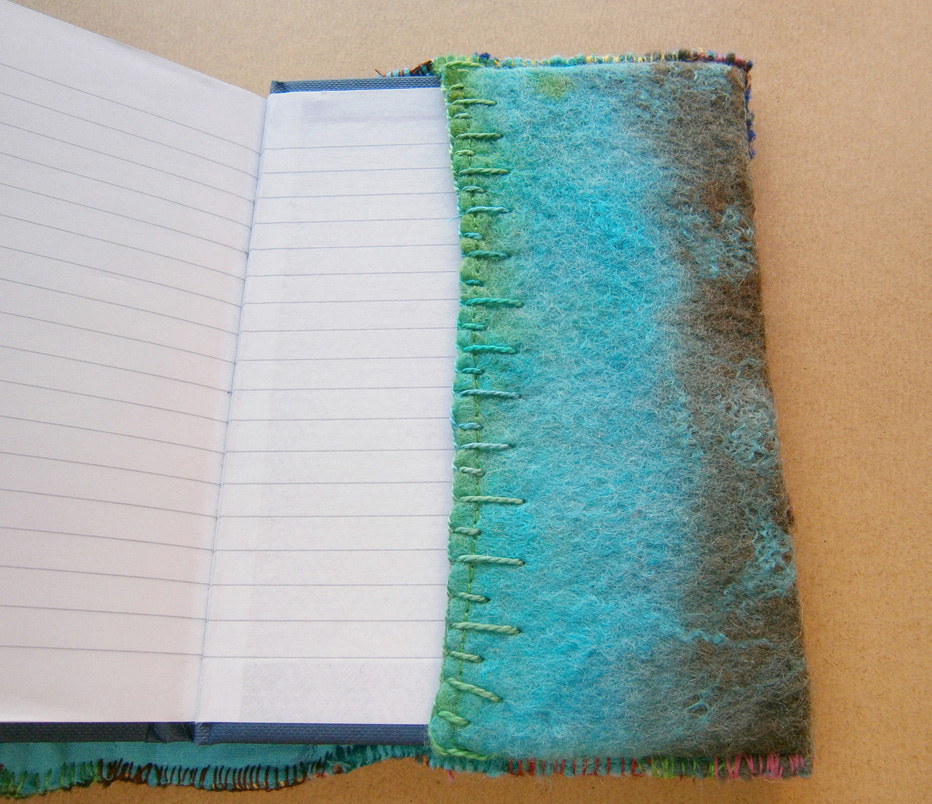
OLYMPUS DIGITAL CAMERAI tried hard to make sure nothing matched, and that it wasn’t too neat or even, including the top and bottom edges, I just followed the edges of the base felt. This is the cover opened out:

OLYMPUS DIGITAL CAMERAI didn’t attach felt pieces to the base where the flaps would be, I didn’t want it to be too thick. The felt I used for the flaps was originally white merino and cotton which I experimented on with direct dyeing.

OLYMPUS DIGITAL CAMERAOLYMPUS DIGITAL CAMERAI also made a strap closure for it in much the same way as I made the book:

OLYMPUS DIGITAL CAMERAIt just fits around the book and clips together with a Delrin clip.

OLYMPUS DIGITAL CAMERA
I thought this notebook would stick out like  a sore thumb in my etsy shop, but surprisingly it doesn’t. But maybe that’s because it probably has a little offcut from almost every other piece in there with it!

Felt fingerless Mitts Experiment

Felt fingerless Mitts Experiment

I am still making fingerless mitts for the fall shows. I have a wool batt that was made from the leftover bits or browns and natural wools. It looks like bark to me.

brown/gray/black/white batt

Then I thought I want the mitts to have more texture. So I got out my pile of trimmings.

left overs to roll 2

I gave them a roll

left overs to roll 3

I added them to the mitts in the hopes of making it look more bark like.

wood look cuff wood look cuff 2

I put the scraps under the last layer.

It worked out but I think fatter inserts might be better.

wood look cuff 3

It is not that exciting.  I may have to add something to it, I am not sure what. Maybe some twigs sticking up or a knot hole.

I have some other ideas to try out. I will share them with you as they happen. Theses are a great size for trying things out. If they work you have a salable item and if not you learn something and haven’t lost a lot. I am not good at making things that are just samples, I want it to be useful, crazy I know.

Wool for Sheep

Wool for Sheep

In my last post I talked about getting some felted body parts ready for making sheep pins. http://wp.me/p1WEqk-1o2  The other thing the sheep need so they will not be naked is wool.

First I had to pick curls out of a Blue Faced Leicester Sheep fleece I have. After having done this you appreciate why buying prepared curls costs so much. It takes for ever to pull the little curls out.  This is something you do chatting with friends or watching TV.

curls fleece

The next part is more fun. My sheep like to have colourful fleeces so they must have their wool dyed pretty colours. I soak the wool while I am picking out dye colours. They take up dye more evenly that way.  Sometimes I do not soak them so they dye unevenly. You get some interesting results that way. Usually they end up 2 tone. I use acid dyes.

curls soaking

I dye the curls in small batches in some small plastic containers I got at the dollar store.

dye in bowl dye in bowl 2

I add the premixed dye and then some extra water to just cover the wool. Then into the microwave for a minuet or two. When it comes out I transfer the wool and dye to a zip lock baggy to sit until it is cool.

dye in bag

I do it this way because when I have tried putting a zip lock bag in the microwave sometimes it get too hot in just one spot and a hole melts in the bag. This way is a little more work but no holes in the bags.

I also over dyed some locks I had done earlier. I think they were done with onion skins. They where a horrible yellow shade I wouldn’t use for anything. The don’t look to bad in the picture but in person, yuck.

curls soaking yellow

I decided on brown and black. I already had lots of green and some orange. They both came out brown. I could do the black again to make it go black but the brown is a nice shade so I will leave it. They are the two at the bottom of the picture. Sorry about the quality of the picture but it was too windy to go outside for a picture.

dyed curls done

Now all I have to do is put all the parts and the curls together.


Sewing, Felt Hat to Purse, Felt Boots.

Sewing, Felt Hat to Purse, Felt Boots.

Last time I told you about organising one section of my room and clearing off the table. My next area is the sewing area. It’s coming along. It started like this:

sewing area before

There is also a bunch of stuff on the floor under and around it that you can’t see in the picture. I have made progress but the shelves to the bookcase have disappeared so it’s hard to fill them up. I did switch the old singer that needs a part for a newer one. I haven’t tried it but it may need a cleaning. I still have the pfaff I can use. I want to set it up for free motion embroidery. It is a work in progress

As part of trying to do some fiber art everyday I have been working on converting a hat to a purse, well, 3 hats actually. The hats started out looking like this:

hat to purse 2

I cut the holy part off and did this:

hat to purse 1

This should add some interest with great texture.

Here is one that has the texture done. The colour on the left one is more what it looks like I think it’s called Laurel.

hat to purse 3 hat to purse 4

I had planed to get the lining in before posting but that didn’t happen. I will show you when I get it done. It will also get a zipper too. I haven’t decided if it should be a clutch or I should find some sort of strap for it. What do you think?

Lastly I have started my on-line boot class. It took me  a while to convince You Tube to let me see the videos and then my Internet went out for a week. So all I managed to do was my sample and get my pattern drawn out.  The sample of gray Finn wool shrank a little more than 50%.

shrinkage

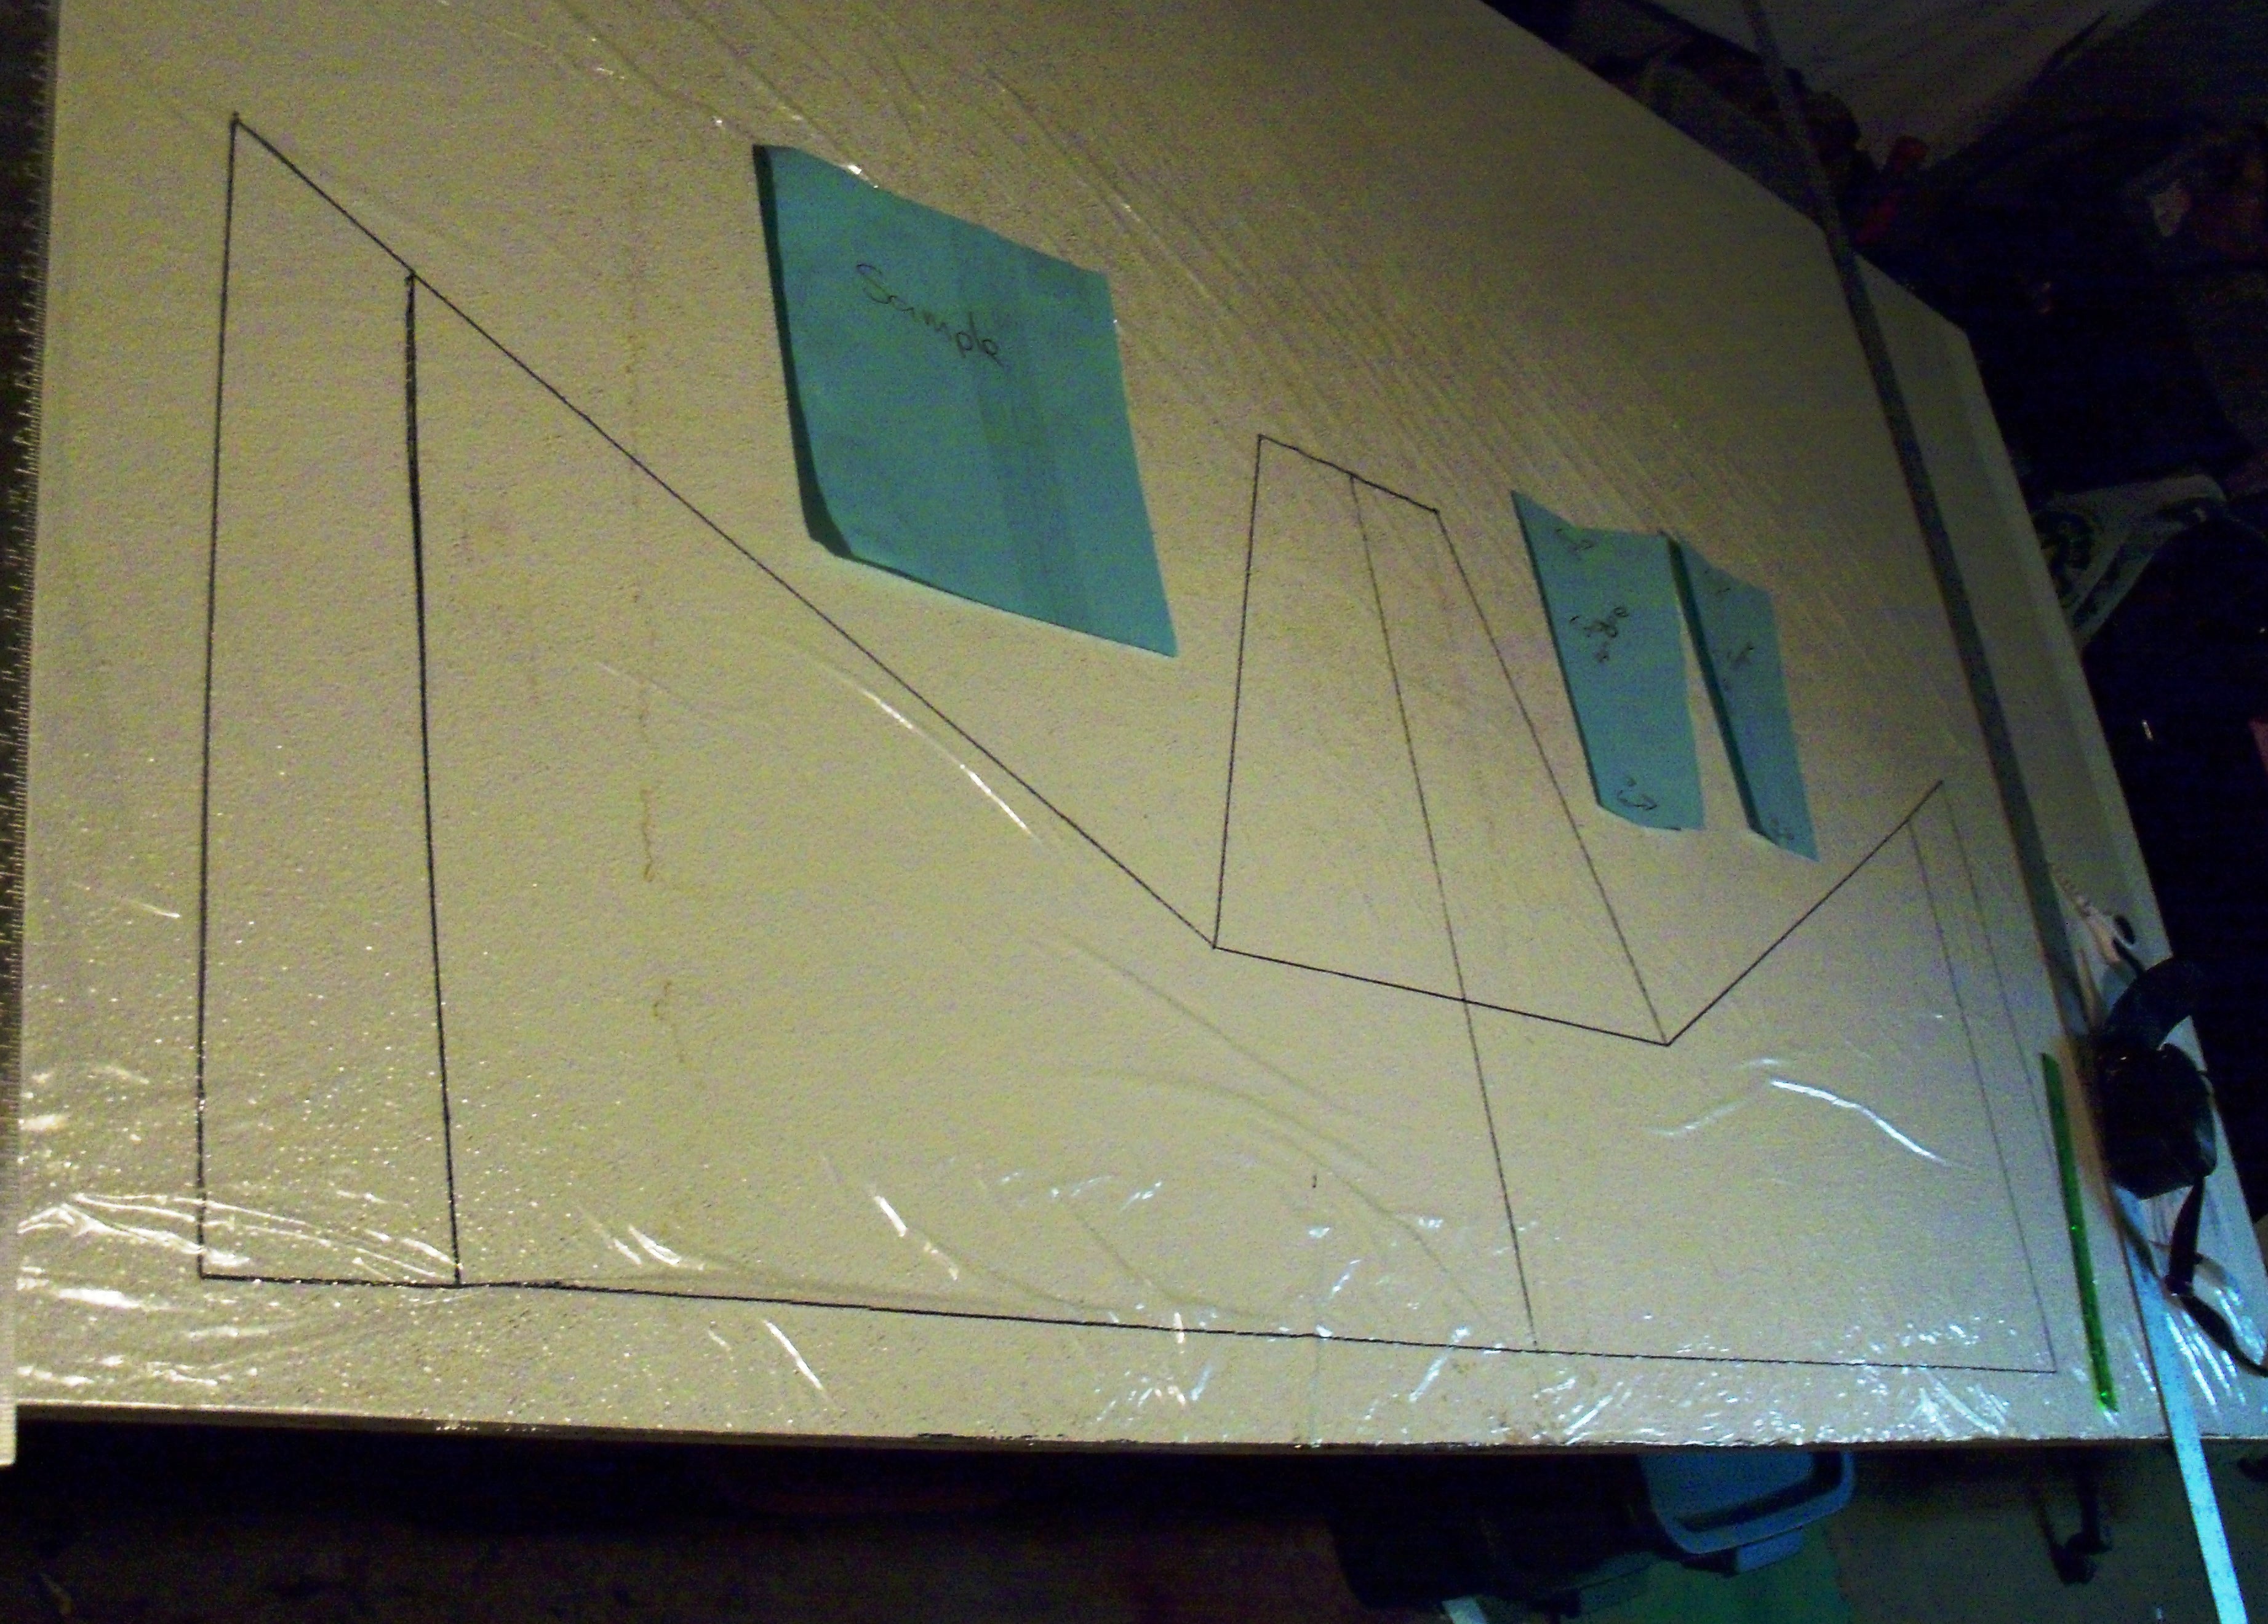
There was a lot of measuring and some math to get the pattern the correct size for the shrinkage.  This is what it looks like at the moment.

boot patten

My mom came for a visit so I couldn’t lay out the boots today. I decided I want to make a leave motif on the boots when they are done so I cut out leaf shapes in white and black. the booths are gray. I stretched a couple with some vintage “artisanal silk”. I am told it’s not real silk but its pretty.  I don’t know if I like it. I was thinking of sewing some veins on with my machine to see how that looks. I have some dissolvable interfacing I thought if I put the leaves on that I should be able to stitch them.

leaves

So I haven’t been able to actually do some fiber art every day but I have been thinking about it everyday and getting to play most days.

Clasps, Closures and Fasteners

Clasps, Closures and Fasteners

You might remember my post a few weeks ago about sorting and using felt scraps, and the notebook cover I made with offcuts. Well, as much as I liked the button closure, I wanted something a little more secure. I had a hunt through my craft drawers and found a bag clip I’d salvaged from something I threw away (I recently discovered these are called Delrin Clips) and using some more felt offcuts, attached this instead of the button.

OLYMPUS DIGITAL CAMERA
One of my WIPs at the moment is a small shoulder bag, just big enough for a camera and purse. The closure I’ve used on this is a metal magnetic bag clasp. They’re quite easy to use: each half comes in two parts, you need to make a small cut in the fabric, push the metal ‘prongs’ through, then add the little washer and fold the prongs in. I haven’t decided yet whether to cover the top with more felt or maybe a large fimo button.

4 pics together
This got me thinking about all the different kinds of claps, closures and fasteners I have. I have the usual buttons, zips, poppers/snap fasteners, hooks and eyes etc, but I also like to salvage and collect any I find cheap. Not so long ago, I saw cheap packs of dog and cat collars and leads in Poundland (like a dollar store) and couldn’t resist buying a pack, which gave me a few Delrin clips and Trigger Hooks.

OLYMPUS DIGITAL CAMERA
These Delrin clips were either bought or salvaged from old bags. The small ones are slightly different, they take a cord type of attachment rather than a flat webbing or ribbon type of fixture.

OLYMPUS DIGITAL CAMERA
Most of the Delrin clips I have do take a flatter attachment though, so I just had to buy some nice braid for attaching them 🙂

OLYMPUS DIGITAL CAMERA
I’ve managed to add to my collection of fasteners while I’ve been doing a lot of clearing out and tidying up lately. I salvaged quite a few lobster style trigger hooks, D-rings, split rings and key rings from old or broken or unwanted items.

OLYMPUS DIGITAL CAMERA
Do you have any interesting clasps, closures or attachments? Do you have any tips for salvaging or buying them cheaply? We’d love to hear your ideas 🙂

My Second Entry into the Weather Felting Challenge.

My Second Entry into the Weather Felting Challenge.

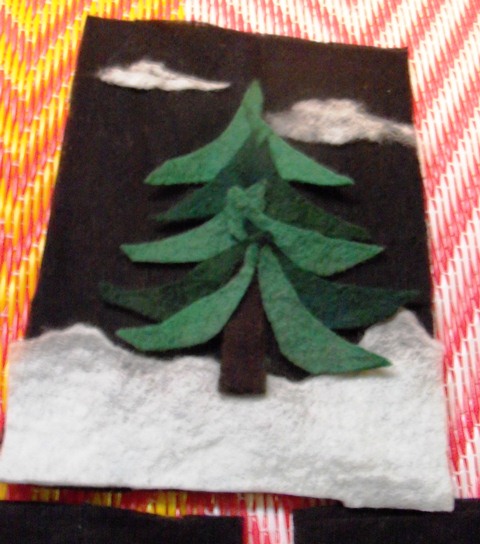
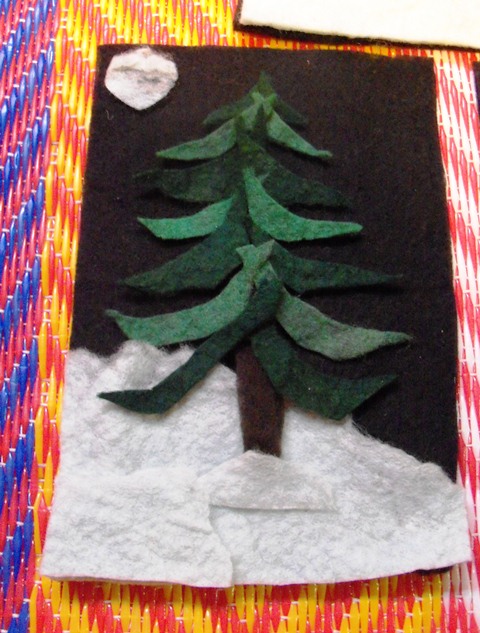
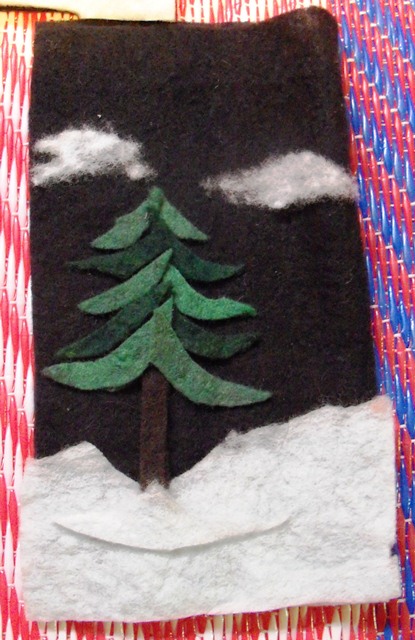
I was tidying up after making something else and had a pile of green trimming. With Zed’s felt scraps post still fresh in my mind they looked like branches to me. I think I must be in a tree mood. I used prefelt for the back ground because I didn’t have any scrap black felt and I wanted to get on with making the pictures and not with felt making.


I used the edge of an off cut in very pale blue piece of felt for the snow and a very thin edge piece for the clouds and moon. its hard to see but I layered the snow pieces on  2 of the pictures to see if it would give more depth after felting. i have never had much luck wet felting finished felt to semi felted pieces but after some rubbing and rolling it all went together really well. I am quit pleased with how they turned out.

There is more depth in the layered pieces. It doesn’t show well bit it does make the snow look more dimensional.  They still need ironing to straighten up the edges. They are a bit to big to use on cards. I think they might look nice side by side in a long frame.

So now I have answered Zed question what do you do with your scraps. http://feltingandfiberstudio.com/2012/11/10/felt-and-fibre-scraps/

Changing the Design of a Nuno Felt Shrug

Changing the Design of a Nuno Felt Shrug

In the spring I made some shrug jackets using a pattern I saw in a book about making simple garments with your weaving. I don’t weave but I can felt a rectangle instead of weaving it.  You would think that I would read what to do instead of just going from memory but that would have been too easy. I made some nice looking shrugs.

Orange shrug after over dying

They look nice enough but they didn’t really fit as well as I would have liked. They were to puffy at the back so not very flattering. I think the problem is the rectangle they are made from was to wide making the shrug to long.  I decided to change them. I unpicked them and gave them a wash to get rid of all the thread holes.

I folded the top down about 1/3 to create a kimono sleeve. You end up with something that is more like a shawl that doesn’t fall off as you use you hands and go about your day.

If you would like a larger collar you can wear it the other way up.

You could also just sew a line down the edge or just the other direction to have a larger sleeve opening. I like these much better. I hope other people like them too. I am going to my guild exhibition and sale this weekend and I will have them there.  On that note if you are in Ottawa this weekend  Drop by the Glebe Community Center to see what we are up to.