If you missed my other posts about this mixed media handmade book you can find post #1 here, post #2 and post #3. It’s a work in progress that I’m taking slowly, adding bits and pieces as I get inspired.
As I was getting ready for my upcoming Level 4 Art and Design class which will involve printmaking, I was going through my stamps and also some previously printed papers that I haven’t used. I thought they would make a good addition to the book. This is a print of an aspen branch with leaves and catkins. I added the black outline with a felt pen. The aspen branch is printed on the back of an eco print.
I found a print of a weeping birch which I added to this painted brown paper page.
While I was looking through my prints, I found a cutout of another aspen branch. I’m not sure what I made it for but thought it was perfect for this green painted page. I might add a few more details into the leaves with colored pencil. I’m not sure yet.
The back of the green painted paper above, was white. I added some ink in orange, green and brown around the edges so the white wouldn’t show around the print I planned to add there. This is the center of the book.
Here is is with the print I added. I also finally bought some gesso and added it to all the white pages. Now I can do some painting or sketching on those pages with more ease.
Here’s the last print I added. I have more prints, but for now, I think I have added enough. This book has a lot of pages and I have a long way to go to get it completely filled. I think I will start sketching on the white pages next.
And for those of you who think I haven’t done any felting for a long time, here’s a felted lotus pod that I created for an online class I took with Gladys Paulus. The class was marvelous and if you get a chance, it’s well worth taking.
Also, registration is open for Helene Dooley’s Hanging Felted Spiral online class. Click on the link and scroll down to the bottom of the page to register. This is a great class to learn more about complex three dimensional felting. You need to be an intermediate felt maker who has worked with resists and three dimensional felting. The class is online and can be accessed throughout the class period at any time. You don’t need to be online at any certain time. So join Helene to create wonderful felted spirals!
A wonderful 4-week holiday in Australia, Christmas markets and hosting lots of family visitors mean I’ve done very little news-worthy felt-making since my last Felting & Fiber Studio blog. ‘Production felting’ is my own term for making lots of similar things for shops and markets. I did a fair bit of this in November and December: mostly printed tea light holders, printed wool ‘pebbles’ and Christmas cards. These were my 2022 cards: handmade felt with hand-printing. I extracted the tree from a larger, royalty-free, public-domain image and added the heart before printing onto fine flat felt.
My 2022 handmade Christmas cards
I sold these through various outlets and sent a small number myself.
I’ve enjoyed making felt ‘pebbles’ for some years. Since learning to print on felt from Lindsey Tyson, I’ve been able to adapt photos of some of my Mum’s watercolour paintings to print onto the pebbles.
So, as I don’t have a lot of new stuff, I thought I’d contribute a few of my past makes and current thoughts as ideas for the first quarter and year-long challenges.
Alas, I left the base alone for a long time during a pandemic lockdown and it was attacked by moths. In a way, being eaten by moths was rather fitting: lifecycles in real life, but the moth holes meant I ended up cutting it up to make bookmarks (after some very hot washing). I did, however, recently sell the tree stump on its own and it now lives in Canada.
Pondering future projects for the tree challenge: I have a very tall, beautifully coloured ‘silver dollar’ eucalyptus tree in my garden.
The eucalyptus tree has potential for lot of other projects, including maybe using the leaves for eco printing onto felt. Eco printing is something I’d like to try, though whether I will get round to it remains to be seen. I don’t recommend any breath-holding for this.
Contemplating Caterina’s quarter-one challenge of making something practical that you can’t buy: one of my favourites is this case I made for my iPad mini. Nuno-felted with sections of recycled sheer silk scarf.
I know you can buy iPad cases but I like that this one is unique and fits perfectly without any fasteners. Because it’s an exact fit, the iPad stays put until you need it, then slides out easily. It’s getting rather battered now as I carry it around all the time so maybe it’s time to make a new one.
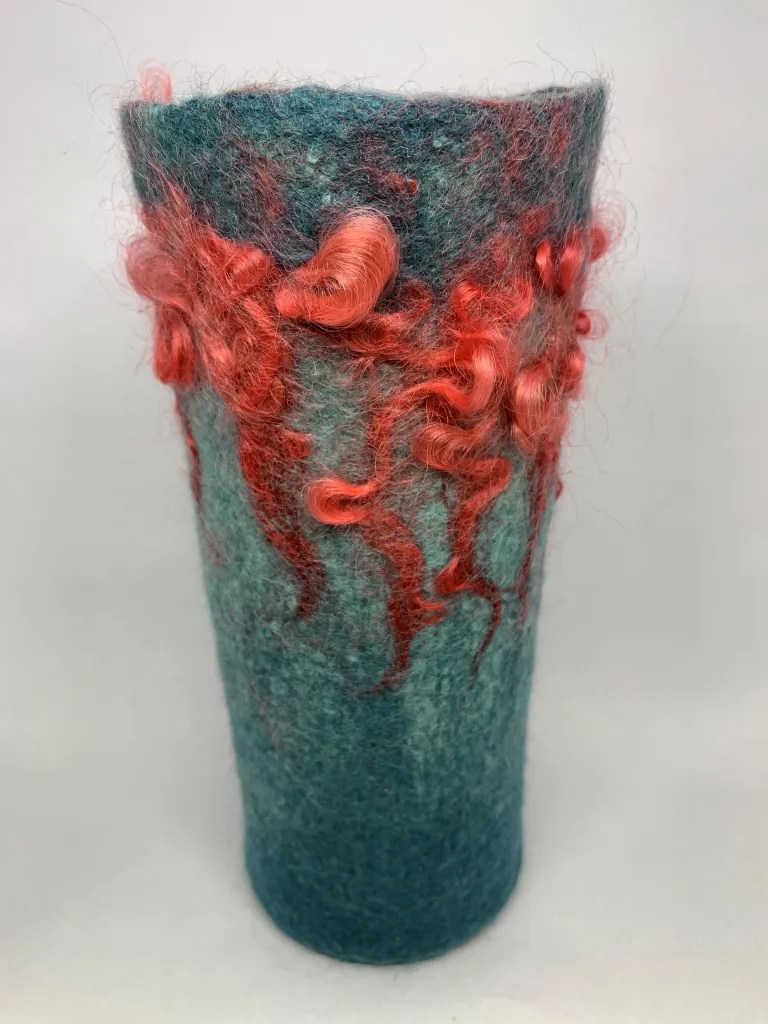
Felted vases and plant pots are also both unique and practical. Here are a few. I like that you can co-ordinate them to your décor, or to a specific plant or flower, or just go for colours and patterns you like.
And finally, here’s something that meets both last year’s challenge to complete some UFOs (un-finished objects) and this quarter’s challenge to make something that you can’t buy.
Here’s a pair of earrings that I started making a while ago using hand-dyed 14.5 micron Merino wool. I incorporated the earring post into the felt and some black sequin fabric inside using resists. These were inspired by the work of Aniko Boros and Judit Pocs.
The sequin section is more sparkly than in the photo
As you can see, I got quite a long way along, but while I finished fulling the one on the left, I stopped with the right-hand one in the pre-felt stage. I’m not completely sure why: probably it wasn’t quite what I had in mind. But it surely can’t take more than about an hour to finish that one, so I’m promising myself here that I will complete that second earring. The world will be minus one small UFO.
I hope I’ve given you a few ideas about different ways of taking on the challenges. How are people getting on with them? If you make something in response to these or any of our previous challenges, please do post your photos on the forum. We all love to see and be inspired by what other people are making.
My local group had our annual retreat in early September. We go out to a lovely lodge on Little Bitterroot Lake and spend a couple of days creating and playing with art stuff. This photo is from sometime in the past. Sadly, this year, the air was full of smoke and you could barely see the mountains across the water. This year, our activities included deconstructed screen printing, making a book and creating some “faux” rice paper.
These are a few of the paper prints that I created. Deconstructed screen printing is done with a previously prepared screen in which the thickened dye has been left to dry. Then you use more thickened dye or plain print paste to release the dried dye from the screen. It is a serendipitous process and you are never sure what you will get in the final prints. I teach this process on felt in my online class.
I usually use fairly thick paper so that I can wash out the thickener that is left on the paper. That way I can do other processes on top of the paper without it running. These are similar to some of the papers that I used in my recent collage challenge.
One of the fun things about the paper is that you can end up using either side. The photo on the left shows the front side of the printed paper and the right photo is the back side.
Here are some of the fabric pieces that I printed. If you click on the individual photos, you can see what type of fabric I used. The little scraps on the top left photo are what was left over after I used a piece of printed hemp canvas for the cover of my book.
These prints are all on silk. The left side is silk habotai, the middle is silk organza and the right side photo is the silk organza layered over the habotai. You could print on many types of silk and this would be a great way to create your own fabric for using in nuno felting.
I will be using these for my upcoming classes that I am taking as backgrounds for stitching, in collages and wherever else suits my fancy.
Next time, I will show you the book that I created while at the retreat. It’s not entirely finished but you will be able to see the deconstructed screen printed canvas as the cover and a piece of printed paper as the inside covers.
I’m learning to print onto felt so I thought I’d show you some work in progress. I’m following Lindsey Tyson’s course ‘Transfer Printing onto Felt and other Fabrics’ so I’m focusing here on what I’ve made rather than how. Lindsey’s been printing on felt for some years and has developed her own techniques. She’s now moving away from felt-making and printing to focus on painting so has produced a comprehensive course to share her expertise. I first saw her work a few years ago and have been really intrigued ever since to know how she produces such lovely images on felt.
I do quite a lot of sales and exhibitions in my local area. I’ve long thought I’d like to develop some smaller decorative items I can make relatively quickly and so sell at a lower price than some of my other work (because it’s more time-consuming). I thought printing might provide an opportunity to do this.
I hummed and hawed for some time before signing up as it involves quite a big investment – not only in the course itself but also in equipment, software, space (for the equipment) and time. I’ve just had a milestone birthday and as my mother wanted to give me a milestone gift, I decided that this was it. I do love learning new skills and developing ideas so I was pretty sure I’d love the course. Thank you Mum!
My first venture was to source some free online images (this is covered in the course) and, along with a little oyster shell sketch I drew, prepare them for printing and print some samples onto scraps of felt.
Small test pieces
I was pretty pleased with the results. However, some of the prints had a rather plastic feel and very visible edge.
Poor quality printBetter quality print
Lindsey was very helpful with her suggestions on how to improve – including highlighting that I’d overlooked one of the steps when using the paper I’d chosen, doh! That is now largely resolved though I’m still wrestling with myself about whether I should buy a new printer as I have an inkjet and apparently laser prints work better.
I made a little tea light holder cover using some commercial prefelt. I’ve never used bought prefelt before (I’ve always made my own) and although it produced a very lovely fine felt, I also managed to create a line in the cover where the sheet of prefelt joined that I wasn’t happy with.
line where prefelt joinedSame line with light behindPrinted back of tea light holderAvocet (with some unwanted fluff!)First tea light holder attempt – using commercial prefelt and one of my own felted bird images
I now know (from the course) that there’s a way round this but I’ve decided for the time being to stick with making my own felt from scratch rather than introducing new variables.
The course covers, in a lot of detail, how to design and manipulate images. It includes tutorials on using free software as well as paid-for software like Photoshop. I decided to buy Photoshop Elements ( a basic form of Photoshop with a one-off purchase rather than a monthly subscription). I have to admit I have not taken to it like a duck to water! Some of that is doubtless me (remember that milestone birthday!) but I’ve seen lots of reviews that agree that it’s not very intuitive and so not particularly easy to learn to use. Fate intervened with (as far as I know) my first dose of Covid-19 during which I confined myself entirely to staying at home for 5 days (as per our current guidance) and until I tested negative. After the first couple of days I started to feel better so decided this was my time to make Photoshop Elements work for me. In spite of sometimes getting very frustrated, I actually quite enjoyed the learning and have to be impressed with the things I can now do with it (however slowly) let alone all the things it can do that I can’t yet. There are some really good free YouTube tutorials too, which helped, and I have certainly put in the hours. Many, many hours.
Back to the felt-making. I made two more little tea light covers – one from 2 fine layers and one from 4 fine layers of 21 micron natural (undyed) merino. I wanted to see how they’d look with a lit tealight inside. Surprisingly they were both OK.
By then I’d thought of using my own felted bird images which I expertly (!) extracted from their backgrounds. I like the redshank and curlew as they both have feet. Often my felt pictures have birds (like the avocet) whose feet are in water or behind pebbles – both because that’s how I saw the wild birds they’re based on and because I find felting bird feet quite hard!
2 layers 21 mic merino4 layers 21 mic merinoBack of the 2 layer one; tealight litRedshank and Curlew on 21 mic merino
I then tried out 18.5 mic undyed merino and decided this was what I’d use as it has a lovely smooth surface, light colour and a fine translucent appearance. Perfect both for printing and for tea lights.
I started to dig into my vast collection of charity-shop-bought silk scarves and added silk strips to the lower part of the designs. This was partly because lit tea lights’ metal cases cast a shadow at the base of the cover (see the lit one above), partly because it adds to the decoration and partly because it can ‘ground’ the images – i.e. give those birds’ feet something to walk on. Oh, it also eases my conscience about quite how many second-hand silk scarves I own.
Redshank with recycled grey silk scarf strip
And so here are some more of the results. I’ve printed a design on the front and the back (apart from the one with a flock of birds – that goes all the way round). They also look nice as plant holders, ‘thought they’re not quite the right proportions for most plant pots so I have to add some small pebbles to the bottom of the glass container if I want to show them as plant holders.
Some of them are free images I’ve found on the internet; some are from my own large felted pictures and one (the honesty seed pods) is from photos I’ve taken of the seed pods and worked on in Photoshop Elements to create a composite picture.
And here are the first 6 I put in the gallery shop at Creek Creative in Faversham (it’s a gallery, café, shop and studios where I rent my studio), just over a week ago. Inside each there are comprehensive warnings about lit tea lights, some felt care instructions and the name of the image.
First shop display at Creek Creative
The redshank on the left sold within a few days – I don’t know about the others yet.
I’ve also made some cards – initially to use up all the little test prints….
Square cards made using test samples
…..and then some I made specifically to become cards
Long cards
And finally a couple of bigger purpose-made plant pots with metal pots inside, using 21 mic merino in green and white.
Side 1 – ladybirdsSide 2 – Butterfly and flowerSide 1 butterfliesPlant pot holders
Next steps? I’m looking forward to a couple of in-person sales / exhibitions I have coming up so I can gauge people’s reactions. I will keep building a stock of tealight holders, plant pots and cards and developing new images so I have plenty of both stock and variety. I will keep extending my knowledge and skills in both printing on felt and using Photoshop. And I will definitely keep working through Lindsey’s excellent course and drawing on her extensive and generous one-to-one and group support to help me on my way.
Here’s a link to a promotional video for Lindsey’s course, in case you want to check it out.
My local group met before our summer break and tried some caustic lino block etching. I have wanted to try this technique for a while but hadn’t gotten my nerve up to be playing with caustic substances (100% lye). Then I found some instructions that seemed straightforward on this blog. (I am just giving the basics here, click on the link for the full instructions if you want to try it.) We followed the instructions, didn’t have any chemical disasters and etched our blocks.
I decided to do some small samples to test out the process before the group meeting. I already had some small lino blocks cut, I think these are about 3″ x 4″. I transferred the design with pencil and tracing paper, then painted on the resist area using Golden GAC 200 medium and let that dry.
Here’s the set up with the blocks in place. You can’t use anything plastic or the lye will eat it.
Here’s the mixture of lye and wheat paste that is applied to the lino blocks. The areas that are not covered with the GAC 200 resist will be etched away. The trial run, I left the lye in place for about two hours. Then the goop is cleaned up and the lino blocks cleaned with a toothbrush in soap and water. Then I used a standard blue ink pad to print these as I didn’t want to get out my full print making ink setup.
Here’s the resulting prints. Interesting, they look so different than the usual hand cut lino blocks. Once the group was here, we repeated the process and etched four more blocks that were 4″ x 6″.
Here’s Louise’s block on the left and the print on the right. I love the organic feel these prints have.
This is Paula’s block and resulting print.
Poppies for Sally in her block and print.
And mine is based on tree rings. I’m thinking about this as a theme for my upcoming art and design class.
I thought this process was relatively easy compared to carving a block and you can really get some fine details and a very different look than carving. I will definitely be doing more etching of lino blocks. Next I will have to try and print with these on felt and see how they come out.
Recently, we had our in person exhibition in La Conner, Washington for the class I have been participating in for nearly three years. Many of you don’t live close enough to attend but we are also having an online Meet the Artists event that anyone can attend.
You are Invited to an Online Exhibition and
Discussion with the Artists of the
Bachelor Buttons Level 3
Advanced Experimental Stitch Class
Join Tutors Gail Harker and Penny Peters at a free online venue
Tuesday July 19– 10:30 am – 12:30 pm PDT
If you would like to attend this free event, you do need to sign up in advance. You can sign up here:
Join us online (no fee) to view our Level 3 Advance Stitch student’sexhibition of creative stitched artwork.It will truly have you dreaming of wonderful possibilities there are for people just like you.
Each of our participating artists will have a chance to talk about their experience working through this coursework, in spite of pandemic conditions! There will be time for questions and answers with the artists.