
Fun with Sauna Hats
About 18 months ago (my, doesn’t time fly?) my friend Duncan, who had recently built a sauna in his garden, asked if I could advise him on making felt sauna hats for him and his wife. This was the first time I’d heard of such a thing (I’m not a big sauna fan) so I asked him to tell me about them and I did a bit of research to understand what was required.

Duncan had already bought some Jacob wool prefelt for the hats. He was going to try following some online wet felting videos but he couldn’t find precisely what he needed and was starting to realise it might be a bit tricky so he asked me to help.
The prefelt was the first challenge. I don’t make garments, partly because I can’t wear wool at all, and partly because I suppose I’m just more interested in other things like pictures, sculptures and homewares. So, I’d never made a hat, but if I did, I would use wool tops/rovings or batts, not prefelt. One of the challenges of creating a 3-dimensional item using a resist is getting a good smooth and even finish. If you don’t wrap the wool tightly around the resist edges, and spend a long time working those edges, coaxing the wool to fit snugly around the resist and firming the edges thoroughly in the early stages, you end up with a visible ridge of thicker felt where the resist edges were. Basically, some wool gets pushed off the edges of the resist and the two sides of your piece felt together along that line, creating a ridge. With prefelt you are adding joining together pieces of ‘fabric’ into the mix, which makes getting a smooth and even finish even more of a challenge.
In my studio I made a small sample – to see how I’d go about joining the prefelt. I didn’t have any of Duncan’s prefelt so I used some white commercially produced prefelt that was to hand. I think it was 80% merino wool and 20% silk.
I drew a rather random bell-shape for the resist. Then I cut one half of the prefelt larger than the resist and the second half smaller. I thought this would give me the best join without it being too thick.
I cut slits into the larger half to help it fit over the resist’s curved lines


I then worked it in the normal way, paying special attention to those tricky edges. Here’s the finished item, and a shot each of the ‘hat’ with my hand and with the resist for scale.


I was pretty pleased: even felt, nice smooth finish with no ridges. A sauna hat any smallish mammal might be proud to wear.
And then, well, life sort of got in the way and we never quite got round to making the hats. Recently, Duncan and I got talking sauna hat making again and I was appalled that 18 months had gone by. Happily we found a mutually convenient day last week and set about our delayed hat project.
The 18 months delay turned out to have added a couple of additional issues. Firstly, moths had got to Duncan’s Jacob prefelt and there were quite a few holes in it. Secondly, I’d forgotten a couple of the things I’d decided/done when making the practice piece.
As I hadn’t used the Jacob prefelt before, I suggested we make a 20cm square sample to give Duncan a very quick first lesson in wet felting and to check the shrinkage.

We measured Duncan’s head, made some decisions about how he broadly wanted the hat to fit and I made some calculations. We’d got 35% shrinkage in the sample but I could see it would have been possible to get more and I wanted a good firm felt. It was also clear that this hat is supposed to fit quite loosely so I rounded the measurements up a bit.

I drew the resist and rechecked my calculations. It really did look huge.

Undeterred we set about cutting out the prefelt with one half larger and the other half smaller than the resist. We also partially felted a scrap of the prefelt to make a hanging hoop – leaving the ends unworked so they would attach to the hat


We wetted the ends of the larger half and folded them over the resist but then I decided it was probably better to wrap the tabbed ends over the other half of the prefelt rather than the resist.
I’m not sure it made a lot of difference which side was laid out first but I did miss out one important step that I taken with the sample. With the sample I had torn and fluffed out the edges of the prefelt where they joined to give a smoother join. I forgot about that and although the final hat was fine, it did have a thicker section at the join that I could have minimized with tearing rather than cutting the edges of the prefelt. If I made another, I’d rethink that bit.
Duncan chose minimal surface decoration so added a spray of assorted autumn-coloured locks to one side. And here are both sides as the work gets underway. You can see the loop has been added to the top (a bit off-centre!) and yes, that white spot on the plain side is a moth hole that we missed when first patching bits in.


When we got to the rolling stage, it still looked huge.

We laughed. A LOT. I was a little worried I’d got the measurements / calculations wrong. But only a little. This was mainly experimentation. If I’d been teaching I’d have made at least one full scale hat and with the right prefelt beforehand. Honest!

Here’s Duncan happily rolling away. I usually use a pool noodle to roll the work around but I’d forgotten to take one and just bubble wrap seemed to work OK.
Duncan kept trying it on and we kept laughing. Happily though, it was getting smaller.


You can see the progress we were making against the resist.

When it was time for me to go home this was as far as we’d got. The sauna hat needed a little more work to finish it off: some final fulling and shaping but I think it was looking pretty good. And Duncan was delighted with it, which is the main thing. We’d worked about 6 hours in total minus a brief (but delicious) lunch break but that included making the shrinkage sample and some faffing around making decisions and dealing with moth holes. I made sure Duncan knew how to finish it off and left him to it.

I was amazed the next morning to see that the previous evening he’d actually set about the second hat and had made excellent progress.

Duncan worked a couple more hours on the hats and here’s the happy couple modelling their sauna hats. They’ve already been used and apparently work really well keeping your head cool so you can stay a little longer in the sauna.

I asked Duncan how he’d found it. Firstly, he said it was a really fun day. Knowing nothing about it previously, he’d found it an interesting and mindful activity. He was also surprised at how very long it takes. I think that’s true of everyone who first tries wet-felting.
I really enjoyed it too. I realised that I’d never previously jointly felted anything with another person. If I’m teaching it’s more demonstration, coaching and checking on my part, with the students doing the work. As this was quite a big undertaking, I demonstrated on the hat, Duncan did most of the grafting but I did join in sometimes either to give him a break, to see how things were going or just to share the load. It was certainly big enough in the rubbing phase for us both to work on it at the same time.
It was also a reminder, though, not to let 18 months to lapse between making a sample and making the final piece and not to make something for the first time with too little preparation, unless it’s with a friend and for fun.
I don’t think my future lies in hat-making but I did enjoy trying it out. Have you tried something new recently? We’d love to hear about it.


 F
F


 1) small grey 4-door Kea Soul with Glenn bringing in as much as he could carry each trip. The parking space is still covered in snow and the Dairy Queen on the other side of the street is not yet open.
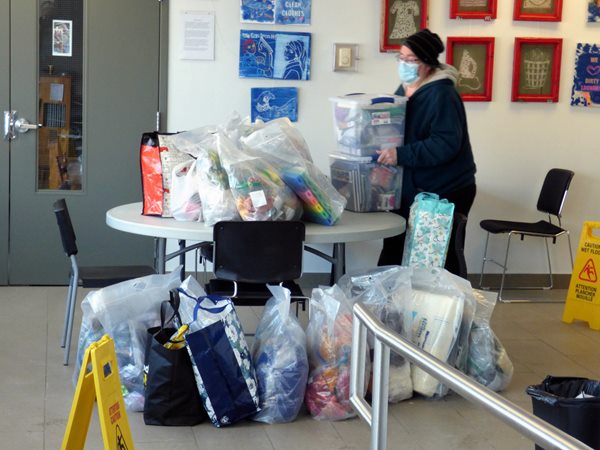 2) clustered around or on the table outside the studio; 12 giant zip lock bags, 4 large bags, one file-holding plastic box, and Glenn placing the last 2 mid-size clear ruff totes on a round plastic-topped table. There are “caution wet floor” signs in the foreground and off to one side.
 3) Classroom set up with each student’s notes, foam pad, frame, and needles set out at their place. To the right are examples of my work (including the Mr. and Mrs. Mer to show 3D Dry Felting). In the background, Glenn is reading and you can see a smaller table full of other supplies we will need as well as a 5-foot table overflowing with bags of wool. (There are a couple of bags sitting on my walker).
 4) Close up of examples of 2D and 3D needle felting and 3 books (Art in Felt and Stitch, Jaana Mattson’s Landscapes in Wool: The Art of Needle Felting and Painting With Wool Landscapes) I had brought for the students to look at.
 5) Three bins and a bag of other things the students might need or could try. Fake clover tools, bags of scissors, extra needles, pins, small pet brushes that work like mini carders, and a bag of permanent markers are arrayed on the table. There are also a couple more small samples of felting and using different types of backing or ground felt.
 6) 13? Bags of wool on a five-foot table overflowing with one on the floor and two bags on my walker.
 7) Well-padded rolling desk chair with a green and black pillow sits behind a folding table with all the students’ supplies.
 8) A close-up of one of the student’s workshop supplies, with various candies and chocolates for stamina (keep watching the pictures and you will see more of the candy selection).
 9) Student with ocean view with lots of blues teals light teals, grey and white wool strewn around. There are is also a package of rockets candy rolls in the foreground
 10) The second Ocean image again has fibre strewn around it. In the foreground, my male cardinal on a branch, using the template method for transfer. Like Watercolour painting, layers of thin colour for the background and a thicker more like acrylic approach to the bird.
 11) Student working on their background behind the tree first. This time the fibre is a mix of white, grey, green-grey, light blue and brown with gray. In the foreground there is the green handle of the clover tool rake (originally designed to clean a clover brush) but works very well to hold down the wool as you felt, it keeps your fingers away from the pointy end and less bloodshed.
 12) The second tree image is having its fence added. in the foreground are works in progress of a night winter tree and on the cheap Dollar Tree craft felt a pair of sheep (you can just see the eye) and a pair of hand carders sitting on a copy of the student’s 21 pages of notes. Next to that is a brass nautical calliper, a wooden frame with an XXL project bag and a box of mini boxes of smarties (candy-coated chocolates).
 13) The first tree picture, Using a 5×7 opening to check the framing of the image. Behind the image and card stock mat is the foam kneeling pad that we were using as a felting surface.
 14) The second tree picture, held up to get a quick check for position in the mat.
 15) a very active roiling sky with sea and beach underneath, there is a seagull added to the right side.
 16) a turbulent sky and sea with a beach in the foreground.
 17) An hour in on a second image of a sheep in a snowfield and snowy sky, sitting in a card stalk mat


