Browsed by
Category: fibre

Hat Class Starting and Some Samples

Hat Class Starting and Some Samples

Terry Berries Popular Hat class will be running again. The price for this four-week course is £50 GBP (approx. $66 US, $85 Canadian, €56, $88 AUD, $97 NZ) and the number of places will be limited to 30 students.

The class will still run in July / August as originally planned. Registration for that class will open on 2 July 2020.

First felting tutorial posted on 16 July 2020 with another tutorial posted in each of the following 2 weeks. The class forum will remain open for you to share your work and ask questions until 27 Aug 2020.


This week I made some samples. First is a sample for my guild summer poker challenge.  In this challenge, you get to pick 4 cards that have instructions like colour fibre or yarn weave structure, spinning type and more. I asked if we could add a felting challenge too. because it was close to the time we play we used the spinning cards but removed the spinning type. You get to exchange one card from the hand you are dealt with.  I got cotton, fluorescent and metallic. I tossed back fluorescent and got blue. Every one thought cotton was very funny when I pulled it. Little do they know I had a project planned with some cotton. I couldn’t find my big bag of cotton but my memory was that it was gauze. I had a little bit of that in a draw.

I laid out some blue merino on top of 2 layers of gauze. Then added some coppery silk and some white silk and some orange sparkly nylon and a square of one layer of gauze. I meant to take a picture dry but wet it down to add the next piece before remembering to take a picture.

I then added some scrunched up cotton. It needs to be wet or it won’t stay scrunched up.

and the back

The sample worked out very well.

I did find my bag of cotton. I had put it in the laundry room to wash. It has a very open weave but it is nothing like this, so it will have to make another sample.

The other sample I did make this week was some Tunis. My friend Bernadette gave ma a little bag to try out. I have never tried Tunis before.

I divided it in half so about 25 grams of wool.

I carded it into little batts with my hand carders. I place them in 2 opposite layers and wet it all down and rubbed and rolled. It didn’t take long. The square was 10×10( 25.5 cm by 25.5 cm) to start and it ended up 7.5 inches by 7.75 inches( 19 cm by 19.6 cm).  so shrinkage is about 25% I could have made it square if I had stretched a little one way or rolled a little more the other. It ended up as a nice fairly smooth dense felt. It would make great slippers or boots I would think. It feels a little prickly if I put it under my chin. I like the way the coloured tips gave it a mottled look.

A little Social Spinning.

A little Social Spinning.


Since we are all sitting at home, and not going out to gatherings,  I did a little spinning with some friends from my weavers and spinners guild on Zoom. A social distancing, social. For our first try, it went very well. We chatted about many things while most of us were spinning,  just like we do when we meet in person.


This is part of the batt I used. You can see there are large parts that or very hard to draft along with wool. It is silk fibre, I think.

It was getting close to time to start zoom so I did a few rolags up with my hand carders. Naturally, I didn’t think to take pictures of them until later. Lying in bed I think that’s ok I had 1 or I thought 2 left I will do it tomorrow. But, they disappeared mysteriously. No one took them or moved them. Not even a bit of fluff from them has surfaced so I think perhaps some fairies came in the night and took them off to make soft beds or something.

I do have a picture of the little bit of spinning I did. I will have to make some more rolags and hide them. Although putting stuff in safe places often means I can’t find them either.

This is the P.S. to this part of the post. I made some more rolags after I finished setting the post up. Here they are:

This is some spinning I did earlier in the week form a different batt. This batt is a nice grey and pink. I think I showed it to you before but can’t find where.

I thought I had a picture of it as a single but it’s not on my phone.  This is it plied into a 2 ply yarn and wound into a little center pull ball. It is quite pretty

I hope everyone is keeping well during this stressful time.

Spinning

Spinning

I haven’t managed any felting this last little while but I have been doing some spinning. I spin on my drop spindle, making small balls I use to decorate my felt. I did have a wheel at one point in my spinning journey. I had an Ashford Traveler. It was a very nice wheel but it ended up sitting in a corner gathering dust, so I sold it.  My favourite wool preparation right now is rolags. The wool just seems to draft so easily.

I’ve spun up most of this blue.

I did a ball of regular yarn and one of thick and thin. I can do both these very well but am having trouble making consistent and thick yarn.

I also have these nice orange-yellow rolags I am working on.

I’ve only done one ball of this so far. I had just wound it off into a wall when I took this so It has some cardboard in it so the center doesn’t collapse.

and lastly some wool I won at the Rosepath Auction at my guild in December. This is a funny cross between an auction and a draw. I spun the smaller ball of this and gave the rest to my friend Judy as she had tried to win it as well. I am not sure what this is other than wool and silk. At least we think so. Bernadette burned some at one of our guild socials and it stunk up the place like burned hair.

and here is the ball.

I have a lot of these balls more than I am ever really going to need for felting. I do make some small skeins, 11 yards, to sell.  That is enough to cover an 8-foot scarf quite densely. I don’t knit crochet or weave so not sure what else I could do with it. maybe some crewel work or rug hooking/punching maybe, because I need another fibre hobby. LOL


Flax Study Group Part 2

Flax Study Group Part 2

Flax Study Group Part 2

In my Last post, we got up to the pulling of the flax plants, tying them in small bundles and laying them against the fence to dry. But this was not the worst fate for these unsuspecting plants. I was unable to attend this section of the processing but the rest of the group worked hard to Ripple and Winnow the flax.


1 aug.7 The flax bundles were moved into the barn out of the rain Aug. 7th

August 10 Most of the flax group got together for a rippling and winnowing party. To Ripple the flax will separate the seed heads from the stocks. The flax from the first part of the harvest should provide the best fibre but the seed will not be as mature. The two sections we left till later should have coarser fibre but better seed viability.

We had a couple suggestions of how to get the seeds separated from the stocks. The use of two rakes did not work out well but Bernadetts’ description of pillow cases and rolling pins had a much better result.


Now that the flax stocks have been decapitated it’s time for winnowing. This will remove the chaff from the seeds. The instructions suggested a breeze was required.  After a bit of experimentation it was determined a strong breeze or wind worked well.

This slideshow requires JavaScript.

7 winnowing flax sead after winnowing

Success, the seeds remain but almost all the chaff is gone.

There is worse in store for this poor unfortunate plant.  At the end of the day it is thrown into a trough and weighted down with cinder blocks. This will not be a spa treatment or a mob execution.  It will be a retting.

8 Retting

Day 1 Aug 10 the water is the colour of apple juice,

9 retting day 2day 2 Aug 11 the colour of tea, then the retting really starts on Aug 13th.

10 Retting fermentation has started

Tuesday August 13 2019, 10:30 am

11 Retting Aug 13 later afternoon fermentation has startedAugust 13 2019 5 PM

12 Retting Aug 14 Aug 14 th

13 AUg 14 the testing a stockOn Aug. 13 Cathy Louise tested a stock of the retting flax  for separation of the boon from the stock. Some is still sticking to the fiber. so it needs a bit more cooking.

14 Flax layed out to dry after rettingAug 17 All the first batch was removed from the trough and moved to the field to dry.

15 Pulling strands of fiber from the flaxAug 17 the fibre is separating from the flax stalk.

On the Same day the second harvested batch went into the trough in the same water that had been used to rett batch one. There was hope that this would speed up the retting process. It seemed to have changed the colour (the second batch was darker than batch 1)  but I’m not sure if it went faster. The final batch went into fresh water to rett after this batch was out.

16 retting batch 2 aug 17

18 another batch drying aug 21another batch drying in the field

17 finished drying batch 1 and back in the barn Aug 21Batch 1 is now dry and is sent to the barn to await an even more terrible fate but first we had the guild Sale and exhibition in early November. So we took a brief paws.

A quick review: We tore the heads of the flax by stuffing them head-first in pillow cases and crushing them with rolling pins. Then took their severed heads and threw them skyward; letting the chaff separate from the seeds. Then off to a spa experience you would never want to experience. Submersion under cinder blocks until rotting starts. Next they were pulled out and left to dry over uncomfortable sticks in a field. Lastly bundled into the barn where they may be safe.

But wait!  There is more indignity to come for the poor flax plant!  it only gets more violent,  We still have the breaks, skutching and hackles to deal with!!  But I think I better make that part 3, I promise to have videos in the next installment. (And of course lots more violent fun fiber torture! I am sure it will all be worth it in the end!)

Flax Study Group Part 1

Flax Study Group Part 1

Flax Study Group Part 1

(Sorry. I got to the first part of the harvest and realized this could grow into a book! So i will tell you about the violence and weapons like swords, brakes, hackles and skutching later.)

There are many reasons you might want to join a local guild. There is the comradery of people who are also interested in what you are interested in. There may be access to shared equipment or resources. There may also be the opportunity to join a study group.  The Guild Ann and I belong to is reasonably old by North American standards and reasonably large for a local guild. We have members with interests from spinning, weaving, felting, dyeing to tatting, lace making and naalbinding . We even have at least one (Icelandic) warp weighted loom represented within the membership.  We have socials every Monday nights if we are not having a meeting which happens once a month.  At socials we spin, weave, knit and chat. One of the chats led to the idea to form a study group to grow and process flax. I think that was about a year ago.

28

Pre planting planning:

Cathy Louise offered planting space at her farm and started to research on seeds appropriate for our climate and length of summer. I tracked down books in the library, looked on line for information, and volunteered to photograph the experiment. We had a number of people that expressed interest but not all made it through to the end. We found a particularly good book on growing flax in Canada.  Cathy Louise bought the seeds (we divided the cost amongst the participants; $7.00 Canadian) and prepared a row in her farm garden for the planting to take place.  I think it was 4 feet wide by 40 feet long.


We had to wait till the field was dry enough to work (there was flooding again this year as the snow melted)

11

This is April 4, 2019 at Cathy Louise’s field south of Ottawa while most of my garden was still covered in snow.


Day 1 planting:

22 Cathy Louise Leads Us to the field

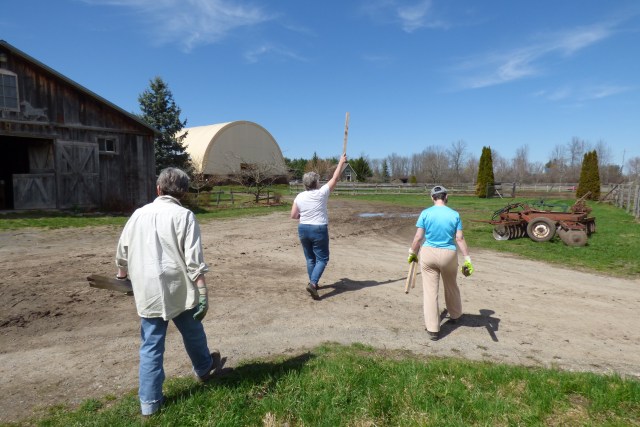
The study group arrived on a bright sunny day (May 5 2019) to rake, stake and plant the 3 bags of seeds to start the beginning of the practical part of the study group.

  • density 4 seeds per inch hand scattered


Step 1 measure and mark the planting section for the flax.

3-4 Positioning the Flax Plot

Step 2 weed and rake the area of planting. Put up a line to mark the planting area.


5-6 Weeding and raking to prepare for the flax seeds


Step 3 we had three seed packages so we cut the section into thirds and marked them by a stake.

We planted each section by scattering the seeds by hand. Then raked and tamped them down.


This slideshow requires JavaScript.

7-13

14 14 Afterwords,  relaxing with everyone on the deck (there use to be cake)

The end of planting was celebrated by cake on the deck!

Cathy Louise gave progress reports as the seeds became plants on our study group face book page; OVWSG Flax Project. (There was much rejoicing when we saw the little green bits  and they didn’t seem to be weeds!)

(Skip ahead a little)

Weeding party- June 08 2019

  • Checking the amount of growth of the row. Height just over 4 inches?
  • Instructions- if it’s not flax pull it.
  • A quick touch up along the edges (was that implement called a stirrup hoe?
  • visit the very pretty cows
  • Celebrate with cake and ice tea!!

This slideshow requires JavaScript.

15- 21 Some of this green is not like the other green so get rid of it! Glenn’s technique is vary relaxing.

22

22 We Work hard evicting and terrorizing weeds.  So we relaxed with Cake and ice tea! it was vary good!

All this took just over an hour and then we celebrated with cake!

Cathy Louise posted updates at the flax grew

23 23

June 22 Cathy Louise Posts update on flax groth

24 24

June 28 updated on flax from Cathy Louise


2525

July 7 update from Cathy Louise

26

26July 11   In early July, Strings were added across the flax to help keep it upright before a large rainstorm was forecast (Cathy Louise, Bernadette and Julie did the stringing)

27 27

July 22 the seed heads suggest we should be harvesting soon updated picture from Cathy Louise

First harvest Saturday July 27, 2019 at 10 am. The harvest took an hour to complete.

2828 Flax flower and seed pods

This slideshow requires JavaScript.

29 – 39 the Harvesting Teem.  small bundles were pulled and tied with a flax plant to hold the bundle securly. the bundles were staked along the fence rail to dry.

4040 the first part of the harvest is in . look at the weeds that snuck in  among the flax plants.

You can see that we left about 1/4th of the row to continue ripening so it could be used as seed for next year. We split the remaining flax in two more harvests so we could not only have viable seeds but also see how leaving it to grow longer would change the characteristics of the fibre.

To also give comparison we were going to rett most of the fibre in a trough but wanted to also see what effect dew retting would create. To sate our curiosity Bernadette took a few bundles home to dew rett (spreading and lay it out on the grass, turning it to start the rotting of the outer part of the stalk to allow access to the inner fibre)

I will show you more of what happened to the unsuspecting flax plants after they were pulled up by their roots and left to dry by the fence. That will be for next week, or i am sure you will feel like you are reading a book!


Someone send inspiration and help…

Someone send inspiration and help…

I recently moved from London to Edinburgh. When asked why I was moving farther north by my baffled English friends, I couldn’t resist telling them it was because England just wasn’t cold enough for me, nothing but Scottish weather would suffice! Some of them actually believed me…

It’s not easy packing up a whole life and its contents, but having a work studio mixed with the personal makes things even harder. Once almost your whole life is safely hidden in boxes, only half the work is done – the unpacking, deciding where everything goes, both in the domestic and business front, is hard work. I’ve been at it for two weeks already and my new place still isn’t finished!

Feel free to be horrified by the mess and judge me, I can’t hear you.

EA1E1A69-CC8C-4D6C-AC0A-C7D0C0EA1F9A

This was the lovely blank slate I had to work with. The ceiling is very high (typical of early 1900’s flats around here), the wood floor is real and the fireplace works. Happy sigh.
(Now comes the cringe-y part)

34BDEF0B-9734-400B-B25B-7AA74C1CF370

It looks like a hurricane passed by, I know. I think I panicked and simply started to take things out of boxes before I had any inkling where anything should go. I kept coming back to the room, standing in the middle and staring at everything, having no idea how to organise my precious stuff. This went on for days!

IMG_4891.jpeg

After a few days of this my brain seemed to finally awake and I’m now finally able to see where I want most things to be, and I’ve started arranging my fibre slowly.

IMG_2091.JPG

I also got one of those adjustable tables that lets me use the computer whilst standing; I’ve yet to use my chair!

IMG_6162

My sewing table is now tucked into the window nook, affording me a little view of the sea and the stunning cloud formations above it. Inspiration might strike more often from now on with all this weather drama…

227280F6-E3F5-4F81-B68A-BC8BAFA86FA1

I promise my floor is now a lot more bare of items, and I’ve finally figured out where certain pieces of furniture will go. Once it’s all done I’ll even have a knitting chair near the fireplace, so I’m feeling very happy indeed.

Let me know if you’d like to see the finished studio, I’m happy to share.

Have you moved recently? Share your experiences with me so I know I’m not alone in dreading the sight of a moving van or two in the near future…