I’ve been running a felt study group and I wanted to share one of the more interesting samples I did in the group. I had some white welsh mountain sheep wool. I have no idea where I got it it was raw and I have had it for years because I didn’t know what to do with it.
The Welsh Mountain sheep is usually white with a white face with no wool on forehead or cheeks and white legs with no wool below the joint. Females are polled but rams usually have curved horns, although some are polled. The fleece is thick and moderately long and the tails are not normally docked.
Breeders give a high priority to hardiness, milking ability, mothering quality and lamb survival. (Lambing percentage can be 130%, which rises to 180% under favourable conditions on improved pastures.[2]) It was not always thus; the 18th-century English agriculturist Arthur Young described the Welsh Mountain sheep as “the most despicable of all types” and a judge at an agricultural show in the 1880s described it as “a diminutive ill-shapen animal with its shaggy coat more reminiscent of hair than of wool”
I had a shoebox sized amount. As you can see not the nicest looking stuff, a bit like a horse’s mane.
I washed it in a laundry bag with some dish soap.
It took 2 washes but it came out a lovely white, white horse but white.
The locks average about 10 inches long.
I weighed out 25 grams and divided it into 4 and carded it into little batts. Each batt would be one layer of the sample.
The samples were all laid out 10×10 inches for easy calculation of shrinkage. At this point, I was skeptical that it would felt at all, it is so much like stong, straight hair
The piece was rubbed and rolled to felt and then rolled on a textured mat and scrunched for the fulling. Throwing doesn’t work well with such a small piece.
Much to my surprise, this is the final result. It’s a bit wonky but that’s down to my hand carding
It’s about 40% shrinkage and it is rock solid. The most I got of any of my samples. It is rock solid. I tried to felt it more but it wouldn’t budge. All the samples were made with 25grams of wool. It makes me wonder about people that say they get 50% shrinkage on their felt protects. Are they measuring differently or are they using very thin layouts? I could see this felting more if I used half the amount of wool. so if I made a sample 20inches by 20 inches with the same wool I would get a higher shrinkage rate. What do you think?
The January Meeting of our local Weavers and Spinners guild had a Zoom presentation on silk from the owners of Sanjo Silk (B.C. Canada). They talked about the different types of silk, about some of their acquisition trips to buy silk and showed us some of what they had in their store. It was all quite inspiring with the silk giving lots of ideas for future spinning or projects.
1 web page of Sanjo silk showing some of the silk they offer (Fiber, Yarn and cool odd stuff)
After the meeting, there was an inquiry if there would be interest in a group purchase to reduce the cost of shipping. Their website offered free shipping over $200.00 Canadian (before taxes). There was another discount if we had a higher number too, but we doubted we could spend that much. We had a small number of enthusiastic shoppers express interest and our new Yarn Convener set out to organize our shopping.
We perused the website www.sanjosilk.com/ and selected our drool-able lists. We then added the costs up and each sent our list to Deborah. She collected our payments, tallied the master list and sent out the order. She organized it all through E-Transfers, (I had never sent money by an E-Transfer, it was all very exciting!) She even organized E-refunds when we had collective spend enough for a further price reduction!!
Deborah had some cool stats that may interest you.
After not very long a LARGE box arrived! Deborah did a sort of the loot into each of our lists then dispersed it among the group.
2 the box arrives!!
3 our combined loot out of the box
I had a specific interest in my acquisitions; I was interested mainly in some of the colours that silk comes in besides white. I chose 3 options for further investigation. (Tussah, Muga and Eri)
4-5 Mr. Mer helps me set up for the fibre photoshoot
The Peduncle tussah silk was a silvery brown. This is fibre from the pediculus (foot) of the cocoon. On their website, it is described as Pewter in fibre form, with a stunning lustre of Brownish-grey. It was the least expensive of the three coloured silks I selected at $11.25 for 50g. I am sorry I did not get more it would be exquisitely blended with fine dark wool.
6-7 Peduncle tussah silk
The Golden Muga silk was a blond colour. This one was described as “liquid gold”. They did warn that there is a lot of natural variation between batches they receive. The differences are caused by variations in diet and environment for the silkworms. They suggest you get enough for an entire project at once so you don’t have variations within the colour range by getting different batches. This one was $16.90 for 50g. I think I would like to see what variation is available so may order again and hope to get it from another batch.
8-9 Golden Muga silk
The Red Eri Silk was a Fox colour orange/gold. Their website described it as a deep Orange-butterscotch, soft Luxuriously lustrous and long staple-length fibre, prepared in a thick roving. I am wondering if Mrs. Mer would like some of this blended with another fibre for her hair and possibly some fishy body highlight. This was $18.80 for 50g.
10-11 Red Eri Silk
While browsing I spotted the oddest looking “cocoons” I have ever seen, full of little holes and in a golden colour. I had to add them to the list! They were listed as Gold Cricula Cocoons (wild) from Indonesia. They further explain that this is the outer part that attaches to the tree branch. The strong gold colour is from the Sericin, if it is removed the silk will be a pale yellow. It was suggested that you can “soak your cricula cocoons in water (with a dash of pH-neutral soap); reshape them, enhancing their dome shape with your fingers; let them dry. Or iron them flat for use in 2D projects”. My brain immediately started thinking about a top for Mrs. Mer!! I am sure that you will think of much more exciting things to try with this cool cocoon attachment! A bag of 5g (a large handful) was $7.00.
12-13 Gold Cricula Cocoons (wild) from Indonesia
The next two selections were similar to each other. The first was 100% Silk Carrier Rods (7 casings for $6.00.) the description was that “they’re actually part of the silk-reeling process. These carrier rods are stiff, strong, and smooth. Some are straight, some curved – they’re very sculptural. And they dye beautifully. (Also see our Silk Casings, which are thinner and finer.)”
14-15 Silk Carrier Rods
Yes, I got the bag of the 100% Silk Casings too, they were priced at $6.00 for 14gr. Their description was; “Although these curious items look a bit “insectoid”, they aren’t. They are bi-products of the silk spinning industry. Each one is unique. They’re similar to the Carrier Rods we also carry, but they’re thinner, finer, and more pliable. Some are ridgey and corrugated, some are not. Each package is a variety of shapes and configurations. Use them for jewelry, to embellish art pieces, or just enjoy their stunning good looks.
16 Silk Casings
From the meeting, I remember they described both as waste products of the silk reeling industry. It is good to have what was considered waste be available to us, I am sure we will find a use for it! I had considered from the web picture possibilities for horns but I don’t think I have enough of the ribbed shape to do that. It is still weird and will likely percolate many odd ideas in the future. In the meantime, I will just enjoy their oddness and may add a few to my demo stuff. Oh, note that they have been cut off so the length of the fibre if separated would be short.
Lastly, I did get a white silk blend with Linin, I think this was a mill end, 97% Eri Silk and 3% Linen (trace amounts). The mill that made this has some debate as to exactly how much linen is included but it will be 3% or less. I seem to have a section where I can’t feel or see anything that looks like Linin. Oh well, it is still gorgeous! The Erin is a shot-stale fibre because the silkworm is not killed but allowed to break and leave its cocoon,( aka; Peace Silk). This fibre has been prepared using a woollen prep. It is described as having a soft and lofty character. It is also described as similar to cotton sliver fibre prep. 100g bag (about 3.5 oz.) was $15.60
17-18 97% Eri Silk and 3% Linen
If we order again, I may try a similar option of 65% Bombay Silk 35% Linen (flax) Spinning Fibre, it was slightly more expensive but had more Flax fibre content. That one is 100g for $19.00.
It is nice to have a selection of fibres to inspire you, or have just the right option available as you are in the middle of a project and just need a bit of something. Being part of a guild and thus easier to organize a group order (we saved a lot on shipping and got a bit of a discount too!) was a great help. Deborah did a fantastic job getting us all organized. I hope we did not overwhelm her and we can try this again! I would like to be able to shop locally (we should be out of partial shutdown by the time I post this, I hope!) but in the meantime, let’s enjoy the bits of fibre shopping we are able to do and live vicariously through looking at each other’s acquisitions.
Did you have a flash of inspiration looking at casings, cocoons or rods? Are you thinking about foxes after looking at the photos of Red Eri Silk?
Now a word about felting
Remember if you are wanting to felt with silk it is not as narcissistic as wool, so it won’t want to stick to itself the way that wool does. Using a tiny wisp of wool over the silk to help lock it in place or blending it with wool as you are preparing your fibres will help it stick. Silk can be used to add a lustre or pop of colour amongst the wool. Ann has applied it on the outer surface of vessels then used a razor to save back the wool and expose more of the silk to great effect. I have used silk fibres mixed with other fibres like alpaca or Icelandic tog as part of the outer coat of some of my animal sculptures to keep the hair/pelt from felting or matting to the body.
If you are going to be working with silk it’s a good idea to start moisturizing your hands a few days before you start. I also use extra-fine files for my nails. Silk, even though it is reluctant to felt when you want it to, will cling to your fingers and anything else you didn’t want it to stick to. Bernadette, who also posts blogs here, has done a lot of spinning with silk and silk blends she may have some good suggestions for you about keeping it under control!
‘Tis the season to show off trees! I’m no exception, so here is my contribution.
A few years ago I had the idea of creating a portable Christmas decoration to sell in my shop. I wanted something small, cute and as eco-friendly as possible. The solution? Needle felted mini trees.
The trees
I think they’re rather fun, even if I do say so myself. The colours are bright and who doesn’t like miniatures?
Each tree has a wire frame to ensure stability. I needle felt the the larger components (tree trunk, copse and base) around the wire and the rest is made separately and stitched onto the main part.
It’s quite fun to felt the baubles, I used to take small amounts of differently coloured wool with me to doctor appointments and such and, whilst waiting, I could get 4-5 balls created. It was also a great conversation starter.
To finish things off nicely, I glue the whole ensemble onto a sturdy piece of locally sourced wool disc and, as they say, Bob’s you uncle.
They’ve been quite the success this year, I’m down to the last one at the time of writing!
Wreathes
Another holiday idea was to create a wreath that could be used over and over again. Have I mentioned I like reusable, eco-friendly things? 🙂
I had some needle felting foam that I regretted buying. It wasn’t the best quality foam and I found out I hated using them, so they’d been languishing in my stash for a couple of years. I didn’t want to throw it away. One day it dawned on me: I could cut and use them for something else.
I love these wreathes and each year I look forward to hanging mine in my front door. They’re not huge because I had to take the foam’s original size into consideration but isn’t it cute?
Sewing
It wouldn’t be a post written by me without some sewing fun. I felt brave and bought some jersey knit fabric to make a Stasia dress by Sew Liberated. You might know a lot of sewers avoid jersey due to its stretchy nature. My previous experience hadn’t been the best but this time I was determined to succeed.
Fun fact: despite my determination, for some reason I didn’t make a mock version of the dress beforehand. I just moved on ahead directly to cutting the good fabric!
The consequence of this is that my sleeves ended up a bit shorter than I’d wanted, so I think I’m going to cut them and create a ¾ sleeve instead.
Can you tell I’m so happy with the result? The black dots and stripes on the fabric are just so cute to me. My poor mother still wonders how I ended up going from wearing just black to being obsessed with mustard yellow, but here we are.
That’s it for today. Can you believe it’s already December? This is my last post for the year, so I wish you a great New Year, filled with fibre and other fun stuff. See you in 2022.
A few weeks ago our guild was offered the estate of one of our more noteworthy weavers. She had stipulated that all her weaving supplies and equipment were to be sold and a scholarship be set up to help educate and promote weaving. We were deeply saddened by the loss of this talented woman, who was also a great resource for our guild. Her generosity set a high bar for all of us. I did participate in the fundraising efforts and purchased a cotton warp to encourage me to get back into weaving.
There was only a small problem with the warp; it no longer had a cross. The cross in a warp helps prevent the threads from tangling. This was going to be a huge challenge but one I wanted to tackle along with two other learning challenges.
Because I am self-taught there are huge gaps missing in my weaving knowledge. Some are very basic techniques. I desperately wanted to learn how to make a weavers knot. This is a knot that almost everyone involved in fibre seems to know how to make. Not me. I wanted it to become muscle memory, so I wanted to make lots and lots of knots. Then when the need arises it will be so easy for me to just – poof – make this non-slip permanent tiny little fastener.
Now comes part two of my learning challenge – reusing a threaded warp. If a weaver is careful and doesn’t remove the remnants of threads from the loom, and if they are long enough, they can be used as a labour-saving tool when threading through the heddles. The heddles are the little eyes on the loom. Threading heddles is a bit like threading very big needles and I really don’t like doing it.
I had preserved the previous warp. I knew it was narrower than the cotton warp I wanted to add, but I didn’t know how many threads were in the cotton warp. There is only one way to find out, count them. There are 225 threads by the way.
So I estimated I would need to add three inches of cotton on either side of the existing warp.
Then came the knots. First I just did overhand knots, but I really didn’t like them. They were thick and didn’t look like they would pass through the reed with ease. Then I started working on the weavers’ knots. Online demos are really interesting, but by the time I got back to the loom I’d forgotten how the loops worked and which way the thread wrapped around and it was all very frustrating. Finally, after a bit of digging, I found a printable diagram and that worked like a charm. My biggest concern is that I may not have a true weavers knot. This works, so maybe it doesn’t matter.
weaver’s knot
overhand knot
I had to thread the cotton through the heddles and Because the cotton along the sides was going to be a little shorter than the wool cotton combination in the middle I added a bit of an extender, sorry I didn’t get a picture of that.
And then it was time to start gently getting everything through the reed and the heddles. This was all done very slowly and carefully so that none of the threads would break. The weaver’s knot worked like a charm. The overhand knot was a bit thick and need some gentle nudging to make it through, but all in all, it worked.
Once the cotton was safely warped on the back beam it was a matter of untangling the threads and winding, untangling and winding. At some point, I was very tempted to just chop it all off the loom and throw it out. It was really getting to be a terrible mess, so discouraging. Then I would look at the back of the loom and see how ordered it was. Everything was coming together as it should, everything was aligned and going onto the beam the way it was supposed to, so I would take a break and come back to it a little later.
And then fairly quickly it was all done. I was a little surprised and definitely delighted.
All this time I had no idea what I was going to do on this warp, not a clue. Maybe make a table runner or some cushion covers. I have some really nice linen to use, some great thick and thin cotton or wool. Then last night it came to me. This lovely textured cotton warp with all its thick bits and thin threads, its ideal length of 4.5 yards (4 m) precise width of 18 in (45cm), it’s ability to take colour like a sponge will be perfect for the recycled kimono project!! Can hardly wait to get started.
I ordered some sari silk a while back as part of a larger order from World Of Wool. I am ordering wholesale so I ordered 1 kg of each of the colours I wanted. the first 2 look very similar here but the first has a lot of green and red and the second has quite a lot of black. I had expected the pink one to be much more purple. It is called Royal Robe. Every batch is different, so you are always taking a chance. It would be great if they took new pictures for each batch but I suppose that would be a big hasssle for them. And they do warn you so no complaining.
That is a lot of sari silk.
I did make up some small bags of it and sold them on the guild’s Facebook page. I will offer it again soon. I still have lots. I haven’t played with it much at all. So last weekend knowing it would be rainy at the market, so slow and I would be bored, I grabbed some of the silk and a spindle to try spinning it. I brought an older cheaper spindle because I knew I would probably be doing as much dropping as spinning. I was right. It is very short and very frustrating to try to spin, especially since I usually do more of a long draw. I tried for a while then gave up and plied the tiny amount I had spun.
Ta-Da…
I told you it was small. Here is a close up.
It is very pretty and shiny but I will not be spinning more this way.
Next was to try blending some with some wool.
I picked these two shades of merino. I think they are mallard and duck egg. They seem to be the same colour but have different saturations of the dye.
And these 3 sari silks to blend in. Looking now I see I picked the 3 primaries.
First I did the turquoise lagoon. I did a layer of the dark, then the light and then the sari silk. I carded it several times to blend it and then rolled it into a rollag
It is very subtle but I think it will add some shin and interest when I spin it.
Next, I did the Salsa, I did the same thing a layer of each of the wools and then some sari silk
And lastly the wildflower
Now I have to spin them up. They are not the neatest rollags but I think they will work. I will do some recarding if I have to but I hope I don’t have to.
Imagine this: you’ve planned that project in your head. You’ve gone through all the steps and know what needs doing. You have all the materials, and you’re getting ready to work on it. It’s going to be epic!
Except… something goes terribly wrong and the end result is nothing like what you expected.
Sound familiar?
This hand dyed yarn looks great at first glance, but in reality it’s “muddy” – the colours have somehow blended into each other in a not-so flattering way.
I’m sure we’ve all been there. Craft long enough and, be it due to bad luck or simple statistics, something will go wrong.
The problem: The yarn above is a colourway of mine called Love Heart Meow. At first glance, it looks exactly as it should, except something went wrong during the dyeing process and the end result is “muddy.” You can’t really tell in the photo, but in real life I can definitely see it and it’s driving me mad.
The solution: I’m going to overdye it. I find that when things don’t go as planned, a blue overdye can save things around. Who knows, maybe I’ll create a new colourway?
(Shameless plugin moment: I’m getting back to blogging in my own website and I’ll be sharing the over dyeing process over there very soon! I’ll of course still be working on new content for our lovely blog here.)
A while back I was doing an exchange with a dyer friend of mine and decided to send her some hand dyed silk cocoons. Silk comes at a price for the poor silk worm, so I was very keen to “make it count” (yes, I’m the soppy type).
I carefully dyed each cocoon, making it so that the exterior and the interior were slightly different and adding variation in shade/colour. I was rather chuffed with the result.
Of course, I then proceeded to ruin things beautifully. I don’t know what happened in my brain but I decided to set the colours with more acid… by dunking the cocoons in hot water.
If you’ve ever dyed these precious things, you’ll know they need to be steam set if you want them to retain their shape. Hot water is most emphatically not the right thing to do, as I remembered even as I was dunking them in the H2O.
The problem: I had a hot mess in my hands, the cocoons all melted into each other, were soft and (to me, at the time) completely useless.
The temporary solution: Remove from water and back away from the project! Make some tea. Curse out loud. Come back later.
The real solution: After keeping whole thing away from sight a while, I looked at it again. It was a mess, but I could make it into something different. The colours were pretty. Then it hit me…
Tah-dah, wall art to the rescue. The colours are actually brighter in real life.
I sewed the Cocoon Combo to some black felt, added some beads and shiny embroidered stars in gold and silver. The shape of the thing was asking for an oval embroidery hoop, so I bought one in a suitable size and Bob’s your uncle.
It looks like something done on purpose, doesn’t it? It’ll be our secret.
Now, this wouldn’t be a post by yours truly if I didn’t add a little sewing, would it?
While perusing one of my usual fabric supply sites I stumbled upon the most fun cat fabric. As with most things in the crafty brain, I had the “button” sorted but not the “suit,” so to speak. I had to come up with something to create with that fabric!
I decided on the Metamorphic Dress by Sew Liberated because it looked comfy and, best of all, asked for two complementary fabrics (the cat fabric had a “friend” that I thought made the cats look even cuter. Aaand, I’ll stop using metaphors now.)
I love this dress. It works great on its own or as a top layer, making it good for more seasons. It’s meant to be reversible, but this one isn’t (there are reasons but I shan’t go into them).
One great thing about being short is, I never need as much fabric to make something as the pattern says I do. After careful calculations, I knew exactly how much to buy and order it I did.
The bad thing is, if you don’t have extra and make a mistake… well.
I was on the phone with my other half and got distracted. Instead of cutting the top layer a specific way, I did it wrongly. I immediately noticed the disaster, but it was too late. My soul hurt. I didn’t want to order more fabric because of this!
The problem: No extra fabric and the huge unwillingness to buy more. I was doomed.
The temporary solution: The same as with the cocoons! Back away from the project. Make some tea. Curse out loud. Come back later.
The real solution: I had a little extra of the gingham fabric. Patchwork to the saving.
I had only made a mistake with one half of the fabric, so that became the back. I cut that piece in two and added a strip of the under layer fabric to the middle. It almost looks like it’s a proper feature, at least to my eyes.
I’ll have to confess I felt rather smug after this. My solution worked, I didn’t have to buy extra fabric and my dress is perfectly wearable.
My smugness was somewhat abated after my mum saw the dress and said it looked like a maid’s apron, but that’s another story…
That’s it, three examples of things that didn’t go as planned but had a solution. If you let your brain think about it for a while in the background, I bet you’ll come up with alternative endings for your “mistakes.” Like the cliché goes, mistakes can be opportunities to do better later. Beats giving up, right?
Finally, the random photo of the day:
My lovely osteopath Jane went on holiday to the Shetland Islands and I asked her to send me some sheep pics. She obliged and I thought I’d share them with you.
A couple of weeks ago, I ordered a pair of English wool combs. They were sold out at the time but the people in the shop were kind enough to allow me to backorder. Now all I had to do was wait a few days and let the spiky goodness arrive at my doorstep!
Finally, they were here.
It occurs to me that these would make great Wolverine claws for Halloween, were I in the mood to risk self-injury… Seriously, despite knowing these are pointy, sharp objects, it still surprised me to find out exactly how sharp they were in a slight moment of distraction. Note to self: don’t daydream when handling wool combs.
If you’re not sure what wool combs are for, these brilliant tools are used to process fleeces for spinning. They work by separating, aligning and combing the wool locks, whilst also getting rid of any vegetable matter (VM). The end result is a fluffy and lovely cloud that you’re supposed to carefully diz off the combs, ending up with a longish sort of roving.
Ideally, you’ll place the locks facing the same direction, which in my case was cut side nearest the tines, ends on the outside.
These are lovely locks from a Texel cross lamb’s first shear’s fleece. I washed it myself. They’re so soft and all I want to do is bury my face in them.. (which I definitely have. Don’t judge.)
Next, you carefully start teasing the tips of the locks apart with the other comb, which will transfer a bit of fibre to said comb at each pass. As you keep doing this, the longer staples of wool will move and the shortest bits will remain on the clamped comb. You’re meant to discard these short bits, but I keep them to make dryer balls.
You can see above that the fibre left behind retains some VM. I don’t mind it because it’s clean, and won’t be seen once the dryer balls are covered in commercially processed wool top. Waste not, want not.
You will do this transferring of fibre from one comb to the other until you’re happy with how the wool looks. The one below was on the third pass.
There was still a tiny bit of VM but I don’t mind.
Since I wasn’t planning on spinning this wool, I didn’t diz it off the comb, I simply pulled it all off together very gently, so it all came off at the same time.
After 30 minutes I had a few clouds.
I’ll be gathering a lot of this fluff into a bag and, once I have enough, I’ll card it on my drum carder and make batts to sell to spinners and felters. Lamb wool really is like a cloud and I’m loving playing with it.
To end this post in my usual tradition, here’s a completely unrelated photo I took a few days ago that I find amusing. This was on a building I happened to pass by here in Edinburgh.
In an earlier post we found out that 3 breeds of sheep were created by Agriculture Canada mixing existing breeds to create a sheep that would give; multiple births, fast-growing lambs and ewe’s with good mothering instincts. At first, their goal was to make a breed of sheep for research purposes but as the project continued they developed into 3 separate breeds; the Rideau Arcott, the Outaouais Arcott and the Canadian Arcott. Since they have been bred mostly for their meat, the fleeces around here are variable often strikingly different between individuals in the same flock. The Rideau Arcott’s fleeces I have worked with before, on my highly technical scale, have ranged from OOOOH! all the way to Ick!
This being the first Canadian Arcott fleeces I have worked with I am testing their qualities and seeing what they may be best for. If you find a Canadian Arcott, it will likely be more lustrous than the Rideau Arcotts, and less variability between individual fleeces. (This is a strong rumour and your Canadian may vary a bit from the breed standard. It’s always best to look at each fleece as an individual)
Last post I tested Ram #2 (it’s ram number two because he was the second one out of the bag.) His ewes are employed as lawn maintenance specialists at a local solar farm.
We found that the fleece worked well with both combing and carding preparations producing a niece yarn from each. I had kept the combing waste and had carded up extra fibre to try the next set of experiments with it. So let’s see what I found out next!!
Comb waist needle felting test
Let’s see what the comb waist is like for felting (I have had very good results from some of Bernadette’s Combing waste fibre for both core and outer layers) she has very good fibre so even the waste is good!!
Ram 2, even in this relatively clean section I have sampled, had some VM (Vegetable Matter) which the combs separated brilliantly. This meant my sample section had VM amongst the fibre short bits and naps. This will be a good test of some of the lesser quality fibre from this fleece.
33 test with comb wast
This is not as fast to needle felt as a Shetland but it has springiness and lustre. For an understructure that needs to be relatively firm but have some give that springs back, it might be perfect. (A belly perhaps?)
34 close up of needle felted ball-ish shape.
I was using a courser needle I think it was one of the T-36’s for this sample. It created a slightly dented surface but if I had switched to a T-40 or paid more attention to how I was poking, I think it would have been able to make it a bit smoother but it was quite acceptable for an underlayer. I did notice a bit of a very fine halo that is more visible in the shadowed areas.
Now the last consideration, can it be wet felted. I have a feeling it may not be good since it shows signs of stubbornness with the lovely fine crimp. But let’s see. There is always hope until it is crushed mercilessly.
So let’s try the carded fibre and layout a sample. To give it the best chance for felting I laid thin wispy layers in alternating directions North /south then east /west. I repeated until I had a puffy pile about an inch thick.
35 approximately 2.5 inches square
I had received a number of small bubble wrap bags with the larger needle felting tools (the 3 needle holders were all very poorly packed and had no bubble wrap)
36 bubble wrap bag that needle felting tool cam in.
I found one of the smaller pouches and placed the layered fleece inside with the bubble facing in. now to add soap and water. Hmm, maybe I better try and start it first in my hand then put it into the bubble wrap.
First, this wool is not a sponge. I used a lot of soap and warm water to wet the fibres, some of which collected in the bottom of the bubble wrap bag. I also discovered bubbles do not make good waterproof bags, they drip. So I put it into an extra-large sandwich bag to contain the wetness.
37 Ooops this bag leaks in the corners!!! need better waterproofing!!!
38 XL sandwich bag!! that will make felting safe!!
I started with gentle caresses across the bubble wrap then moved to gently rubbing it between my hands. I focused on working in both vertical and horizontal directions. The wool has spread out but doesn’t feel like it’s grabbing yet. Let me find a video to watch and I will keep going.
39-40 taking a quick peek
41 cant see what I’m doing too many bubbles!!!
As the soap built up I went and rinsed some of it out.
42 43 There does seem to be adhesion! But let’s see if I can get a bit more. I put it back into the bubble wrap bag and put that into the sandwich bag. Now, to add more enthusiasm to the rubbing!
44 Now off for a rinse and see what we have and is it felt?
45 Drying, look how thin it is. There was some shrinkage as well as some migration at the edges.
46 Yes, that is defiantly felt! with the lateral migration, it is very thin.
47 no longer the about 2.5inch square I started with.
47 it certainly isn’t an inch thick anymore!
Ann wanted to know “Did it shrink at all? When I have felted some of the “nonfelting” wool before it didn’t shrink. It did stick together but as you say, you could pull it apart. It would make good sheets of batting to go in a quilt”
I don’t think it would be a good one for quilting it flattened too much. I think it may have shrunk but it also spread so I think it spread about an inch but it is also a lot thinner than it started. It did shrink if you consider it vertically even with the displacement into extra width.
This might be effective when mixed with some more enthusiastically felting sheep and then used for a super thin light summer scarf or shawl. It may be a good base to build up from. I may have to do another sample to see how it reacts with different sheep and other fibre
it is softer in texture than the spun yarn. I could probably tear it apart if I really tugged a bit. It is holding to the pinch test but again if I was more aggressive I could likely pull off the uppermost layer. So a bit more aggressive felting might have helped its cohesiveness. Even with that stated it is at the stage that it is definitely felt and not fibre. It kind of reminds me of cookie dough that looked thick as it went in the oven but when cooked spread into a puddle
I think this would not be a top choice for most wet felting projects but some of its properties may be useful. I think this may be more of a fleece to look at for weaving. Its low elasticity would defiantly be a plus when making a warp!
PS just got my second covid shot yesterday and it may be bright and sunny out but I think it’s time for bed. this time I got the Phyzer version and it’s much nicer than the AZ (i feel like I was kicked in the arm by a small mule then climbed a large mountain.) if I can avoid getting covid it will all be worth it!! have fun felting and I will chat more when I wake up.
I told you last post that I had re-bagged the two Canadian Arcott Rams. They looked quite well skirted but one seemed more careful with his personal hygiene than the other. I started with Ram #2 who seemed to enjoy his dust baths.
3 Ram #2 4 Ram #15 #2 unwashed sample
Getting on to the Washing
Glenn got one of the washing buckets out and I pulled out the strainer buckets and divided the fleece into 7 portions, 4 quite clean and 3 less clean.
6-8 test washing of some of the cleanest looking parts of ram #2
This year I tried elevating the washing bucket so it was easier to lift and lower the strainer bucket within it. This was easier until it was time to dump the water out of the bucket. I lifted the strainer buck out and left it hanging to drip on one of the blacksmith hooks. That went well but as I started to tilt the bucket to pour out the dirty water it started to splash on the asphalt driveway. It was determined to get me wet with all the splashing! Luckily, I had thought ahead and worn my rain boots! So my feet remained dry but the lower part of my jeans may now need a wash (but with cleaner water this time)
9-10
Glenn brought the RV hand washer and spin-dryer up from the laundry room (it just sat there over the winter)
11-12 Glenn Helps with the spin cycle.
After a quick spin, it was onto the drying rack.
13 Now a pause, while the wool dry’s
14 Glenn takes time to smell the roses.
And now back to work. The test washing of ram 2 is ready to take a look at.
15 now it’s time to eat ice cream with strawberry and think of the different fibre preparations I would like to try with this fleece. let me go find my hand carders and my mini combs! (but after I finish the ice cream)
Now that we have the Canadian Arcott (Ram #2) cleaned let’s make a few tests to find out what this fleece wants to become! not all fleeces are good for all purposes, so we should get curious and try a few options. this will tell us more about this breed I have not tried before.
Hand Carding the wool Test
Let’s see what happens when we try hand carding. I have a few hand cards, I chose the ones I like the best with the curved backs and have a nice carding cloth. I got them second-hand and have not tried to figure out the teeth count I should probably figure that out eventually.
16-17 rolags from the Hand Cards
Yes, that feels quite soft and lofty but there is definitely some lustre too. This could be interesting as knit socks. If only I Knit!!
Carded spun sample
I used the carders, created rolags and used the Electric Eel Wheel 6.0 (EEW6) to spin the singles.
I plied on the spindle since I didn’t want to switch bobbins for a small sample
18-19 2 ply sample
20 I hung the wool to dry in the window. Even without sunshine, it dried quite quickly.
21 washed 2 ply woollen prep.
There is a bit of elasticity in the woollen preparation but not as much stretch as other fleeces I have spun. I think it would make a good blanket or throw if woven and used as warp or weft.
I then took some of the combed fibre and spun it on the Electric Eel Wheel 6.0 (EEW6) as I did with the carded sample.
27 EEW6 with 2 ply sample
It was easy to spin. I plied on one of my drop spindles since I still didn’t want to change bobbins for the short sample I had created.
28 Washed locks, combed fibre and 2 ply yarn.
29 the unwashed 2 ply samples.
You can see the halo already. I will wash and dry the rest of the sample. I made a mini skein, washed it, swung it around the bathtub, whapped it on the side of the sink then hung it up in the window with a small weight.
30 Hanging in the window to dry. Unfortunately, this seems to have inspired darker skies and rain!
31
33 washed 2py combed top
When dry; the yarn feels coarser than I had anticipated. It is not as soft as a Merino, more like a Corriedale but with less elasticity. There is very little stretch in the yarn so I am now curious as to how it would work as a warp for weaving. This breed may be ideal for warps.
Comparing the Woolen (carded) vs the semi-worsted (Combed) yarns. The Woolen does have more loft, bloom and halo and slightly greater elasticity. Both would work as weft but I suspect the Combed will be a bit better weft since it has less bloom or halo to interfere in the heddles.
Next, we will check out the felting properties of this sample of Canadian Arcott. We will use the comb waste to check its ability to be needle felted and some of the Carding to check if it will wet felt. Ann is thinking it will not. Let’s see what happens next week!
My first fleeces of the year were purchased today. Even better, I was picking them up at the same Farmers Market where Ann sells delicious tarts, cookie, Bread and pies! The Market is set up so you go in a big circle with all the booths have space and a wide gravel path. This year there are more booths.
1-2 Barhaven Farmers Market
3 Ross and Ann!
I bought Mom a couple of Chocolate chip cookies (they are her favorites) as well as Cookies and tarts for Glenn. More customers were arriving so I couldn’t stay and chat so it’s time to move on to the Fleece.
4 Note the bag of fleece in the back left corner of the booth!
The fleeces I purchased were Rams who belong to a flock of about 300 sheep. The Ewes are gainfully employed as professional Lawn maintenance specialists, keeping the weeds trimmed under solar panels! I hear the burrs that were in last year’s fleece have been almost eradicated. (I did not see any in the fleeces I got this year as I re-bagged them).
5 This is a bit better view of the 2 skirted Rams.
6-7 Distracted by small cool wild flowers beside the parking spot.
Now to get back to the important parts, these rams are Canadian Arcotts. This is a breed that you may have had the opportunity to have fun with before. Its one of 3 breeds (Canadian, Outaouais and Rideau Arcott) developed by the Canadian government here in Ottawa. The last part of their name, Arcott, stands for Animal Research Centre Ottawa. The Arcott breeding program began in 1966 with the goal to create a breed which reproduced rapidly for genetic and other sheep research. The original mix of breads are listed as Finnish Landrace, Southdown, East Friesian, Suffolk, Leicester, North Country Cheviot, Ramnelet, Dorset Horn, Shropshire and Ile-de-France for the Arcotts.
1982 all three Arcotts were recognized as distinct breeds. Rideau Arcott mature quickly grows rapidly and often have triplets. Although they are primarily a meat breed, their wool is described as a medium quality and variable. The Outaouais Arcott are also know for fast growing and often having triplets. There fleece is considered variable and there was a mention of good for milking. The Canadian Arcott is considered as a good meat breed with fast growth. The fleece was listed as Soft, lustrous 3-4 inches long and a 25 – 33 micron count.
I unfortunately do not have a photo of the rams who produced these fleeces. If this was in smell-i-vision you could experience the lovely sheepy aroma. Some rams are a bit aggressive aromaticly, but both of these fleeces have a more normal sheepy smell.
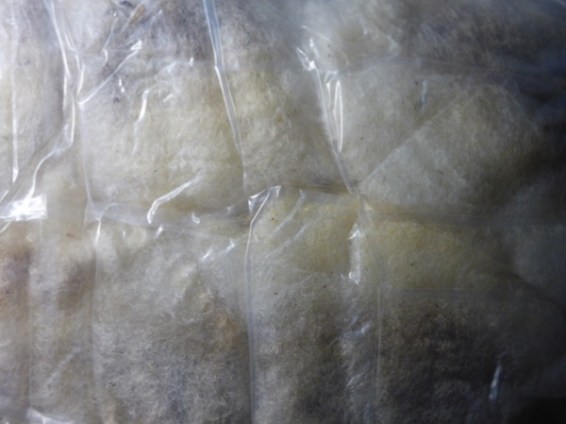
8-11 Fleece #1- Ram professionally sheered and well skirted. The crimp is tighter than fleece #2. The locks I used as an unwashed sample are about 3.5 inches long.
12-15 Fleece #2 – Ram professionally sheered and well skirted. Not as crimpy as Ram #1. The stale length is about 3 inches on the unwashed sample I pulled.
Both these look like they would make fun spinning fleeces and I look forward to sampling them for felting. I have not worked with a Canadian Arcott before so this will be both fun and educational. There will be samples to share but first I have to finish cleaning up the side yard so I have space to wash and dry the fleeces!
Coming up on Monday will be our guild A.G.M. We will also be having a fiber poker challenge. This year as well as Spinning and Weaving there will be a deck for Felting! I will tell you about that in a future post.
Have fun and keep felting, spinning, weaving, fleece washing! So much to do we need to make the days longer! Oh yes its summer, that will help!!


 1 web page of Sanjo silk showing some of the silk they offer (Fiber, Yarn and cool odd stuff)

 2 the box arrives!!
 3 our combined loot out of the box


 16 Silk Casings




 33 test with comb wast
 34 close up of needle felted ball-ish shape.
 35 approximately 2.5 inches square
 36 bubble wrap bag that needle felting tool cam in.
 37 Ooops this bag leaks in the corners!!! need better waterproofing!!!
 38 XL sandwich bag!! that will make felting safe!!

 39-40 taking a quick peek
 41 cant see what I’m doing too many bubbles!!!

 42 43 There does seem to be adhesion! But let’s see if I can get a bit more. I put it back into the bubble wrap bag and put that into the sandwich bag. Now, to add more enthusiasm to the rubbing!
 44 Now off for a rinse and see what we have and is it felt?
 45 Drying, look how thin it is. There was some shrinkage as well as some migration at the edges.
 46 Yes, that is defiantly felt! with the lateral migration, it is very thin.
 47 no longer the about 2.5inch square I started with.
 47 it certainly isn’t an inch thick anymore!


 1-2 scenes from last week
 3 Ram #2
 4 Ram #1
 5 #2 unwashed sample


 6-8 test washing of some of the cleanest looking parts of ram #2

 9-10

 11-12 Glenn Helps with the spin cycle.
 13 Now a pause, while the wool dry’s
 14 Glenn takes time to smell the roses.
 15 now it’s time to eat ice cream with strawberry and think of the different fibre preparations I would like to try with this fleece. let me go find my hand carders and my mini combs! (but after I finish the ice cream)

 16-17 rolags from the Hand Cards


 20 I hung the wool to dry in the window. Even without sunshine, it dried quite quickly.
 21 washed 2 ply woollen prep.
 22loading the comb
 23 First Pass
 24 Second Pass
 25 Third Pass then Drafting off the comb and the comb waste
 26
 27 EEW6 with 2 ply sample
 28 Washed locks, combed fibre and 2 ply yarn.
 29 the unwashed 2 ply samples.
 30 Hanging in the window to dry. Unfortunately, this seems to have inspired darker skies and rain!
 31
 33 washed 2py combed top


 1-2 Barhaven Farmers Market
 3 Ross and Ann!
 4 Note the bag of fleece in the back left corner of the booth!
 5 This is a bit better view of the 2 skirted Rams.

 6-7 Distracted by small cool wild flowers beside the parking spot.


 8-11 Fleece #1- Ram professionally sheered and well skirted. The crimp is tighter than fleece #2. The locks I used as an unwashed sample are about 3.5 inches long.


 12-15 Fleece #2 – Ram professionally sheered and well skirted. Not as crimpy as Ram #1. The stale length is about 3 inches on the unwashed sample I pulled.