Browsed by
Category: exhibition

Travelling and Textiles – a perfect mix!

Travelling and Textiles – a perfect mix!

It’s summer time here in Ireland and the living is, well, slightly more laid back than the norm.  Having decided to metaphorically kick off the shoes for the month of July, I thought it might be nice just to “see and share ” rather than “do” and this forms the basis of my post.

Before I start on the main focus of this post (my holiday in Italy),   I just have to show you a beautiful piece that totally blew me away.  Before heading off, I visited Dublin’s Botanical Gardens.  Founded in 1795, it is an oasis of calm for any visitor and I would highly recommend a visit if you happen to be in the neighbourhood.  While there, I noticed that there was a patchwork exhibition happening in one of their exhibition spaces.  This piece just caught me, so I want to share it with you.  The artist is Ethelda Ellis and the piece is called ‘Aoife’s View’.  The curator told me that Ethelda is a medical doctor by profession.  If you would like to see more of Ethelda’s beautiful creations check out her blog: http://ethelda.blogspot.com/

Now, to the Italian holiday.  We headed to Como mid-July and, in spite of the heatwave, spent our time sightseeing and eating!  Our base was Como which is to the north of Italy, right beside Switzerland.  Lake Como is totally dwarfed by the Alps – a really beautiful place.

We called into the Cathedral, the Duomo which was magnificent internally and externally.  I reckon that to appreciate all its beauty would take months observing 24/7!  I want to share with you a small area of a tapestry which was made in 1610 and which underwent restoration in 1990.  It was impossible to get a good photo of the entire masterpiece as so much detail would have been lost.  So I settled for a little!

One of our tours took us to the tiny picturesque village of Orta which is situated on Lake Orta.  It was recommended that we visit the interior of the local church which was situated at the top of a steep street.

My journey was interrupted by the sound of a piano recital and when I investigated I discovered a rather special textile exhibition happening in the same building.  The works exhibited were by Sergio Cerini.  The artist merges his early experiences in the Italian high fashion industry with his current artworks, producing beautiful pieces which are in essence a mix of paper mache and textiles.  The description does not do justice to his widely exhibited pieces and he was reluctant to allow me to photograph his work.  He did, however pose in front of one of the pieces and others can be viewed on his Instagram page @sergiocerini

Since the 1800s, the city of Como was historically the main producer of Italian silk.  When ultimately production was outsourced to China, the area was in danger of losing connection with its cultural heritage.  The large factory was bought by the Hilton hotel chain.  These photos show early paintings of the factory, what it became at the height of the industry and where it is now (apologies for the reflection on the glass):


Rather than allow the old machinery to be lost to history, a wise decision was taken about 10 years ago to set up an Educational Silk Museum to preserve these beautiful machines.  Along with displaying the machinery, some of which dates back to the nineteenth century, the museum offers interactive videos and exhibits of high fashion clothing.  Unfortunately this section was not open during my visit but I thought it might be fun to show you some of the many machines featured.  So please, grab a cuppa, sit back and I hope you enjoy the show.  I have included captions for ease of reference.
 

Level 3 Advanced Studies in Experimental Stitch Exhibition

Level 3 Advanced Studies in Experimental Stitch Exhibition

The ‘Bachelor Buttons’ in the midst of setting up the exhibition. (Maureen couldn’t be there, but her beautiful work was.)

I recently completed Level 3 Advanced Studies in Experimental Stitch at the Gail Harker Creative Studies Center and we held an in-person and online exhibition. Gail’s courses are similar to City and Guilds in the UK. If you’re close to the Seattle area, there is a new session of Level 3 Stitch beginning in September. Just click on the link above for more information. (And you really don’t have to be that close, I live almost 600 miles away.)

We had a busy few days setting up the exhibition and I thought you might like to see a few set up photos.

And then it was the day of the exhibition. We had around 80 people attend over the two days in early July. It was wonderful to be able to see all the hard work accomplished by my fellow students and to share our work with other interested people.

I asked my fellow students if I could share their work and I’m happy that everyone agreed so that you can see some amazing fiber art. These are just a very few examples of their work produced in class.

Maureen Goldsmith

Maureen Goldsmith wasn’t able to come to the in-person exhibition but was able to send her wonderful work.

Covid Birds © Maureen Goldsmith

Covid Birds by Maureen is a framed wall hanging, you can see it in the first photo behind the group photo on the wall, to understand the size of the piece.

Covid Birds – Detail © Maureen Goldsmith

Here’s a detail view so you can see the stitching more closely.

Val Gleeson

Val has an interest in historical embroidery and needlework.

Pleasurable Pursuits © Val Gleeson

Her piece “Pleasurable Pursuits” is based on historical needlework studies that she pursued during the class.

Pleasurable Pursuits – Detail © Val Gleeson

Here’s a detail shot so that you can see the amount of hand stitching in this piece.

Acer Macrophyllum Book and Samples © Sheila Asdal

Sheila Asdal created a machine and hand stitched book about the Big Leaf Maple and the creatures that find shelter and sustenance in the tree.

Acer Macrophyllum Book © Sheila Asdal

Here’s a side view and front cover of the book.

Acer Macrophyllum Book – Detail of Moth © Sheila Asdal

And a detail view of the stumpwork moth she created.

Catherine Sloan

Catherine’s interests are from nature, including rocks, plants, seed heads and the winter garden.

The Winter Garden Series © Catherine Sloan

She used her original photos of her winter garden to create this handstitched series.

The Winter Garden Series © Catherine Sloan

Each of the individual pieces are about 6″ x 6″.

The Hanging Garden © Bobbie Herrick

Bobbie Herrick is also inspired by her garden. She took on a tremendous project in creating The Hanging Garden light.

The Hanging Garden © Bobbie Herrick

Bobbie’s lamp was created with machine and hand stitching and cut back applique. She found it interesting to work with light during this process as it changed the colors immensely when the light was turned on behind the fabric.

Ethereal Bottles © Alana Koehler

Alana Koehler was inspired by a row of bottles on her windowsill. As she worked through the process, she became intrigued with the difference between the hardness of glass and the translucent fabric that she ended up using in Ethereal Bottles.

Ethereal Bottles © Alana Koehler

The sheer fabric in Ethereal Bottles float away from the wall and the bottles are created with machine stitching. It is definitely ethereal in person.

Ruth Lane with The Language of Trees © Ruth Lane

And lastly, there is me. The Language of Trees is based on the concept that trees and other forest plants, have a vast communication network underground.

The Language of Trees © Ruth Lane

This wall hanging is mostly machine stitched on a dyed and painted background. The little bits of orange are words that I selected from tree poems to express the trees communicating with each other.

And because I have had a few people asking, I have also included my book about my dog Edgar. Here is “The Book of Edgar”.

Thanks to all my classmates for their camaraderie and support. Thanks to Gail and Penny for all your expert guidance and perseverance through a challenging three years of class.

Quilt & Stitch Village

Quilt & Stitch Village

I’ve just taken part in my first show after two years of Covid restrictions and it felt great to be back to normal! The event was the British Quilt & Stitch Village, an annual 3 day textile show held at Uttoxeter Racecourse in Staffordshire.

It was my first time exhibiting at Uttoxeter and I wasn’t sure what to expect. Would visitor numbers be low? Most ladies attending shows like this are of a certain age (me included!) and I know some still have concerns about mixing in large groups. This is predominantly a quilt show, would there be enough interest in feltmaking or would the majority walk straight passed? I was manning my stall alone…. would the neighbouring stall holders be too busy to relieve me when I needed a loo break? I needn’t have worried, when the doors opened at 10am the visitors flooded in and it turned out to be three very “full on” days! These are a few of the items I had on show……

I’ve recently made these collars, narrower than previous designs, with a roll edge trimmed in a contrasting colour.
For me the main aim of being at the show was to advertise my workshops and this is a new workshop sample for a Wallhanging class exploring different 3D techniques.

My pitch was next to Project Linus, a charitable organisation that provides quilts and blankets for children in need. Their aims are to “Provide love, a sense of security, warmth and comfort to children who are seriously ill, traumatized, or otherwise in need through the gifts of new handmade blankets and afghans, lovingly created by volunteer “blanketeers.” And to “provide a rewarding and fun service opportunity for interested individuals and groups in local communities, for the benefit of children.”

Project Linus always attracts a lot of interest and the two lovely ladies on that stand were swamped with visitors for the three days! Somehow they still managed to cover for me when I needed a comfort break which was really appreciated!

I didn’t get much chance to visit other stands but when Jane (Wylde Oak Artistry) came over to say hello and told me she was working with Spun-bond fabrics I had to go see her work. I loved her masks and corsets, made on the theme of body dysmorphia, and came away feeling that there is so much more I could be doing with Lutradur!

Another stand I particularly enjoyed was “Traverse”, a group of exhibiting textile and mixed media artists. Apologies for not getting close ups of their work…….it’s worth following the link and taking a look at their website.

It’s a great show, spread over three large halls as well as various other smaller buildings. Most of the photos I took were prior to opening but as you will see from the last three, we really did get visitors! Roll on Quilt & Stitch Village 2023!

I am running behind so…..

I am running behind so…..

I declare throwback Tuesday. I seem to have run out of time this week so I thought you might like to see this post from 2017. Jan posted some pictures in our guild group and it reminded me and I thought it was worth another look. I hope it and the links to the other 2 posts about it will give you lots of inspiration for your own work.

Ann


This is the 3rd and final set of pictures from this exhibit. http://mvtm.ca/?exhibition=colour-unboxed the first is here: https://feltingandfiberstudio.com/2017/01/18/colour-unboxed-by-out-of-the-box/ and the second here: https://feltingandfiberstudio.com/2017/01/26/out-of-the-box-part-2/ Again I apologize for some of the odd angles as it was very crowded with people enjoying the exhibit. In the last picture, you may find it hard to see but there is a very long weaving draped across the ceiling.

This slideshow requires JavaScript.


An International Project by Line Dufour

An International Project by Line Dufour

Line Dufour has been a practicing textile artist and tapestry weaver for the last 35 years. She is a graduate of the Ontario College of Art in Toronto Ontario and has always had her own studio. She taught weaving to adults for about twenty years, while at the same time doing art/craft shows and exhibitions. She is currently retired from teaching but continues her studio practice. At the moment, Line does not have a gallery that represents her, and if someone wants to purchase one of her pieces they contact her through her website or social media or other channels. Line’s website www.linedufour.com. You can find her cv on there as well. She is currently enrolled at the University of Gloucestershire in the UK and working on obtaining her Master’s in Creative Writing and Critical Thinking.

And now the project


Fundacion Pablo Achtugarry, Punta del Este, Uruguay 2017


Fate, Destiny and Self Determination [] Le Sort, Destin, et l’auto-determination [] Suerte, Destino y Auto-determinación [] Los, Przeznaczenie i Wola [] Das Schicksal, das Geschick und das Selbstbestimmungsrecht

[] 운명, 숙명 그리고 자기가 결정한 팔자. 팔자  []  Usud, sudbina i samoodređenje [] Sorte,Destino,Auto Determinação [] Öde, mål och självbestämmande [] Fato, Destino e Autodeterminazione


Written by Line Dufour.

Fate is defined as a force, energy, principle, element or power that prescribes to each person a set of limits, boundaries and confines. In Islam it is called Kismet. The Greeks called Fate, Moira. Greek Mythology speaks of the three Fates: Clotho, Lachesis and Atropos who supposedly controlled each person’s fate. The youngest, Clotho,  is a spinner and she determines the time of birth and spins the thread of life on her distaff. Lachesis measures the length of the thread to determine the length of one’s life; the time of death is decided by Atropos, who cuts the thread. Inherent in the idea of Fate, is that one has no influence over events and outcomes. Mythology and psychology distinguish between Fate and Destiny. Destiny is considered an expanding field of possibilities alluding to our potential to influence our Fate. This makes Destiny kinetic. “The lives we construct are an inextricably woven fabric of influences, possibilities and accumulated consequences of choices made.” (James Hollis)

The development of the COVID-19 has made all of us more aware of the impact of isolation on our well being. This sense of isolation forms the underpinnings of this installation launched in 2016.  Fate, Destiny and Self Determination was created as social media driven initiative to reduce the isolation artists experienced in their artistic process through co-creating the installation, providing planned hands-on events and gathering them together to exhibit their collective efforts. Inclusiveness is the weft that weaves the installation together.

Fate, Destiny and Self-Determination is composed of three sections. The main tapestry woven panel (on the left) was created by Line Dufour, referencing the contemporary practice of tapestry where artist and weaver are one. The second panel on the right, was woven by visiting participants ranging from the inexperienced and amateur to the professional. This referenced traditional tapestry conventions in that many weavers work(ed) on the tapestry at the same time or at various stages and did not contribute to creating the tapestry designs.

The final section is composed of irregular shapes positioned at varying heights, between the 2 main panels, floating freely in space, as though the tapestry is pulling apart or coming together.  As each shape arrives, Dufour photographs/documents it, posts it to the Facebook page for the project https://www.facebook.com/Fate-Destiny-and-Self-Determination-An-international-tapestry-project-194385150700425 as well as on Instagram@tapestryline and Twitter@tapestry_line. She also includes information about the participants such as their website if they have one, and other comments they have made about the project or about their work and/or life. Thus far, 864  shapes have been received from 43 countries, and a total of about 519 people have participated. The installation continues to expand as it accepts shapes on an ongoing basis. Part of the exhibition includes a list of all participant names. If a label cannot be displayed in the gallery, a QR code label is available so that the gallery viewer can access the web page with the names of all participants.

Each time Fate, Destiny and Self-Determination is installed the shapes are never placed in the same positions, making it interactive and spontaneous, and permits the curator(s) to be part of its creation. Conversely, the curator could also invite the gallery guest to position shapes on the wall between the two panels, having them re-create the installation.

The installation welcomes invitations to be exhibited around the world, and to that effect has been exhibited in the following venues:

  • Craft Ontario in Toronto, Canada
  • The Montreal Centre for Contemporary Textiles, Montreal, Quebec, Canada
  • The Doyle and Margaret Hartman Gallery, Regis University, Denver, Colorado USA
  • Craft Council of British Columbia, Canada
  • The San Jose Museum of Quilts and Textiles as part of the American Tapestry Alliance Biennial 11
  • Guan Shan Yue Art Museum, Shenzen, China. 9th From Lausanne To Beijing
  • The Centre D’Action Culturelle de la MLC de Papineau in Québec
  • World Textile Art Biennial at the Fundacion Pablo Achtugarry in Punta del Este Uruguay
  • World of Threads, Oakville, Ontario, Canada
  • Rosccommon County Council, Roscommon Ireland
  • Tuchmacher Museum, Bramsche, Germany
  • Tuch & Technik Textilmuseum, Neumunster, Germany


Anyone who wishes to do so, can create a shape using a textile/fibre related technique (tapestry, rug, weaving, felt, basketry, etc) or create a piece that references textiles with whatever materials they like. Any hue from the colour wheel is suggested. You can use more than one colour. There is no minimum or maximum size, but the average size is 10cm (4”) . There is no maximum on the number of pieces you can submit. A person can also weave (create) a shape of their country, state or province or any shape except not a square or rectangle.  You can look at the Instagram @tapestryline page for the project to see how other people have created their shapes.

Connections: An Exhibition

Connections: An Exhibition

I’ve just taken down my work from a Made in Whitstable group exhibition at a local arts centre gallery so thought I’d tell you about the felt pieces I had in the exhibition.

Made in Whitstable is a loose affiliation of artists and makers who have a close connection to the town, on the coast in SE England.

With a diverse artistic group it’s not always easy to find a title that everyone is comfortable with. ‘Connections’ seemed to offer enough room for people to work with in their various styles and mediums.

This exhibition was postponed from Easter 2020 so it was great finally to get some work out there, and to catch up (albeit at a distance and in a mask) with people I haven’t seen for a long time.

As I’ve described in previous blogs, this year I’ve been learning from online workshops. I’ve long been interested in both seed heads and shells and these have both continued to feature in my recent work. Reflecting on this, I realise they are all forms of natural protective cases and although it’s not a snappy title, I decided it was a good ‘connections’ theme for me.

This is a picture I made specifically for the exhibition.

Recycling Oyster Shells: Turnstone at the Royal Native Oyster Stores, Whitstable

These photos show the oyster shells laid out, prefelt shells in a single sheet, then cut up and laid onto a background of white Norwegian batt (lower half) and tan Perendale batt (top half). There’s a recycled silk scarf laid over the tan batt layers to give the impression of a pebbled beach in the distance.

Layout for the turnstone, using a combination of merino wool and prefelt; fully felted turnstone and a trial with two birds. I decided to go for just one. I needle felted the turnstone into place then added the eye, beak, legs and a few feather details

I also made some smaller pictures along the shell & seed pod theme

Top left: mussel shell with recycled silk sea, cotton scrim wave foam and prefelt pebbles

Top right: Oyster shell with mixed wool and yarns and fabric barnacles on a recycled silk background

Bottom left: pink shell on a recycled silk beach with cotton scrim wave foam and mixed wool and silk fibre sea

Bottom centre: paper felt shell on recycled silk background

Bottom right: Corriedale, silk and yarn background with multiple-resist circles, hand stitching and a sycamore key

I also had various 3D shapes in the exhibition.

Left – based on a eucalyptus seed pod. I made this in a wonderful workshop by Gladys Paulus in November 2019. I covered that workshop in my first blog for the Felting and Fiber Forum. Various wool batts and mohair locks.

Top right – conker made in two parts (using the stem technique I learned from Gladys). Outer made from Perendale and Norwegian batts, inner is merino wool tops

Bottom right – based on a hazelnut, also made soon after Gladys’s workshop.

Here’s a poppy seed head I made this year after Fiona Duthie’s Fibre + Paper workshop. Mulberry paper is felted into the felt surface. The paper adds structure, folds and pleats well and can be drawn on / painted. I painted this with watercolours. I had to make the top separately so stitched it on. A local craftsman made the base; the pod is held on a piece of dowel attached to the base.

This nigella seed pod is also paper felt but made side-on with pre-felted ropes and thicker wool sections (not prefelted) to allow variable shrinkage (learned from Soosie Jobson). I had a reclaimed jarrah wood and dowel stand made for this.

Another paper felt shape, inspired by shells, with pleats and nobbles made as a result of Fiona Duthie’s workshop

And finally, I included a few plant holders and some earrings.

Here’s my display area – I did put the cards (bottom right) on a small table!

My display area

There were lots of good exhibitors. Here’s a small selection: top left fused glass by Irene Southon; middle left acrylics by Josephine Harvatt; bottom left watercolours by Sarah Louise Dunn showing local sites commissioned by Whitstable Museum to illustrate a map of the town; right, prints by Linda Karlsen. Work by Irene, Josephine, Sarah and Linda (Wearartworks) can all be found on social media like Instagram and Facebook. They and other exhibitors can also be found on Made in Whitstable’s Facebook and Instagram.

The footfall was rather disappointing and I would guess that sales were down on previous years, but it was really good to get some work out on show and to see what other people had been creating.

ReConnect – The Online Exhibition of the International Feltmakers Association March 2021

ReConnect – The Online Exhibition of the International Feltmakers Association March 2021

This is a guest post from Ann B.  Thanks for the post, Ann!


After reading Karen’s post on how she found her inspiration for her entry for the International Feltmakers Association proposed online Exhibition, I was encouraged to have a crack at it.

I had found it extremely difficult to find inspiration from the theme of their previous exhibition, which was “Kaleidoscope”. I have a very literal mind and could not think of how to portray that idea – I don’t/can’t do non-representational, but I must try to think “outside the box”.

At first I found it impossible to think what to do. First I looked up “reconnect” in a good dictionary – the Cambridge dictionary said:

1. “to join or be joined with something else again after becoming separated”

2. “to improve a relationship that has become less good or less close”

3. “to make you feel or understand something that you had stopped feeling or understanding”

4. “to create a relationship with someone again after a period of time”

as well as the obvious of reconnecting a disconnected phone call or internet link.

How on earth was I going to depict any of that? Initial thoughts ran along the lines of the connecting stitches in garment construction, and the more obvious stitches connecting inserted lace and tapes and how to use this in a felted piece. All this was going round in my head, when I happened to notice one of my husband’s photographs of the Scissor Arch holding up the tower in Wells Cathedral pop up on my laptop screen saver and this brought my attention to connections with the past and the future.

I started to mull over the idea of a piece of felt with the scissor arch as cut open channels on a piece of felt, which were then sewn together again, i.e. reconnected.

I cropped the image and printed a grey scale picture so that I could more easily gauge the colour values, and I subsequently decided to stick with the grey scale as it seemed to add to the drama of the image.

I then made a tracing of the main features, leaving out a lot of the detailed glimpses of the crucifix, the Jesse Window, the organ and the vaulted ceilings behind the arches. I used this to plan the piece: what prefelts I would need; what resists I would use; the order of placing resists and layers of prefelts. I wanted to start dark and come forward into the light, so that the arch itself would be white. I decided originally that there would be a minor variation from the greyscale palette – I would use the fact that the vaulting of the ceilings was picked out in gold paint and I added pale yellow to the list of prefelts.

This picture shows the prefelts I made, but in the end I did not use the mid grey, nor the yellow.

I made a couple of photocopies of the tracing so that I could cut out templates for the resists and the prefelts, and then I cut them out. I made a “crib sheet” setting out the order in which I needed to work – I have been known to forget what I was supposed to be doing halfway through a project, and I didn’t want to do that this time. I have not attached a copy of this as you probably wouldn’t be able to read my scrawl.

This picture shows the resists and templates after use. In fact there should be a resist in the shape of the little curly topped bit shown centre bottom. Unfortunately it’s still in the piece somewhere I couldn’t find it so left well alone. It was supposed to reveal the white base of the picture being lit from the Jesse Window shining through above the organ.

Once I had finished the initial fulling, I cut out the resists, (those that I could find) the resist for the scissors was cut at the cross so that I could pull it all the way out, as I did not want to cut the channel just above the cross. The top of the arch and the lower “legs” section I did cut all the way so that the darkest grey would show behind the white. I then inserted a piece of metallic grey fibre inside the top channel so that when the stitching reconnected the cut edges it would resemble the slashed and pinked work in Tudor costumes. I then finished the fulling, sealing the cut edges. I then set it to dry, but unfortunately I did not pay sufficient attention to where I laid it to dry as it has a distinct lean to one side at the top, and I didn’t notice this until I came to photograph the finished piece.

Although I had abandoned the idea of adding the pale yellow prefelt inside the top of the scissors arch to try to echo the gold paint on the arches there, I decided to pick out the nearer arches in gold thread and used a back stitch. I decided to stick with gold as the only colour in the picture and reconnected the cut channels with two goldwork yarns using sorbello stitch, which is an embroidery stitch used for insertion work. Using some silk yarn which I had hand dyed variegated grey many moons ago, I emphasized the edges of the scissor legs and the circles connecting them to the walls of the cathedral.

Having abandoned the yellow prefelt, I wondered what I should do with the blank space that left me with. I’m not sure why I decided to add the masked face instead. It just seemed the thing to do as we have to wear the things so often at the moment.

By this time, I was heartily sick of the piece anyway, so I took the required photographs, filled in the application form and sent it all off; and lo and behold I eventually received an email confirming that it had been accepted for the Exhibition.

This is the finished piece and the close-up of the Sorbello stitched lower arch.

This is the link to the Exhibition on the IFA’s website . If you click on an image it takes you first to the part of the submission form with a description of inspiration etc, and then to more photos of the work. If you click on those images you can see the complete photograph – in some cases they had to be cropped to thumbnails for the general exhibition page.

https://www.feltmakers.com/online-exhibitions/

3D wet felting experiments (part two)

3D wet felting experiments (part two)

In my last blog spot I showed how I made a sprouting seed pod as part of a group of 3D wet felted objects I’m calling ‘Lifecycles’ that I am submitting to an open exhibition.  You can see that blog here if you missed it or want a reminder https://feltingandfiberstudio.com/2020/01/13/3d-wet-felting-experiments-part-one/.

The second piece is a fallen tree branch with fungus and lichen. My ideas is that as one thing dies (the branch) it gives life to others (fungi etc). This will tie in with the sprouting seed pod (a new tree) and maybe I’ll add a couple of other things too, yet to be decided.

Wondering where to start with the texture I take myself off to the local park to look at different types of bark.

I am particularly taken with these very ridged examples and wonder how I’d go about creating that texture in wet felt.  I happen to have some off-cuts from the seed pod on my work table – a piece of fabric, probably linen, I found in a charity shop and felted –  so I decide to see what it looks like if I lay those under some new felt.  Keen to do things properly (and not waste time) I make a sample.

I am still experimenting with using wool batts from different breeds of sheep (rather than merino tops) so put together natural brown and grey Shetland and Finnish wools plus a little dyed green Perendale including a couple of bits of prefelt. You can just see the ridges when felted but I want more so try cutting into the surface. I really like that effect.

Sample of recycled scarf felted to become lichen

I try out some pieces of a (charity shop) hand dyed silk scarf for lichen and like those too so decide to get on with making the log.

I make a sheet of nuno felt using the recycled fabric which I cut into uneven strips.

Using a large rectangular resist I lay out 3 layers of wool on each side, wet it down, and add the felted linen strips on one side in what I hope is a bark-ish pattern. 

I cover these with two more layers of mixed brown and grey wool then add the surface decoration including prefelted discs for fungus and some marbles under the largest green section.

Surface of side one laid out

I would normally lay out the whole thing before starting to felt but there is a lot going on by now that I don’t want to disturb by flipping it over so I start working the first side to try to get it stable before finishing the second side layout.

On the second side I add yarn, locks, nepps, slubs, silk noil, nuno prefelt, pieces from a striped charity shop silk scarf….I am really starting to enjoy this. It’s a good job there isn’t a kitchen sink nearby as I might throw that in too. I’m thinking that as the log will be lying down, this will be the under side so it doesn’t matter if I don’t like everything. I could even cut bits out.

It takes quite a long time to rub and full this woolly smorgasbord, working hard into all the grooves. As I finish working it I decide it looks better standing up and so the log becomes a tree stump. 

Final tree stump from the front

In the end I decide not to cut into the surface as there is plenty of texture and I also leave the marbles in as I like the green knobbly bits (visible in top picture). 

What next? I’ve been mulling over how the pieces will be displayed together and decide to make a flat piece of ‘woodland floor’ felt for them to stand on.  I start with a piece of mixed leafy-coloured prefelt.

I cut the prefelt into rough leaf shapes and lay them on some layers of brown wool.  I can’t resist adding a little bit of 3D so felt some thick green rope to look like new shoots emerging from the ground. 

Finally I make an autumn leaf to highlight the annual cycle of a tree’s dying and renewal. 

Here’s the final piece.  Have I captured the idea of life cycles?

Final “Lifecycles” piece

And yes, Lifecycles has now been accepted into the exhibition so will be on display at Beach Creative in Herne Bay from 20 March to 2 April as part of the 3 gallery exhibition ‘Map’. If you’re in the Whitstable, Faversham, Herne Bay area do pop along to the Fishslab, Creek Creative and/or Beach Creative Galleries and check out how other people have responded to the Map challenge (dates vary slightly). I know some of my friends have fabulous work in the exhibitions so I think they will be hugely varied and interesting shows

Do Animals Have Emotions?

Do Animals Have Emotions?

This may seem like a rather philosophical title for a textile blog but please bear with me, I wanted to share a new direction and body of work with you.

Image result for animal emotion

These thoughts and ideas have been slowly percolating through the recesses of my mind for about 20 years, since a fairly heated debate with a psychology teacher on whether humans are the only animals who possess cognitive abilities (perception, attention, memory, motor skills, language/communication and visual/spatial processing). She quite vehemently argued that only humans possess all of these skills, I was a veterinary nurse at the time and forcefully argued the opposite, taking it further and arguing that animals also feel emotions too.

Image result for jain temple

This debate was recalled during a trip to India in January 2018 and a visit to a Jain temple. The Jains have an intriguing philosophy and what struck me most about the monks was the extreme lengths they go to in order to preserve and protect all life, they believe every animal is sentient and as such, must not be harmed by their actions (either directly or indirectly). Their vows of non-violence make them the ultimate pacifists, a stance which I thoroughly admire but have to admit, have no hope of ever attaining. They are strict vegetarians and do not eat after sunset for fear of accidentally eating an insect on their food, and the monks pluck out all their head hair rather than shaving it so as not to harm any lice that might be residing there.

While sentience is essentially another word for consciousness and it is relatively easy to argue that most animals, even the smallest, are “conscious” on at least some level, even if it is just awareness of food sources and potential mates. The idea that all creatures are sentient rekindled my thoughts about the cognitive processes and expression of emotions in animals.

Paramecia – are they conscious?

I knew I wanted to explore this idea from a creative perspective but was unsure where to start. Researching colour theory revealed a wealth of information about our emotional responses to different colours and this led me to play a game of “abstract word-association”; starting with a one or two words that described an emotion I worked on small squares of water colour paper, trying to express that emotion with just colour and mark making, these are some of the results:

Joy / happy
Eager / enthusiastic
Calm / relaxed
Jealousy
Isolation
Vulnerable / intimidated
Afraid / Scared
Anixious
Despair
Grief

These little sketches were surprisingly cathartic to make, if you or someone you know is going through a challenging time and finding it difficult to talk about how they are feeling, asking them to illustrate, in an abstract way, a series of emotions (both positive and negative) from a list of words may be helpful.

Taking Gladys Paulus’ mask workshop earlier this year has given this topic, and my approach to it, a whole new lease of life, no longer confined to 2D work I have been having a ball making various animal sculptures, each expressing their own emotion. As each new personality takes shape on my work bench I am finding myself creating whole backstories for them.

I am thrilled to introduce you to 2 new, very special friends:

“Laughing Lionel”

While the king of the beasts has a fearsome reputation, Lionel is really a very gentle, affable soul who likes nothing more than a good chortle at the ridiculous things humans do.

“Indignant Margo”

She isn’t quite finished, but will be a wall-mounted sculpture like Lionel when she is.

Margo is an old soul in a young body, she takes offence at almost everything and wears a permanent look of indignation on her face. She believes her purple spots are a sign that she is descended from aristocracy and therefore everyone is beneath her; if anyone is going to look down their nose at you, it should be the tallest of the beasts!

These two sculptures (and hopefully one or two more if can finish them in time) will be on display at the Art Box exhibition, at Denbies Wine Estate, Dorking RH5 6AA, UK, between September 23rd and 29th. If you are in the area please pop in and say hello, it is a beautiful place to visit and entry to the exhibition (with artworks in a range of media from 8 independent artists) is free.

Which animal and emotion would you like to see paired together?

Do you think I am anthropomorphising (applying human characteristics) the animal kingdom, or do you agree, animals do feel and express emotions, and perhaps some humans are too ignorant to understand when the animals around us try to communicate these emotions?

Level 3 Studies in Art & Design Exhibition

Level 3 Studies in Art & Design Exhibition

I completed my course of Level 3 Studies in Art & Design at the Gail Harker Center for Creative Arts in March. Our class had an exhibit and I wanted to show you a portion of the exhibit. These photos included my work as well as work of my classmates with their permission. Hopefully, all of the photos are in the right orientation, sorry to my classmates if I made any errors.

Here we are after receiving our diplomas. From left to right, Ellen, Ruth, JP, Tesi and Gail.

Here is the new center in downtown La Conner, Washington. Our class had the first exhibit in this space.

This slideshow requires JavaScript.

Here is the set up of the entire space. We were just finishing up hanging all the artwork and getting everything cleaned up.

These are shots of one of the walls in the back where we had a variety of work hung and includes work from Ellen, Tesi and myself. It was a really interesting process in figuring out what worked together and how to hang pieces as a group.

This slideshow requires JavaScript.


This is a slideshow of Ellen’s work. You can read more about her thoughts on the course here. 

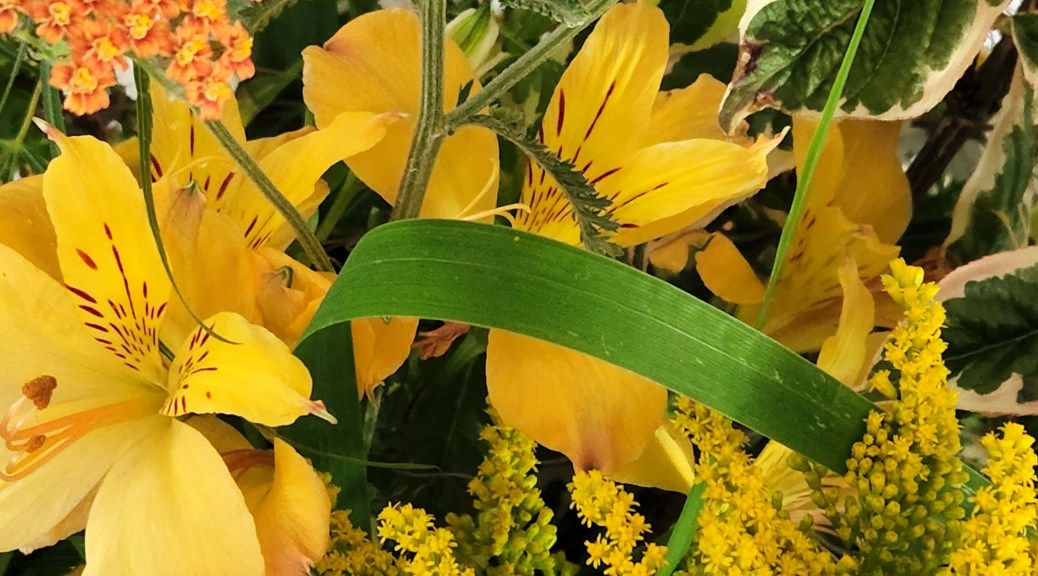
The flower arrangements were done by Carla, Ellen’s sister. You can see in the first set of photos the arrangements that were scattered throughout the room.

This slideshow requires JavaScript.

Here’s a slideshow of JP’s work. Here is a post that tells more about her thoughts on the class.

This slideshow requires JavaScript.

This artwork was created by Tesi. In this post on Gail’s blog, she describes how the class allowed her inner child to emerge.

This slideshow requires JavaScript.

And the last slideshow is of my work. Here’s the post where I talk about the class and what I learned.

And if you’d like, you can watch this video of my work as it hung in the show. There is no commentary and shows most of the same artwork that you have already seen in the slideshow. But it does give an all around view of the carved books. The last part of the video shows that back wall where there is a mix of work by Ellen, Tesi and me.

I hope you enjoyed a look into our exhibit. It was two and half years of hard work but I thoroughly enjoyed the class. I have no connection to Gail Harker other than having taken her classes but I would highly recommend any of her courses. They are well worth the investment and I have seen my artwork improve immensely since taking her courses. So if you’re anywhere close to Washington state in the US, check out her link at the top of this post for classes beginning soon.