Last weekend we did a demo at the makers fair. It was the busiest dem I have ever done. Next year we will take more people. Almost 6000 adult ticket were sold. Children were free. My voice was almost gone by the end of the first day. I wondered if I would be able to talk on Sunday. But years of practice talking too much paid off and I was good to go in the morning and lasted all day.
Jan is on the left for weaving, Elizabeth in the middle doing spinning and weaving and then my place is on the right were I had people making wet felted felt beads.
And a little closer, the elephant was made by Elizabeth on a ridged heddle loom.
This is my how to make a had display
These are the guild sample books. One for sheep, one for other animal fibers and cullies fibers, and one to other fibers. the black at the front is Kevlar.
First Jan dressed her loom, and then started a sample piece for a Viking blanket. She has found information on several way these were done so now she is figuring out what will work best for her.
And this was me most of both days. Jan had a hard time getting a picture of me as I was always surrounded by not just children but also adults wanting a turn.
One of the Leaders form this group came and made a bead so she could use it as a spacer in one of the machines that had some had some metal parts hitting each other.
There was lots of variety. There must have been a doz 3D printers. But some low tech stuff too.
This is a guest post from Sue B. (chookie on the forum) who recently visited the Bendigo – Australian Wool Show. She does apologize for the quality of the photos as they were taking on her phone in crowds with moving models. Thanks for sharing Sue!
Fibre anyone? 3 days at the Bendigo – Australian Wool Show saw me both exhausted,spent out and very satisfied. With seven sheds of crafts and handiwork plus so many fibre and craft sellers/suppliers and demonstrators of everything from sewing machines to felting rollers, it took all of three days to see everything. Not counting the sheep judging of every breed in Australia plus some goats, shearing, sheepdog trials and all the tents with outside sellers selling everything from food ,clothing to tractors and all in between. Another large marquis was given over to education and many higher education facilities had stalls plus some student work in the fields of wool and wool craft or wool fashion. I was so busy looking I often forgot to take pics. LOL
Eco dyed entry in the Wool Craft Section – one full shed contained entries for all types of wool craft and all under glass so it was hard to avoid reflections in the images – my apologies for them.
This entry was knitted and felted and contained all one needs in one bag.to go crafting – ingenious.
Felted Hat – gumnut or wattle style.
Banksia Hat
Felted entries
Woven entries
Felted Banksia man
Wattle Scarf
Felted Entries
On day one I was lucky enough to catch the Wool Fashion Parade with felting,weaving and knitting – and sometimes all on one garment – what fun and so well done. Unfortunately with the compere speaking and me taking pictures I didn’t get the details written down, but here are some catwalk images – sorry about the quality – I was using my phone and above and around spectators when I could get there.The theme for the entire show was based on May Gibbs Books “The Gumnut Babies”. Each catwalk entry was themed to this subject.
May Gibbs Book
This garment was spun and woven by the grower of the wool.
This was the winner of the Gumnut theme section and is spun and knitted completely by hand, amazing work, sorry no better images.
Felted vest
Felted donut vest
This entry was based on the Banksia Men from the story.(they were the bad guys).Felted, leather & metal.
Spun and woven garment with fleece felted trim.
Back view
Spun wool and woven garment
The Big Bad Banksia Man – All felted garment & boots.
Congratulations Barbara, Teri will be contacting you shortly!
For those of you who didn’t win and would like to sign up for the class there are a few spots left, first come, first served. Registration for the class ends on August 9th and the class begins on August 11th. See the class page for further information.
My Friend Jan Scott took a great class at our guild a few weeks ago. It fit with our second quarter challenge ( http://wp.me/p1WEqk-3Mi ) so well I asked her to do a blog post about it. It was a two day workshop This is the post about day one. Day two will be my next post.
Tom Knisely workshop on Sakiori and Zanshi: Weaving Japanese Rural Cloth
Ottawa Valley Weavers and Spinners Guild June 2016 Our Guild was very fortunate to arrange a workshop with Tom Knisely’s and guild meeting presentation in conjunction with a talk he gave at the Almonte Textile Museum.
Tom is an internationally known Spinning and weaving instructor. Starting his career with the Mannings School at the age of 14 and eventually becoming education director and working for them for over 30 years. He has written books on rag rugs, baby blankets and created weaving videos for interweave press. He was voted teacher of the year by handwoven magazine in 2011. It’s easy to see why, he was always positive, supportive and unflappable.
He has an interest in recycled weaving in all its variations. Normally you think of rag rugs or cattalong, there are even shaker rug vertion similar to the Acadian twisted weft technique.
When Tom finally saw a rural northern Japanese obi woven with very fine strips of cloth he got very excited. As he researched he discovered a second group of textiles that were recycled but not made of strips of cloth but from threads ether the ends of warps or threads picked from scraps of cloth.
Notice the pile of samples, each one came with a story!!
There are two techniques, day one we worked with Sakiori. “Saki,” which means to tear or rip up, stripping it into pieces, and “ori,” which means weave. So it is reweaving thin strips of originally old silk or cotton. The second technique was Zanshi weaving / (sandhi orimono) is a Japanese for “vestige,” or “leftover”. Zanshi textiles were woven from the extra threads which remained after weaving. (Loom waste). The area these techniques come from are rather poor, tend to grow bass fibers and are rather cold in the winter. The source of the rags are Rag merchants traveled up the cost buying rags in the south (silk and cotton) and selling them in the north. Sometimes the rags were used like a patchwork to create a new fabric but others were stripped and rewoven or picked apart for the threads which were tied together with tiny knots then used usually as weft. This labour intensive practice makes much more sense when you remember Silk and cotton are much warmer and softer than linin or hemp.
The workshop was to introduce us to the two techniques and we would create a scarf from our samples. As you will likely have noticed from the fish episode of making cat caves, I don’t usually wind up with something that looks like the rest of the class. So let’s see what happened.
Day One; Sakiori .
Tom demonstrated and discussed preparing the strips for weaving. Originally torn in thin strips, he used circular cutters and a cutting mat. Then we got to give it a try. He also demonstrated how to lash on to the front beam of a loom and to hemstitch without difficulty. One of the students had brought a very large quilters cutting guide which worked well for a lot of our fabrics.
We had pre-class instructions to seek out silk or polyester colourful scarves or men’s ties at Value villages and Salvation Army thrift stores. I brought a couple of my old silk saris and decided on one of them and a couple of the scarves I had found. Since Tom had found that 2 large lady’s silk scarves made one new scarf I cut up a lot of the sari and all the scarves. I over estimated as usual and have enough to left over to get a serious start on another project!
Sakiori was originally woven as a 2 harness weave structure. So we had a ridged heddle loom (with 2 heddles to get the warp spacing and my little 2 harness table loom in the class. In the second class there was a 2 harness saori loom.
Often when you weave with rags you are making rugs. So you expect stiff cloth with little drape or flexibility. Because the strips are very thin and you have a second weft thread (most of us used Tensell-looks like silk but not as expensive) in between the cloth strips you get a very drapy silk cloth. You can sample with I 2 or 3 shots of tensell between the silk and see what you think. Or you can try it without any and just use the strips! I was enjoying my first sample so much I just kept going and did my whole warp in sari and scarf. I had enough to make a little sleeveless jacket! See it’s not really a scarf.
I think this might be interesting with strips of nuno felt or very thin strips of wool felt. I would love to see what you can remake with scarps and left over ends of felt!!
To inspire us further he showed a 4 harness vertion and the scarf it had been made from. There is a definite change in the colours from the original scarf to the newly woven one!
The blue and gold one is threaded similarly to an inkle pattern. Notice the really cool macramé fringe. See its coming back!!! Better dust off your books from the 70’s!!
Although Sakiori is not a difficult technique to grasp it was absolutely enjoyable to spend time listening to the stories and gentle suggestions from Tom. He is extremely knowledgeable and vary gracious. If you ever get the opportunity as one of my classmates said she “would take a workshop on how to boil water” with him!
Ok Now for what my scarf looked like. (Considering what my cat cave looked like this is a bit closer)
The inside
AND it sort of fits my husband. He didn’t think it went with his Canada post shirt.
Thank you Jan! It almost makes me want to weave. Maybe If I could get the loom already warped LOL.
This is a guest post by Elizabeth Sutherland one of our forum members who had the good fortune to visit the Maryland Sheep and Wool Festival this year. Thanks for the post Elizabeth!
I had a free ticket Southwest Airline ticket to spend and a sister living close to the Howard County Fairgrounds, so I took the plunge and signed up for the Intro to Natural Dyes and Indigo Dyes classes by Jackie Ottino Graf.
Jackie is from Maine and was formerly the head dyer at Swans Island, a company that use locally spun wool and natural dyes to produce yarns and fabric. Jackie was with Swans Island when they were dyeing in small lots on the back porch to when they moved into a large industrial-sized building and began dying in much larger lots.
I really have done very little natural dying, so it was all new to me. We began with a lesson on the importance of keeping a log of our experiments. The log should include the type of fiber and weight (Weight of Goods – WOG), type of mordant, the dye, the dye’s material type and amount, and notes about the process.
Date:
Fiber to dye: Description of the fiber being dyed
WOG: weight in grams
Fiber Preparation: any notes on how the fiber was prepared before mordanting
Mordant: List the amount of mordant, temperatures, and duration
Dye notes: The percentage and type of dye used
Jackie showed us the differences in types of dye materials. She favors the powdered extracts for ease of use and consistent performance. She showed us the shopped madder root vs powdered, and the cochineal bugs vs ground bugs vs extract.
The dyes we used were:
Cochineal
Madder
Osage Orange sawdust (aka Bois D’arc)
Onion skins
Saxon Blue Indigo
Logwood
Cutch
Walnut Hull Powder
One thing that was an ‘ah-ha’ moment for me was when Jackie said that mordant provided a ‘primer’ between the fabric and the dye that allowed the dye to adhere to the fibers. Alum tends to make fibers sticky, so a pinch of Cream of Tartar helps counteract that.
I took many notes as Jackie was always mentioning things that I had never heard. She talked about when Swans Island build the large dyeing building and change the water supply. They never could get the new water to match the old and just had to change their recipes and dyes. One time she was teaching where the water had a lot of iron in it. The results were very unexpected. Iron ‘saddens’ colors (I like that phrase).
We proceeded with the dying – all fibers were pre-mordanted. The class was in an unheated metal barn, so it was pretty cold. We dyed in an outside area with an overhang. This was the setup we used. Jackie is in the olive sweater on the right.
We started with the cutch and walnut dyes. This is the walnut.
Then we proceeded to the madder (left) and cochineal (right). Cream of tartar added to cochineal takes the pH down for a brighter color. On the other hand, a higher pH for madder gives red and lower pH results in more orange. pH can be lowered with vinegar, citric acid, cream of tartar and raise with chalk, Tums.
We did a quick walkabout to find local materials to use for a mystery dye. We chose some wold raspberry leaves. We threw them into a pot with 2 skeins of wool at about a 1:1 ratio by weight. We were to end up with a ‘rainbow’ of mini-skeins dyed with natural materials, as so. By the way, the rings Jackie’s brilliant find and are usually used in lobster pots.
The Saxon Blue Indigo was to give a blue, and the Logwood was for Purple. The logwood looked very promising when the wool was initially put into the vat, but turned into an indigo blue at the end.
The Osage orange was interesting to me since it’s a native tree in Texas. It gave a nice yellow. The onions gave browner yellows. The raspberries did nothing , so we ended up overdying the skein with several colors to get a green. The colors were a little more subdued than if we had been able to leave them to soak overnight.
Here is the final ‘money shot’, with Jackie.
From Left to right:
Walnut hull powder with iron
Walnut hull powder
Cutch with iron
Cutch
Logwood
Saxon Blue Indigo on Gray wool
Saxon Blue Indigo
Osage orange sawdust with iron and then put in the logwood exhaust
Osage orange sawdust on gray wool
Raspberry with Dyer’s Chamomile powder (and I think indigo exhaust)
Osage orange sawdust
Onion Skins
Madder
Cochineal exhaust
Cochineal
The following day was a class that used madder only. They changed the pH to get a huge range of colors. When I saw the colors I almost wished I had taken it, but I’m still glad that I spent the day with my sister instead. Here is a photo of the skeins they dyed.
The second class I took was the indigo class. I was a bit hesitant to take an Indigo class as I had heard that the ‘vat’ took a long time to get going properly. Jackie dispelled that notion since she uses indigo powder that has already been fermented and stabilized (or whatever is needed). Also, since the leaves must be processed within minutes of picking (and the nearest indigo plants were hundreds of miles away), creating a true Indigo dye vat is not practical.
Two easy things about Indigo is that it does not require a mordant, and the measurement of the WOG to dye is not particularly important since you can just keep using a pot of dye until it’s gone. Two more difficult things about indigo are that it is temperature sensitive – you must keep it between 125 and 145 F. The pH needs to be 9-10. The harder thing is that you need to keep the oxygen out of the vat – no splashing around.
It’s not just a dump and shake, as there are chemical reactions occurring that you want to take care with. The indigo powder was mixed with a tad of water to get it wet (it doesn’t like being wet so you have to coax it). Then slowly add more water to about ¾ full. Carefully add the lye and stir. You should feel some heat coming off the jar. Add some more water to almost full, then ½ of the Thiox. The Thiox removes the oxygen, so you want to be able to adjust this as needed. Let the mixture sit and mingle for a while. It should turn a green after 20-30 minutes. If it’s still blue, then add a bit more Thiox. This stock should last indefinitely if stored away from sun and in moderate temperatures.
We pre-soaked our yarns and fibers while the water was heating up. When it was at least 125 F we added some of the stock and let it sit for another 20 mins to mingle and meld. After that Jackie showed us how to ‘read the vat’. The first two – temp and pH are simple since you can use a thermometer and litmus paper to test. The third, the Oxygen content, is more subjective as you have to look for the green color. Here’s Jackie showing us the green color.
When all looked well, we skimmed the ‘bloom’ off the top, since it would cause discolorations in the dye. You can see the scummy bloom here.
After this, the dying! Remembering that oxygen affects the colors, we slowly dipped our fibers and fabrics into the vat. We left them in for 2-3 minutes, then took them out to oxidize. That was interesting and fun – watching the colors change from green to deep blue. We just kept dipping and oxidizing until we got the color we wanted, and the class was finished. Voila!
The next day was Saturday and was the start of the MSW Fair. I went with my very patient sister. Her oldest son, his girlfriend, and their 9 month daughter, were soon to depart Maryland for a new job in Washington State, and she was hosting a farewell party, so our time was limited. I had thought about trying to get a fleece, but at one of the classes someone said that the fleece barn was usually packed with people. Since I had not a clue of what was a good or bad fleece, I decided to skip that and head directly to the prepared fiber sellers. When we arrived, the fleece barn had a long line.
Luckily the weather held up for us. The previous days were very rainy and cold for May. You can see the clouds in this view back to the parking area.
Photo by Elizabeth Sutherland
I hit the main shed first, so I could do some power-shopping. There were sellers of all types there – from raw fleece to finished apparel. There were a lot of sheep-themed nick-knacks along with the fibers and tools. I didn’t see a slant toward knitters, spinners, weavers, or felters, but I was pretty focused on getting the roving. After I had purchased all I could justify, and more than I thought I could take home on the plane, we toured the sheep sheds. I was wishing I had a small pair of snips so I could ‘sample’ the locks.
Many of the exhibitors had nice little displays about their breeds.
I was quite taken with the Jacob sheep and those horns.
Being a city girl, I had never seen a sheep shorn like this.
I thought that I was going to have to have my sister ship my purchases home to me, but I was able to fit everything into my suitcase and the bag I threw into my suitcase at the last minute. The fibers were packaged in plastic bags, so I just sat on them to remove the air and shoved them into the bag. I joked with my sister, telling her to watch the news that evening to see if an airplane crashed due to a sudden explosion of sheep fluff. Luckily, that didn’t happen. I had a great time at MSW, and visiting with my sister and her family. I hope I can go again next year, but stay longer to shop more!
Thanks Elizabeth, looks like next time you need to bring an empty suitcase with you!
Experimenting with felting is the best way to learn, and you learn just as much from things going wrong as you do from things going right.
After making ‘The Fingerpost‘ picture, shown below, I was full of enthusiasm for the ‘chopped up bits of felt look’ and I wondered if I could make a small decorative pod with it.
So I spent ages getting sore fingers chopping up pieces of scrap fulled felt …
… then I arranged some of it onto one side of my circular resist. I had to use tweezers as the felt bits either stuck to my fingers or flew off to the other side of the table when I tried to place them – it was a painstakingly slow job and my eyes went a bit wobbly with the concentration.
I then applied two layers of white merino wool before flipping it over to start painstakingly applying little bits to the other side.
This is when the alarm bells started to ring…
…I realised at this point that I was going to have a white band running around the middle of my pod … unless I could perhaps pull the white fringe of merino wool from the other side v-e-r-y- snugly around to squish the layers together?
So I carried on to eventually complete the second side.
Aww – I thought it looked pretty – a bit like a plate of ‘dolly mixtures‘.
I had real nagging doubts about the success of the project but I knew that I would learn something from it so I carried on. As I started to wrap the white merino ‘fringe’ over one part of the edge, some bits fell off from another part. It was a struggle and it ended up looking like a bag of potatoes.
After I’d applied all the layers of wool, I had an embryo pod that was the thickness of a car tyre. There was no way I could roll it in a bamboo mat, so I listened to the radio while I rubbed… and rubbed… and rubbed until I thought it would be ok to remove the resist.
I cut a hole to remove the resist then turned the pod inside out to full it. As I did so, several colourful bits of felt flew off the pod – it looked like a boxer spitting out teeth – and lots more pieces were loose. It was unworkable.
I could see what I’d done wrong.
I should have fulled the pod a bit after removing the resist before attempting to turn it inside out. It might have been better too, considering the amount of shrinkage of a pod, if I hadn’t put the coloured bits on the resist so densely.
It’s frustrating when things go wrong but valuable lessons can be learned from the experience. I don’t give up on a piece easily, and I usually keep the felt to re-use, but this pod was definitely a lost cause and as there was nothing I considered salvageable for re-use, I consigned it to the felting box in the sky.
Our guest artist/author today is Nada Vukadinovic also know as Halay on the Felting and Fiber Forum. She has generously offered to share her workshop experience learning a Fiber Inlay Technique.
A few weeks ago I attended a workshop in Maribor, Slovenia, given by internationally renowned textile artist and felter, Vilte Kazlauskaite from Lithuania. Her work is fabulous. You can see her creations here: http://vilte.tumblr.com/
She held three workshops, but I was able to attend only one. It was called Fiber Inlay Technique. Quite intriguing, I had no clue what this could mean and I was very excited to learn about it. I attended only one afternoon workshop. On the previous day attendants learned something about fabric manipulation in nuno felt, and the last day was devoted to the creation of a vest.
We were working with two types of silk: ponge and chiffon and were expected to create a piece of work, either a shawl or something similar, a flat piece anyway. I decided to make a square piece which I will probably use for a cushion.
First we were asked to draw a pattern on a piece of paper in the form of a mosaic that we would like to appear on the finished work, e.g. a bird, or something abstract.
I decided to draw something simple.
We used different sorts of fiber (mulberry silk, viscose, bamboo, and flax.)
When we were finished laying out fabric and fibers we began rolling and rolling. When we noticed that the wool has penetrated through all the layers of silk, we started kneading the piece and then rolled the project without the rod. The shrinkage percent was from 40-50%.
This is what we got in the end:
Unfortunately, we were working only with white silk and some blue and white fibers, but I imagine it would be interesting to play with different colours, especially different colour fibers. The fiber I personally used for the first time was flax and fell in love with it. I am already planning to buy some and dye it.
To put fiber inlay technique in a nutshell, it means lots of silk and different fibers. Here are some more photos showing Vilte’s work: beautiful textures.
And here is some yummy hand dyed silk.
Vilte uses natural dyes only.
It was nice to learn something new. Here in Slovenia we don’t have many opportunities for learning new felting techniques, but the situation seems to be improving. We are planning to invite another master from Ukraine and are getting quite excited about it.
Thank you Nada for sharing this exciting technique with us!
About eighteen months ago I discovered LINQS, a group of 5 ladies who had thrown down a challenge to anyone residing in Lincolnshire to create art quilts influenced, in any way at all, by the work of the great British artist David Hockney. Joining this group proved to be a great move for me as I’ve made so many good friends, all with a common interest, and learnt such a lot from being in their company.
Researching Hockney’s work was an eye opener. Before visiting the Hockney Gallery at Salts Mill the only paintings of his that I was familiar with were the “poolside” ones. At the Hockney gallery in Saltaire, Lancashire I found myself drawn to his landscape paintings, in particular his depiction of trees. Some of his work I really liked while other pieces I strongly disliked but the time spent researching his work led me to developing a fascination of my own for trees and woodlands, particularly tree skeletons stripped bare of their leaves in Winter. Influenced by what I had seen I began photographing trees wherever I went and my Three Tall Trees 30” x 40” quilt is based on a photograph I took while out walking in the woods at Woodhall Spa.
Once I had worked out my design on paper I set to preparing my fabric for colouring with Procian dye by soaking it in a solution of soda. Unfortunately I think I must have used too much soda. Although I covered it before ironing I still managed to burn the entire area of fabric above the tree tops! My nice crisp, white sky was ruined and my heart sank at the thought of having to start all over again! I set the fabric to one side, put the kettle on and broke out the cake……feeling happier now I decided, rather than start again, to cut out the woodland, back it with Vilene and make a huge piece of appliqué. Not only did I save myself time and fabric but this also turned out to be a blessing in disguise as it was so much easier to handle under the machine than the whole cloth would have been!
Layers of organza and netting were used to create shading and depth for the forest and then the background trees were stitched by machine using various coloured threads. I made a test piece first using free machine embroidery but it wasn’t giving the sharp edged look I wanted so I swapped to using the walking foot instead.
The textured woodland floor was created with painted muslin, organza and hand stitching. Vilene has become one of my favourite materials to work with as it won’t fray and can be cut, painted and sewn so easily, I found it was ideal for making the foreground trees which I painted using Inktense blocks and then added some detail with Inktense crayons, blending the colour with water. Once the the finer tree branches had all been hand sewn the three tall trees were tacked in position.
The final stage was to add a backing and then machine sew through all the layers to quilt the three trees in place. I figured I didn’t have to do too much more quilting with the backing on as I had done plenty of sewing through the various layers as the piece had progressed. As far as I was concerned it was already “quilted” but I made sure that it had enough quilting across the work to hold the back in place. It’s now finished and will be going on tour nationally, with the rest of the LINQS “Inspired by Hockney” quilts, starting with the Springfields Quilt Show in Spalding on June 3rd
Many thanks to Karen for writing this post for us.
The first online class of Experimental Screen Printing on Felt just finished up and I thought you might enjoy seeing some of the creations of the great group of students that participated. I have also included their feedback and testimonials about the course. I am planning another session of this class in the fall if you missed it and you’d like to take the class.
This first set of work is by Teri and she posted quite a bit more over on her blog if you want to check out more of her screen printing. This is what Teri had to say about the class:
Two methods really stood out (and were new) for me: – the deconstructed screen printing, I can see myself doing a LOT of this in various guises (mixed with some of the other techniques) and probably isn’t something I would have stumbled across on my own – the vinyl resists, this is a great technique for making more permanent screens and I love the positive and negative option this method offers
The videos were a great addition although I found them a bit long (finding 2 hours to watch videos on top of making the screens and printing was pretty tough some weeks), is it possible to edit them down? That might also help with some of the download problems too?
The PDFs were great, I am sure I will be referring to those again and again, and the discussions on the boards was really helpful too, especially when other students shared what they had been doing.
Thank you Ruth, I have had an absolute ball with this class and I have a huge pile of printed felt to show for it! Now I just need to find some uses for it all….
These next two pieces are deconstructed screen printing by Selma. Selma said:
I was behind in gathering all the right equipment in a new country and with a lack of space things didn’t really go smoothly for me. I liked the course as It gave us the basics and opened the door to many possibilities that screen printing has to offer. Now when I feel more comfortable with the whole process I will enjoy experimenting further. The videos are very clear and thorough but I had problems with loading some of the videos which definitely slowed me down as well. I couldn’t go back back and forth when needed and just wanted to see certain part of video so I printed all the PDF instructions and have them on hand while working. It was nice to see other people’s work and experience on the boards. Ruth was always very helpful and quick in her responses.
Cheryl created the screen prints above. Here’s what Cheryl had to say about the course:
Having online classes absolutely fills a learning gap for me. I live in a rural area and can not afford nor have the time to travel to locations to take these classes (although some of the classes I’ve seen offered in the UK or Australia might be wonderful to attend in combination with other travel).
Before seeing this class offering I had actually already read another book about screen printing! I am a visual learner so having the videos is good for me even though I ended up going to the library to view them. After seeing the videos having the pdfs to use is invaluable, trying to use the pdfs without having viewed the videos would not work for me.
I will continue to screen print, I will need to figure out how to incorporate it with what I’m doing now and experiment with other fiber techniques. I like the freezer paper resists and using the shredded paper and oatmeal resist the best. I have the painted interface ready to use and have the vinyl fuse for resists to use.
I hope to be on your email list for future classes.
The work above is by Tonya. She over-dyed a couple of the pieces which you can see on the top right. She also even screen printed a 3D vessel! We discussed some options on how to keep the print more visible on the finished vessel and she is going to explore this area further.
And last but not least, Sam created the screen prints above. She did a double layer of printing to get the tree scene with moon.
It was a great class and I really enjoyed teaching it. You don’t get to see everyone’s work in an online class because some people don’t participate in the sharing and discussion but the work I did get to see was awesome. I just love the different effects that you can get with these techniques. Thanks to the students that did participate and I look forward to the next class. I hope you’ll join me in the fall.
Each time we have a quarterly challenge, there is a place to post everyone’s creations on the forum. This first quarter challenge has really brought in some great ideas and entries. The challenge was to use a flat resist in felting in a way that you hadn’t before. You can read more about the 1st Quarter Challenge here. I thought it would be fun to show you what everyone has created so far. And if you haven’t done anything for the challenge, there is still time as it lasts through the end of March!
These are in no particular order and I am using people’s forum user names rather than their real names. If you’d like to join us on the forum, please click on the forum button on the side bar, we’d love to have you!
These entries are from Frances. She made a rosebud pod, a vessel within a vessel and a scarf with a sleeve. You can see how to make the rosebud pod here.
Carole aka craftywoman created the layered pod above. We all decided it had a very interesting organic look to it.
Next up is this puppet created by Janekiwi. You can see the resist that she used and the finished puppet on the right. His name is Garlic 🙂
Jwugg created an “octopod”. Here is the in progress photo where she is using a book resist.
And here is the result. Just love this photo out in his habitat.
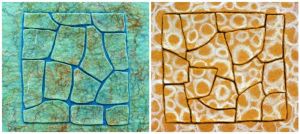
Lyn posted two pieces using the same “cracked mud” technique using resists to create the cracked effect.
These pieces were created by Blythwhimsies. She used metallic fabric under resists in the top two photos and used a different resist than she had before in the vessel in the bottom two photos.
Mwes created the two vessels above. You can see the layouts/early felting stages on the left and the finished vessel on the right.
These projects were created by Halay. She used some different shaped resists than she had in the past.
Smiff created two different vessels with different book type resists. It is interesting to me that shaping makes all the difference in the world when you use these types of resist. Making the “leaves” become indentations really gives an entire different look to a vessel. Also where you cut the resist out makes a huge difference as well.
I believe Zed already showed her entry on a post here of her flower shaped pod.
The hats above were all created by Teri Berry. She used a variety of resist shapes and added some embellishing techniques including adding foil to her flame hat. All of us on the forum decided she should get a Royal Appointment to make hats for the Queen.
Zara created this nuno felted patch mosaic vest on a resist type she hadn’t used before. You can see the variety of fabrics she used in the close-ups.
And I already showed you mine on a prior post but here’s the “thing” I made with a book shaped resist.
A late addition by Luvswool, a cat cave.
I hope you have enjoyed seeing everyone’s creations. The creativity is astounding and I hope that if you haven’t tried something for the challenge that you will be inspired to try felting with a resist in a way you haven’t in the past. It was great fun and we have had a wonderful exchange of ideas on using resists on the forum. So join the fun! Do share anything with us by adding it to the challenge thread on the forum.
This is a guest post by forum member Frances T. whose blog is here. Frances has a wonderful way of combining her passions of flower gardening and felting. She used a book resist for the first time in response to the First Quarter Challenge to make a rose pod and because she cuts the resist open differently, she gets a totally different result. There is a link to a PDF at the end if you would like to download the tutorial in PDF format.
1. Cut two (2) circles of the same size out of a pliable plastic. For this demonstration a 10 1/2-inch dinner plate was used as a guide.
2. Place the circles one on top of the other and sew a seam down the middle. This makes the book.
3. On side 1 place roving overlapping the right edge slightly and very thinly.
4. On side 2, place roving overlapping the left edge slightly and very thinly.
5. Cover the roving on side 1 with mesh to hold it in place and wet with warm soapy water and rub gently.
6. Repeat step 5 on side 2.
7. Place roving on side 3 overlapping slightly and very thinly on the edges.
8. Cover the roving on side 3 with mesh to hold it in place and wet with warm soapy water and rub gently.
9. Turn the piece over – side 4 – and gently pull the roving that was left overhanging onto the resist which will cover the edges of the circle. Then place roving on side 4.
10. Cover the roving on side 4 with mesh to hold it in place and wet with warm soapy water and rub gently.
11. Turn back over to side 3 and pull any stray roving around the edges up over side 3; smoothing towards the center to avoid thicker roving at the edges that will create a “seam” line.
12. Cover with bubble wrap and rub vigorously with a felting tool. Flip and rub the other side and continue flipping and rubbing until felt is holding together well.
13. Place felt on a bamboo mat and roll. Unroll and place felt in the opposite direction and roll. Roll 10 to 15 times in one direction and then change to keep the round shape. Felt shrinks in the direction it is rolled. Do this about 10 to 20 times.
14. Cut a small slit off the edge and remove the resist.
16. The rose bud can now be shaped and hardened the way any other vessel is completed. One method is using a balloon.
Using a Balloon to Shape and Finish a Vessel
1. Place a balloon in your vessel and then inflate it until the vessel fits slightly loose around (about ¼ inch space between the balloon and vessel). Place the vessel with balloon inside of it into a mesh bag and run under hot water and then put in the dryer on heat setting for about 15 minutes or until the vessel has shrunk to the size of the balloon. Use plastic inserted between layers to hold petals
2. Remove from dryer deflate the balloon. Repeat step one until the desired shape and firmness are achieved.
3. Finish by air drying.
A white one was made first and the difference in how the two came out when shaping is obvious. It is difficult to make exact duplicate vessels.
Thanks Frances for showing us your take on using a book resist. Not all of Frances photos are shown in the tutorial above so click on the link of the PDF to see extra photos with the explanation.