Browsed by
Category: Community

Cretan Felted Shepherd’ Cloaks – Guest Post by Jill

Cretan Felted Shepherd’ Cloaks – Guest Post by Jill

This is a guest post by Jill about her recent trip to a local museum. Thanks Jill for this great post!

A recent visit to the excellent Cretan Ethnological museum in Vori, South Crete, gave me an unexpected surprise – a glimpse of a felting machine! This folk museum, in a tiny town in rural Crete has won many awards and has an interesting textiles section. I knew of the historical farmers’ woollen capes, but had not realized they were felted.

For hundreds of years, life for sheep and goat farmers in Crete remained almost unchanged. Indeed, many people still live in a relatively similar way now, albeit with 4 wheel drive trucks instead of donkeys for transportation.

During the winter, shepherds lived in their family’s village in the lowlands , with olive trees, a kitchen garden and often orange groves; moving their flock around this area to graze. In April-May the sheep were shorn then moved up into higher altitude pasturage, until November; the shepherds remained in the mountains during much of this time. Their most important garment was their felted woolen cloak.

It is a voluminous coat, heavy, water-resistant, with a large hood, and often below knee-length.

Cretan sheep are kept primarily for milk (much used for yogurt and cheese) and meat, the wool is a by-product. Coarse, it was used mostly for weaving heavy rugs, bags and blankets.

To make the cloaks the wool was usually washed, carded and woven at home by the women of the household and then was stamped by foot by the men for long periods in a water-filled wooden basin and support frame. OR by using a kind of felt machine, water powered, which had paddles to agitate the wool into felt.

I have read that each cloak took 4 kg of wool. Mostly white or brown (natural), some were dyed dark blue or black. Whilst the most basic are a simple tent shape, I was surprised that most do have sleeves. The cloak was used as bedding as well as worn outside.

The wool was also used as padding in donkey saddles. I loved the recycling element on this saddle.

The decoration is made of bottle tops from the local fizzy pop, called Gazoza. The museum’s displays are kept dark to avoid light damage to the artifacts, hence the poor quality photos.

Woolfest – Guest Post by Tracey

Woolfest – Guest Post by Tracey

Tracey attended Woolfest recently and was kind enough to take photos and write about her experience for us. Thanks Tracey!

I recently attended the wool and wool crafts extravaganza that is Woolfest, held over two days at Mitchell’s Lakeland Livestock Centre, Cockermouth in the beautiful Lake District in the UK. It is all about creativity and design, amazing colours combined with quality skilled craftsmanship. I think around two hundred exhibitors attend.

So let’s dive in and show some pictures!

One highlight for many is the raw fleece sale. Any individual farmer/breeder may enter a maximum of 5 fleeces per breed for sale. Visitors can then have a good sort through and leave them in the Fleece Creche to be collected later!

Sheep and Alpacas are also on display for visitors to chat with the farmers and breeders. Here are a few photos.

On display in the main show ring were breeds such as Jacob, Manx Loaghtan, North Ronaldsay, Exmoor Horn, Hawkshaw, Hebridean and rare breeds. There is a small seated audience with lots of interesting commentary. I particularly took a liking to this wonderful beast.

There was quite an amount of Nuno felting, scarves, blouses etc, so when I saw these beautiful blouses I thought Nada, one of our forum members would love to see them, as she makes lovely garments, they were gorgeous. If you look to the left of the blue blouse you will see lots of beautifully made slippers too, just like Nada makes!

Then I saw something that Ann (shepherdess) may like to see as she has recently posted a cat cave blog on the this site. They were hobbit hole cat caves, they were wonderful, so solid and well made, I had to take a picture!

The time at the show was slipping away and it was when I saw this quirky teapot cover that I thought yes, it’s time for refreshments!

Suitably refreshed my friend and I continued around the show.

There were many demonstrations going on at various times of the day. Such as spinning, shearing, Dorset button making, needlepunch, Saori weaving. Also how to crochet a simple flower, how to knit faster!, simple felting, tapestry weaving, doll making and a spinning wheel surgery, so lots of advice available.

Here is a picture of a silk paper artists stall.

It was quite hard to choose where to spend your money when all the stalls looked as colourful and inviting as these:

Here is a display of shawl pins:

I was taken with these lovely wall hangings, some were quite large, I can only imagine the work that goes into them.

I came away with a few happy purchases such as Merino wool, nepps, wood and ceramic buttons, slubs, locks, yarn, silks and throwsters waste, lots of little pretty things! Oh and we were there from 10am – 5.30pm, what a fun filled day.

Well I hope this has given you a little insight into the world of Woolfest, and if it inspires anyone to go, I am sure you would not regret it. It is a busy show with lots of visitors, but this is my second visit and I feel it is a relaxed place, you do not feel jostled or pressure in any way. I think it is because you are surrounded by like minded enthusiasts, a lovely calm experience. It is just a wonderful place to be.


Thanks Tracey and it’s great that you were thinking of us as you wandered through Woolfest!


Textile Journey in Norway

Textile Journey in Norway

Today we have a Guest post from Cathy Wycliff (Luvswool) on her textile journey in Norway.

Norway has been recently named the country with the “Happiest People” in the World.
My May vacation to Norway was a nature lover’s dream, which is part of their secret.
We traveled with a group of weavers and knitters through the beautiful countryside, which
was dotted with waterfalls, fjords, mountains and lush greenery.


First stop was Oslo, where we witnessed Norwegian pride as the country celebrated their
independence day with parades and flag waving.  We visited the Viking Ship Museum,
where carefully restored Viking long ships are on display, circa 700-800.  There were textile tools on display, but only a few textile fragments have survived through the centuries.

The next two weeks were spent traveling through the rural areas, one of which was Rauland in Central Southern Norway.  We stayed at the Rauland Folk Arts Academy, where we studied and learned about tablet weaving and Norwegian traditional loom weaving.  I thoroughly enjoyed the floor loom weaving but did not take well to the tablet weaving.  No matter, you could weave what you  wanted to weave, as long as a loom was open.  We used primarily Glimakra and Oxaback Swedish made looms, which seem to be the standard for Scandinavian floor loom weaving.

This was a new experience in weaving for me, as I am a newish weaver and have never before woven using patterns.  My Saori loom is a floor loom used primarily for artistic “free weaving,” although it could be used for other types of weaving as well.  I enjoyed  trying to follow a pattern at the Academy.  After four days of weaving we were ready to move on.

We also learned Hardanger embroidery in the quaint town of Utne, which is tucked into a mountain range and located on a beautiful fjord.  If my eyes were only 30 years younger, I might have become addicted to this fascinating, but time-consuming type of traditional “white on white” Norwegian embroidery.

We visited several historical textile mills and museums on the west coast of Norway.  At Osteroy museum, we were fascinated by the ancient floor looms and large collection of traditional textiles.

After two weeks of beautiful scenery, wonderful food and amazing textile experiences, it was time to say goodbye to the happiest people in the world.

Cathy, thanks for sharing this beautiful and educational journey with us.

Exploring Different Pod Shapes

Exploring Different Pod Shapes

We have another Guest Post by Tracey from the Forum today.

I wanted to carry on exploring how to make different shaped pods by altering the shape of the resists. I thought a stone shape may open up new possibilities regarding the surface design. I have always used pond liner for my resists, I think it is perfect for the job, especially as we had a lot left over from pond construction! Here is the resist, it roughly measures 15.5” x 10.5”.

As before I placed six layers of Merino wool either side of the resist and here it is wetted down with yellow and orange silk hankies as decoration, the colour of the wool is a lovely rust so I thought how this would compliment it.

After lots of hard work felting, I cut a cross to take the resist out, it is a small hole, luckily I have small hands to get inside to start the fulling!

Once it was fulled, I packed it with fabric to help it dry out, by doing this it creates ‘memory’ and hopefully retains the shape you want it to be. When it was dry I had plans to decorate it slightly with some Mother of Pearl nugget shell beads that needed a home, the colour matched perfectly. Here is the finished pod.

Because by then, I definitely had the bug, I made more.

When I am layering the wool, I try to lay it neither too thinly or too thickly, but evenly of course. I was putting down six layers of wool each side of the resist as I have mentioned before. However, when I have held my pods I feel that the very bottom ‘gives’ a little, even though I work them until my shoulders and arms ache!, so I was not very happy with this. I decided to go to seven layers, a lot of wool!, but I am far happier with the outcome, much sturdier and thicker of course!

I then decided to change the shape of the resist once again and cut an oval shape, this one measures 16.5” x 13.5”.

For this design I put down four layers of Merino each side, wetting down each time. I then added two small circles of resist to reveal craters in the end design, with a different colour underneath. Here is the picture, I didn’t realise at the time but it looks like a happy grinning martian! I then continued with the remaining three layers each side.

I then decorated it with lots of lovely Blue Faced Leicester locks and wool nepps.

Lots of hard felting and fulling later, here it is, with a little bead detail.

IFA Conference

IFA Conference

This is a guest post by Anne H. (penguin), one of our forum members who recently attended the IFA Conference that was held near her home. Thanks for the post Anne!

I’ve only been felting a couple of years, and I’m certainly no expert, but when I saw that the International Feltmakers’ Association was holding their annual conference (with workshops of course!) only an hour away from me I couldn’t resist. I was a little nervous going on my own as I’ve done a few residential courses before (for embroidery) but I’ve always known some of the people there – however, the group of approximately 65 ladies (and one man) couldn’t have been friendlier, and I had a wonderful time. If you ever get the chance to go, I highly recommend it!

The whole event was also extremely well organised and there was something to do all the time – although of course you didn’t have to join in with everything. Shortly after we arrived an aluminium jewellery workshop started, and later that evening there was a mini-marketplace with a few members’ stalls and a bring and buy charity sale, and Annemie Koenen, one of the tutors and a remarkable felter, had brought an entire shop with her from Holland – lovely dyed wools, tools, soaps, silks … most of us wanted to go home with the lot!

The meetings are held alternately somewhere in the UK and somewhere … not in the UK. Next year it’s Sweden. I wish I could go! We had someone from Canada and someone from Iceland, and two or three from Holland, although most people were UK based.

The two workshops I did were with Zsofia Marx – hat making, and Chris Lines – Felt Faces. The one with Chris was on the first day and I learnt an incredible amount. I was going to use a pic of my hubby, but he’s got a fair bit of hair and a beard, which would have made him a very tricky first subject. So instead I ended up doing a brooding looking popstar – Chris couldn’t remember who hewas but I liked his face!


One of the ladies from another workshop came round and said, ‘Coo, who’s HE?’ I managed to keep a dead straight face as I said, ‘Oh him? That’s my husband!’ The look she gave me was priceless. ‘I’ll be round yours tomorrow!’ she said … but then I couldn’t hold the straight face and had to confess that I had no idea who it was really.

Chris, the tutor, was horrified that I was using Carex hand soap and gave me a lecture on why olive oil soap was the ONLY thing to use. So why had I taken Carex? Because Zsofia, the tutor for the sculpted hat workshop, had said to bring liquid soap.

Well that evening myself and another lady who was going to be doing the Zsofia workshop next day decided we had better create some liquid olive oil soap – so I made a kind of gel in a tub with a lid, and Pat made a big (lidless) tub of soapy water, which she spent the whole of the next day trying to get people to use so she could get rid of it! Zsofia was most amused at what we’d done and said the soap I had bought would have been fine! A classic example of how every felt maker seems to work differently and swear by different things.

I’m still using my olive oil gel now and it’s great! I have to say that I did actually find things felted much better and much more quickly with the olive oil soap so I’m now a convert!

I didn’t get ‘my face’ finished during the workshop hours so I skipped the talk that was laid on that evening and went back to the workshop to finish off. Just as I’d finished my effort, another lady came in to finish hers, so I stayed and kept her company until bedtime. Unfortunately she’d used Superwash for her background without realising and of course it WOULD not felt! In the end she needle-felted the rest to her background and it looked fantastic so all was not lost.

The hat making workshop was terrific – Zsofia, a Hungarian-born lady now living in Holland and speaking superb English, was delightful. She started us off by showing us a variety of hats she’d made and then had us all trying them and telling each other, frankly, if they suited or not, while we looked in the mirror in the ladies’ toilets – as there were no mirrors in the classroom! This meant that most of us ended up not making the hat we liked the look of sitting on the table in the workshop, but the hat that actually looked good on us! I wanted to make the hat with the crazy rose sticking out of the side but it looked terrible on me! (two back on the right of the photo):

So I made a much more simple, pleated hat instead.

’Thanks to some excellent advice from the Felting and Fibre Studio forum I’d taken a selection of colours too. My intention was to make the hat purple with some peach decoration, but that was shouted down by Zsofia and the other ladies, so I stuck my hank of turquoise/green stripy merino roving on my head and said ‘What about this then?’ and they all said that suited me perfectly, so my purple hat ended up green! So much for trying to move away from my comfort zone – but at least it goes with a lot of clothes I’ve got, and my glasses; I always gravitate towards turquoise!

The hat was laid out on a 2D resist with coarser wool inside and the finer, coloured wool on the outside – except that the layout was inside out so the merino was against the resist and the other wool, in my case Corriedale, was on the outside.


Corriedale wasn’t the best choice as something a bit courser would have been good, but I had a lot left over from the Chris Lines workshop so that’s what I used!

Zsofia took us through the whole process from laying out, to wetting out and rolling, rolling, rolling … and then eventually cutting out the template (see photo below).

Then came fulling the hat into a 3D shape, first getting rid of the ‘seam’ from the template, and then gradually shaping the hat through rubbing until we had a fairly shapeless and ugly cone!

Then the magic happened as Zsofia showed us how to pleat the hats and set the pleats using steam.

I must say I’m really thrilled with the result, and was amazed that we all got a finished out of the process and that they were all so different!

After the second workshop we had the ‘Gala dinner’ where we were all asked to wear something we’d felted. I took a couple of scarves and also a completely mad, over the top jacket which I’d made for an exhibition a couple of years ago but never worn. I mentioned this to a few people on previous days and the answer was basically, ‘Look luv, if you can’t wear it here, where can you?’ so I braved it and it elicited much interest and some complements, so I was glad I did!

The following day we had a big show and tell in the main hall where we got to see everyone else’s work. I didn’t photograph everything but I was especially taken with the tops and dresses from the Vivienne Morpath two-day workshop:

And of course the variety of Felt Faces we managed to produce between us:

as the AGM, (which was relatively painless as these things go), and then lunch and homeward bound.

All in all a terrific weekend and I’m so glad I went. I hope I’ll be able to go to many of these meetings in the coming years.


Different Shaped Pods From Circular Resists

Different Shaped Pods From Circular Resists

Today we have the first of a few guest posts from our forum member Tracey.

I am very interested in the different ways that pods and vessels can be shaped, often seeing a felted piece and thinking ‘what shape resist did they use?’
The first pod pictured here was made using a 12” diameter round resist.  It has six layers of blended Merino wool each side, and it is embellished with silk yarn and mulberry silks.  I cut a 3” slit in the centre to extract the resist once fulled, and it resulted in an oval opening.  A crossed slit would make the opening more rounded, or you can just cut a small circle.  It is always better to start small, you can then make the opening bigger if required.

I also made a seashore pod.  This was made the same way as the green pod but I think the resist was about 19” diameter, quite big! I blended blues to replicate the sea and added white silk caps and curly locks to hopefully look like the crashing waves. I then sewed a few shells and sea glass onto the beach, using invisible thread.

Then as an experiment, I felted over another slightly smaller resist of 10” diameter, decorated it with silk caps and silk tops.  This time I cut the opening to extract the resist on the outer edge of the circle, so the bottom of the ‘vase’ is the opposite side to the cut, and here is the result.

I may sew beads around the top in an idle moment!
Here is a picture of where the openings were cut to extract the resist on the green and blue pods:

10th International Shibori Symposium Exhibitions

10th International Shibori Symposium Exhibitions

This is a guest post by Kim of Flextiles. She recently attended the Tenth International Shibori Symposium and I thought you all might to get a glimpse of what she did and saw there. Thanks Kim!

My previous post about the 10th International Shibori Symposium (10iss) in Mexico last November focused on some of the workshops I attended. This time I’m going to report on some of the inspiring exhibitions and beautiful work on show.

Several of the exhibitions were in the Centro de las Artes de San Agustin (CASA), around 45 minutes’ drive from the centre of Oaxaca. It’s a former cotton mill that was converted into a stunning arts centre by local artist Francisco Toledo in 2000. Its hilltop location gives amazing views, and it has two exhibition halls and smaller rooms for running workshops.

Here there was a wonderful exhibition, curated by Yoshiko Nakamura and Consortium Arimatsu Narumi, of historical and modern Japanese indigo-dyed kimono from Arimatsu and Narumi in Japan.

Another exhibition here showcased 12 pieces of clothing designed by Mexican designer Carla Fernandez, highlighting connections between the Mexican and Japanese traditions of ikat (known as jaspe in Mexico and kasuri in Japan).

The contemporary garments were wonderful, combining Japanese silhouettes and designs with traditional Mexican rebozo patterns.

The main exhibition hall at CASA was given over to a wide range of contemporary shibori artworks and wearables, curated by Yoshiko Wada and Trine Ellitsgaard. Unfortunately, the evening viewing I went to was quite dark, so I found it tricky to get decent photos, but here’s a flavour of some of the pieces on display.

A short walk downhill from CASA is the paper making cooperative Arte Papel Vista Hermosa, also founded by Francisco Toledo. Its members use bark, plants, flowers, cotton, hemp, silk, linen and pieces of shiny mica in their products. As well as seeing the artisans at work, visitors can have a go at making paper themselves.

For this exhibition they worked with artist Kiff Slemmons to produce some stunningly intricate paper jewelry. And yes – I did end up buying a piece! 🙂

Back in town, the Textile Museum of Oaxaca was, unsurprisingly, the main exhibition focus. One of the most eye-catching was an installation of bandhani flags by Christina Kim. This was a collaboration between artisans in Kutch in Gujarat and the National Institute of Design in Ahmedabad to employ women displaced by the 2001 earthquake in Kutch. Fluttering against the blue sky, the flags were a stunning sight.

The second exhibition was an interesting cross-cultural comparison of shibori and ikat techniques from around the world. While I know something of the Japanese and Indian traditions, I was less familiar with jaspe, the Mexican equivalent of ikat.

Ikat is the process where (usually) sections of the warp threads are bound with threads before dyeing, forming a pattern that will show after weaving. Sometimes the weft threads are dyed, and sometimes both warp and weft – this is known as double ikat (or patola in India).

It’s immensely disciplined because you have to know exactly where the dyed threads will end up in the final piece – no changing your mind (or pattern) once you start! The resulting designs tend to look a little “fuzzy” around the edges.

Shibori pieces on display ranged from a Japanese kanoko shibori jacket to raffia- stitched fabric from Africa.

Finally, there was a fascinating exhibition on the plumed weavings of Mexico. In the 1980s, a fragment of fabric woven with a mixture of cotton and duck down was found in a flea market in Puebla. The technique seems to have been unique to Mexico, and the exhibition displayed work by modern weavers incorporating duck down.


There is a website here explaining the process, but it is all in Spanish.

If you have any questions, please feel free to comment and Kim will answer you. Thanks for the post Kim!


Tenth International Shibori Symposium

Tenth International Shibori Symposium

This is a guest post by Kim of Flextiles. She recently attended the Tenth International Shibori Symposium and I thought you all might to get a glimpse of what she did and saw there. There will be a second post in February. Thanks Kim!

Last November, I attended the 10th International Shibori Symposium (hereafter referred to as 10iss) in Oaxaca, Mexico. The symposium is organised by the World Shibori Network every few years, and this was the first one I had attended. With six days of workshops, presentations, receptions and exhibitions it was a pretty full-on experience, but great to be in the company of so many other hardcore textile enthusiasts!  

In this post I am going to describe some of the 10iss workshops that I and my Ever Supportive Partner (ESP) attended. ESP has no experience at all of working with textiles or shibori  but was keen to join in anyway. If the alternative was letting him loose in the local mezcal bars for six days, I thought it best to encourage him. 😉

Shibori is a Japanese resist dyeing technique, like tie dye. As well as binding, you can use stitching, wrapping, and folding and clamping to prevent dye from reaching parts of the cloth to create a pattern.

Shibori workshop with Ana Lisa Hedstrom

I’ve long admired the work of Ana Lisa Hedstrom, and I signed up for her workshop mainly because she was covering katano shibori, but I came away with many more ideas and inspiration.

kw1

Katano shibori, named after Motohiko Katano, is a process of stitching through several layers of fabric and not pulling the thread up afterwards. Instead, the lines of stitching channel the dye, producing softer marks that look as if they are airbrushed. There is a more detailed explanation of the technique in Shibori: The Inventive Art of Japanese Shaped Resist Dyeing by Yoshiko Wada, along with some stunning examples. The World Shibori Network sells some sets of Katano postcards. Ana Lisa brought some lovely samples with her.

Here’s the piece of katano I did in the workshop, on silk noil dyed with cochineal and then overdyed with indigo:

kw11

All the dyes used in the workshop were natural – the indigo vat was made using limestone and local fruit, so smelled lovely! However, because we had limited time, we were unable to leave the fabric in the dyepots for very long, so some of the colours are paler than we would have wished.

kw4

One of the other techniques we explored was machine stitch shibori. As with katano shibori, you stitch through several layers of fabric at the same time before dyeing. Ana Lisa had brought plenty of samples that inspired us, especially where more than one colour was used.

This was one of my attempts on a wool and silk scarf, dyed with cochineal and then indigo.

kw9

We also used the sewing machine to stitch pleats in different directions before dyeing – this is the result of mine after unpicking.

kw10

Since coming home I have dug out my ancient sewing machine and will be working on developing some of these techniques!

Itajime workshop with Elsa Chartin

Next door to our workshop with Ana Lisa, ESP was experiencing itajime shibori with Elsa Chartin. Itajime or sekka shibori is where the fabric is folded and then clamped between resists, producing geometric designs. I thought this would be a relatively easy introduction to shibori for him, especially as he is not good at stitching or tying knots! ☺

In this workshop they used chemical vat dyes, which, like indigo, require reduction and then exposure to oxygen for the colour to develop. After experimenting with different folding and different shaped resists they moved on to dyeing with more than one colour (moving the resists in between) and also discharging colour from dark fabrics, again using resists. They also overdyed on commercially printed fabric.

ESP enjoyed this very much – the results are quick and can be done on relatively large pieces of fabric. Of course he now considers himself an expert  and in an even better position to criticise my work! 😉

Cochineal dyeing with Michel Garcia

The official title of this workshop with Michel Garcia at 10iss was “Cochineal dyeing in four ways”. It was rather an understatement, as we ended up with 19 different colour swatches from cochineal!

Mexico was an appropriate place to do this workshop, given that cochineal is the most popular dye used there. The cochineal beetle, Dactylopius coccus, lives on Opuntia cactus species. The red colour comes from the carminic acid that makes up around 20% of its body. To make the dye, the dried beetles are ground up in a pestle and mortar and then added to the dye bath.

kw18

Michel used three different fabrics – wool, silk and cotton – along with different combinations of mordants and astringents to produce 19 different shades from cochineal, ranging from pink and orange to purple and dark brown. It was an extraordinary demonstration of the variations in colour you can get from one dye.

The different colour variations were achieved by varying the mordant (the ones he used included alum, symplocos, aluminium tartrate, aluminium acetate and ferrous acetate) and sources of tannin (such as pomegranate rind, persimmon and gallnut). For some swatches he used an all-in-one bath; others he premordanted before dyeing in a separate cochineal bath.

The final colour also depended on the type of fabric. Here are pictures of swatches of wool and silk dyed with cochineal.

This is a cotton strip mordanted with various combinations of aluminium acetate and ferrous sulphate, dyed with cochineal and pomegranate rind.

kw21

And this cotton strip uses the same mordants as above but is dyed with cochineal and gallnut extract.

kw22

Finally, Michel demonstrated his artistic side, using different combinations of mordants to paint an image onto cloth that didn’t appear until it was submerged in the dye pot.kw23

Safflower dyeing with Kazuki Yamakazi

Safflower is an interesting dye because it contains both red and yellow dyes so, depending on the fabric and pH, it produces different colours.

There’s a section on safflower dyeing in Jenny Dean’s book Wild Color, which explains the methodology. ESP and I tried this out last year, using a pack of dried safflower we bought in Malaysia, but it wasn’t very successful. So ESP was dispatched to this workshop to find out how it should be done!

First the safflower petals are soaked overnight, squeezed, strained and removed. This dye turns alum-mordanted fabric yellow (better on silk than on cotton).

The petals are washed to remove the yellow and soaked in an alkaline solution for two hours to extract the red dye. After straining and before adding the fabric, citric acid is added to neutralize the dye bath. Distinctive small bubbles form at this stage. If too much acid is added the red dye will start to precipitate out – sometimes this is done deliberately to extract the dye to use in cosmetics.

Silk added to this dye turns orange, while cotton turns red or dark pink.

The difference in colour is because the red dye also contains a second yellow dye, which is absorbed by silk but not cotton. You can see in the photo below that the silk (top row) is more orange than the red cotton below.

kw30

To get pink silk, you need to use cotton as a “dye bank” to absorb just the red dye and then extract it. At around pH4 the dye is locked into the cotton. If you then put the cotton into a bath of pH6-7 the dye is released from the cotton. Squeeze out the cotton and remove it from the dye bath before adding more citric acid. Then add the silk – you get bright pink!

Japanese dyers might repeat the entire process six times to get intense colours into the dye bank.

The process doesn’t work well with wool, despite the fact that it is a protein fibre like silk. This is because wool needs to be heated to more than 30C to open the scales, but the pigment begins to break down at 30C, so you just get a pale pink.


A Peek at Terri Simon’s Eco Printing Class with Nicola Brown

A Peek at Terri Simon’s Eco Printing Class with Nicola Brown

Thanks to Terri Simon aka Meterrilee on the forum for sharing her eco printing experience today.

Today, I would like to share my experience with eco-dyeing. Most, if not all, of our blog hosts and many followers have experience with eco-dyeing, but it was a first for me and I loved it! I decided to take an online class with Nicola Brown from Ireland. She is a wonderful teacher—very thorough in describing the process in an online format, including several videos to illustrate further. She was available daily for six weeks to comment, problem solve, and encourage us as we journeyed through that week’s lesson. Like other online classes, there are “chatroom” areas to post pictures and ask questions, and to comment on one another’s creations. The online environment is available for six months and all of the lessons were downloadable in PDF format. Additionally, Nicola created a Facebook page for us to continue communication. Thanks, Nicola, for a great online experience!

As a dyeing newbie, I had to assemble equipment. At a nearby thrift store, I found an aluminum fish cooker with all kinds of inserts for steaming, an iron stake, and a length of copper pipe which I cut into pieces to fit into the fish cooker. We had an outdoor fire source…a propane tank and hook-up for deep frying a turkey. It worked perfectly on my covered back porch (this is Southern Oregon’s rainy season). Here’s my equipment:

terri-pans

All for $20. Not bad!

I ordered a bunch of silk, silk/wool blend, and 100% wool scarves from Dharma Trading, which had a good selection and reasonable prices. I also made pieces of felt to experiment with. For vegetation, I used rose leaves, loose tea, red and brown onion skins, strawberry and blackberry leaves, Japanese cut leaf maple and eucalyptus, donated to me by a friend who has several trees. The rest came from my garden (and kitchen.) There are lots of different “brews” for obtaining the prints. Some involve rust water, others vinegar water and other things thrown into the cooking pot (different metals, plants…). And of course, there are multiple ways to prepare the fabric for dyeing, none of which use harsh chemicals (the harshest chemical used is vinegar). I really like this aspect of eco dyeing…it’s all very natural. I am amazed that the beauty of a leaf can be imprinted substantively on fabric, right down to the intricate veining.


Here are some photos of my experiments.pic-2

This turned out sort of dark and muddy. These are Japanese maple leaves. The scarf actually looks good with the right outfit, but the prints are very subtle and not what you want when you are just starting out (at least not what I wanted!).

These are pieces of handmade felt, with eucalyptus (the skinny and bright orange leaves) and strawberry leaves. The purplish looking circles are cut from red onion skins.

pic-3

Next is a blend of wool and silk. You can really see the details of the onion skins on this fabric.

pic4

The scarf below is 100% silk. The print is much softer looking. I like the tie lines produced when wrapping the bundle.

pic5


Finally, I made some felt placemats and while they are interesting, I am not a fan of the muddy yellowish background. I found out it was operator error for not keeping the heat up high enough for a long enough time. I had to go out for a bit and turned off the flame under the pot, letting the placemats sit for about an hour until I got home to untie them. My mistake! Had I kept the heat up for the full five hours, I would have produced a much clearer print, such as the example pieces I have included in this picture. But, they are still pretty in a muted way.

pic-6

I highly recommend Nicola’s classes. She is an excellent teacher, very thorough and organized and she has a delightful wit as well.  You can find more information on Nicola and her classes here:   http://www.nicolabrown.ie/


About The Studio Site

About The Studio Site

Can you believe it’s just over 5 years since we first started the Felting and Fiber Studio site and blog? We’ve had a lot of new visitors and commentors on the blog recently, and lots of new members on the forum too, so I thought it might be time to do a reminder about everything we have to offer here on the Studio site. The main page where all the blog posts appear is the ‘Home‘ page. Whenever you open the website up, this will be the page it brings you to, so after having a good look around, click ‘Home’ to bring you back here.

1-home-pageThe ‘Contact Us‘ page is for getting in touch with us about anything which doesn’t relate to any of the blog posts or other pages. Maybe you have an idea for a Guest Post, or some info we can add to the site, or just want to make sure you don’t miss out on any classes! Leave your name and contact email and send us a message in the ‘comment’ box.

2-contact-usIn the drop down menu under ‘Online Classes‘, you’ll find a list of the classes we offer.

3a-online-classesIf you hover over each one in the menu, you’ll find they all have sub-pages, where you will find more information, testimonials and galleries of work produced by the students who took the classes.

3b-online-classes The ‘About Us’ page tells you a little bit about why we started the Studio site, and there are sub pages for each of us with some info about ourselves and our interests.

5-about-usThe Felting page gives a brief outline about what felting is, and in the drop down menu, different types of felting: Machine, Needle, Nuno and Wet, all have their own pages with more in depth info and sub-pages with galleries of examples.

6-felting-pageMost fibre artists like to branch out a bit from their main area of interest, and you probably know from our blog posts that we do too, so it’s no surprise we have a ‘Mixed Media‘ section on the website. As well as the Mixed Media page, there are sub-pages for Beading, Hand Stitching, Machine Stitching and Surface Design. Each of these pages also have gallery pages featuring lots of work and inspiration.

7-mixed-mediaThe Fibers section is packed full of information about wool and other animal fibres. The main Fibers page explains some of the different terms that are used to describe wool in its various stages of processing. The Wool and Other Animal Fibers page has a lot of information about wool, and animal fibres such as Alpaca, Angora goat, Llama and Camel. There is also an explanation of the Micron and Bradford Count systems of measuring a fibre’s fineness or coarseness; and a PDF guide to the most common sheep breeds and their Bradford and Micron numbers. The gallery page features photos of different animal fibres. Preparing Fibers has a guide to processing your own wool, from washing a raw fleece to carding it into fluffy batts ready for felting or spinning. There is a photo set and detailed description. And if you want to go even further in fibre prep, have a look at the Dyeing page for some inspiration.

8-fibresThe ‘Other Fibers‘ section has lots of photos and info about the fibres and fabrics we commonly use in felting such as silk and organza fabrics; fibre prepared into tops like bamboo, banana, viscose, and the more unusual fibres like crimped nylon, plastic and Angelina fibres.
There are individual pages for Silk; other Protein Fibres; Cellulose Fibres, Synthetic Fibres and also Fabrics. The gallery sub-pages for each one feature lots of uses of all the different fabrics and fibres.

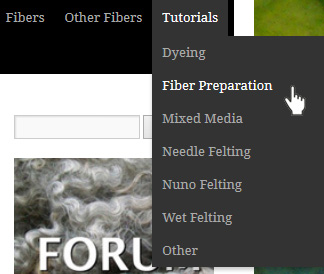
9-other-fibresA site full of info wouldn’t be complete without a Tutorials section. There are free Dyeing, Felting, Fiber preparation and Mixed media tutorials all written by one of us, including a video on how to make your own roving using a diz, PDFs on Degumming silk and dyeing it; Stitching on felt, making mixed media wall art, using a sander for wet-felting, a beginners guide to using a drop spindle and dyeing with food colouring.

10-tutorialsAnd if you can’t find what you want there, there are also links to outside sites in the Links/Resources section, including rosiepink’s free felting tutorials and their fantastic e-book showing how to make amazing felt artwork and some felting and fibre suppliers too. A fairly recent addition to the site is the ‘Shop‘, where you can safely and securely buy various books, e-books and tutorials on wet felting and needle felting.

11-shopOne thing the Felting and Fiber Studio site needs and which has helped it be so succesful is a Community.

12-communityWe’ve been so lucky to get to know and become friends with so many like-minded people from all over the world. From 4 of us starting the site 5 years ago with a handful of supportive friends commenting and spreading the word, we’ve grown to have almost 350 regular followers; a very popular forum; lots of fellow fibre artists and bloggers regularly contributing with guest posts; and really popular online classes. So as well as this post being a guide to what’s available on the site, it’s also a chance to say Thank You to everyone who’s been with us since day one, and to those who’ve joined us along the way, and supported us not only with blog views and comments and writing blog posts, but with sponsoring banners on the forum to pay for hosting and to keep it ad-free. Thanks! 🙂