Browsed by
Category: Guest Writer

Cathy’s Nuno Felt Projects

Cathy’s Nuno Felt Projects

We have a guest post today from Cathy (Luvswool on the forum) about Nuno Felting.

***

CATHY’S NUNO FELT PROJECTS:

Following are my three attempts at nuno felting, none of which has been very successful.  I am posting here, hoping to get some recommendations.  Any advice offered will be welcome.  While I understand it’s difficult to compare processes–you will not know exactly what kind of wool I used, what temperature the water was, the quality of my silk–still I hope the photos will help explain.

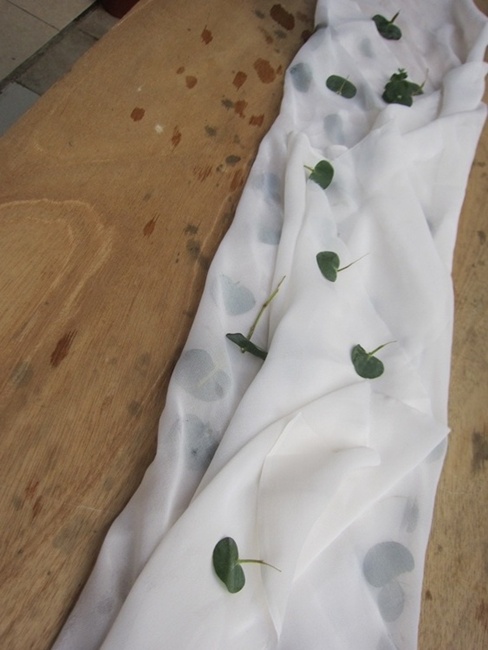
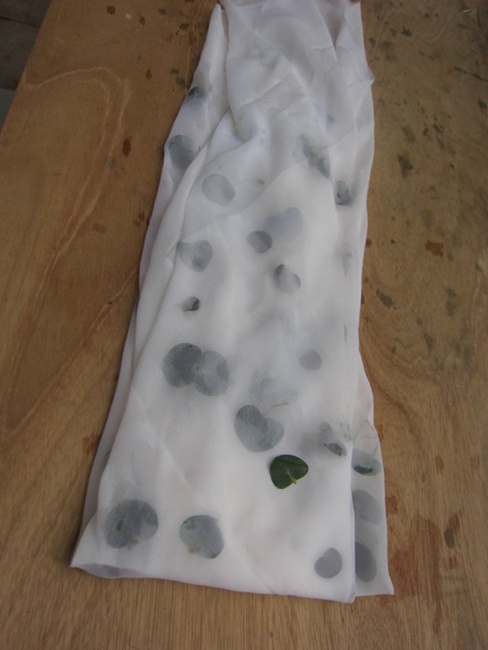
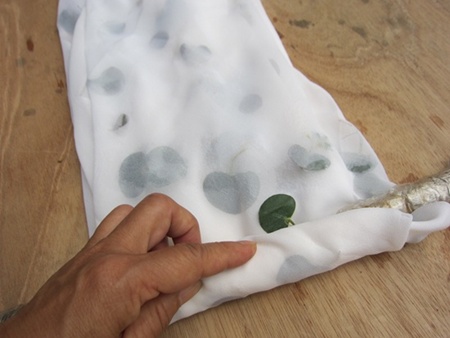
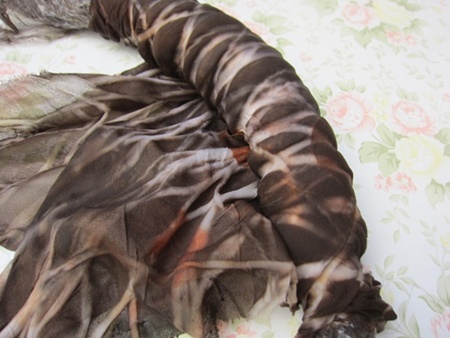
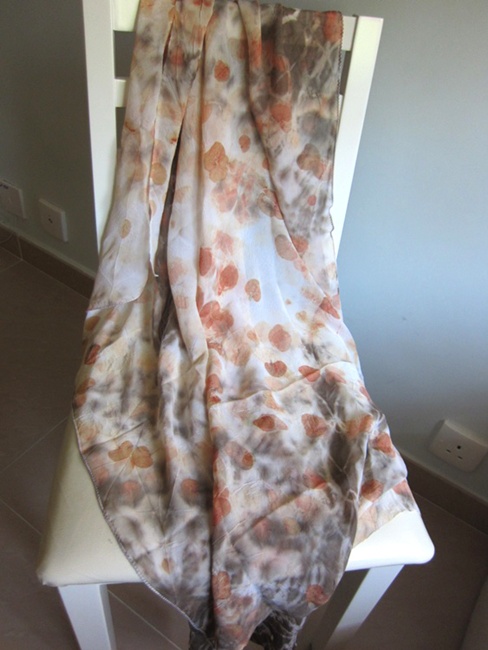
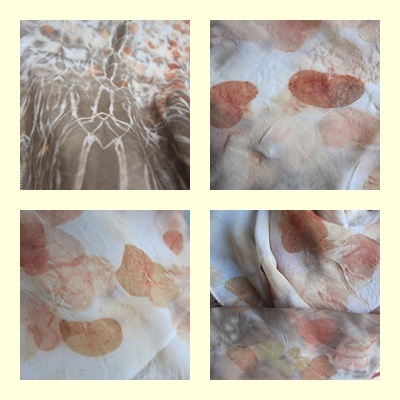
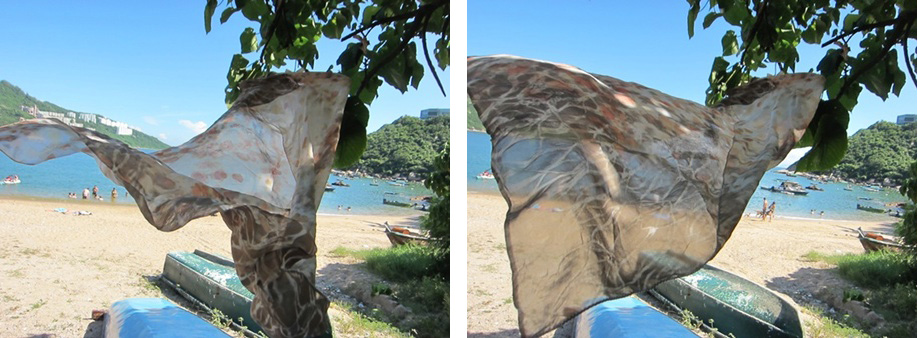
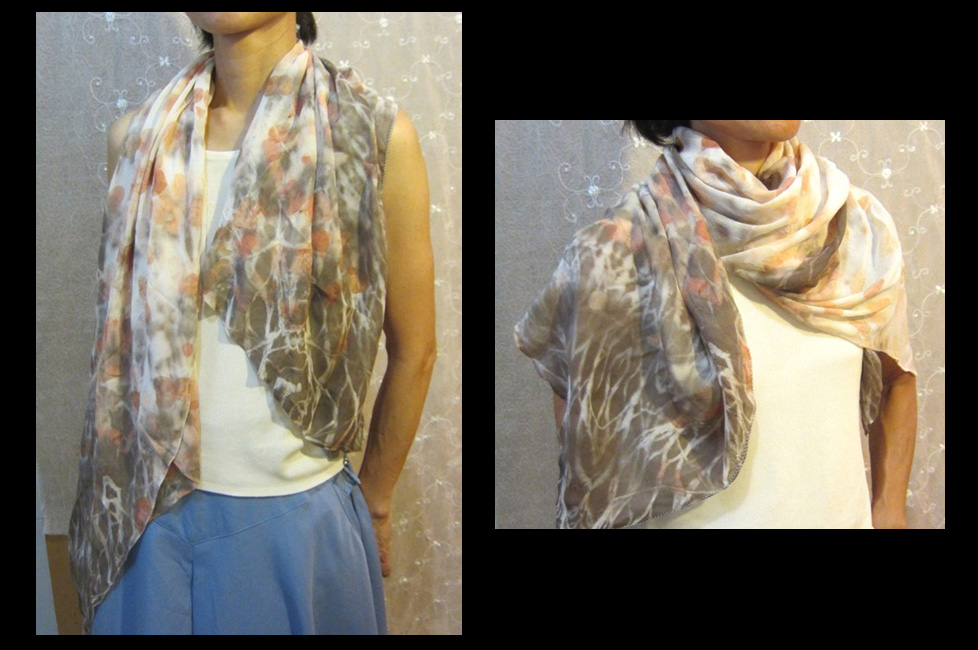
After having watched numerous videos and studying books on nuno felting, I purchased some silk scarves (silk gauze) from an Etsy shop.  These scarves were approximately 12 x 57 inches and particularly recommended by the shop owner for nuno felting.  I wanted to make a scarf that looked light and lacy with some silk showing, so I used wisps of Merino wool and some silk hanky pieces which I lightly placed on top of the peachy/orange silk scarf, just one layer. (Sorry, no “before” photos)

photo 1bphoto 2After following the nuno felt instructions carefully, I ended up with some of the pieces felted and some not, as you can see from above photos.  Not a good start.  Figured it could be the silk quality or the water temperature?  Not enough wool?  I set the project aside.

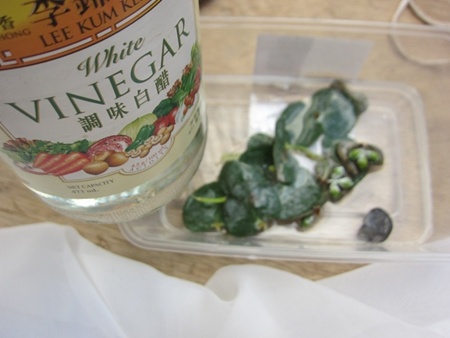
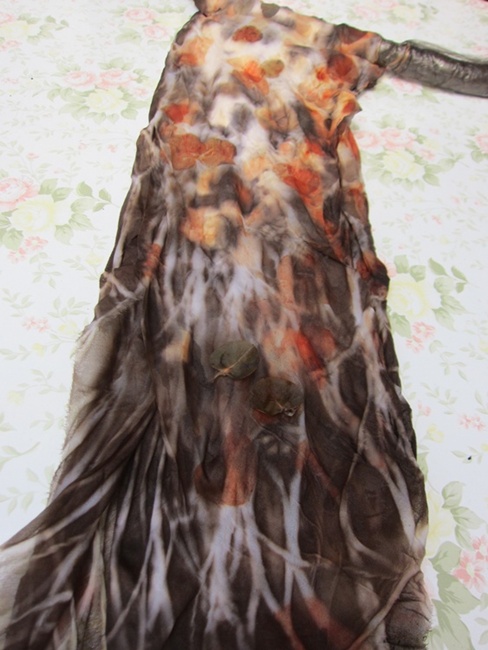
Project #2 – I had some silk scraps from vintage Japanese kimonos, and thought I should do some samples before attempting another “real” project.  So I used white and red Merino wool on top of silk, lightly nuno felted to make “pre felts”.  Silk scraps literally peeled away when I lifted the corners to check on my progress.

photo 3photo 4
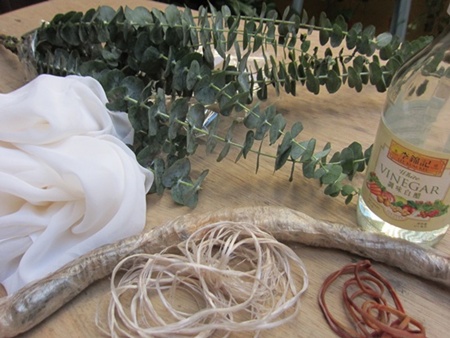
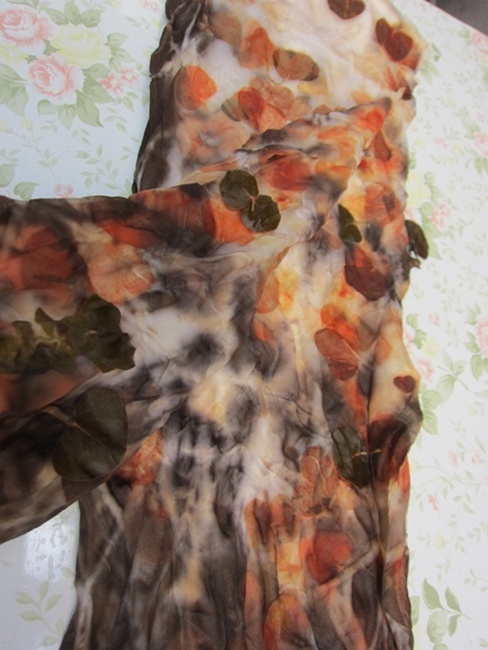
Project #3 – I purchased a remnant of beige silk chiffon from a nearby shop, Vogue Fabrics, which has an amazing selection of fabric, including lots of gorgeous silks.  Huge remnant section so I did not need to break the bank.  Clerk did a “burn test’ so I was assured to be purchasing silk, not synthetic fabric.

photo 5I used three layers of wool, not being sure this was actually Merino, since I bought this on ebay and the seller was unsure what type of sheep’s wool.  It felt a bit rougher than the soft Merino I usually use, but nothing to lose, right?  Although I did not photograph my first go-around, there were approximately 20 “holes,” that is, I could see the beige chiffon through the wool (nickel to quarter size holes), and it did not look good. Underside after nuno felting:

photo 7
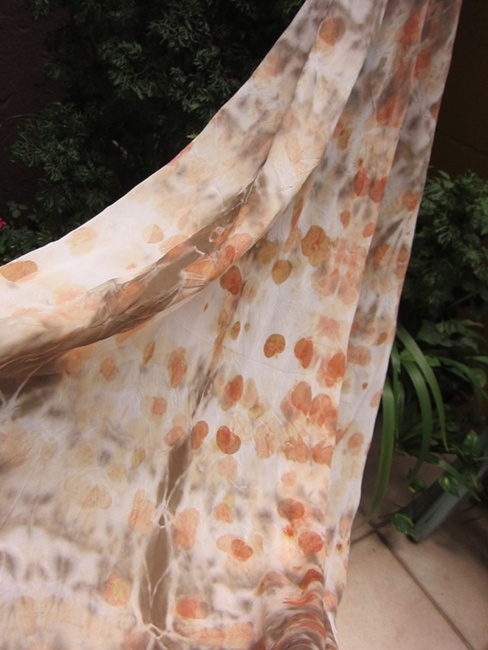
Next I needle-felted the same wool, along with some light green Merino wool, onto the holes.

photo 8Then I wet-felted the entire piece. After rolling, I rinsed in hot and cold water, fulling (throwing in sink), vinegar dip & cold water rinse.

photo 9Now it looks better, but I still do not consider it to be a successful nuno felt project.

photo 10bProject #4 — Here is my piece of light green silk gauze (as purchased from Etsy shop mentioned in Project #1) ready to be nuno felted.  Awaiting your suggestions and comments!

photo 11

Indigo and Shibori by Kim Winter

Indigo and Shibori by Kim Winter

Today’s post is by Kim Winter of Flextiles. Kim lives in London, UK and has been blogging about her textile experiments since 2011 after taking creative and experimental textiles at Morley College. I follow Kim’s blog and have found it very interesting so I asked her to write an article for us.

Type “tie dye” into Google and a mosaic of fluorescent spirals and sunbursts leaps out of the screen.

tie dye - Google Search

But try “shibori”, and the results are more subtle, largely (but not entirely) blue and white.

shibori - Google Search

Yet both are similar techniques – folding, binding, twisting or compressing the cloth so that parts of it are not exposed when it is dyed, resulting in very distinctive patterns.

shibori-close-up-001

The Japanese, as with so many craft forms, have developed the techniques even further, wrapping the fabric around poles before binding, using special devices for looping the thread around the cloth, or pulling up rows of stitching very tightly to resist the dye. And the dye often linked with shibori is indigo, which explains the dominance of blue and white designs.

“Like old men’s pee”

I was introduced to shibori and indigo dyeing at my local adult education college in London when I signed up for evening classes in textiles a few years ago. It was a great course, providing an introduction to different techniques over three terms, including wet felting, hand and machine embroidery, and soft basketry.

In the summer term our tutor heaved a large black plastic vat into the room, removed the lid, and I got my first glimpse of an oily, shimmering surface with flecks of froth. It didn’t appeal to everyone – one student described it as “smelling like old men’s pee”. But after a couple of dips, I was hooked.

I’m not going to go into the detailed chemistry here, but a well-maintained indigo vat is not blue – it’s greenish-yellow. Indigo turns blue only when it is exposed to oxygen, so when you remove a piece of fabric from the vat, it changes colour from green to blue before your eyes. It’s quite magical – and very addictive!

It also has the advantage that you don’t need a mordant, so it’s relatively quick compared with some other forms of dyeing. However, to build up colour fastness it’s best to dip several times and leave the fabric to oxidise well between dips.

Shibori obsession

I started off with conventional shibori techniques:

• stitching (nui shibori)

screen-shibori-010-resized

shibori cushion 001

• binding (kumo shibori)

shibori samples 003

• pole wrapping (arashi shibori)

shibori samples 013

• clamping with a resist (itajime shibori)

cd-itajime

And pretty soon I became obsessed – the experiments in a Kilner jar by the kitchen sink graduated to an increasing number of blue-stained buckets and bowls cluttering up the garden and kitchen, provoking gripes from (otherwise) Ever Supportive Partner!

home-indigo-001

oct2013 scarves4

Then I started experimenting with shibori in other processes.

• Shibori and screenprinting – stitching the fabric before screenprinting over it, then opening the stitching.

screen-shibori-007-resized

shibori-screenprints-large-translucent

moon-print-open

• Shibori and felting – binding or wrapping the felt or nuno felt before shrinking in a washing machine or steaming it.

marble-flask-tied

marble-flask-after

nuno-net-shawl-flowers-front

• Shibori on paper – taping the paper to a pipe, wrapping string around the paper, dipping, then adding more string and dipping again.

shibori-bound-paper

• Shibori in a heat press – stitching a pattern in synthetic fabric, then putting it with a sheet of disperse dye paper in the heat press.

heat-shibori-003

I also signed up for shibori indigo courses with specialists – an online course with Shibori Girl and a summer school in Norfolk with Jane Callender – where I learnt an incredible amount.

But, as with most textile techniques, there is still so much to learn and experiment with – one day I hope to grow indigo from seed, and produce a naturally fermented indigo vat (not easy in a cold London house). And ultimately I would like to spend some time in Japan, learning more about the whole culture and tradition that surrounds this entrancing dye.

Sustainable scarves

In the meantime, I’ve taken to upcycling scarves from charity shops and vintage sales using shibori and indigo dyeing. This has several advantages:

• It’s more interesting for me, as each scarf is different (colour, size, fabric, pattern) – so I don’t get bored.

• It’s obviously more sustainable – around 500,000 tonnes of clothes get sent to landfill every year in the UK alone, yet many of them are perfectly wearable.

• Because the cost of my raw materials is lower, the price buyers pay is lower too – whether the scarf is made of silk or cashmere. What’s not to like? 🙂

oct2013-scarves1

Some of these scarves are available from my Etsy shop; others I sell at various markets around London.

I’ve also started experimenting with natural dyes such as onion skins, coffee and tea.

onion-scarf2

But I think that indigo will always be my first love. It can be a bit temperamental to work with – the alkalinity has to be quite high, and you mustn’t slosh it around too much in the vat or the dye will oxidise and you have to recharge it too frequently.

Yet every time I unstitch, unclamp or unbind a new piece is like the first time – the sense of wonder at the range of blues I can get from a single vat, the colours changing and developing in front of me.

I even like the smell! 😉

fq-spiral-angleKim Winters

You can find Kim at her blog Flextiles or at her Etsy shop. Thanks for sharing with us Kim!

Third Quarter Challenge – Marilyn’s Entry

Third Quarter Challenge – Marilyn’s Entry

Today’s post is by Marilyn Nelson (Pandagirl on the forum).

MNelsonchallengeoverviewThis was definitely a challenge for me since it was my first time using acrylics, modeling paste and curing modeling clay. I’m also more into abstract than realistic representation.

For some reason I was fixated on doing a butterfly (probably wanting to hold on to summer).  So, I worked on the butterfly first.  There were several renditions in silk and clay, but I ended up using the first clay one which I used wire between layers to bend the wings making it dimensional and painting both sides with acrylics. The antennae are wire.   A silk butterfly would have been even better, but I couldn’t figure out how to paint it like a Monarch.  I tried, but wasn’t happy with the results.

While I worked on the butterfly the rest of the picture seemed to come together.  I covered an 8×8″ stretched canvas with modeling paste and created a textured sky and meadow with a palette knife.  After it was dry, I began layering acrylic washes to intensify the dimension. However, after painting the texture wasn’t that obvious.

MNelsonChallenge side view 2

The bottom of the crinkled silk flower was left over from a failed felting experiment.  So, I cut another small piece to fill it out.  The stamens of the flower are yarn.  The leaf is prefelt that I felted a piece of wire on one side to be able to give it flexibility to form it.  Then I used copper wire taken from the ends of wired ribbon to make the veins in the leaf by running it lightly in spots through the felt to hold it.

I used the cut outs from the silk to make the smaller flowers. The orange spirals were a last-minute addition from left over clay I was playing with.Of course, I had to figure out how to attach everything.  I used a combination of modeling paste, acrylic medium and Mod Podge. (Not mixed together.) 🙂

MNelsonChallenge side view

I’ve included a couple of views to show the dimension of the piece.  I hope you can see the details.  I need to work on my photography skills.

Karen, a special thanks for posting the challenge and to all the members who have encouraged me to join the fun!  I had a great time and learned a lot.  I’m looking forward to the next challenge.

Marilyn Nelson


Third Quarter Challenge – Lyn’s Entry

Third Quarter Challenge – Lyn’s Entry

Today’s post is by Lyn from rosiepink

Yacht Heeling
Yacht Heeling

I enjoy the Studio Challenges because they encourage me to try different things.  Karen’s challenge for this quarter is ‘Mixed Media’  and after spending a day on Lepe Beach during Cowes Week, I just had to do a yacht.

My husband likes painting so I thought a joint project would be fun.  I gave him a rectangle of machine-made white felt  (45cm x 33cm /18″ x 13″) and asked him to paint a sea/sky background using water colours.  I thought water colours would look good on white felt, sort of fuzzy and pretty, and it did look good … but as it dried the paint sunk right down into the felt!

He painted the background again… then we sadly watched it fade as before.

We stared at the felt, and had a think, then decided to try watered down acrylic paints.  It looked lovely but we weren’t going to stand by and nervously watch.  We decided to be proactive.  Out came two hairdryers and we blow-dried the watery paint on the felt as quickly as possible.  Success!

I cut a hull and sails from beautifully textured, shiny dupion silk then laid the pieces onto the painted background.  Yuk.  It didn’t look good.  So I tried other ideas such as using scraps of handmade felt and various fabrics.  Nothing seemed to work so I pushed it to the edge of the table and even considered abandoning the idea.

My room was a real mess because I’d got out so much of my stash searching in vain for just the right thing.  I took a deep breath and started to tidy, and that’s when serendipity happened.  A scrap of lightweight interfacing material somehow landed on the painted sea.  It looked good.  It wasn’t too heavy, as the other fabrics and felt had been, it would be easy to stitch into place and I could colour it.

yacht spinnaker in the water - small imageI cut out the shapes I needed then ran ‘messy’ free stitching over the interfacing until I was happy that it looked like a yacht heeling.  I considered leaving the interfacing unpainted (and I wish I’d taken a photo at that stage) because it had a delicacy about it that I liked, but I’d planned on having a colourful spinnaker so I applied water colours to the interfacing.  I used an almost dry brush because I thought that if I made the colours too solid they would overpower the background.

When I’d finished, my husband added a little more white acrylic paint to the bottom of the spinnaker and the hull of the boat.

I liked working on the joint project but it wasn’t easy on my ears.  My husband sails so he felt obliged to impart his knowledge by frequently pointing out that my stitching of the yacht wasn’t anywhere near technically correct!

Thank you Karen – I’ve benefited a lot from your challenge.

Eco Printing Onto a Silk Chiffon Scarf by Terriea Kwong

Eco Printing Onto a Silk Chiffon Scarf by Terriea Kwong

Our guest writer today is Terriea Kwong who has very kindly written a tutorial for us about eco printing onto silk.

********

This is the basic and simple way to do prints on silk chiffon.

a1. Materials used : eucalyptus cinerea leaves (silver dollar), 100% silk chiffon, vinegar, paper core roll, string and rubber bands. Well wash the fabric before use. Can be used when it’s wet or after it’s dried.

b2. Before putting leaves over the chiffon, dip in vinegar water.

cc3. Put the leaves over chiffon, 2-3 folds diagonally, put a little more leaves over it.

dd4. Then half fold it.

ee5. Roll up with the paper core roll tightly.

ff6. Bundle with rubber band, then tie with string.

gg7. Boil with some eucalyptus barks and the same sort of euc leaves (silver dollar) with 1/4 cup of vinegar.

hh8. After 1.5-2 hours boiling, unbundle it. The dye pot can be re-used.

ii9. Dark when it’s still wet.

jj10. Remove all leaves.

kk11. Dry in shade, then rinse and dry in air.

ll12. A scarf is made.

mm Tie lines and shades of eucalyptus leaves prints:

nn Soft and airy scarf:

oo This is silk chiffon, so color is a bit soft:

ppI’m pleased to share with like-minded and workshops can be arranged individually. Contacts via below:

My blog : http://terriekwong.blogspot.com

My email : terrieakwong@gmail.com

My page : www.facebook.com/TerLingCreation

******

Thanks a lot to Terriea for this excellent guide to eco-printing and dyeing 🙂 Terrie gets great results printing and dyeing, here is a gallery of some of her other work:

Running A Small Fibre Business

Running A Small Fibre Business

Today our guest writer is Lyn from rosiepink who, with her daughter Annie, has run a successful small fibre business. They are also the authors of the excellent books, Creating Felt Artwork and How to Make 3D Felt Vessels Using Flat Resists.

*****

I like to buy small packs of assorted fibre-goodies because it’s an economical way to try different fibres and materials, and a good way to build up a varied stash. As a felt maker, stitcher and general fluff lover I can never have too much of various bits ‘n’ bobs in every colour to dive in and out of.  I like to include coloured scrim in my felt, and a few years ago I couldn’t find much available to buy, so I bought a roll of un-dyed scrim and my daughter and I made a batch of small pieces in a big variety of colours to play with.  It was a fun day, with lots of tea and laughing.  Then people asked if we sold it.  So we had a go!

We sold bundles of hand-dyed scrim and then expanded to offer small packs of wool in several colour choices.  The scrim bundles were well received by people who wanted a wide variety of colours of hand-dyed fabric to use as textile inclusions, and the packs of wool were popular with people who wanted a lot a colours but not a lot of wool.

hand dyed scrimAfter three years, we decided to take a change of direction and wanted to concentrate our spare time on making and designing things rather than selling the materials, but it was a great small business experience.

Small packs of unique or varied textile items are a good product for a ‘kitchen table’ business, and if you have thought about taking the plunge, hopefully sharing our experience will help to give you a checklist of things to consider before you start, and show you what was involved for us to run a small online fibre business.

Before you start a kitchen table business, the first thing to consider is space.  The making of the bundles of hand-dyed scrim used not only the kitchen table, but the rest of the kitchen and the room next to it as well.  The wool was bought in bulk from a well-known company and the making-up of small packs of wool needed a whole room.  When you’re done with producing the packs, you then have to find storage space for them.

Are you fit enough?  Dyeing a few pieces of fabric is a relaxing pastime, but producing a great quantity is hard physical labour.  And rolling up a few balls of wool is pleasant, but will your shoulders and wrists still feel the same after doing it for eight hours?

But don’t worry too much, after a few weeks of walking backwards and forwards to the post office to dispatch your sales, you’ll soon get fit!

Merino woolYou’ll need a good head for figures to calculate the retail price of your packs.

First, add up how much the materials for your packs cost, and remember to include: the cost of the raw materials and the postage you have to pay to get them; packaging materials; listing and selling fees; paypal or other bank charges.

Then work out the cost of your labour, based on the hourly rate you choose, for: sourcing and purchasing the raw materials; producing the packs;  photographing and listing them for sale; dealing with orders and enquiries; packing and then posting.

You will need to keep an account of all the money that comes in and all the money that goes out, because once a year the taxman will need to be informed.

However, despite the hard work, it’s lovely being your own boss and spending your working day surrounded by fabulous fibres!

Thanks a lot for all that information, Lyn 🙂  If you have any questions about running a small business, please leave them in the comments. If you have any suggestions for future articles, please use the Contact Us page.

Trip to the Garment District in New York City

Trip to the Garment District in New York City

My friend Paula recently visited New York City and made a trip to the Garment District while she was there. I thought you might like to hear about her visit. So here’s Paula…

Lobby of Waldorf-Astoria

I went to New York City with my husband who was on a business trip. We were lucky enough to stay at the historic Waldorf-Astoria. This is the lobby and we were on the 27th floor.

Doorbell at Waldorf-Astoria

My room had a doorbell, go figure. My doorbell at home doesn’t even work.

Another View of NYC

Here’s a view from on of the windows.

View of NYC from Waldorf-Astoria

Here’s a view of Park Avenue from our room. While my husband was in meetings, I explored the city on foot. My main goal was to visit the Garment District for fabric to nuno felt.

Wooden Escalator - Going to Habu Textiles

My first planned stop was Habu Textiles. I took a cab so I wouldn’t get lost but the cabbie didn’t even know where it was. He dropped me off and told me I would have to ask how to get there but it should be in this block. I could tell I was in a garment district because of this really ugly bridal supply store so I went and asked. After giving the woman the address she said “Oh that’s three blocks south.” I walked down three blocks and a very helpful man showed me where the building was. I had to get into a really old elevator to the second floor and then off to take this escalator to the next floor.  The escalator is made out of wood! When I saw the entrance to Habu Textiles, it didn’t even really look like a retail business but I bravely forged ahead.

Habu Textiles

I opened the door to this feast for the eyes. I ended up on my hands and knees looking through all the baskets at all the various yarns and threads.

Habu Textiles

And there was more on the walls. Most of the work that Habu produces is for yarns and knitting. They use all natural fibers such silk, bamboo, hemp, linen and more and blend them together to make wonderful yarn. They use all natural dyes and produce one of a kind fabric.

Habu Textiles

They even combine metals such as bronze and stainless steel into their yarns.

Habu Textiles

I wish I had a better photo of these little squares on the wall. They were 3-4″ squares of fabric that were layered and stitched with sashiko. They were really beautiful.

Bamboo Cloth

This cloth is made from bamboo.

Haul from Habu Textiles

Here’s my entire purchase. It includes the bamboo fabric, silk wrapped cotton, Kasumi (polyester), linen paper, cotton paper, bronze buttons and French safety pins.

Habu Textile - Various Yarns

These are pieces of the yarns that are bundled in the photo above that I bought to use for embellishing felt. I can’t wait to try them out. I spent an hour and a half at Habu and it was time well spent. The next planned stop was B&J Fabrics which was only two blocks away.

B and J Fabrics Bag

Luckily, I found the building right away and could see the fabric in the window five floors up. There weren’t any signs but I went into the building concierge and he directed me to the right place.

B and J Fabrics

There were piles and piles of fabric none of which you could reach. If you wanted to buy something, you had to take a sample to the desk and then they would find the bolt of matching fabric and cut your requested fabric. I was looking for silk chiffon to use in nuno felting and they had wonderful printed chiffon. They had all kinds of “fabric” there including fox, skunk, coyote and even an entire alligator skin. The store is used by designers, design students and Broadway costume design.

Silk Chiffon

I chose about 15 different printed silk fabrics and wanted a half yard of each. It took a long time to choose and I have to avoid those beautiful ones that were $89 per yard.

Silk Chiffon

Once I had chosen, I took the samples up to the desk and then I waited on the couch for an hour. I had asked only for silk chiffon although some of the print samples were on silk charmeuse.

Silk Chiffon

When the woman brought out my pieces, I noticed that not all of them were chiffon and that she had cut some in charmeuse. The manager was very nice about it and went to see if he could find the same patterns in chiffon. After another hour, I finally had my purchases.

Silk Chiffon

I spent over 5 hours at B&J Fabrics.

Silk Chiffon

My husband even called to find out where I was and came and found me.

Silk Chiffon

I had plans to go to more fabric stores and a yarn store but never made it out of B&J. That was day one. The second day I went to Purl Soho which is a knitting store and spent all day there. I was so exhausted after those two days that I never made it back to the garment district. If you decide to go, make sure that you have good directions and your walking shoes.

Selling on Etsy

Selling on Etsy

Today on Marketplace Monday, I have an invited guest to talk about Etsy and selling online. I don’t have any experience on Etsy so I thought it would be good to ask my friend Vicki to talk to you, since she has a successful Etsy shop. Vicki dyes the most beautiful fabric. She sells mainly to quilters but if you use any kind of fabric in your artwork, you should check out Vicki’s shop as her fabric is wonderful and she will even make a custom piece just for you if you can’t find what you need.

Thank you, Ruth, for inviting me here today. As Ruth knows, I am an Etsy seller and I love the Etsy platform so when she asked me to talk a bit about selling on Etsy I jumped at the chance.

I am not a felter; I am a fabric dyer and quilter and I blog at Field Trips in Fiber. I started blogging about my quilting, dyeing and other pursuits in 2006 and that eventually led to selling my hand dyed fabric. I opened my Etsy shop in 2009. As with anything it was a slow start but the business has grown steadily. After 3 years of selling I can still say that choosing Etsy as my platform was one of the best decisions that I have made.

Today I thought I would talk about three things. First we will discuss why Etsy over other sites, second I’ll share some tips that apply no matter which platform you choose and finally, I’ll discuss some tips for creating great listings.

Why Etsy

Before choosing Etsy I had to choose to sell my fabric on a marketplace platform instead of a dedicated web site. That was an easy one for me. I do not have the time or money to manage a separate web site. I’d rather be creating than doing web maintenance. I consider the Etsy fees that I pay as a bargain for some fabulous IT support.

I chose Etsy simply because it is the biggest platform out there. There are other sites like Big Cartel and Art Fire and they are very good sites. But I want my fabric where the buyers are and Etsy gets more traffic than any of the competitors. Consider the following stats:

  • There are over 875,000 Etsy sellers. Yes, it’s a lot of competition but they are there because that’s where the buyers are. Most casual shoppers do not even know about any other sites for buying handmade and vintage items.
  • Over 2.9 million items are sold on Etsy each month.
  • Etsy is the most pinned site on Pinterest

If you want your items to be as visible as possible, Etsy is the platform. The challenge will be differentiating your shop and your products so that they do not get lost among the millions of other listings. Here are a few tips.

Etsy Tips

 The biggest challenge on Etsy is getting your listing seen.  Recently listed items will appear in the search first so you can list/relist often to keep your shop fresh. I try to have new items to list every week but when I don’t I will relist a few items just to keep something showing early on the search page. Selling hand dyed fabric gives me an advantage since there are not a great number of hand dyed fabric sellers. But if you are selling a popular item, like jewelry or art, then listing often is important. Etsy also feeds Google search so listing items frequently will move you up in Google search pages as well.

Also, make use of the search tags and listing name to help customers find your items.  This is what Etsy uses to match your item to a search query. Use all 13 allowed tags on each listing and make them relevant. Try to consider the search terms that potential customers would use to find your item. Include colors and your name for people searching by artist.

Etsy also provides a lot of help and guidance to sellers. The Etsy Online Labs is full of great information and you can always get a question answered in the forum. You can also purchase Search Ads reasonably that will guarantee you a certain amount of front page visibility.

But you cannot rely solely on customers finding you through Etsy. To have a successful business on Etsy you must drive a lot of the traffic yourself directly to Etsy.  About half of my customers are first-time Etsy customers. They have joined Etsy specifically to buy my fabric.

Think about who your customers are and where they might be. If you are selling art, your customers are not likely on other fiber art blogs. They might be hanging out on decorating blogs or homemaker blogs or even local interest blogs and sites. It’s important to find the customers first so you can tell them about your great products.

I get a lot of traffic from Google search and that has helped me identify other audiences for my fabric. I’ve sold fabric to a guy who wanted it for background for his aquarium, someone who wanted it for a speaker cover and to a lot of costume people and photographers. The costume and photography connection is one that I am exploring now for some advertising venues beyond quilters and fiber artists.

Here are a few things that I do to promote my hand dyed fabric. Maybe a few of them will give you some ideas for your own art.

  • My blog: I focus at least 2 posts each week on my hand dyed fabric. I usually have a “New in Shop” post mid-week and I have a post each Sunday highlighting possible quilt layouts using the current featured fabric palette. I also highlight blogger who use my fabric. Many of them are kind enough to post links to my shop and blog. Two in particular provide some of the best advertising possible and it’s free although I make sure to give them some free fabric from time to time.
  • Advertise on other blogs. This is a tricky one. It takes some work to find just the right sites. I have tried in vain to attract the “modern” quilters to hand dyed fabric. They simply are not ready to go there but I found a craft-centered blog where my advertising is finally paying off. In addition to advertising I periodically sponsor a giveaway on the blog to bring my products front and center.
  • Sponsor contests and giveaways on other web sites and blogs.  I sponsor quilt contests on quiltinggallery.com and usually sponsor the semi-annual Blogger’s Quilt Festival. Some require payment and a donation but often you can find ones that only require you to provide a prize.
  • Advertise in publications. I advertise in several magazines. It’s not inexpensive but it does work. Make sure your ad is not too busy but is graphically strong enough to attract attention.
  • Offer to write guest posts on other blogs. People often need a break and will welcome an opportunity to have a guest post with a topic relevant to their readers.

Even with the great search features of Etsy, you will get most of your business from the traffic that you drive there yourself. You may not be able to invest in advertising from the beginning but there are a lot of free ways to get some exposure and traffic, especially on the web. Find the blogs and web sites that you think your customers are reading and start approaching them to provide content. Make sure that the content is relevant and beneficial. It’s usually best to not make it all about your product. Maybe it can be a free tutorial using your product or some care information for the type of art that you make. All it takes is some research, writing and a few emails.

You have traffic, now what?

OK, so now you have customers knocking at your virtual door you need to get them to buy something.

There is nothing more important than the photography. People can’t touch and hold your item in your virtual shop so you need to do it for them. Colors need to be accurate, they need views from all sides (when appropriate), and they may need to see the item in use or to see the scale of the item.

Check out other listings that you like and make note of the photography. What draws you in? Be sure that the image is clear and lighted properly. No one is going to buy an item that is not photographed well.

Etsy allows you up to 5 photographs on a listing. Use them! You could show alternate colorways, different sides or detail shots. If you are selling finished art, show it displayed as it would look in their home.

You also need to write a good description. Two things can help here. Read descriptions of other items for ideas of what to include and then get someone to proof read it for you. Preferably you can get someone who is the profile of your buyer to look at the description and photographs.  If they have questions or anything is confusing then you know that you have something to fix.

Etsy also has regular Shop Critiques and I find them very helpful even if my own shop isn’t selected for a critique.

This is just a starting point. Once you have your shop set up plan to devote a day each week to promotion and maintenance. This will give you time to research the myriad of sites on the web that offer Etsy selling advice and to research advertising and promotion opportunities.  It’s a business and it requires a lot of work but it will pay off in the end.

Thanks Vicki! That’s some great information. If you have any questions, for Vicki about Etsy, please leave them in the comments and we’ll get you the answers or answer them in a future post.

A Real Life Example of Product Presentation

A Real Life Example of Product Presentation

Amanda from FeltFinland has graciously offered to do a guest post for Marketplace Mondays. Take a look at her website to see some of her delightful creations that will really put a smile on your face. So here’s Amanda.

You have worked hard to make some great felted works of art. You have an opportunity to sell them. What you need are those extra little touches that will catch the eye of the buyer and also encourage them to return and buy again another day. Product presentation is a key part of selling. No matter how stunning your creations, if they are haphazardly piled on a table, not many people will give them a second glance. I have developed and learned a few ideas over the last 3 years of selling at craft fairs which I am happy to share with you.

Make use of all the space on your table without overcrowding.

Don’t forget you can add height – a small set of shelves, an upturned box, branches, logs are a few things I have used. I have always liked wood and wool together. 

Choose an appropriate coloured cover (sheets and old curtains are cheap options) for your table, one that won’t detract from your work. Make sure it is big enough to fall down and cover the front open side of the table. This allows you to store your boxes and bags under the table without the world seeing them! One of the photos shows how not to do it – pink cover which is too short – all the tables were set up the same by the folks organising the fair!

I also like to use baskets and basket weave trays of various shapes and sizes to display my products – this also helps to keep things together and prevents products getting all muddled.

Pricing – personally I like to individually price my items, using free-standing labels on the table top next to the items or small price tags stuck on pins then stuck in the relevant item. I do not like to put sticky labels directly onto the felt.

If you do not want to show your prices, have the costs of each item readily available (in your head!) for when a customer asks. Print prices on stout card from your computer using a clear bold font – these can easily be reused too.

Add your own personal touch – I give names to a lot of my creatures such as Aliens, Owls etc. I print them onto good quality card from my computer and these go home with their owner. Don’t forget to add to the label your company name, website etc. 

Pop one of your business cards into the bag the sold item is going home in. 

Cellophane bags work really well with small felted items and can be sealed with customised stickers. Bags are available in different sizes and cellophane wrap can also be used. Paper bags have their place but will hide your creation! Plastic bags have their use if it is pouring with rain to keep your sales dry on their way home!

I hope these few pointers will help. I found it useful attending craft fairs as a buyer and seeing how other people presented and packaged things. It gave me some great ideas but also showed me what not to do!

Guest poster: Amanda Heikkinen