Hunter’s Star
I’m not a huge fan of piecing traditional quilt blocks together. I do, however, have a great appreciation of their beauty and craftsmanship. It’s really hard to sew all those ¼” seams together and make everything match up correctly! So much easier to make Art quilts where all that precision may not be necessary. And who doesn’t love having a handmade quilt on one’s bed??
I’ve been attending a quilt retreat (which gathers three times a year) near my home for over 10 years. One of the attendees used to work in a quilt store and made LOTS of quilts. I got to admire them from across the room as she built them and put them up on her design wall. One pattern I fell in love with was the Hunter’s Star. There are so many variations to this pattern. I vowed to myself that if I ever made myself a bed quilt, I wanted it to be using this pattern.
Fast forward a couple of years…a quilt shop near me was going out of business and had great sales on all their fabric. I knew if I was going to make a Hunter’s Star quilt, I wanted it to be blues on a white background. So, I bought a bunch of bolt ends in blues at a great price. Then they sat for a couple of more years. I finally decided to start working on it about 3 or 4 years ago. I mostly worked on it at the retreats, so it has been fairly slow going.
At my last retreat in August, I finally got all the blocks sewn together. Yay! I have to fess up and say that all the points aren’t perfect, but I was pretty pleased with how flat everything laid.
I was also happy to have it sewn together at the retreat so I could get input from the others about the borders. What fabric to use and how wide should I make the borders and do I need two borders. Always good to have other eyes look at it.
I decided to go with two borders, the inner border being a solid dark blue that is different from the fabrics in the blocks and making it 1” in width. The outer border will be 5” wide and I will use the solid light blue that is used in the block. I’m hoping I’ll have enough of that solid light blue to use for the quilt binding. Heaven forbid I have to buy MORE fabric!
Here is a photo of the quilt after sewing the first border on.

Sorry about the background and wonkiness of this photo. I was standing on a rickety ladder trying to get the whole thing in the frame. At this point this quilt measures 82 ½” x 82 ½” so it’s quite large.
I ran into a dilemma after I took this photo. I decided to audition my outer border choices again before I started cutting fabric. I tried the medium blue speckled fabric that is in the block and was kind of intrigued with how it looked.
Here is the medium solid blue.

And here is the medium speckled blue.

I then got the bright idea to lay the quilt out on my bed and see how those two fabrics looked with the bed skirt I have. Good thing I did that! If I was going to hang this quilt on a wall, I’d probably go with the lighter blue as I feel that one pops the colors a bit more, but on my bed things looked different when placed next to my dark blue bed skirt!
Here it is with the solid blue border. The bed skirt is navy blue.

And here it is with the speckled blue border.

I think I might go with the speckled blue after seeing it on the bed. And now I’m not sure I like the 1” dark blue inner border. It’s all looking like I have three borders on the quilt. Maybe the inner one needs to be a tad bit thinner. But I’m not sure this mid blue is THE ONE either.
Guess this project will remain another one of my UFO’s until I can get back to it. And here I thought I could get this done in one sitting. Joke’s on me!
I’ve always been told to make design decisions visually and I think that rule helped me out a lot on this one. I’m glad I haven’t cut the lighter blue into border lengths yet. I’ll need more thinking before I figure this one out.
My sister suggested that I may need another color bed skirt OR I could add another 2 rows of blocks to each side (ugh!) and don’t have borders, just the binding. The new bed skirt idea sounds more appealing than making 16 more blocks!
Which border do YOU like best and why??
Here is another bed quilt that I made from blue Japanese fabrics that I had collected over the years and finally got to use. No border on this one so it looks okay with the bed skirt. I should have thrown my matching pillowcase covers on so it looked more like a bed! I love this quilt.

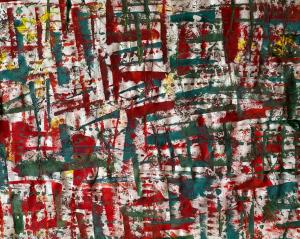
And another bed quilt I made and have not put on the bed yet. It seems like it should go on a wall more than a bed. It was a UFO that I started years before the Hunter’s Star quilt and finally finished. Not my favorite but it’s DONE! Not sure it would look very good with my navy blue bed skirt either since the background is black. Again, sorry for the crummy photo.

I’ve got one more bed size quilt that I want to make and it is about ½ way finished. I’ll get it done someday. It won’t look good with my current bed skirt either!

So, until I can get back to my Hunter’s Star quilt, I’ll put it back into the UFO pile along with these other projects I hope to get to one day.

How big is your UFO pile???
Happy creating!
Tesi Vaara