Browsed by
Author: ruthlane

When I discovered felting in 2007, I finally found the creative outlet for which I had been searching. I love that the versatility of fiber allows me to “play” with a wide variety of materials including wool, silk, fabrics, yarns and threads. Creating one of a kind fiber art pieces to share with the world fulfills my creative passion.
Yurt Beginnings

Yurt Beginnings

We finally purchased the wood to begin making the yurt frame. I can’t begin felting until the side walls are made so I know the correct size to felt the cover. The yurt frame is made up of 4 lattice sections (think baby gate here) and then the roof poles attach to the top of the lattice and insert into a round piece called the tono at the top of the yurt. We are following instructions from a book by Paul King. If you click on the link, you can see what a professionally built yurt looks like. Hopefully, ours will be close.
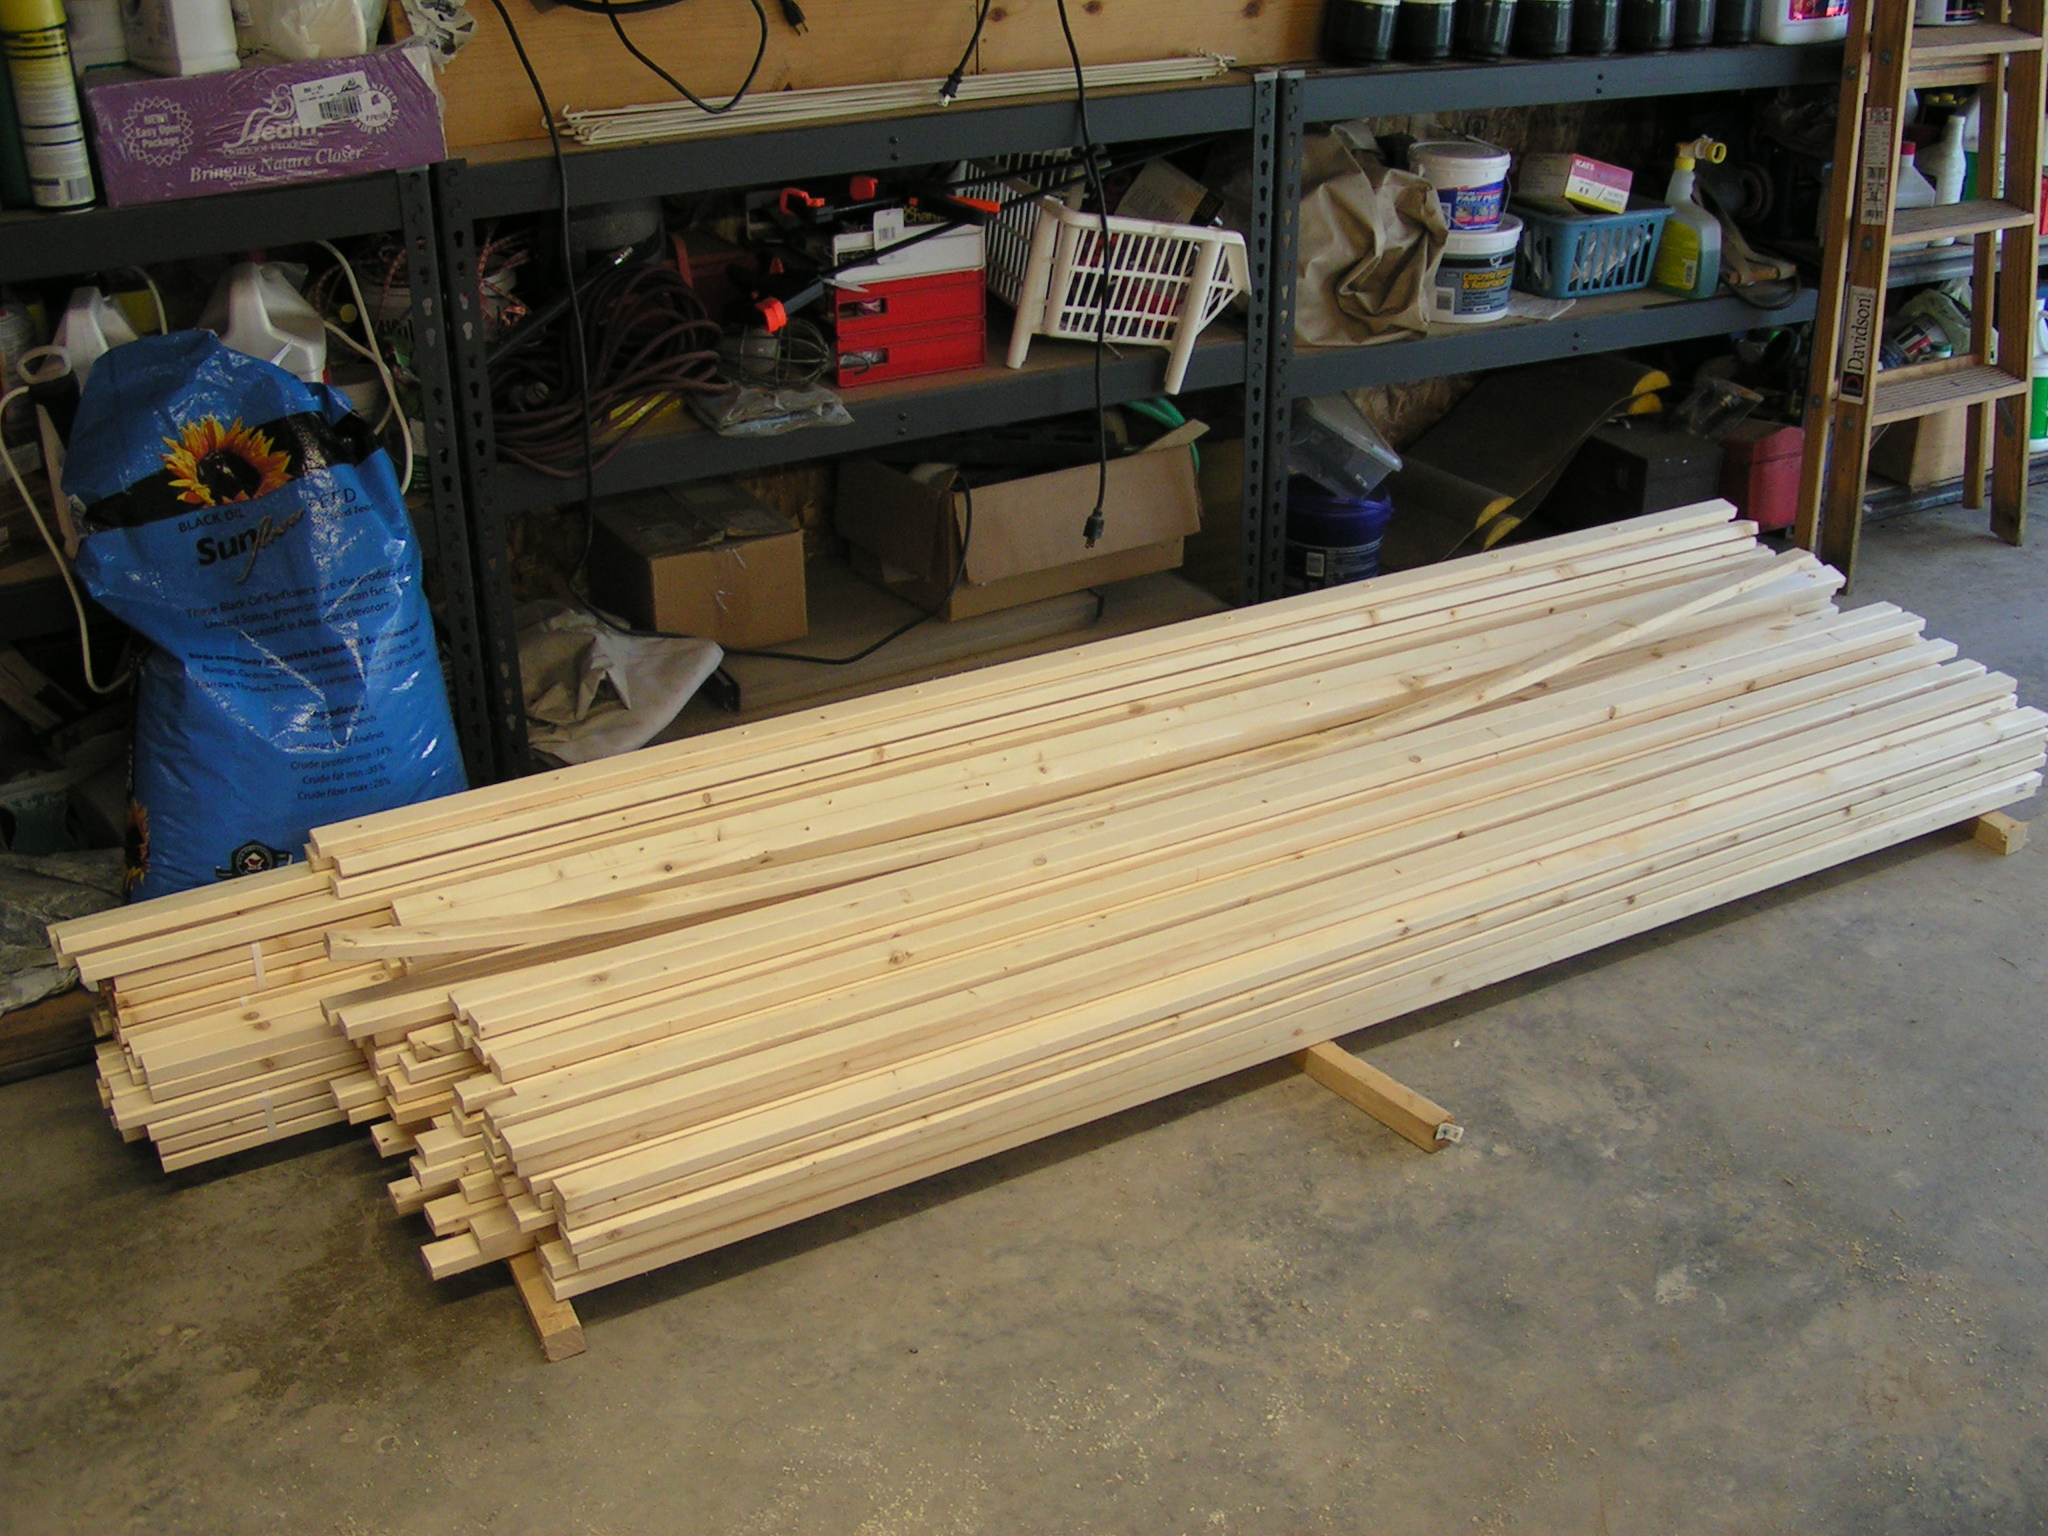
Yurt woodOur plan is for a 16′ diameter yurt made in the Mongolian style. We bought 162 1″x 2″ x 8′ pieces of wood. 110 of these are for the side walls and 52 for the roof poles. The side wall pieces needed to be 7′ long so I cut off a foot with the table saw. Do you see that pesky warped piece. It didn’t look like that when we bought it but without any pressure from other boards, it warped like that in about 30 minutes. That will be a short piece for sure.
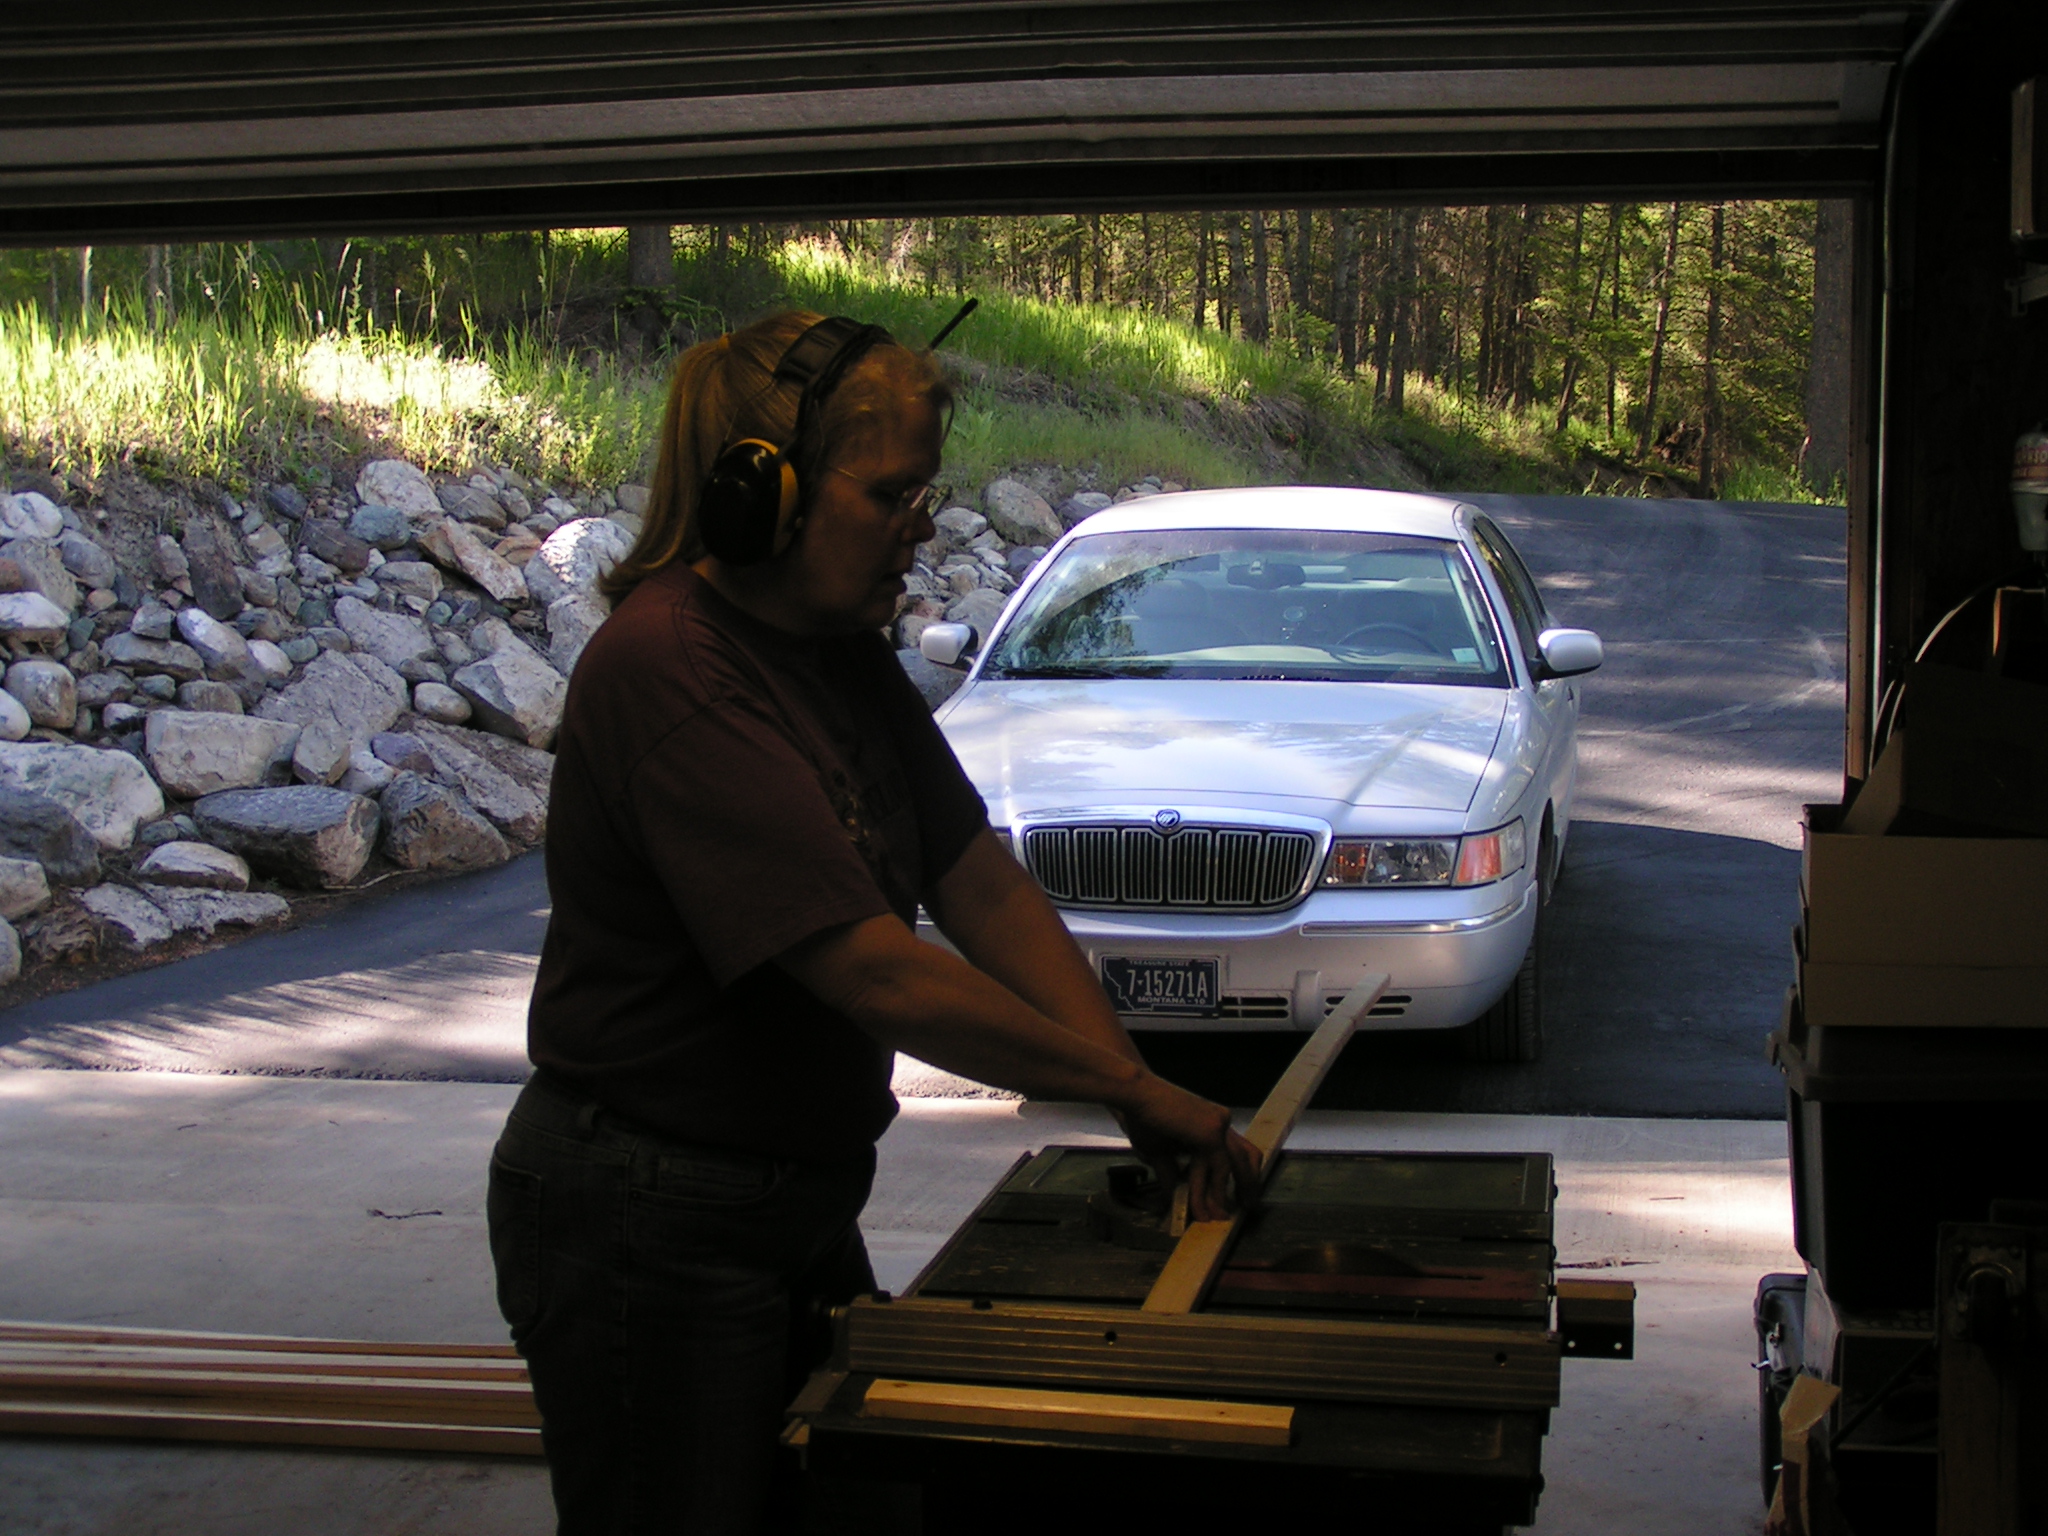
Ruth on the Table SawThis isn’t the best photo but here I am sawing away. I did take shop class in high school but it’s been a while since I’ve used power tools. The ripping fence kept moving and I sawed several pieces too short. Luckily, we need 44 pieces that will be shorter than 7′ long for the ends of the lattice. Dennis finally figured out how to attach the fence properly and I got all the pieces down to the required seven-foot length.

wood scraps

Here’s the pile of ends after sawing. I’m not sure what we’ll do with these scraps but I’m sure we’ll think of something.
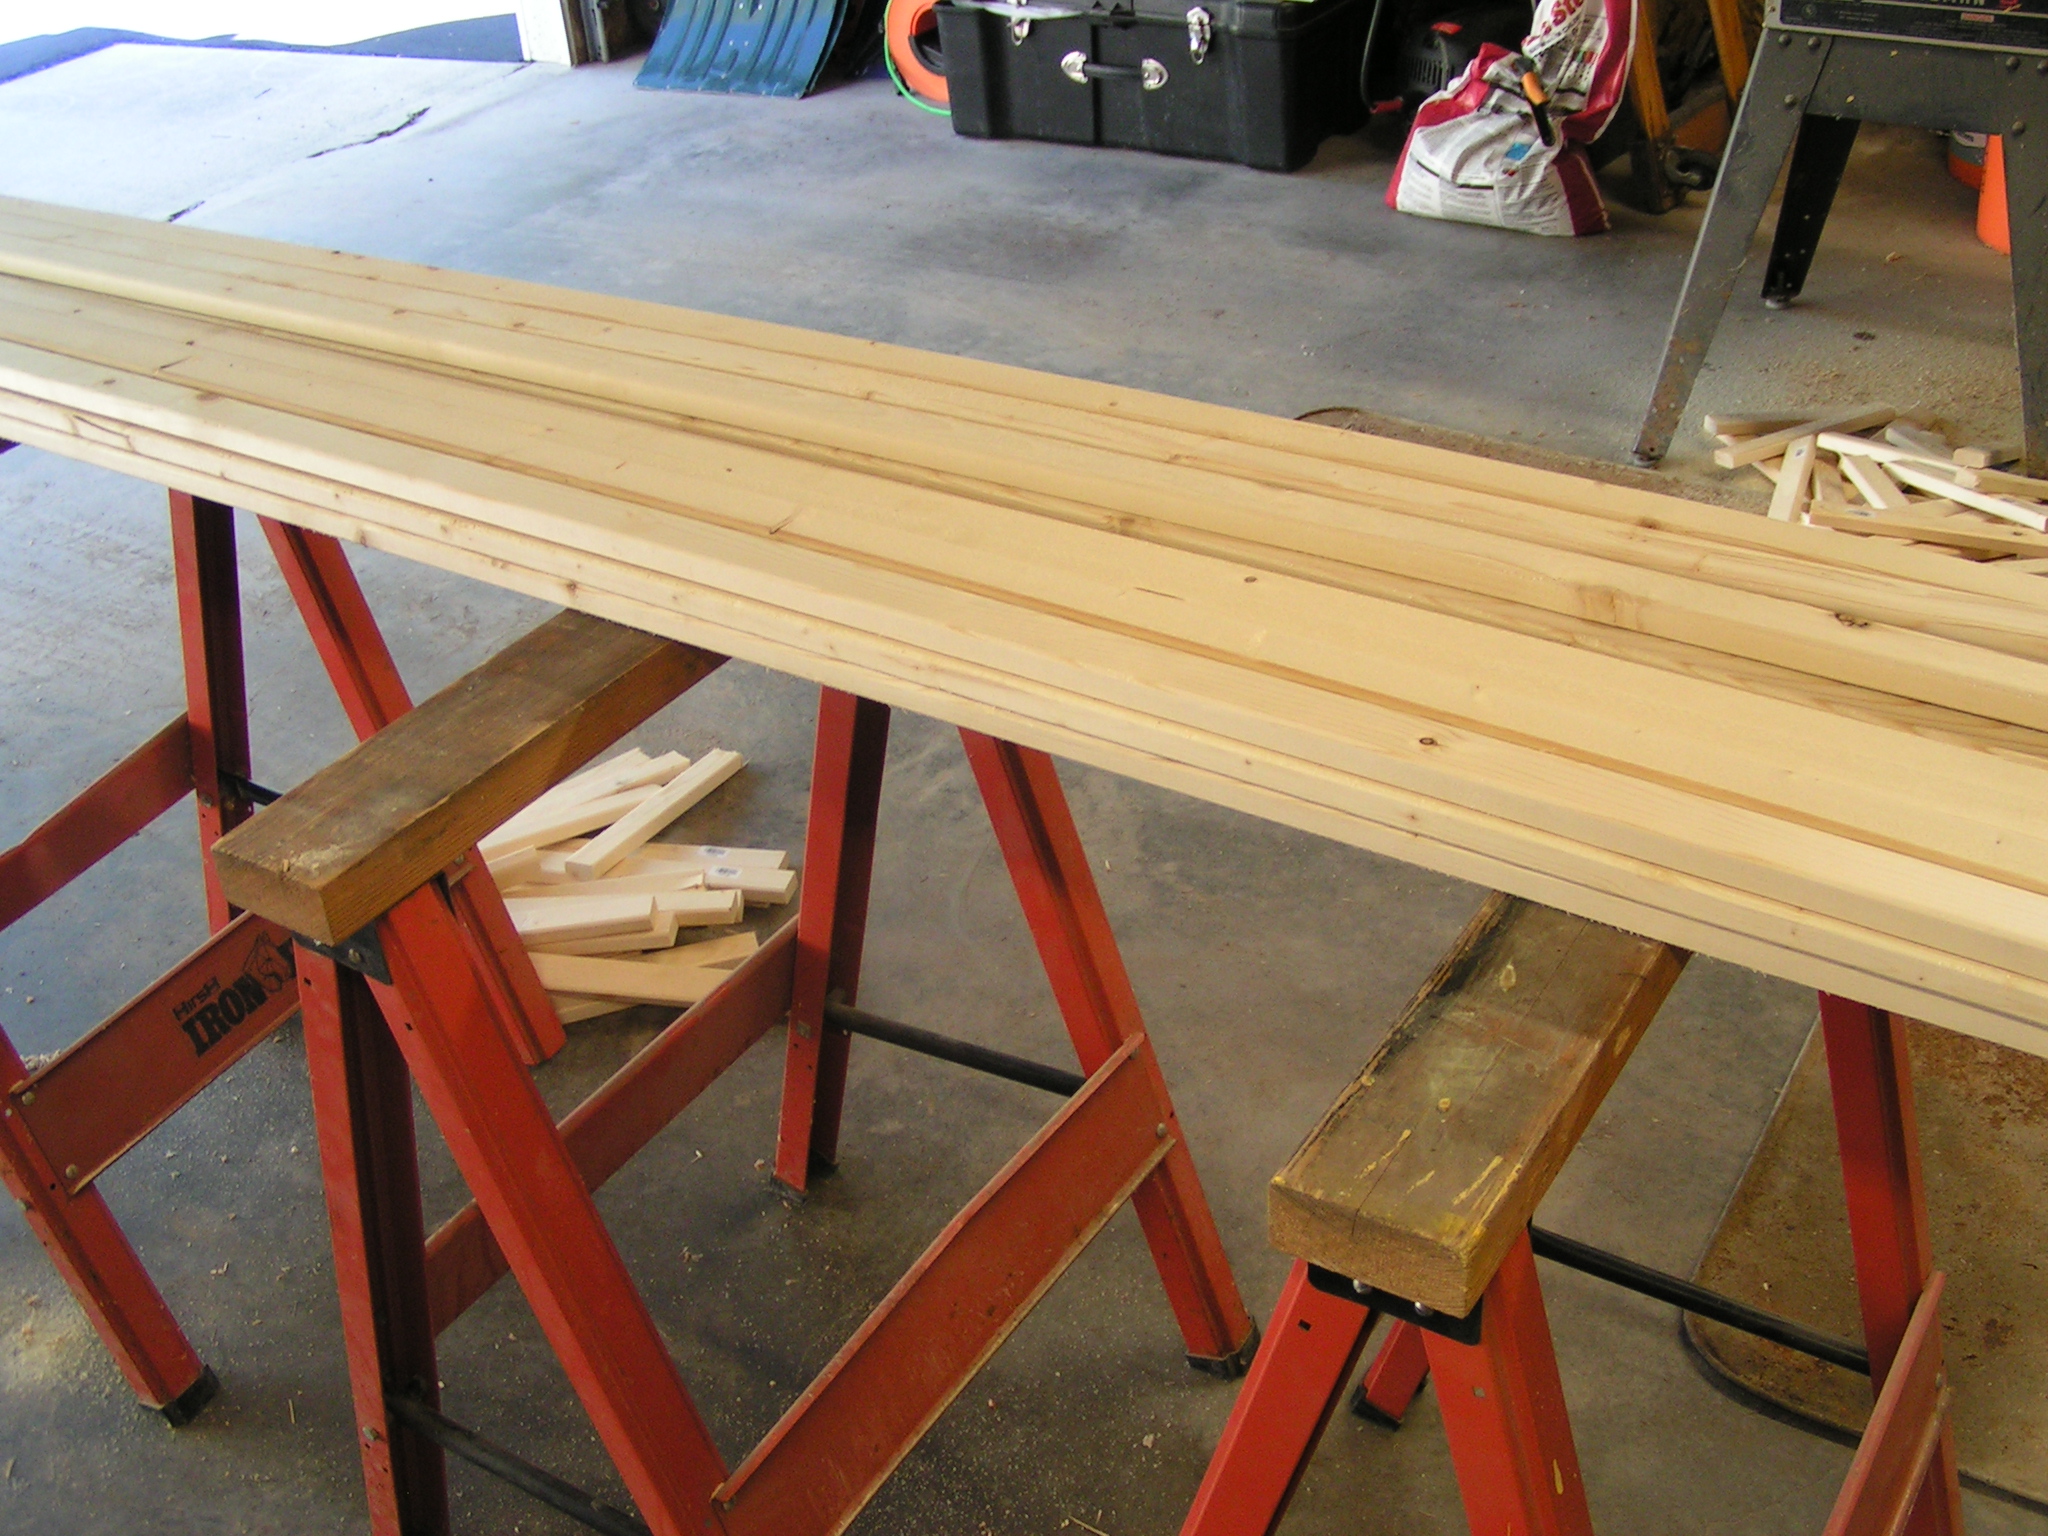
Short piecesWe had to separate out all those short pieces and then figure out what sizes they need to be to fit on the ends of the lattice where you don’t need a full piece. There’s something about counting the holes; we need two 8 up lengths and two 8 down, four 6 up and four 6 down etc. I have read that part of the book three times and I’m still not sure what he means exactly. I think we’ll have to lay out one lattice section and see exactly where we’re supposed to cut as we really don’t want to have to go back and buy more wood.
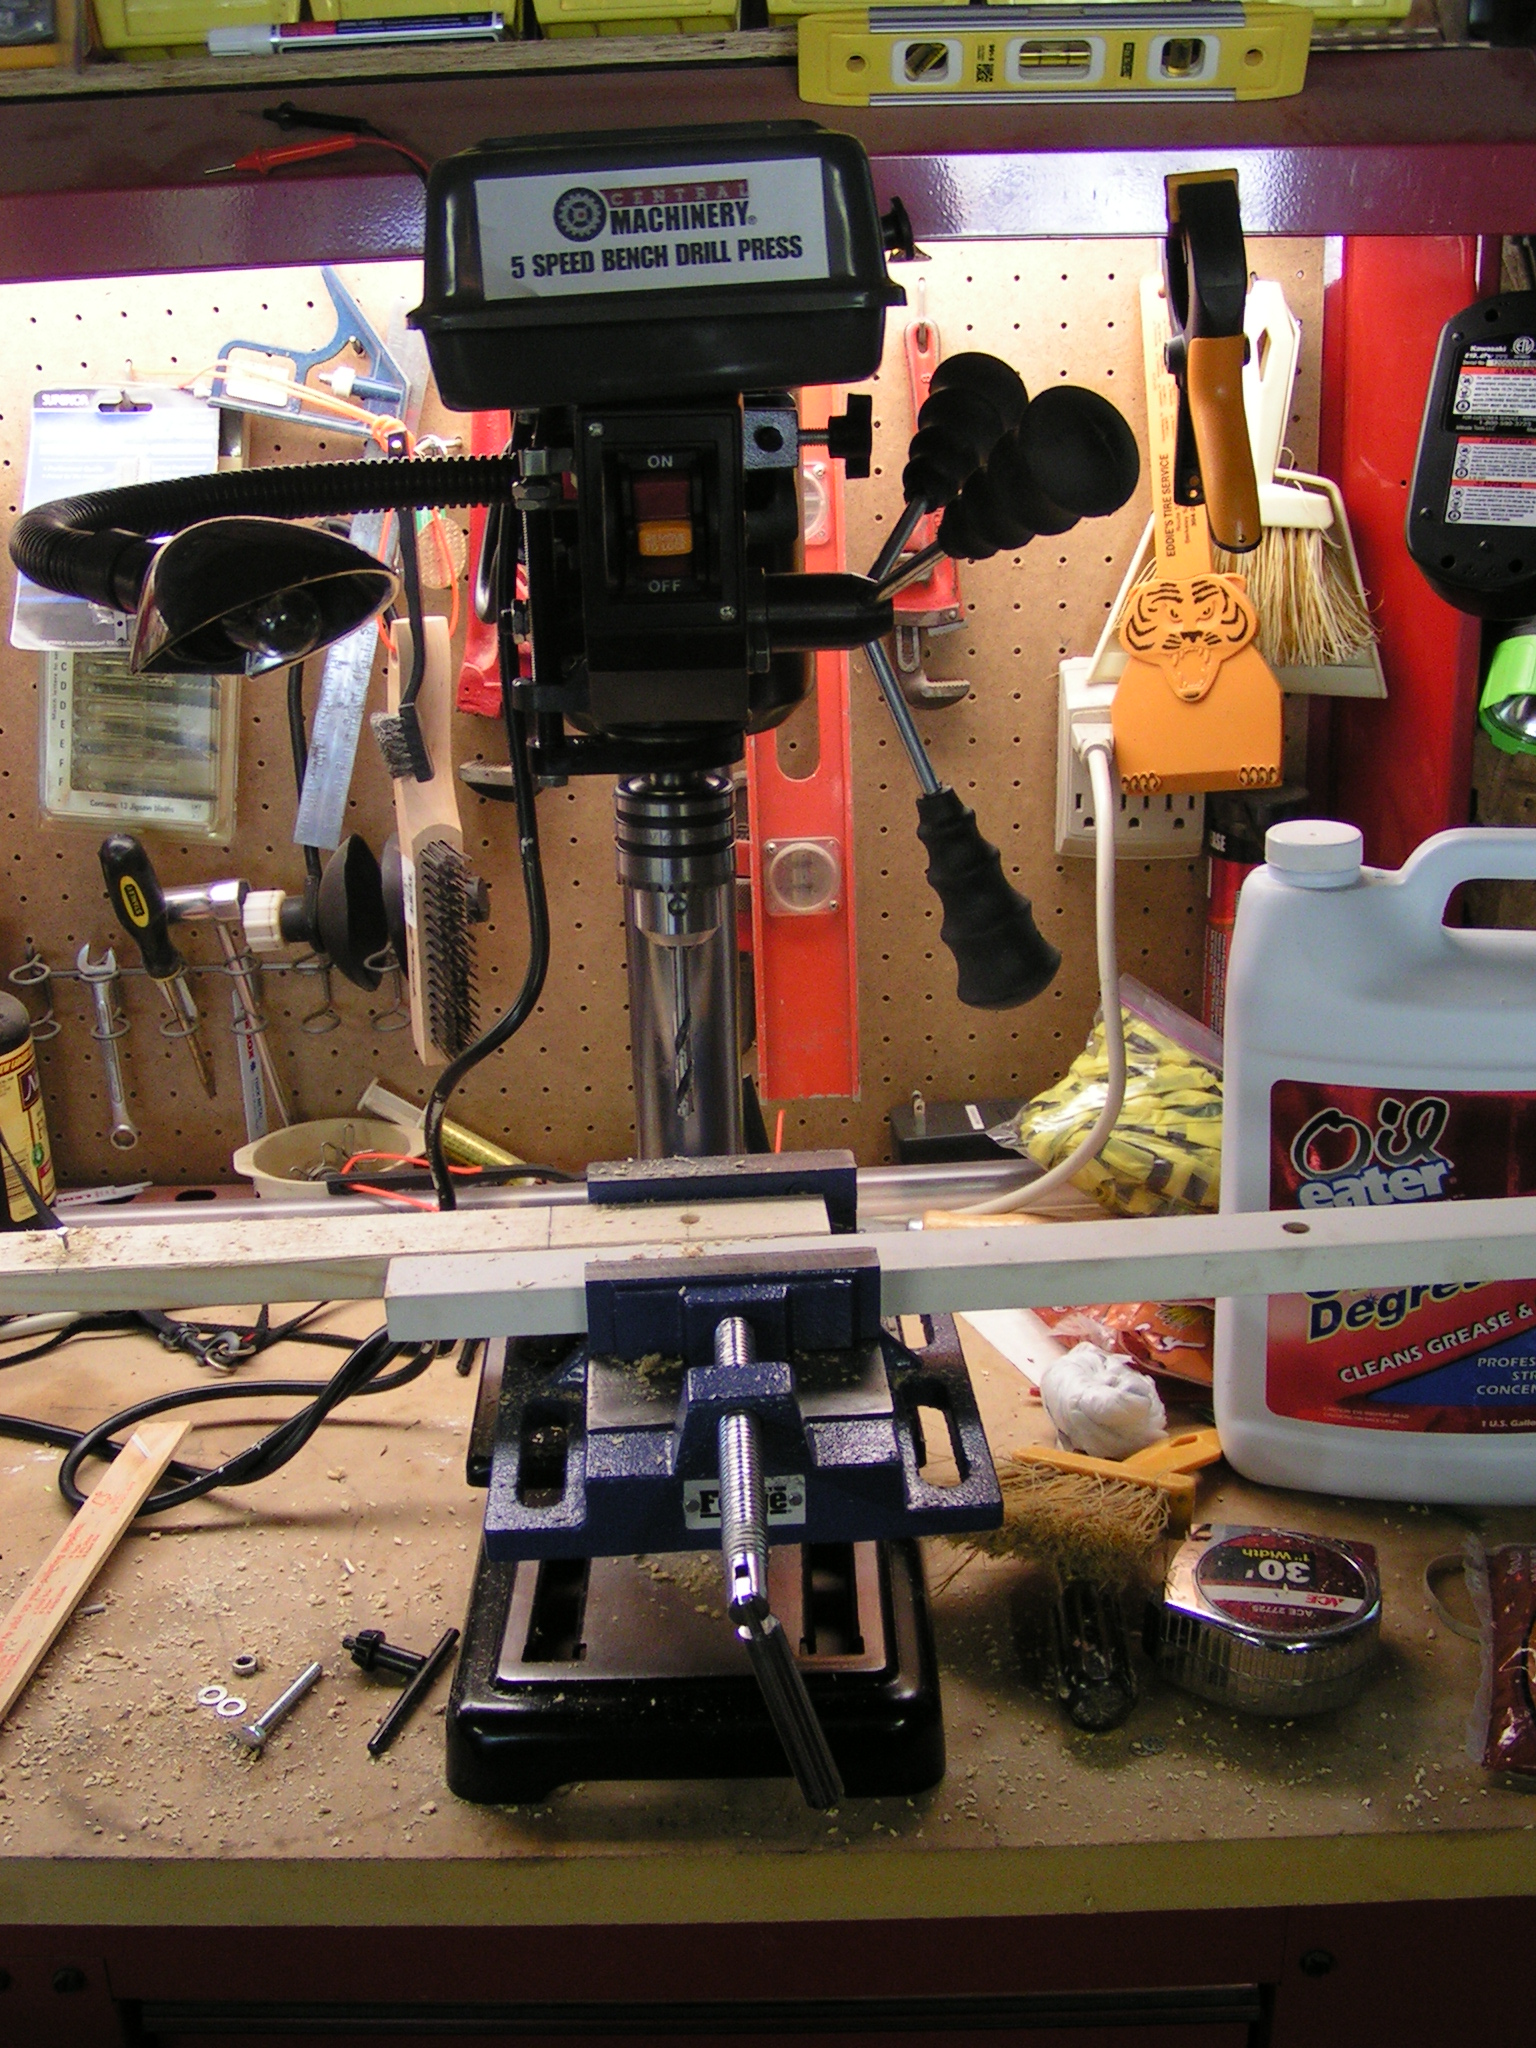
Drill PressNext up was the drilling process. The lattice has to be connected together at all the crossing points on those 7′ long boards. So each board needs to have 10 holes drilled into it. 10 holes in 110 boards or 1,100 holes drilled. Exactly 9″ apart and then holes need to be vertical or the lattice won’t operate properly. Thus the need for a drill press. In the instructions, Mr. King kindly explains how to make a little jig or pattern to follow. The first hole is drilled at 2″ and then each hole after that is 9″ apart.

Drill JigHere’s the jig we devised from his instructions. The mark to the left of the drill hole is 2″ so you line up your board and drill the first hole. Then further over to the left, you’ll see a nail. Once your first hole is drilled, you lift up the board, put the hole you just drilled over the nail and then drill the next hole. The nail is exactly 9″ from where the drill bit goes in. And then you just keep moving your board down and putting the hole you just drilled over the nail until you reach the end of the board and have drilled 10 holes.
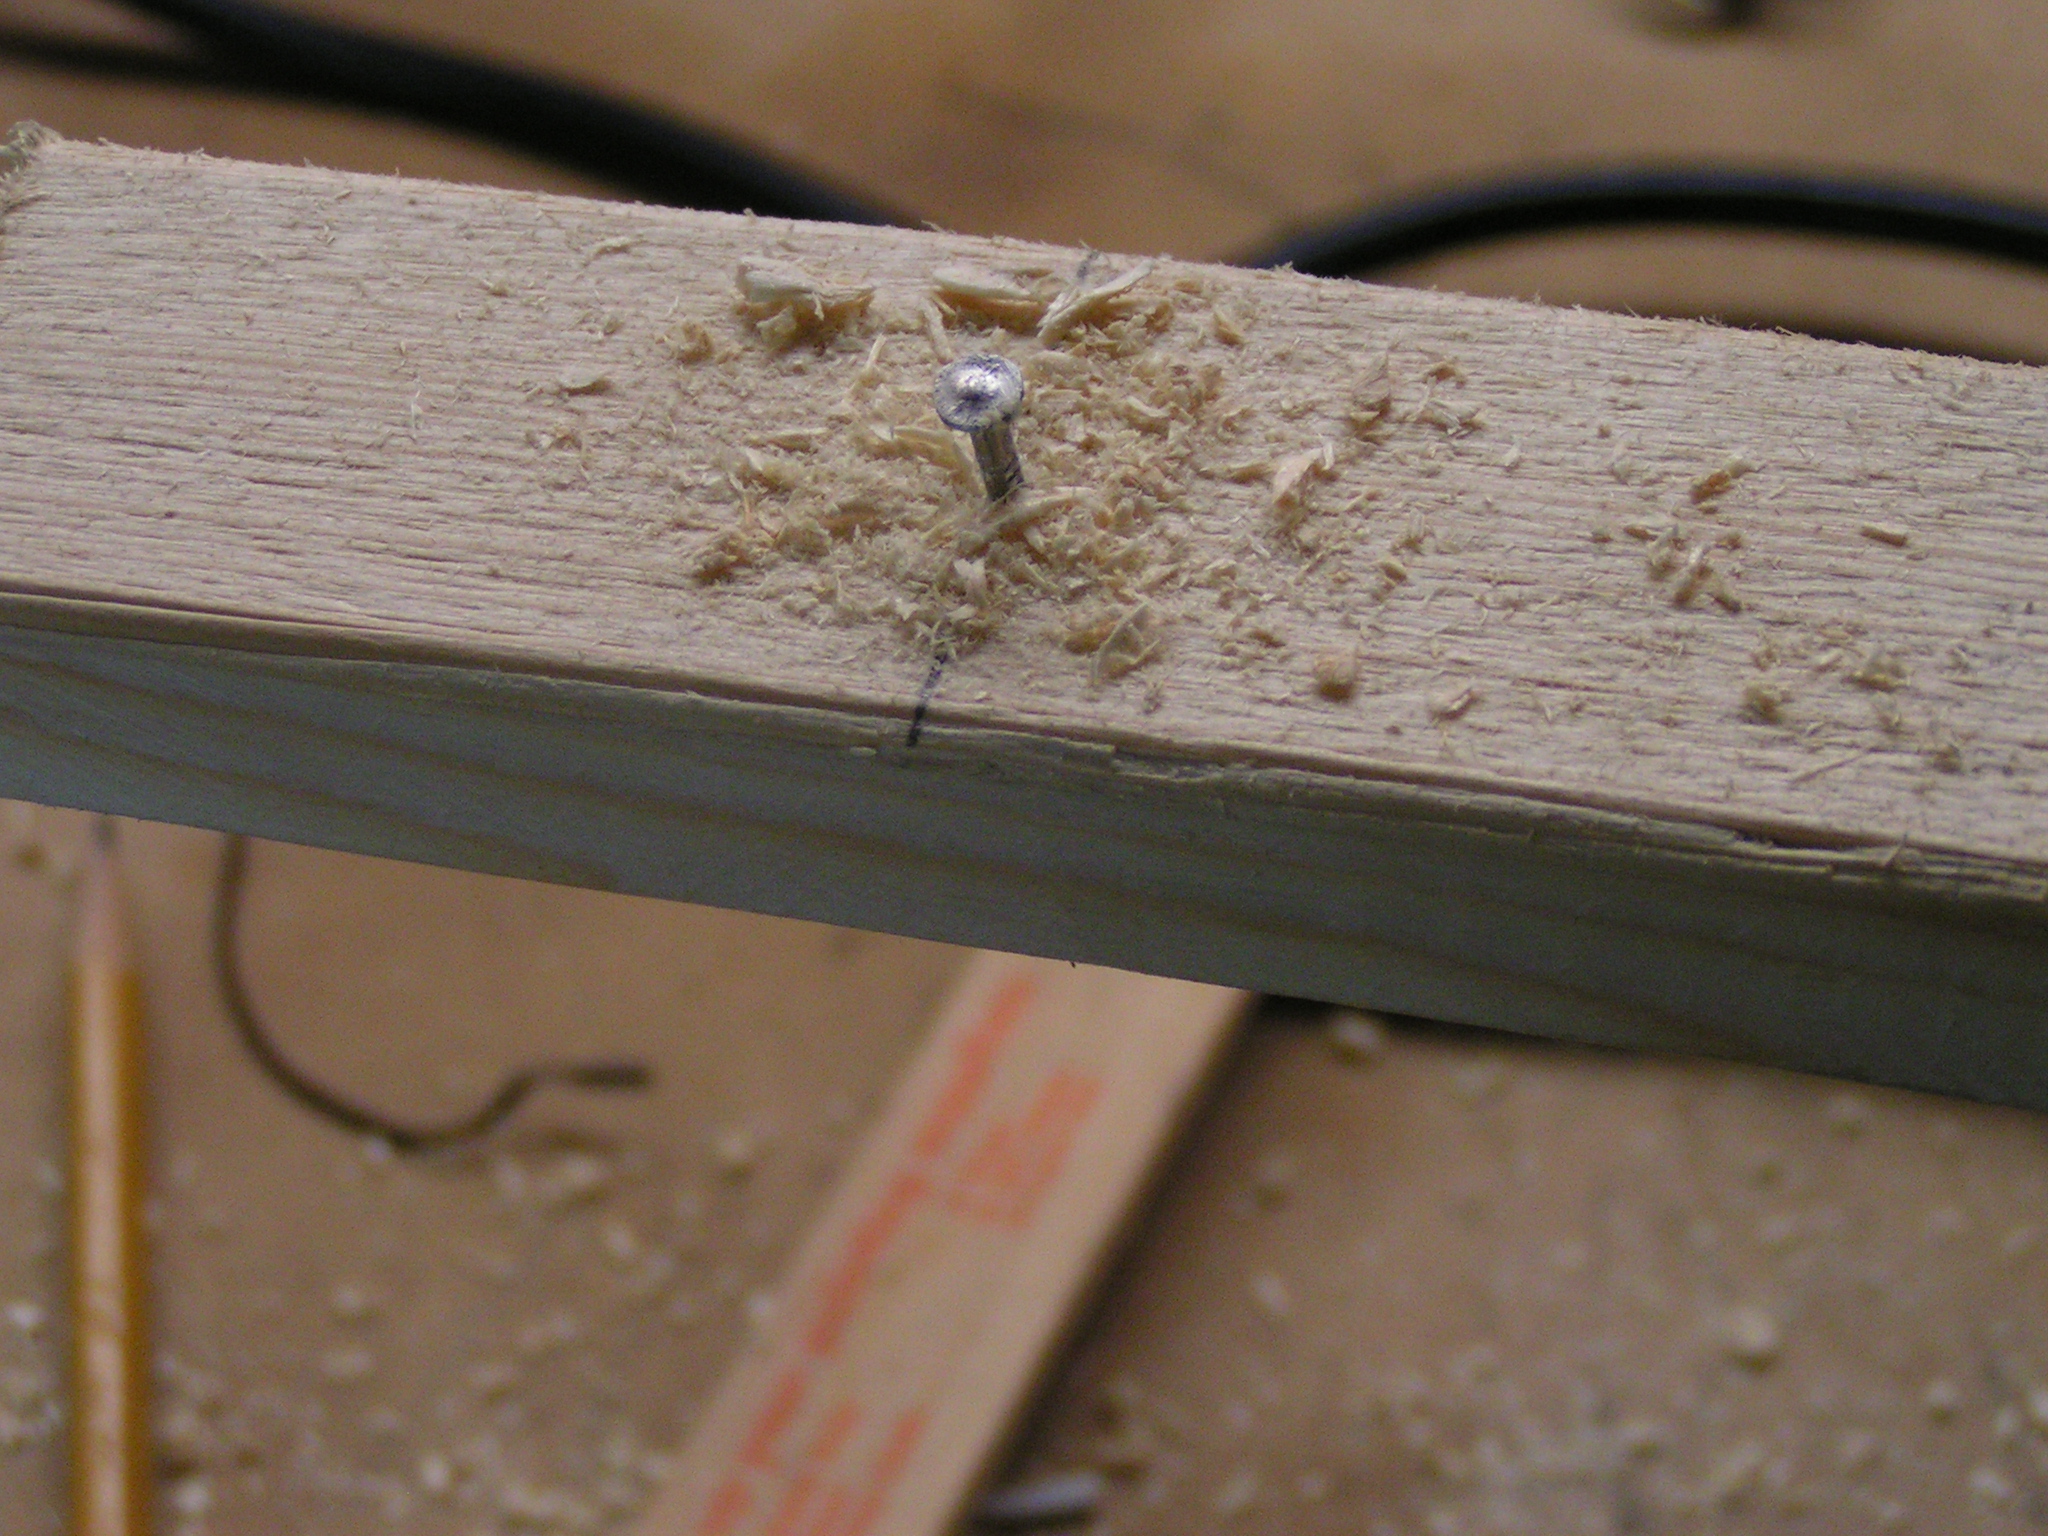
nailHere’s the nail; I did end up marking the side of the board where the nail is so I could move a little faster. After drilling a few of these though, you really get used to where 9″ is.

DrillingHere is a board being drilled. I drilled for about 4 hours on Sunday and Dennis drilled for another hour or so. We are about 1/3 of the way through our 110 boards. Then they’ll need to be sanded and we’ll have to figure out the cutting of the short pieces. Some have to be cut square and others at a 45 degree angle. The ones cut at the 45 degree angle go by the door frame. I did buy a 5 gallon container of orange paint to paint all the wood. That should brighten up the inside. So I’ll keep you posted on our progress. We’re going out of town next week but I hope to get all the boards drilled before we leave.

P.S. I still have all my fingers! 🙂

P.S.S. If you’d like to see an update on the umbrella tree, see my post on Permutations in Fiber.

Growing Roots and a Bit of Ground

Growing Roots and a Bit of Ground

I have been continuing to work on my exhibition piece and it is getting closer to being finished. I started with felting a bunch of rocks, then ground to cover the base and last I made roots. Now I just have to put them all together, sew on the nuno felt to the umbrella and finish up the details.

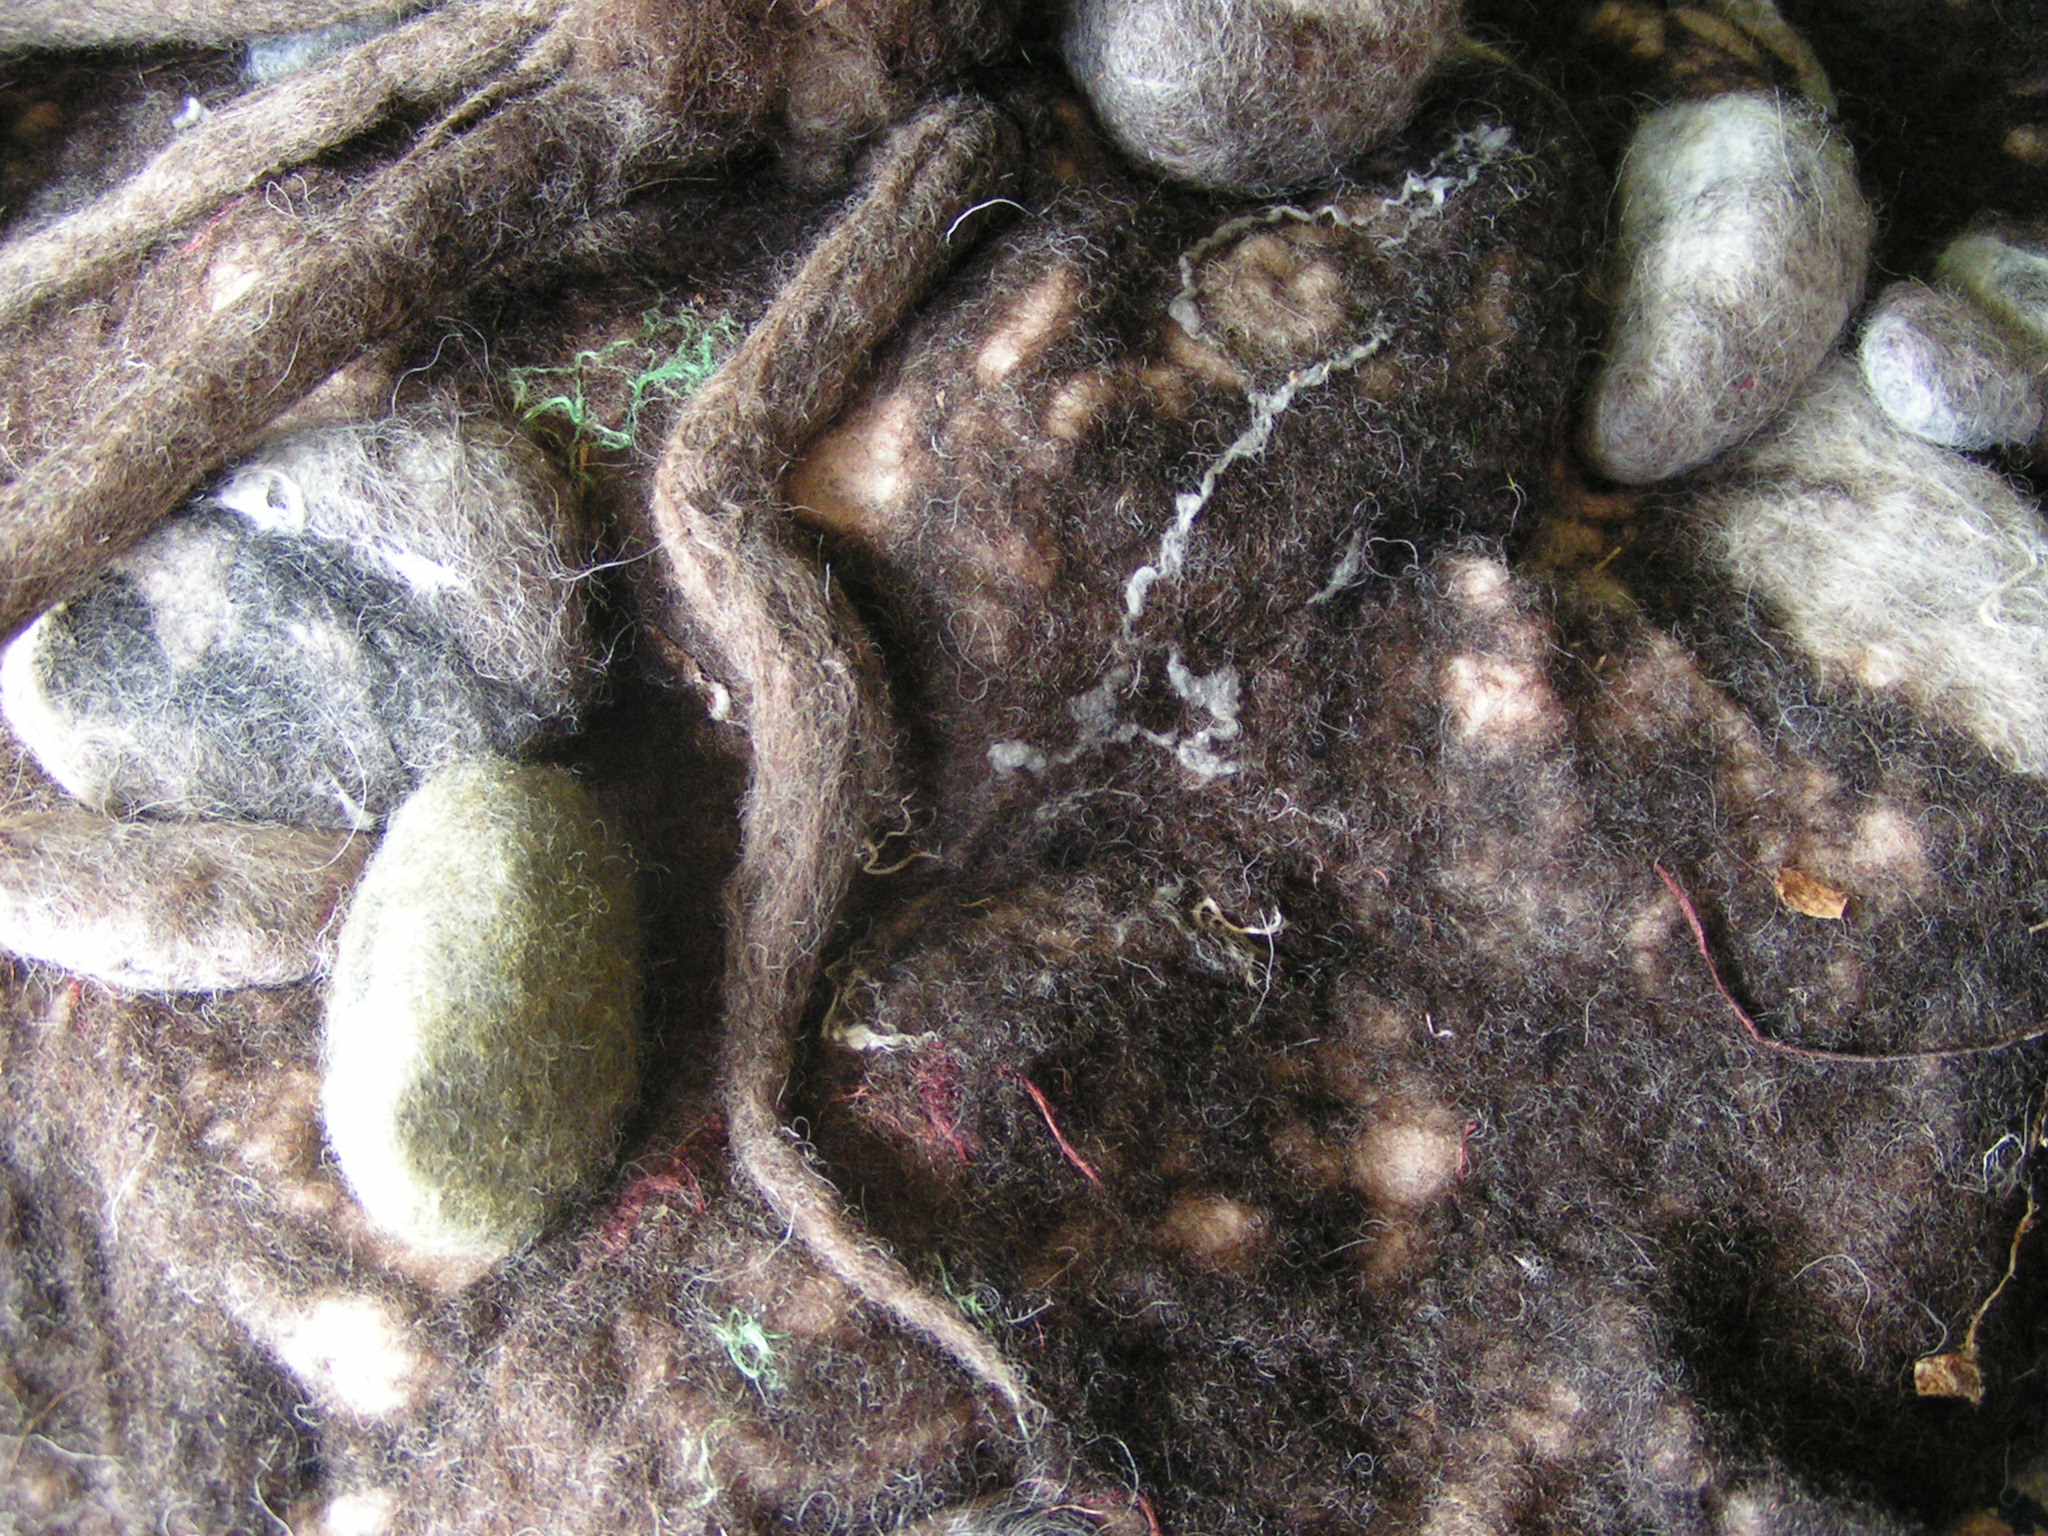
Felted RocksThe rocks went pretty quickly, I used a variety of grays, black, browns, tans and greenish/browns. Even a little bit of red. The rocks in Montana are a variety of colors.

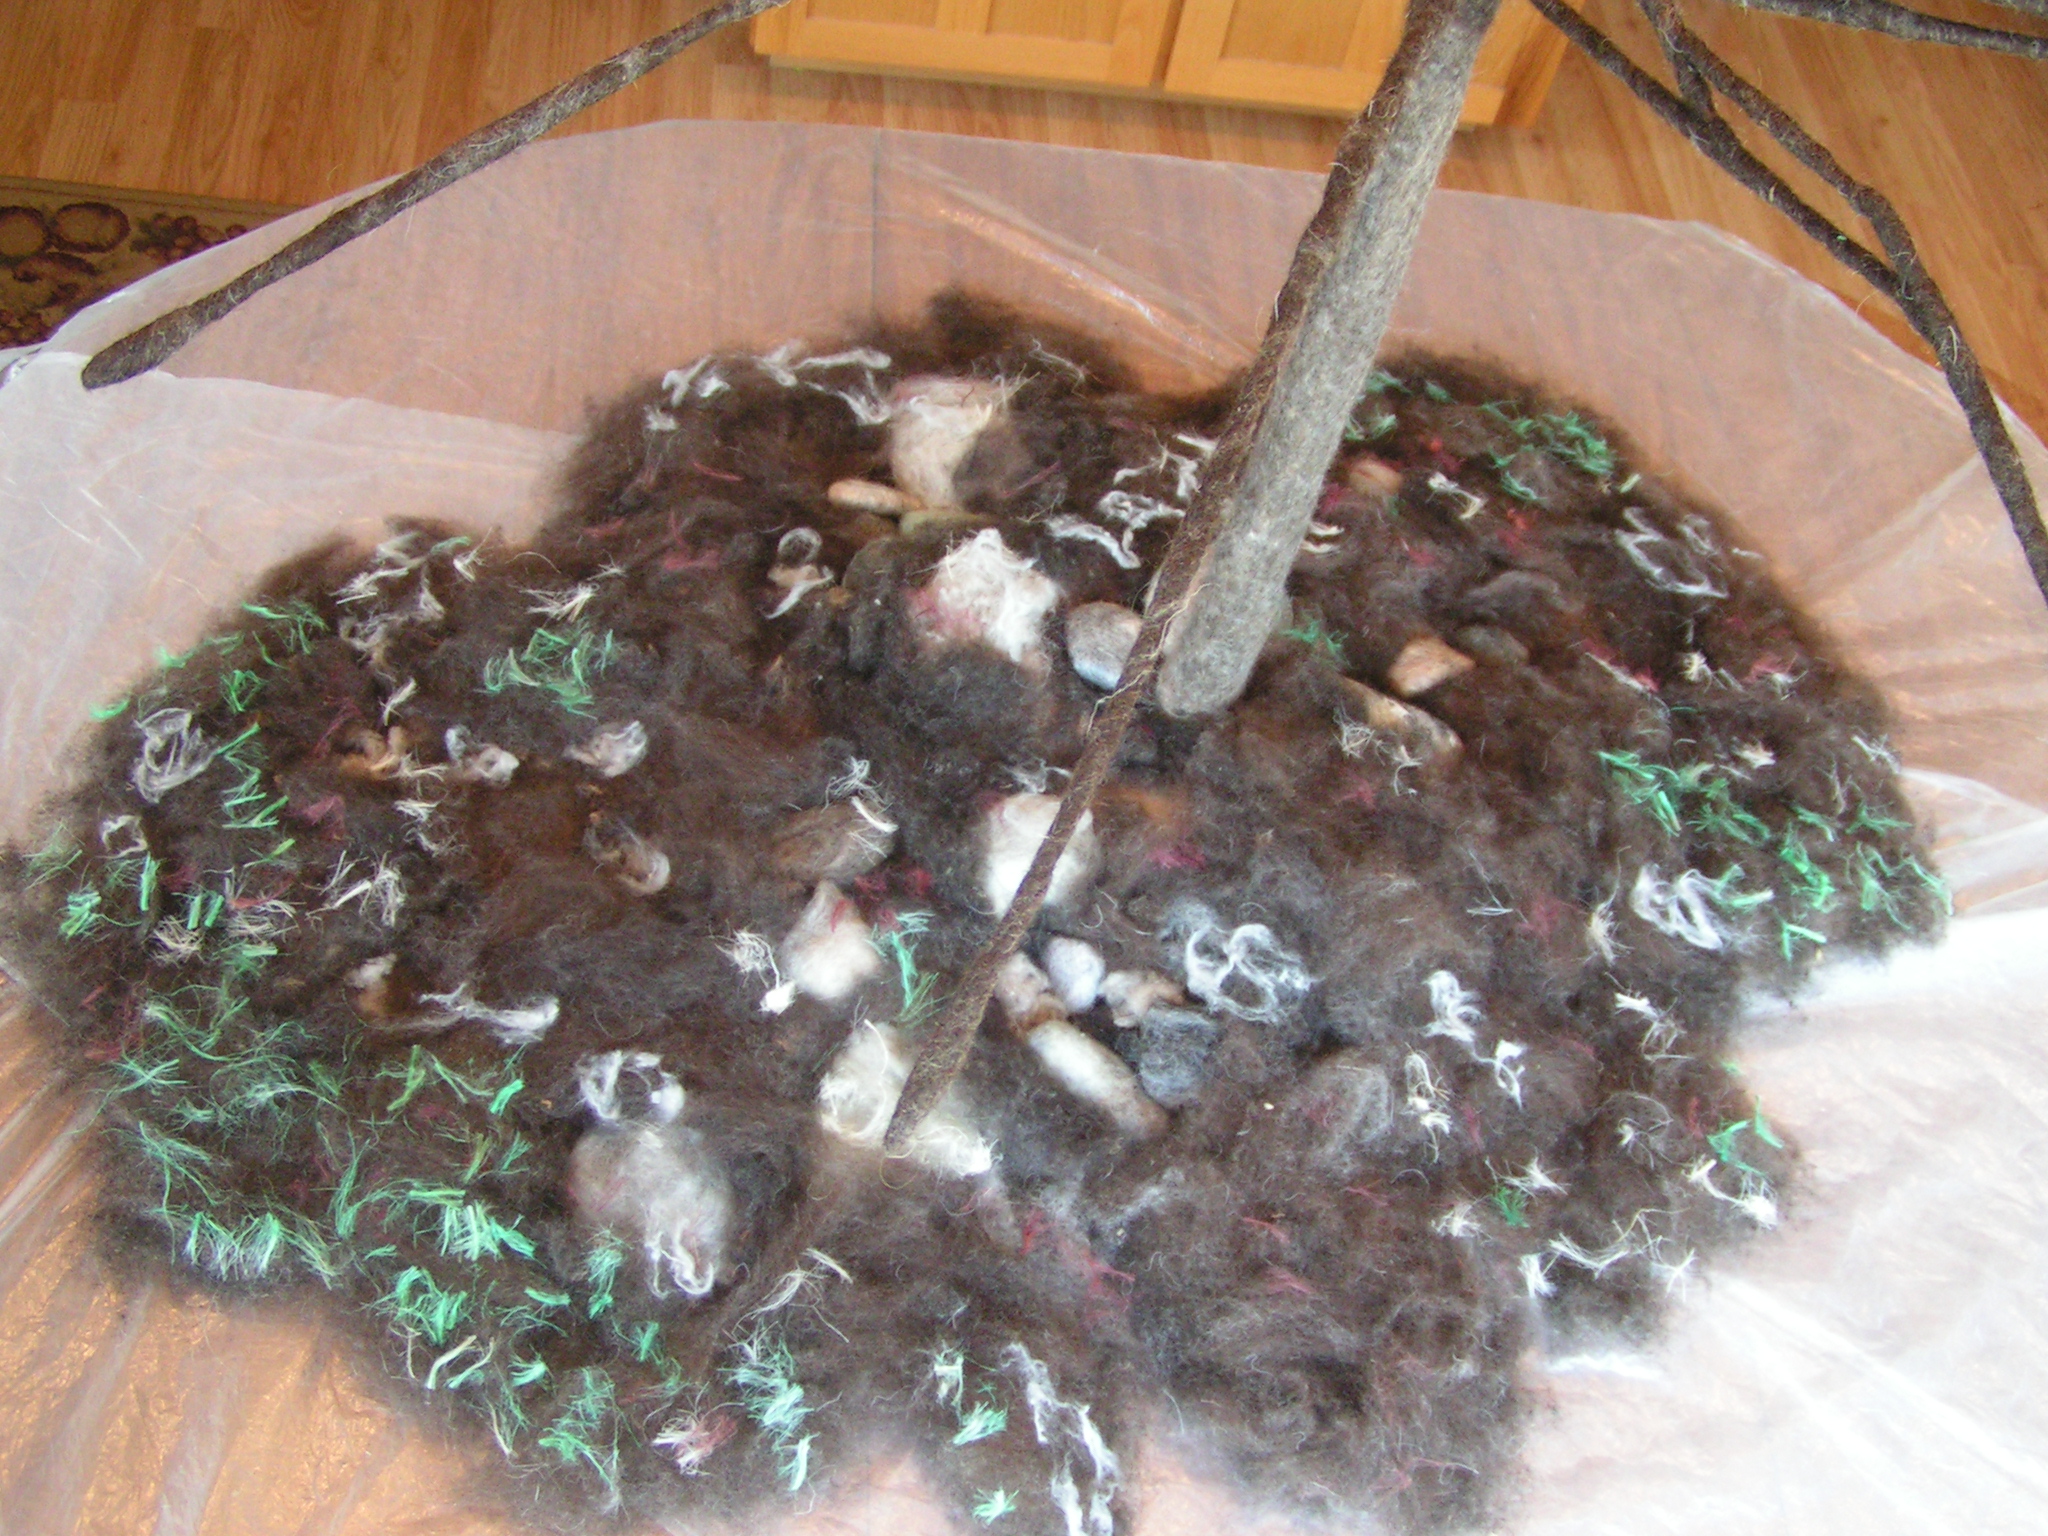
Lay out under treeNext up, I laid out the wool around the base. I wanted to felt it right around the trunk so it there would be no seam. I’m sure I could have done a piece of pre-felt but decided just to felt it right in place.

Wetting it down


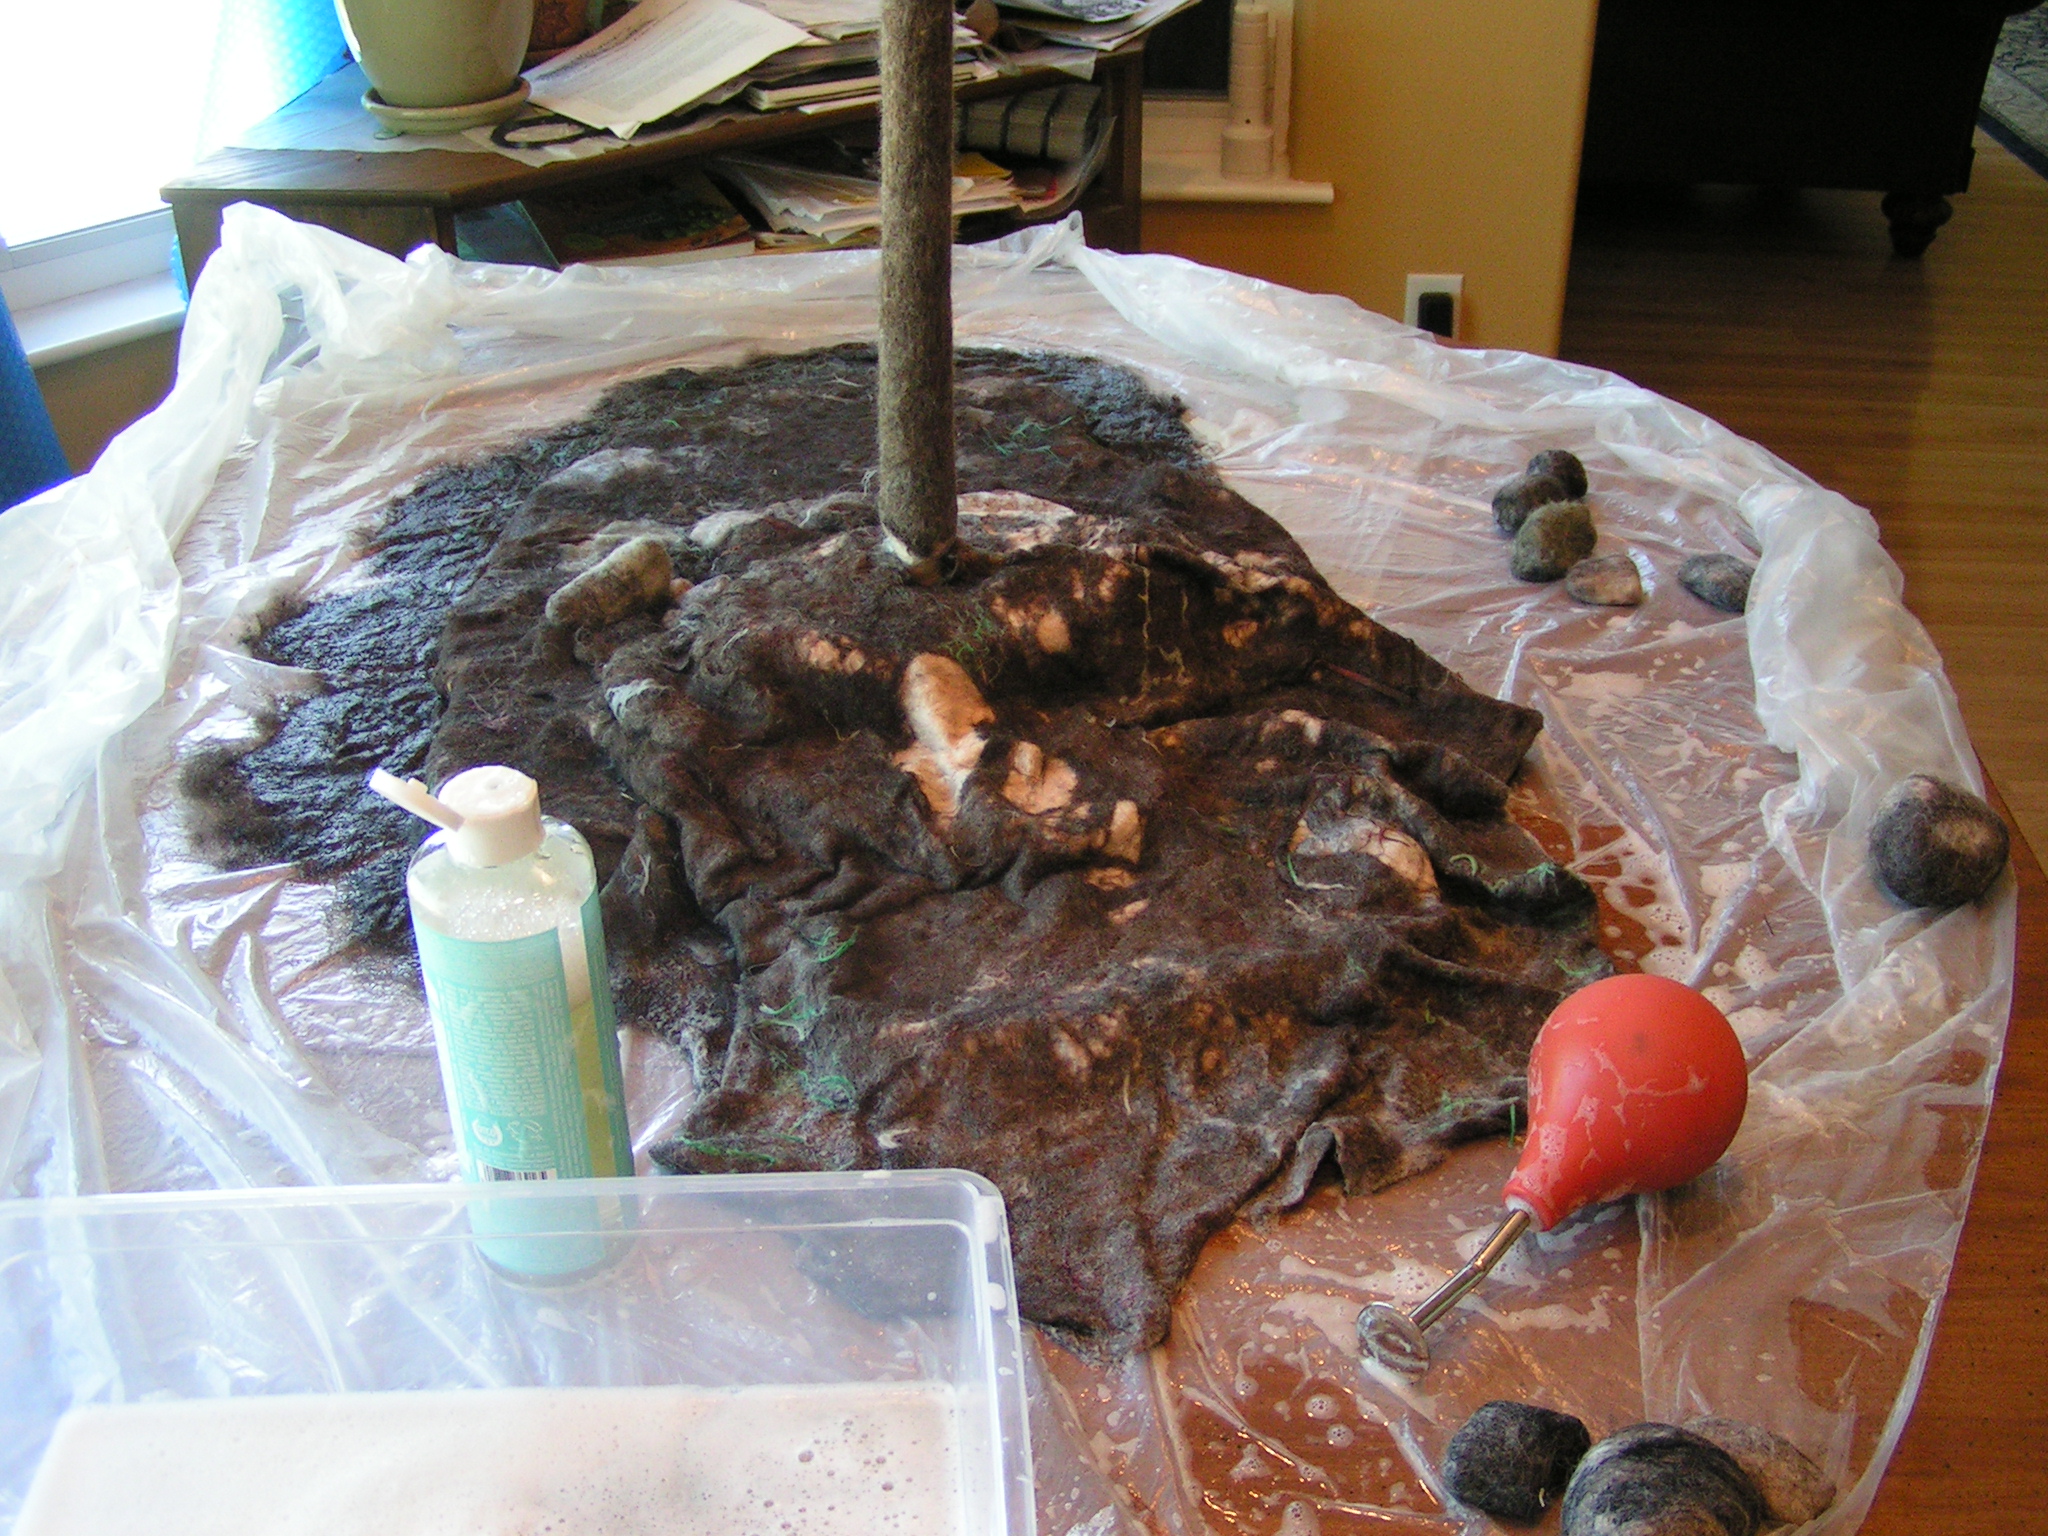
Here it is being wet down. I had the felted rocks on top of the wool but decided they would have to come off or everything wouldn’t felt properly.

All Felted


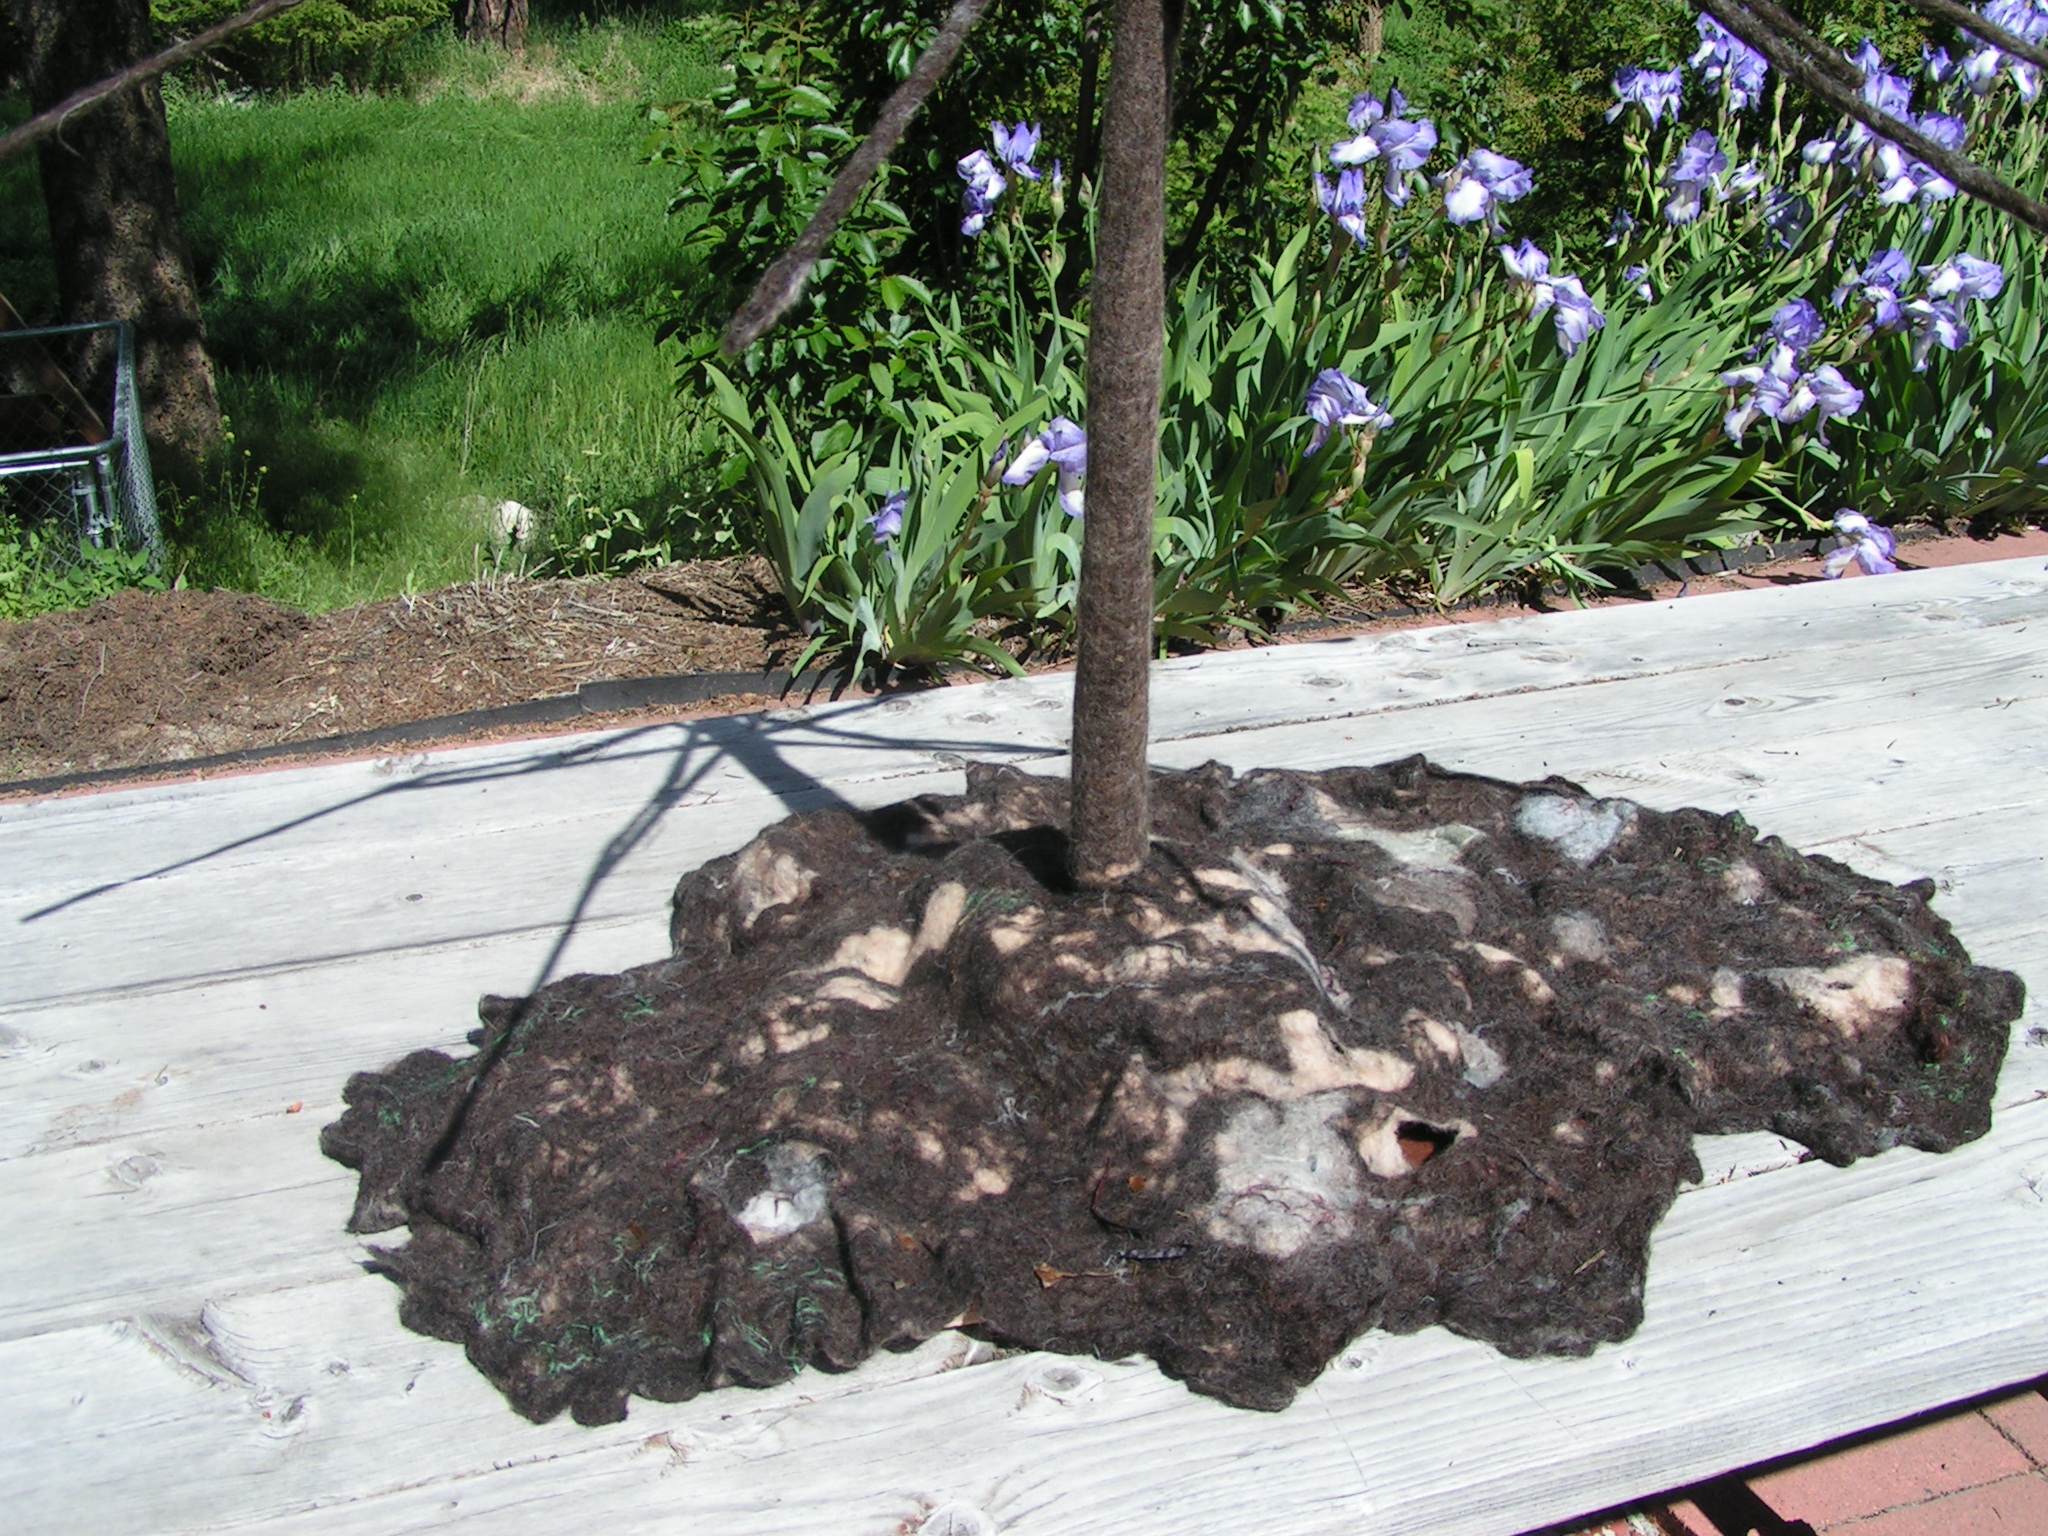
Here it is drying in the sun after it was completely felted. I did have a bit of shifting of the surface “earth colored” wool but that will most be covered up by rocks, roots and other finishing details.

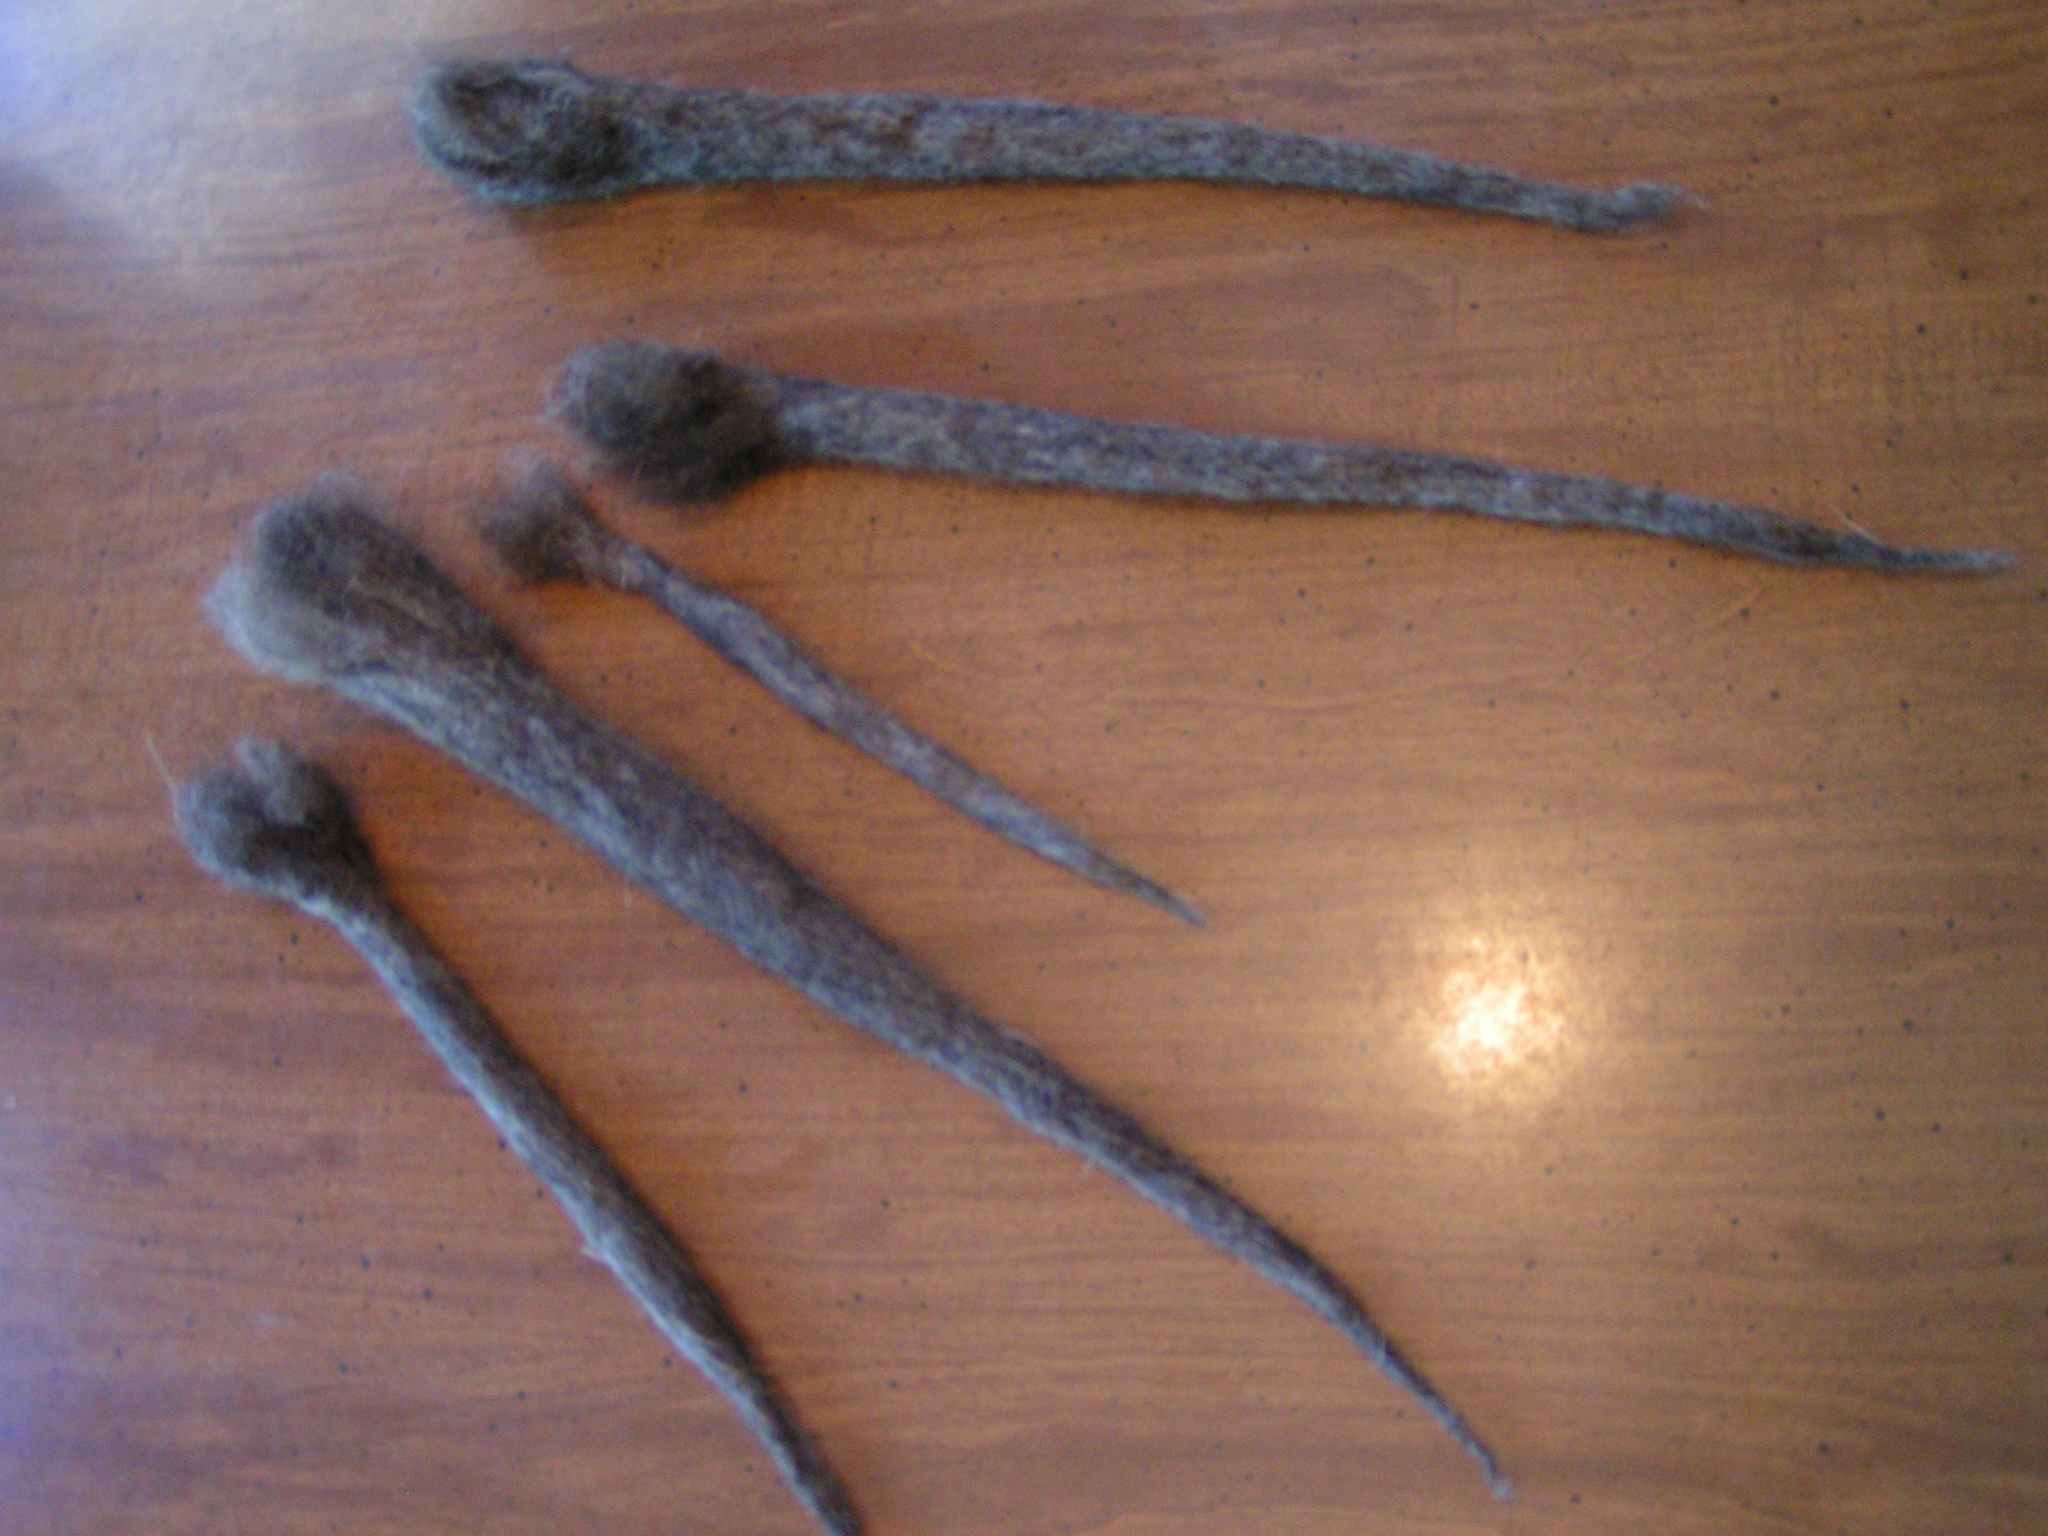
Soft rootsNext up was making some spikes for roots. Here they are after dry felting and rolling on the “Turbo Felting Board”. This board really works great for making cords. You can use stair tread that they sell at hardware stores as a substitute.

Felted rootsHere are the roots after felting down. I didn’t harden them up because they need to be shaped once they get attached to the tree.

Around the trunkHere’s the entire tree with the roots just laid down. It almost looks finished now!

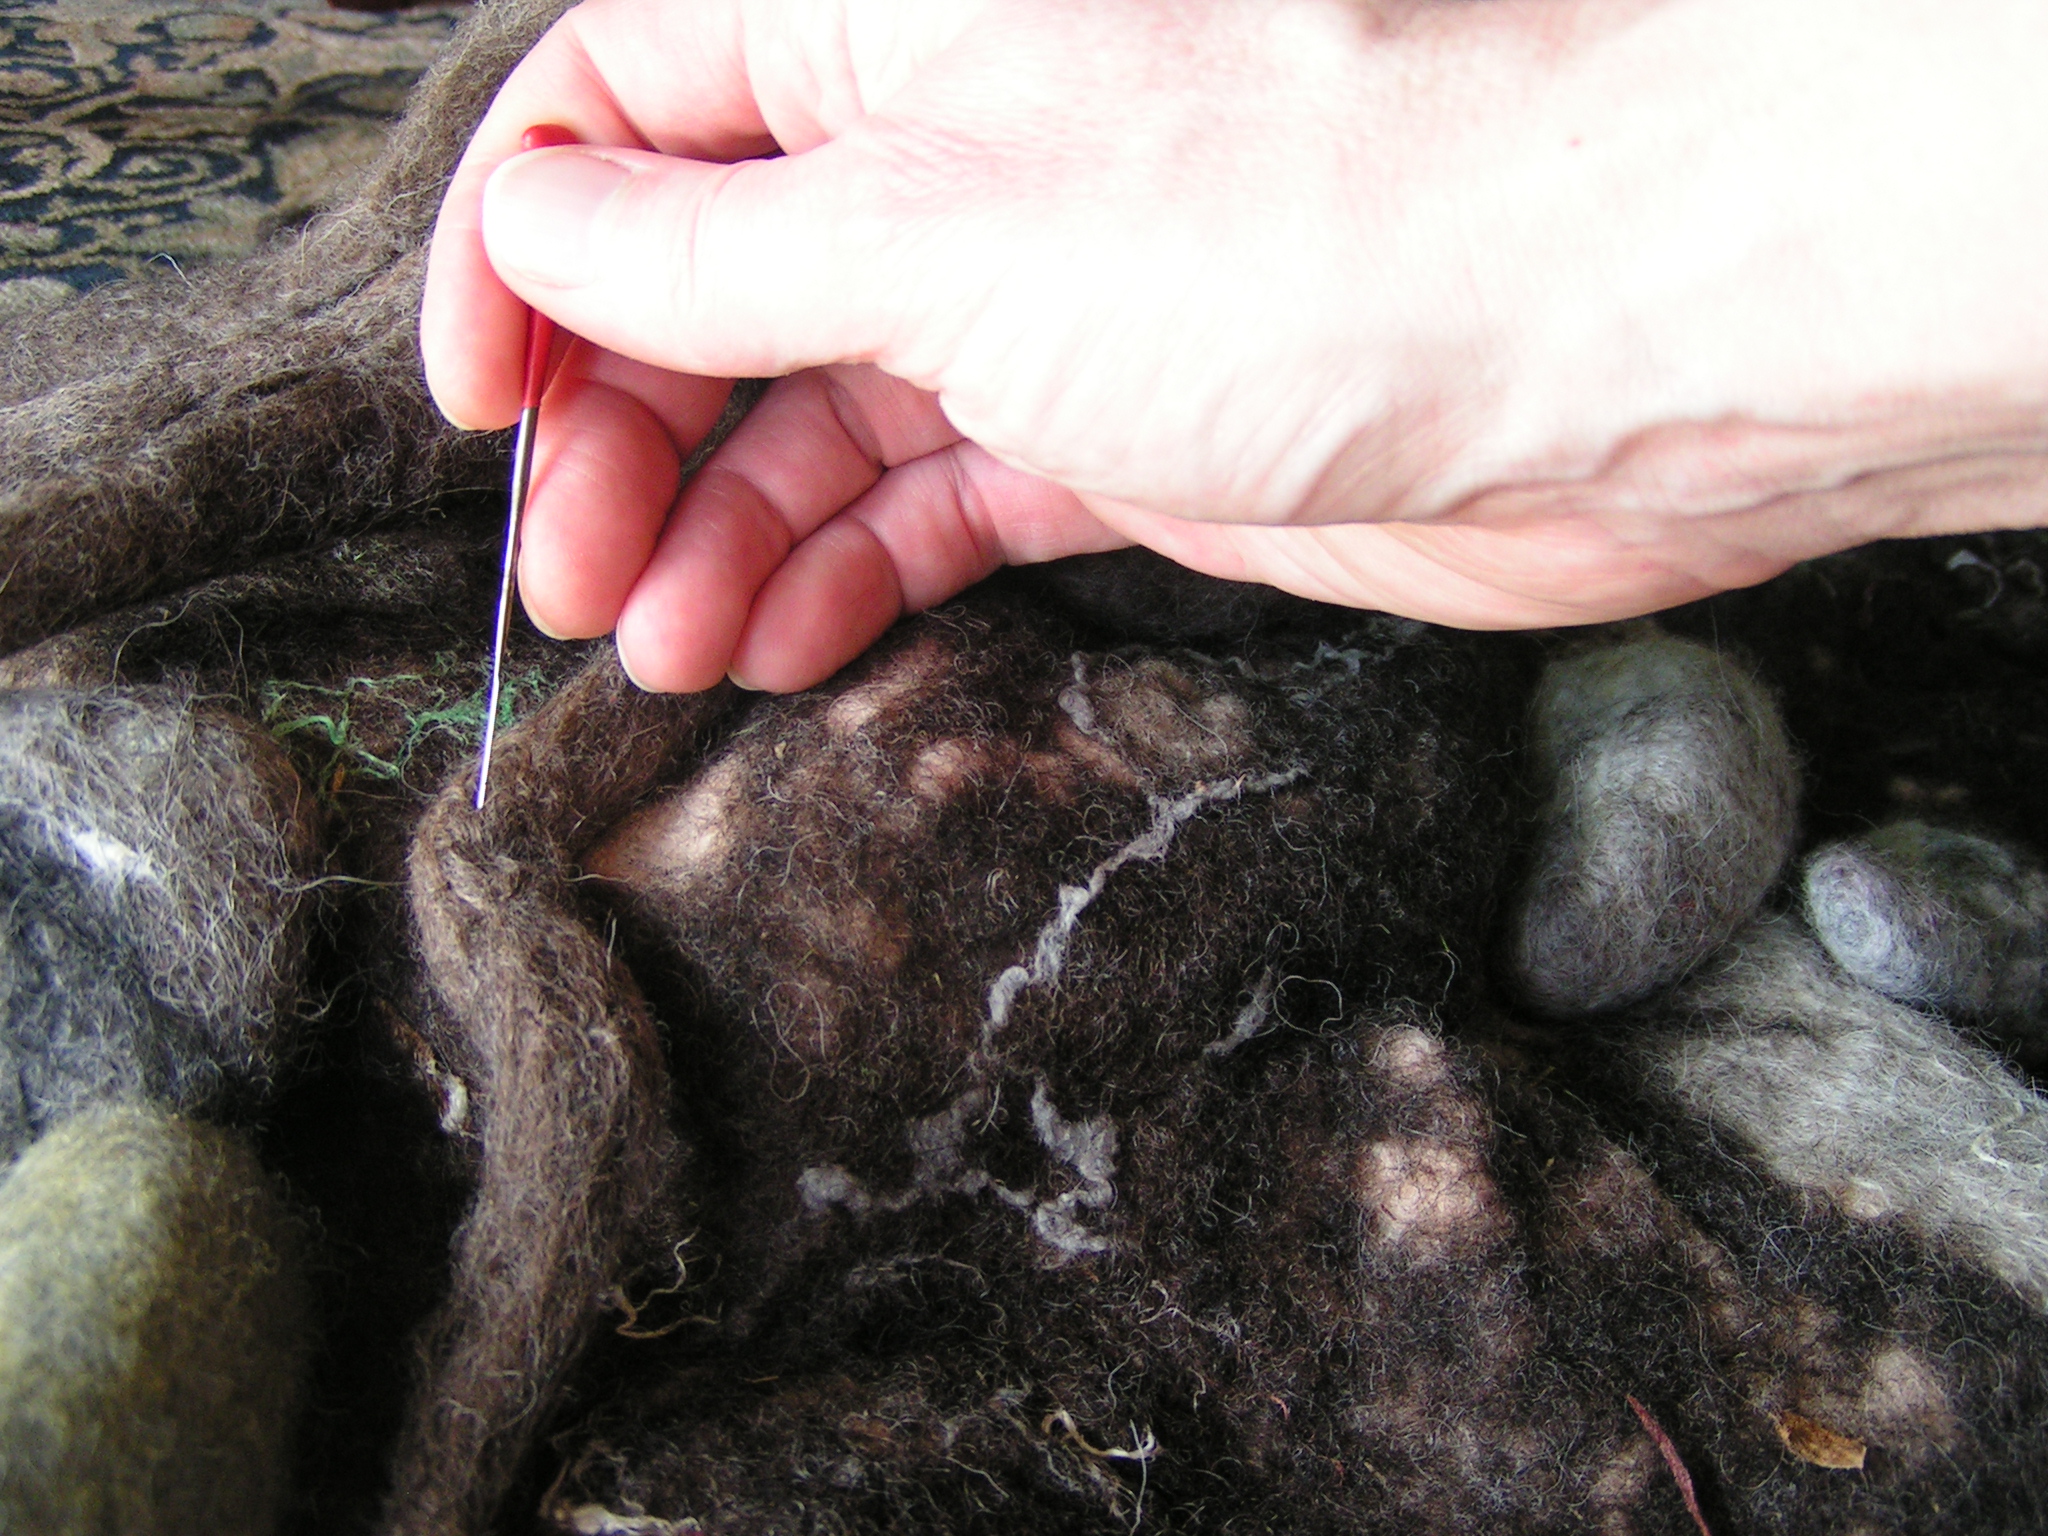
Needle FeltingNext up was a little needle felting to shape the roots and attach them to the trunk.

More like a rootAh… that looks more root like.

Partially FinishedI got two roots started on the needle felting process. I am still going to add some padding underneath the “earth” and glue it down so it won’t be shifting around if someone touches it. So it is getting there. I am happy with how it is turning out.

I also thought you might like to see part of my inspiration for this piece. A poem by Karen Shragg:

Think Like a Tree

Soak up the sun
Affirm life’s magic
Be graceful in the wind
Stand tall after a storm
Feel refreshed after it rains
Grow strong without notice
Be prepared for each season
Provide shelter to strangers
Hang tough through a cold spell
Emerge renewed at the first sign of spring
Stay deeply rooted while reaching for the sky
Be still long enough to hear your own leaves rustling


Progress on My Shelter Exhibition Piece

Progress on My Shelter Exhibition Piece

I made some progress on my exhibition piece with the theme of Shelter. If you don’t follow  my Permutations in Fiber blog, you might have missed the post about felting the umbrella. Take a quick look at that post first and this one will make more sense. I showed you the green nuno felt that I made for Ann’s challenge and it got put to good use.

Pattern for Cutting

This was the scary part, cutting up the two pieces of nuno felt that I made. I was unsure if I really had enough fabric. I needed four triangles all together. The red pattern piece is the original fabric from the umbrella. I decided to let the bottom edges be uneven to make my tree less uniform.

Cutting Green Nuno FeltHere is the first piece cut into four sections. They were definitely not all the same size but I decided not to stress about perfection as it wouldn’t be that noticeable later. I also cut up the second piece of nuno felt into four triangles.

Umbrella Tree

Then I sewed all eight pieces together.  And put it on my felted umbrella frame. It is not stitched down to the frame yet because I still need to felt the base of the tree and make roots for it. I will save the stitching down of the “leaves” until last.

Umbrella Tree Closer ViewHere’s a little closer view. I really like the different textures and colors of green.

Underneath the ShelterBut this is actually my favorite view. I love seeing the light come through the thinner parts of the nuno felt, the felted branches and being under the “shelter”. Next part to work on is roots and covering the base.

Creativity is a Verb

Creativity is a Verb

This isn’t a new book, but one that I have enjoyed reading numerous times. Creative is a Verb: If You’re Alive, You’re Creative by Patti Digh was published in 2011.

Creative is a verb cover


This is the description that is on Patti Digh’s website about the book: Your life is the work of art. Following up on her successful Life Is a Verb, and in the tradition of Julia Cameron’s The Artist’s Way, Patti Digh here presents a book that leads readers by both heart and head to acknowledge, reinforce, and use their own creative spirit. Creative Is a Verb is a book for everyone, whether you say, “I’m not creative” or “I’m just a dabbler” or “I’m an artist.” Original artwork enhances each essay, contributed by artist/followers of the author’s blog, 37 days. Thirty-three related essays are organized around six overarching themes that guide readers beyond the fear of creativity to embrace their inner artist. As the author says, “If you’re alive, you’re creative.” Among the themes: “Be Ordinary,” “See More,” “Get Present,” and “Catch Fire.” Each essay is followed by creative exercises for the reader, allowing her to apply the principles of each story to her own life.

I’m not always one to do all the “exercises” in a book but I was certainly inspired by the essays and the quotes that are scattered throughout the book. I really like the way she tells who the book is for:

“This book is for everyone who courageously creates their life as a work of art, sometimes beautiful, sometimes messy, sometimes painful, sometimes mundane, and always an expression of their unique vision; for everyone who notices the color Chartreuse and crazy clouds wherever they go; for everyone who makes art from stones, from trash, from loss; for everyone who longs to climb back into the marvelous; for everyone who yearns to reclaim their creative spirit, their art spark and for those who want to jump into their yearning and walk toward their obstacles. Yes, I mean you.”

Does that sound like you?

Call For Entries

Call For Entries

My fiber arts group, Tangled, A Montana Arts Collective, is sponsoring a fiber arts exhibition at my store The Purple Pomegranate in Whitefish, Montana during October. The theme for the exhibition is Shelter and I cordially invite you to apply for the exhibition. I know that lots of our readers do not reside in the US but you are also invited to apply. You would be responsible for the shipping to and from the exhibition so it probably isn’t that practical but I don’t want to exclude international entries.

The information about the exhibition is below and if you have any questions just let me know. You can download the information and an application form here.

Call for Artist’s Submission of Entries:

Announcing:  Tangled Fibers Show—A Fiber-Arts Collection

When: Month of October, 2013

Where:  The Purple Pomegranate, Whitefish MT

Artists are invited to submit applications and jpg photos for a Fall Presentation Exhibit at The Purple Pomegranate Gallery in Whitefish, Montana.

Submission Deadline:  August 15, 2013, for October 1, 2013 Exhibit opening.

Theme of Exhibit:  Shelter.  Shelter is one of the basic needs for all living creatures.  What constitutes shelter?  Is it an actual structure or metaphysical?  From the lowliest tent to a mansion, shelter exists in many forms and has many different meanings.  What does shelter mean to you?

Guidelines for Artist’s submission:

  1. Size:  Each piece of work must fit within 36” long, and 24” wide exhibit space.  It may be 3-D in form. Art must fit through a standard size door.
  2. All art must be an original piece of work, not shown prior to this show and created in the last two years. Artists may submit from 1 to 3 fiber works for the one time, non-refundable application fee of $20.00.
  3. Each piece should be priced for retail sale, with 40% commission being retained from sale of work.
  4. Art must be stable and be easily displayed on a wall or pedestal that supports a maximum of 20 pounds.  No perishable organic material. Art must be structurally sound.  Each submission should be able to be hung from one point of reference on the wall, portable or permanent or placed on a pedestal.  Included with submission should be instructions for hanging or display.
  5. Artist must submit an artist statement, with the application.  Statement must be in context with the theme, Shelter.
  6. Artist will need to submit proof of insurance coverage OR release the Purple Pomegranate from any liability related to harm of the art. Artist is responsible for shipping or delivering the work to the Purple Pomegranate and for sending a prepaid return label FedEx/UPS for pieces to be shipped back to artist.
  7. Jurying: The jury process will include a panel of judges reviewing jpg photos sent by e-mail. Submissions that do not follow rules of entry will not be submitted to jurors. Only entries received by August 15, 2013 will be considered. Works selected for exhibition that are not accurately depicted by jpgs may be removed from the exhibit at juror’s discretion. Works selected are to be available for the entire exhibit. E-mail notification of acceptance will occur by September 15, 2013. Delivery of work September 25-27, 2013. Pick up work  November 1-3, 2013.

As a side note, the piece of green nuno felt that I showed you last week is for my entry for this exhibition. I still have a long way to go on the piece but I have begun and I’m excited about the possibilities 🙂

Nuno Felting Experiments

Nuno Felting Experiments

I started thinking about Ann’s challenge right after it was announced in April but this is the first time I have been able to start working on the challenge actively. I wanted to try several different ideas I had for nuno that I hadn’t tried before. One was to try a cut prefelt shape sandwiched between two pieces of silk, the second was to try using rows of cheesecloth attached by felting and the third was to use locks as embellishment on nuno felt.

Pre Yarn Layout - BackI started with the largest piece that will be used on a project for an exhibition planned in October. This is the back side of the silk where I used preyarn to give a branching effect.

Layout FrontI then flipped the silk over and applied merino wool mixed with a variety of other fibers including silk noil, cashmere, angora, tencel, flax and banana fiber that I had carded into batts over the last month.

Added LocksNext came the locks which I added randomly over the surface. These were hand dyed Wensleydale locks and they are pretty coarse so I was wondering how they would migrate through the silk. I used 5mm silk gauze that I had previously hand dyed.

Finished Green Nuno

Here are the end results. I got lots of texture which I really wanted.

Texture Green NunoThis is the back side. You can see where the locks migrated through in the spots that look more yellow. No problems migrating through the silk.

Pre Felt on SilkMy next attempt was with the prefelt. Here is the shape that I cut out and I used some silk I already had. I did think to myself, this is 8 mm habotai silk and I don’t know what kind of wool is in the prefelt as I made it several years ago. Will it work? You should always listen to yourself.

Pre Felt SandwichI covered the prefelt with another piece of silk and then felted the piece by rolling. The fibers were migrating but not very quickly and not evenly. I kept working at it but it was slow. Next time I do this it will be with 5mm silk gauze and merino prefelt.

Finished SandwichHere is the result. I got a lot of ruching which is expected with 8mm habotai and all of the prefelt design is not attached. It would have worked better if I had listened to that little voice that warned it might not work.

Orange Pre FeltNext up was the experiment with cheesecloth and prefelt.

Hand Dyed 90# CheeseclothThe prefelt was another left over piece with unknown wool content. Here’s the cheesecloth. It’s 90# so pretty close weave for cheesecloth.

Cheese Cloth Strips

I ripped it into strips.

Ruffle Layer LayoutLaid it on the prefelt and then added a little bit of wool on the base of the cheesecloth that I wanted to felt in.

Wet Down and Plastic LayerI then wet that section down and covered it with plastic.

Second LayerThen I added another layer of cheesecloth and a bit more wool. Wet that layer down, covered with plastic and repeat.

All Layers Wet Down and CoveredThese are all the layers ready to start rolling.

Checking LayersIn the middle of felting, I did check the layers and did a bit of rubbing over the added wool.

Finished Layers

And here’s the result. Layered cheesecloth in rows that have been nuno felted in to the felt. They are very sturdy and you can’t pull them off.

Side View Cheesecloth LayersHere’s a side view where you can see the felt on the bottom. This would certainly have been simpler if I had just sewn the layers of cheesecloth down with the sewing machine. I’m not sure what the benefit of felting them would really be. But I guess on a three-dimensional piece that could not be sewn. it might be useful.

I enjoyed these experiments and have to think up some more ideas. I do have another idea floating around using Zed’s idea of nuno and resists that she showed earlier. Hopefully, I’ll have some time to try that idea out as well. Have you done anything for the nuno challenge? We’d love to see so please post it to Flickr or the forum.

Preparing to Teach

Preparing to Teach

If you teach classes, you already know how much work it is to prepare for a class. But for those of you who haven’t tried your hand at teaching, I thought you might be interested in the preparations that go on before a single student is taught a thing. My friend Paula and I are going to teach a couple of classes at our local community college, FVCC in early June. Today we spent all day preparing. That doesn’t count the time we have already spent planning on what to teach, filling out forms for the college and making a Power Point presentation.

Power Point Presentation

I worked up the Power Point presentation over a month ago and it would have been fairly straight forward if I remembered how to use the program. But I hadn’t used Power Point in a number of years so it slowed me down a bit. I spent at least three hours putting it together and then I had to have someone else upgrade it to Power Point 2010. The equipment at the college seems to be a bit ahead of my Power Point 2003. I never see the point in upgrading software if it still works.

Readying Class SuppliesWe headed down to Camas Creek Yarn as Paula works there and has an in for getting our supplies for the classes. The supplies are included in the cost of the class as that’s the way the college wanted it. In my prior classes, supplies were purchased in advance and just a supply list was given. So we spent several hours getting all the supplies together to put in bags so each student will have a “supply kit”.

Paula Measuring Pre-YarnHere’s Paula measuring out different colors of pre-yarn for the kits.

Confusing Ourselves

We were picking different colors to go with a variety of colors of roving. We needed 4 yards per pack but somehow got confused and started doubling the amount of pre-yarn we needed. Who knew counting was so difficult?

Picking Out Silk Roving

Next we added in some silk roving and silk hankies. So downstairs we went to figure out what colors would go with our color combinations we already had.

Silk HankiesHere are the colors of silk hankies that we chose. Paula dyed these.

Assembly LineThen we set up an assembly line to make our packs. Each pack contains Imperial wool roving, silk hankies, hemp fiber, silk noil, pelsul locks, silk roving, merino roving, pre-felt and pre-yarn. We are going to be doing three projects in the class and there are probably enough embellishments to do 20 projects. But we thought the students would appreciate extra embellishments for later use at home.

Ready to be BaggedThese are all the supplies in one kit.

All Bagged Up

Here’s our pile of bagged kits. I am making a supply list that will be stapled to the bag. But I need to make up some business cards to go in them as well. I’m not sure why I don’t have any of those yet?? (I guess I don’t listen to my own advice after writing all those Marketplace Monday posts.)

Felt Trivet Sample

Then Paula and I spent the rest of the day making samples for the class. We’re starting with a flat piece of felt with embellishments. This one is mine with a silk hankie, hemp, pre-yarn and pelsul locks.

Felt Trivet Sample

This one is Paula’s. She always adds more embellishments than I do. She used pre-felt, silk roving, silk hankie, pre-yarn, flax, silk noil and pelsul locks I think.

Finished SoapsThen we made felted soap. Mine’s orange and Paula’s is green.

Felted RocksAnd the last samples are felted rocks. Paula’s is on the left and mine is the hairy one on the right. All in all, we’ve spent around 12 hours preparing for a 6 hour class. This doesn’t include the time we’ll spend gathering up all the equipment needs, packing up the car and the preparations of setting up the day of the class. I like to be prepared, so I’m not complaining, just letting you know that the time a teacher spends is not just in the classroom. Hopefully, we’ll get enough students signed up for the class to run. Right now, we still have openings so if you’re in northwest Montana, we’d love to have you join us. Just click on the link in the first paragraph to sign up. 

Are you teaching classes? What are your thoughts about class preparation? Any tips for other teachers? We’d love to hear your thoughts. Do you take classes? Do you have suggestions for how teachers could be better prepared or suggestions for better teaching methods? We’d love to hear those too.

Ice Dyeing – A Quick How To

Ice Dyeing – A Quick How To

My local fiber art group did some ice dyeing yesterday and I thought you might like to try it. It’s a simple process, doesn’t take long and gets great results.

MINOLTA DIGITAL CAMERA


The supplies needed are ice, cotton or silk fabrics, fiber reactive dye powders, soda ash, water, a container for the soda ash liquid, a container about gallon (3785 grams) sized to dye in, dust mask, gloves and a spoon to apply dyes. I have not tried this method with acid dyes but it would probably work. You would just need to steam the fabric before rinsing it out.

The first step is to mix 1 cup of soda ash with a gallon of water, stir until dissolved. Place all your fabric in the soda ash water and soak for at least 30 minutes. Take your gallon container, glass jars work really well for this, and place a layer of ice on the bottom of the jar. Put one piece of fabric on top of the ice and just squash it down into the jar. Put more ice on top of the fabric. With your gloves and dust mask on, sprinkle about 1/4 to 1/2 teaspoon of dye powder over the ice. We used 2-3 colors per layer.

ice dyeing 4


Place another piece of fabric on top of the dye powder layer. Put more ice on top of that fabric and sprinkle more dye powder on top. Keep layering fabric, ice and dye powder until the jar is full. I used reds, blues and blacks in the jar seen in the photo above. You can use any colors that you wish.

ice dyeing 3


You can see Carole layering her fabric, ice and dye powders.

ice dyeing 2


Bunny used a large dye pot to work in and it worked just as well as the glass jars. Plus it holds more fabric so you could do larger pieces easily this way.

ice dyeing 7


Once your jar is filled to the top, do a last layer of ice and dye powder and then close with a lid. If you don’t have a lid, use plastic wrap over the top. Then set the container aside for 24 hours. The ice will melt and the dye powders will mix with the melting ice and dye the fabric with fantastic patterns.

MINOLTA DIGITAL CAMERA


Here are my two jars after melting for 24 hours. The hardest part is not disturbing the fabric. Pour out the excess dye liquid and then rinse the fabric. I rinsed three times in cold water in the sink and then put the fabric in the washing machine with a small amount of Synthropol and washed with a regular wash cycle. Then iron the fabric. 

MINOLTA DIGITAL CAMERA


This is one of the pieces of fabric that was at the very bottom of the red and blue glass jar. It’s very dark but I think it will be really nice with stitching using a light-colored thread on top.

MINOLTA DIGITAL CAMERA


I used a variety of small pieces of cotton of various weights that I had handy. 

MINOLTA DIGITAL CAMERAThis is 90# cheesecloth and this is just a small portion of it. It dyed beautifully. You could also put cotton thread in the dyeing jar but I didn’t have any white thread to try. You can also over dye fabrics this way so if you have a fabric that you don’t particularly like, try over dyeing it with this method.

MINOLTA DIGITAL CAMERA


I loved this one. It was on the very top of the red/blue jar.

MINOLTA DIGITAL CAMERA


This was some cotton muslin that was stitched together prior to dyeing. It reminds me of sunlight through the tree tops.

MINOLTA DIGITAL CAMERA


The ice melting really gets different reactions of the dye with the fabric than you can get in other methods. This works with snow too but for those of you that rarely get snow, ice is simple and gives good results.

MINOLTA DIGITAL CAMERAThe colors will be lighter if you use less dye powder and darker with more dye powder. You can mix a variety of colors or not. The results will always be different and you won’t be able to duplicate your results but that to me is the best thing about this method. Each piece of fabric will be unique. I didn’t have any silk but this will work with silk as well. I think this method would be really good to use on silk that will then be nuno felted. 

If you try out ice dyeing, please post photos on the forum or on our Flickr group, we’d love to see how it worked for you.


Trip to the Garment District in New York City

Trip to the Garment District in New York City

My friend Paula recently visited New York City and made a trip to the Garment District while she was there. I thought you might like to hear about her visit. So here’s Paula…

Lobby of Waldorf-Astoria

I went to New York City with my husband who was on a business trip. We were lucky enough to stay at the historic Waldorf-Astoria. This is the lobby and we were on the 27th floor.

Doorbell at Waldorf-Astoria

My room had a doorbell, go figure. My doorbell at home doesn’t even work.

Another View of NYC

Here’s a view from on of the windows.

View of NYC from Waldorf-Astoria

Here’s a view of Park Avenue from our room. While my husband was in meetings, I explored the city on foot. My main goal was to visit the Garment District for fabric to nuno felt.

Wooden Escalator - Going to Habu Textiles

My first planned stop was Habu Textiles. I took a cab so I wouldn’t get lost but the cabbie didn’t even know where it was. He dropped me off and told me I would have to ask how to get there but it should be in this block. I could tell I was in a garment district because of this really ugly bridal supply store so I went and asked. After giving the woman the address she said “Oh that’s three blocks south.” I walked down three blocks and a very helpful man showed me where the building was. I had to get into a really old elevator to the second floor and then off to take this escalator to the next floor.  The escalator is made out of wood! When I saw the entrance to Habu Textiles, it didn’t even really look like a retail business but I bravely forged ahead.

Habu Textiles

I opened the door to this feast for the eyes. I ended up on my hands and knees looking through all the baskets at all the various yarns and threads.

Habu Textiles

And there was more on the walls. Most of the work that Habu produces is for yarns and knitting. They use all natural fibers such silk, bamboo, hemp, linen and more and blend them together to make wonderful yarn. They use all natural dyes and produce one of a kind fabric.

Habu Textiles

They even combine metals such as bronze and stainless steel into their yarns.

Habu Textiles

I wish I had a better photo of these little squares on the wall. They were 3-4″ squares of fabric that were layered and stitched with sashiko. They were really beautiful.

Bamboo Cloth

This cloth is made from bamboo.

Haul from Habu Textiles

Here’s my entire purchase. It includes the bamboo fabric, silk wrapped cotton, Kasumi (polyester), linen paper, cotton paper, bronze buttons and French safety pins.

Habu Textile - Various Yarns

These are pieces of the yarns that are bundled in the photo above that I bought to use for embellishing felt. I can’t wait to try them out. I spent an hour and a half at Habu and it was time well spent. The next planned stop was B&J Fabrics which was only two blocks away.

B and J Fabrics Bag

Luckily, I found the building right away and could see the fabric in the window five floors up. There weren’t any signs but I went into the building concierge and he directed me to the right place.

B and J Fabrics

There were piles and piles of fabric none of which you could reach. If you wanted to buy something, you had to take a sample to the desk and then they would find the bolt of matching fabric and cut your requested fabric. I was looking for silk chiffon to use in nuno felting and they had wonderful printed chiffon. They had all kinds of “fabric” there including fox, skunk, coyote and even an entire alligator skin. The store is used by designers, design students and Broadway costume design.

Silk Chiffon

I chose about 15 different printed silk fabrics and wanted a half yard of each. It took a long time to choose and I have to avoid those beautiful ones that were $89 per yard.

Silk Chiffon

Once I had chosen, I took the samples up to the desk and then I waited on the couch for an hour. I had asked only for silk chiffon although some of the print samples were on silk charmeuse.

Silk Chiffon

When the woman brought out my pieces, I noticed that not all of them were chiffon and that she had cut some in charmeuse. The manager was very nice about it and went to see if he could find the same patterns in chiffon. After another hour, I finally had my purchases.

Silk Chiffon

I spent over 5 hours at B&J Fabrics.

Silk Chiffon

My husband even called to find out where I was and came and found me.

Silk Chiffon

I had plans to go to more fabric stores and a yarn store but never made it out of B&J. That was day one. The second day I went to Purl Soho which is a knitting store and spent all day there. I was so exhausted after those two days that I never made it back to the garment district. If you decide to go, make sure that you have good directions and your walking shoes.

A Fiber Nest

A Fiber Nest

I was planning on posting about my friend Paula’s recent trip to New York City and her visit to several cool fabric shops. But Paula got distracted and didn’t get the photos sent to me. Instead, she sent me photos of a fiber nest that she created. If you’re on the forum, you might know Paula as ‘sula’smom’. Sula is her dog and after a storm, Sula was really interested in something in the yard. Sula’s dad went to check out what was going on and found this:

squirrel 001So he brought it into the house and Paula went into rescue mode.

squirrel 002

Baby squirrel was really cold and barely breathing so Paula got him warmed up.

squirrel 007And put him into a nest of fiber. I do know squirrels really like wool because I had one steal my entire bunch of wool I put out for the birds to use for nests.

squirrel 005Isn’t he the cutest little thing?

squirrel 029He started perking up a bit after he got warmed up and got over the shock of falling from his home.

getting better 002Here’s baby squirrel thanking Sula for finding him.

getting better 001

I hope Paula has all her shots up to date 🙂

dinner 002And now it’s dinner time. I don’t usually post things that aren’t really fiber related but there is the “fiber nest” after all and he was just too darn cute. Yes, I know that you shouldn’t keep wild animals. I’ll let you know the outcome.

Paula sent me more photos as she was trying to get on the forum and couldn’t find her password. So Rocket J or Rocky for short, was helping her.

ForumsquirrelHere’s Rocky trying to help Paula.

forum squirrel 2


He’s looking at the forum trying to find her password.

forumafsquirrel


Oh no! What’s that? Animal fibers? What are you doing with animal fibers?

pocketsquirrel


Rocky got spooked by seeing that category animal fibers and had to retreat to the pocket of safety on Paula’s shirt. Time for a little nap.