Browsed by
Month: July 2014

Craft Fair

Craft Fair

As most of you know, I did my first ‘proper’ craft fair on Sunday just gone. It was at the gorgeous old building of Victoria Baths just a mile or so from Manchester city centre. I didn’t sell much ( a piece of rainbow felt, 3 bookmarks, a credit card holder, a felted soap, a coin pouch and a heart shaped ring pouch) but I did pay for the cost of the stall, and I did meet a lot of nice people. A wet/needlefelt artist had a stall in the row behind mine, she had lots of nice pieces, but I didn’t get her details. Maggie was upstairs, she had a lot of nice felt pieces and had been felting for a long time, and she sold me some dyed flax for a bargain price! This is Maggie’s stall:

She had some gorgeous woven and cobweb scarves:

Opposite the end of my row was Jude. She does pretty much everything! From washing raw fleece, to dyeing it mostly with natural dyes, spinning it up into gorgeous yarns and then knitting it into amazing shawls and hats. She also felts and does workshops teaching her many skills. This was Jude’s stall, unfortunately I didn’t get a photo of her spinning wheel.

These are some of her yarns. I think she said her dad turned the bowls himself. Just disappearing to the right are some needlefelted sheep with hand dyed locks:

My stall was a lot neater when I first set it out, but I only took photos nearer the end. This is most of it:

And this is the other end:

If anyone has been put off doing a craft fair because of lack of transport, I thought I’d show you how I took my things. You might remember my ‘granny’ trolley from a post last year, that is what I used to take everything to the fair in. I used a large ‘document’ box, and a couple of shoe boxes. This is the smallest shoe box I used:

In this, I had 7 pieces of felt.

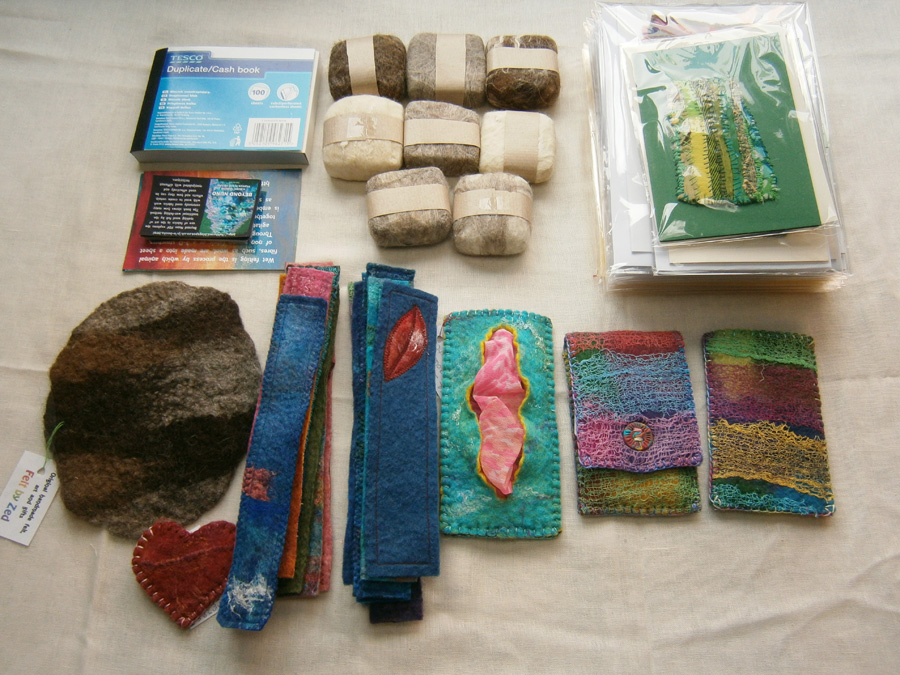
This is the second shoe box I used:

In this I had all my greetings cards, handmade felted soap, a receipt book, some business cards, a couple of mirror cases, a glasses case, ring pouch, coaster and lots of bookmarks.

The document box, which came flat and cost 70p from Ikea, measures 10 inches high, 10 inches deep and is 13 inches wide.

In this I managed to fit: 3 large gadget sleeves; 22 phone/camera sized cases; 2 glasses cases; 13 credit card and coin pouches; 5 purses; 3 slim gadget cases; 6 A5 notebooks and 8 A6 notebooks. I think I had even more in it on the way there!

I did have a small shopping bag with the table cloth cover, some paper bags and my woolly vessel in, but almost everything else was in the trolley.

Suffolk, Banana, Masham and Bamboo

Suffolk, Banana, Masham and Bamboo

I’ve used banana fibre tops with Suffolk wool tops before, so I know they look really interesting together. I fluffed up some of the banana fibre, and added it to the top of the Suffolk. Though I used lessl of the banana fibre than I have previously, I wasn’t disappointed by the results.

OLYMPUS DIGITAL CAMERAThis angled picture shows the texture more:

OLYMPUS DIGITAL CAMERAThis is a close up of the centre part

OLYMPUS DIGITAL CAMERAAnd this is a supermacro of the wool and fibre texture

OLYMPUS DIGITAL CAMERAIn the middle along the right edge is an area where the fibres are a little thicker. In the top photos it looks quite dense, but a supermacro close up shows the tangle of wool and banana fibres.

OLYMPUS DIGITAL CAMERAAnd from this angle you can see the pattern even better

OLYMPUS DIGITAL CAMERAAnother combination of wool and fibres I found really interesting is Grey Masham and Bamboo top. I’m not sure if Masham is classed as a coarse breed, I think its Micron count is between 29 and 34. It’s certainly more ‘wiry’ than fine wools, but is still quite soft to the touch. The contrast of the wool and sheen of the bamboo was quite striking, yet at the same time, the wool seemed to ‘absorb’ the fibre. This is the whole piece from an angle.

OLYMPUS DIGITAL CAMERAThis is slightly closer and from above, there’s an area in the centre with barely any fibre on it:

OLYMPUS DIGITAL CAMERAThis is a close up of the dense patch just to the right, it’s interesting to see how the fibres are still affected by the characteristics of the wool even when they are thicker.

OLYMPUS DIGITAL CAMERAThis is a close up of the area just left of centre at the top of the piece, showing dense and sparse patches.

OLYMPUS DIGITAL CAMERAI hope you’re not getting bored of these because I have about 30 other breeds of wool and about 15 natural fibres, I’m not going to do the maths, but that’s quite a variety of combinations I can come up with!

Cochineal and Indigo Dyeing

Cochineal and Indigo Dyeing

Yesterday my friend Linda and I did some natural dying with cochineal and indigo.  She had purchased a kit with several kinds of natural dye stuffs and instructions. We decided on cochineal and indigo so we could get fuchsia, blue and purple. cochineal is easy enough to prepare you boil it strain it and then reboil what’s left  and strain 4 times to get you dye solution. It was a lovely deep pink. you have to mordant your things to use cochineal. For cotton you have to first soaking in  tannin and in then in alum. For wool you just use alum.

mordenting for dyeing

Here are a couple of the pieces after they came out of the cochineal

cochineal dyed stuff.

The indigo is a little more involved to get ready and it stinks. first you make up a concentrate using the powder and chemicals. Indigo is used in an alkaline solution. You stir it together and then have to let the purple solution turn yellow/green.

indgo solution Then you have to carefully, under the alkaline water in your bucket, pour the solution in. You do not want to add any oxygen to the dye bath. Then you have to wait another 1/2 hour or so for it all to goes completely yellow again.

IMG_1456

When you add your wet articles to dye you have to carefully lower them into the bucket so as not to add any oxygen to the solution.

putin bundles in indigo The magic happens when you take things out of the indigo. Even after just a couple of min in the bucket things will start to go blue when pulled out.

start to change when you take them out after 30 to 40 min you get much better colour. Here is some cotton that was tied in knots so parts would resist the dye.

out of the indigo untieing the clothThe pieces that were in the cochineal where a disappointment. when we added them to the indigo all the red disappeared and only the blue took.  We discovered after doing some research that we were supposed to used the mordent for 24 hours. That would be  2 days of soaking for cotton and one for wool before you can start to dye.  a couple of the cotton gauze pieces did keep a little pink

cotton gauze here are the rest

dryingThese have all been in the indigo once

and these twice. The very dark ones are a natural dark gray Norwegian wool.

multiple dippings

The other thing I tried was my hair it has gotten long enough that it is becoming hard to handle so I am going to get it trimmed soon. So I thought why not have some fun with it first. I stuck it in the cochineal and then in the indigo.

and in cochiniel ann in the indigo

Unfortunately the cochineal washed right out in the indigo and the indigo did not take at all. In the end Linda had some stuff called panic manic that she used to give me the purple I was looking for.

hair dye anns hair

This was a fun day but I think I will go back to my acid and fiber reactive dyes, so much simpler to use and predictable results. If anyone knows why the indigo didn’t work on my hair I would like to know. I though with hair being a protein fiber it should work.

Choosing A Color For Matting and Framing

Choosing A Color For Matting and Framing

Last week, I showed you the process I used for determining the value of the matting/framing for my Stewart Stephenson challenge piece. For those of you that asked, I chose value #3. The next thing I needed to do was choose a color. I could have gone with gray and I think it would have looked OK. But I decided I wanted to try some different colors to see which I liked best. I used some painted papers that I already had and I painted a few.

I tried mixing black and deep cerulean blue (middle row, 1st on the left) and I mixed blue and orange to try to get a color close to the darkest color in the actual piece. But I ended up with purple (middle row, 1st on the right). The remaining colors are ones that I already had painted. The orange wasn’t bad, but I really liked the blue green (middle row, middle photo) but it wasn’t a dark enough value.

I then decided to use paint colors straight out of the bottle because then I wouldn’t have to mix the color to cover the canvas. The one on the left is Cobalt Turquoise and the one on the right is Deep Cerulean Blue. I decided I liked the Deep Cerulean Blue the best.

MINOLTA DIGITAL CAMERA

So I painted the canvas and this is the result. It looks better in person. But I’m considering adding a glaze to the top to make it slightly darker.

MINOLTA DIGITAL CAMERA

This photo shows the true color of the canvas a little better. It isn’t quite as dark as the value #3 card. So I think I will mix a little black with the deep cerulean blue and then add some gloss medium to glaze the surface and see if I like that better. It has been really difficult getting the photos to show you the process as the colors have not stayed true. But I guess I’ll get this framed eventually.

Happy Fourth of July to all of our US readers!

Third Quarter Challenge 2014

Third Quarter Challenge 2014

I have chosen (Oscar) Claude Monet as the artist for the challenge this quarter.  He was born in Paris, France in 1840 and died in Giverny, France in 1926.

MTIwNjA4NjMzOTE3NzY5MjI4Monet was named the creator of “Impressionism” because he was more concerned with light and form than realism.  The painting that inspired the name came from his painting “Impression, soleil levant (Sunrise), 1872,  which now hangs in Musée Marmottan Monet,Paris.

Impression, Sunrise 1872

He preferred outdoors to school and amassed a huge body of work based on studies of various landscapes at different times of day, season and weather conditions to study the changes in light and form.


Japanese Bridge 3
Japanese Bridge 3
Japanese Footbridge
Japanese Footbridge


Like many artists of his time, Monet suffered from depression, poverty and illness.  However, it never dampened his passion for his work.

My only merit lies in having painted directly in front of nature, seeking to render my impressions of the most fleeting effects.”
—Claude Monet

Sunflowers The-House-Seen-From-The-Rose-Garden2-small


Claude_Monet-Madame_Monet_en_costume_japonais Claude_Monet,_Grainstacks_in_the_Sunlight,_Morning_Effect,_1890,_oil_on_canvas_65_x_100_cm

There are several good sites of his work, but this is probably the most comprehensive,  cataloging over 1700 of his works.  http://www.claudemonetgallery.org/

There are many repeating themes in his work and also a wide variety of styles throughout his long career as his style evolved.  I think there is something for everyone and a lot of it will lend itself nicely to felting and mixed media.

claude-monet-irises-detail Claude-Monet-Water-Lilies-38-Oil-Painting claude-monet-the-artist-s-garden-at-giverny-c-1900


Still-Life-With-Pears-And-Grapes-small cliff-near-dieppe

Happy creating!

Remember to post your challenge pieces on the forum: http://feltandfiberstudio.proboards.com/board/18/studio-challenges