Browsed by
Tag: resists

New Vessels

New Vessels

We decided to make ‘coiled pots’ at the Well Being centre yesterday. At first we were going to coil pencil roving waste around a resist, but thinking about how fiddly that would be, we decided to do a coil on each side of a template. We made really rough resists:

This is the Pencil Roving waste we used:

We put some silk threads onto the resist first. This is mine:

This is Cath’s:

Then started our coils. I chose to do mine directly onto the resist:

Cath decided to make a coil first:

This is how my first side looked:

And Cath’s first side:

We added wisps of wool:

Then two layers of wool. I used some broken Merino tops:

Cath used a grey blend, unknown from Botany lap waste:

This is the coil on my 2nd side:

And with the wisps from the other side folded over:

This is mine with the wisps from the 2nd side folded over. We added 2 more layers each side

Here’s an action shot of Cath felting hers:

This is mine after I started to felt it:

This is Caths when she’d cut the opening and turned the bowl the right way out:

This is mine after I cut the opening:

Cath cut into her vessel opening:

I didn’t get chance to finish mine, but this is how I looked on the bottom just before I rinsed it to bring home:

I will show the finished vessel next time.

Pandagirl’s Year in Review 2016

Pandagirl’s Year in Review 2016

I hope everyone had a nice holiday and are ready for the New Year.

It’s almost the end of 2016 and looking back on the things I’ve done, there seems to be a few themes.

I did a lot of natural dyeing.  Avocado skins, pits and the combo.

20160125_113312

Cochineal

20160701_155219

Alkanet/Logwood20160701_154915

logwood iron top wo bottom

Osagealkanet with iron

Madder

20160622_123212

Cutch, Rhubarb and Indigo

20160703_115005 20160701_155539 20160907_124311-1


Eco printing

img_7161

Resists

20150501_152541

20160301_164851

20160326_121301

20160322_113050

20160506_142241

Under the sea theme20160429_160634a_edited-1 20160526_155222

2nd Quarter challenge working with scraps – the former credit card case turned into an ear bud case.

20160506_122938

Then the cityscape with scraps.

20160523_142107

A scarflette with locks

20160125_111403

Ginkgo stitching

20160123_152812

Crochet piece felted and embellished with stitching

20160823_134235-1

Felting wit my grandsons

20160807_152216_001

Silk scraps into a free motion stitched vase

20160708_142758

3rd Quarter challenge adding dimension from Kristy Kun’s class

20160924_155325-1 20160924_155038-1

Ruth’s Paper Lamination class

20160614_153320 20160720_173749

20160609_122027

Teri’s hat class

20161012_152103 20161012_151800

Mini weaving wall hanging

20161113_151758

More work with scraps for a sewing machine case

20161204_142831

4th Quarter Challenge with embellishments for a coupon case.

20161107_164205

And blue booties for a shower

20161208_165948

Of course, there were also plenty of samples during the year including using the needle felting machine to felt some unfeltable fabrics.

A big thank you to Cathy Wycliff for her post on weaving and felting; my sister Carol Olson for sharing her new sheep with us;  Nada for sharing her workshop experience in Slovenia; Zara for her posts on Felting on a Trampoline and her Yak, Mongolian, Churro and Zwartables samples; Leonor for her soap tutorial and Terri Simon on sharing her projects from Kristy Kun’s class.

It was a great year for me in terms of learning new things and doing some recycling.  How was your 2016 year of fibers?

Happy New Year and Happy Felting in 2017!


Seeing Spots

Seeing Spots

Last month I visited the San Diego Aquarium and a couple of tide pools while seeing relatives and touring the area.  I’m always fascinated with the beautiful creatures from under the sea.  When I returned home, I did some more research and came across the Blue Spotted Ribbontail Ray.  You can read more  about them here:  https://en.wikipedia.org/wiki/Bluespotted_ribbontail_ray

You can also Google them and see some really beautiful pictures.

I have seen other Stingrays in Sausalito, California, but nothing this beautiful.  Of course, the colors made this guy pretty attractive to me.  I thought it would be a fun, challenging project in felt.

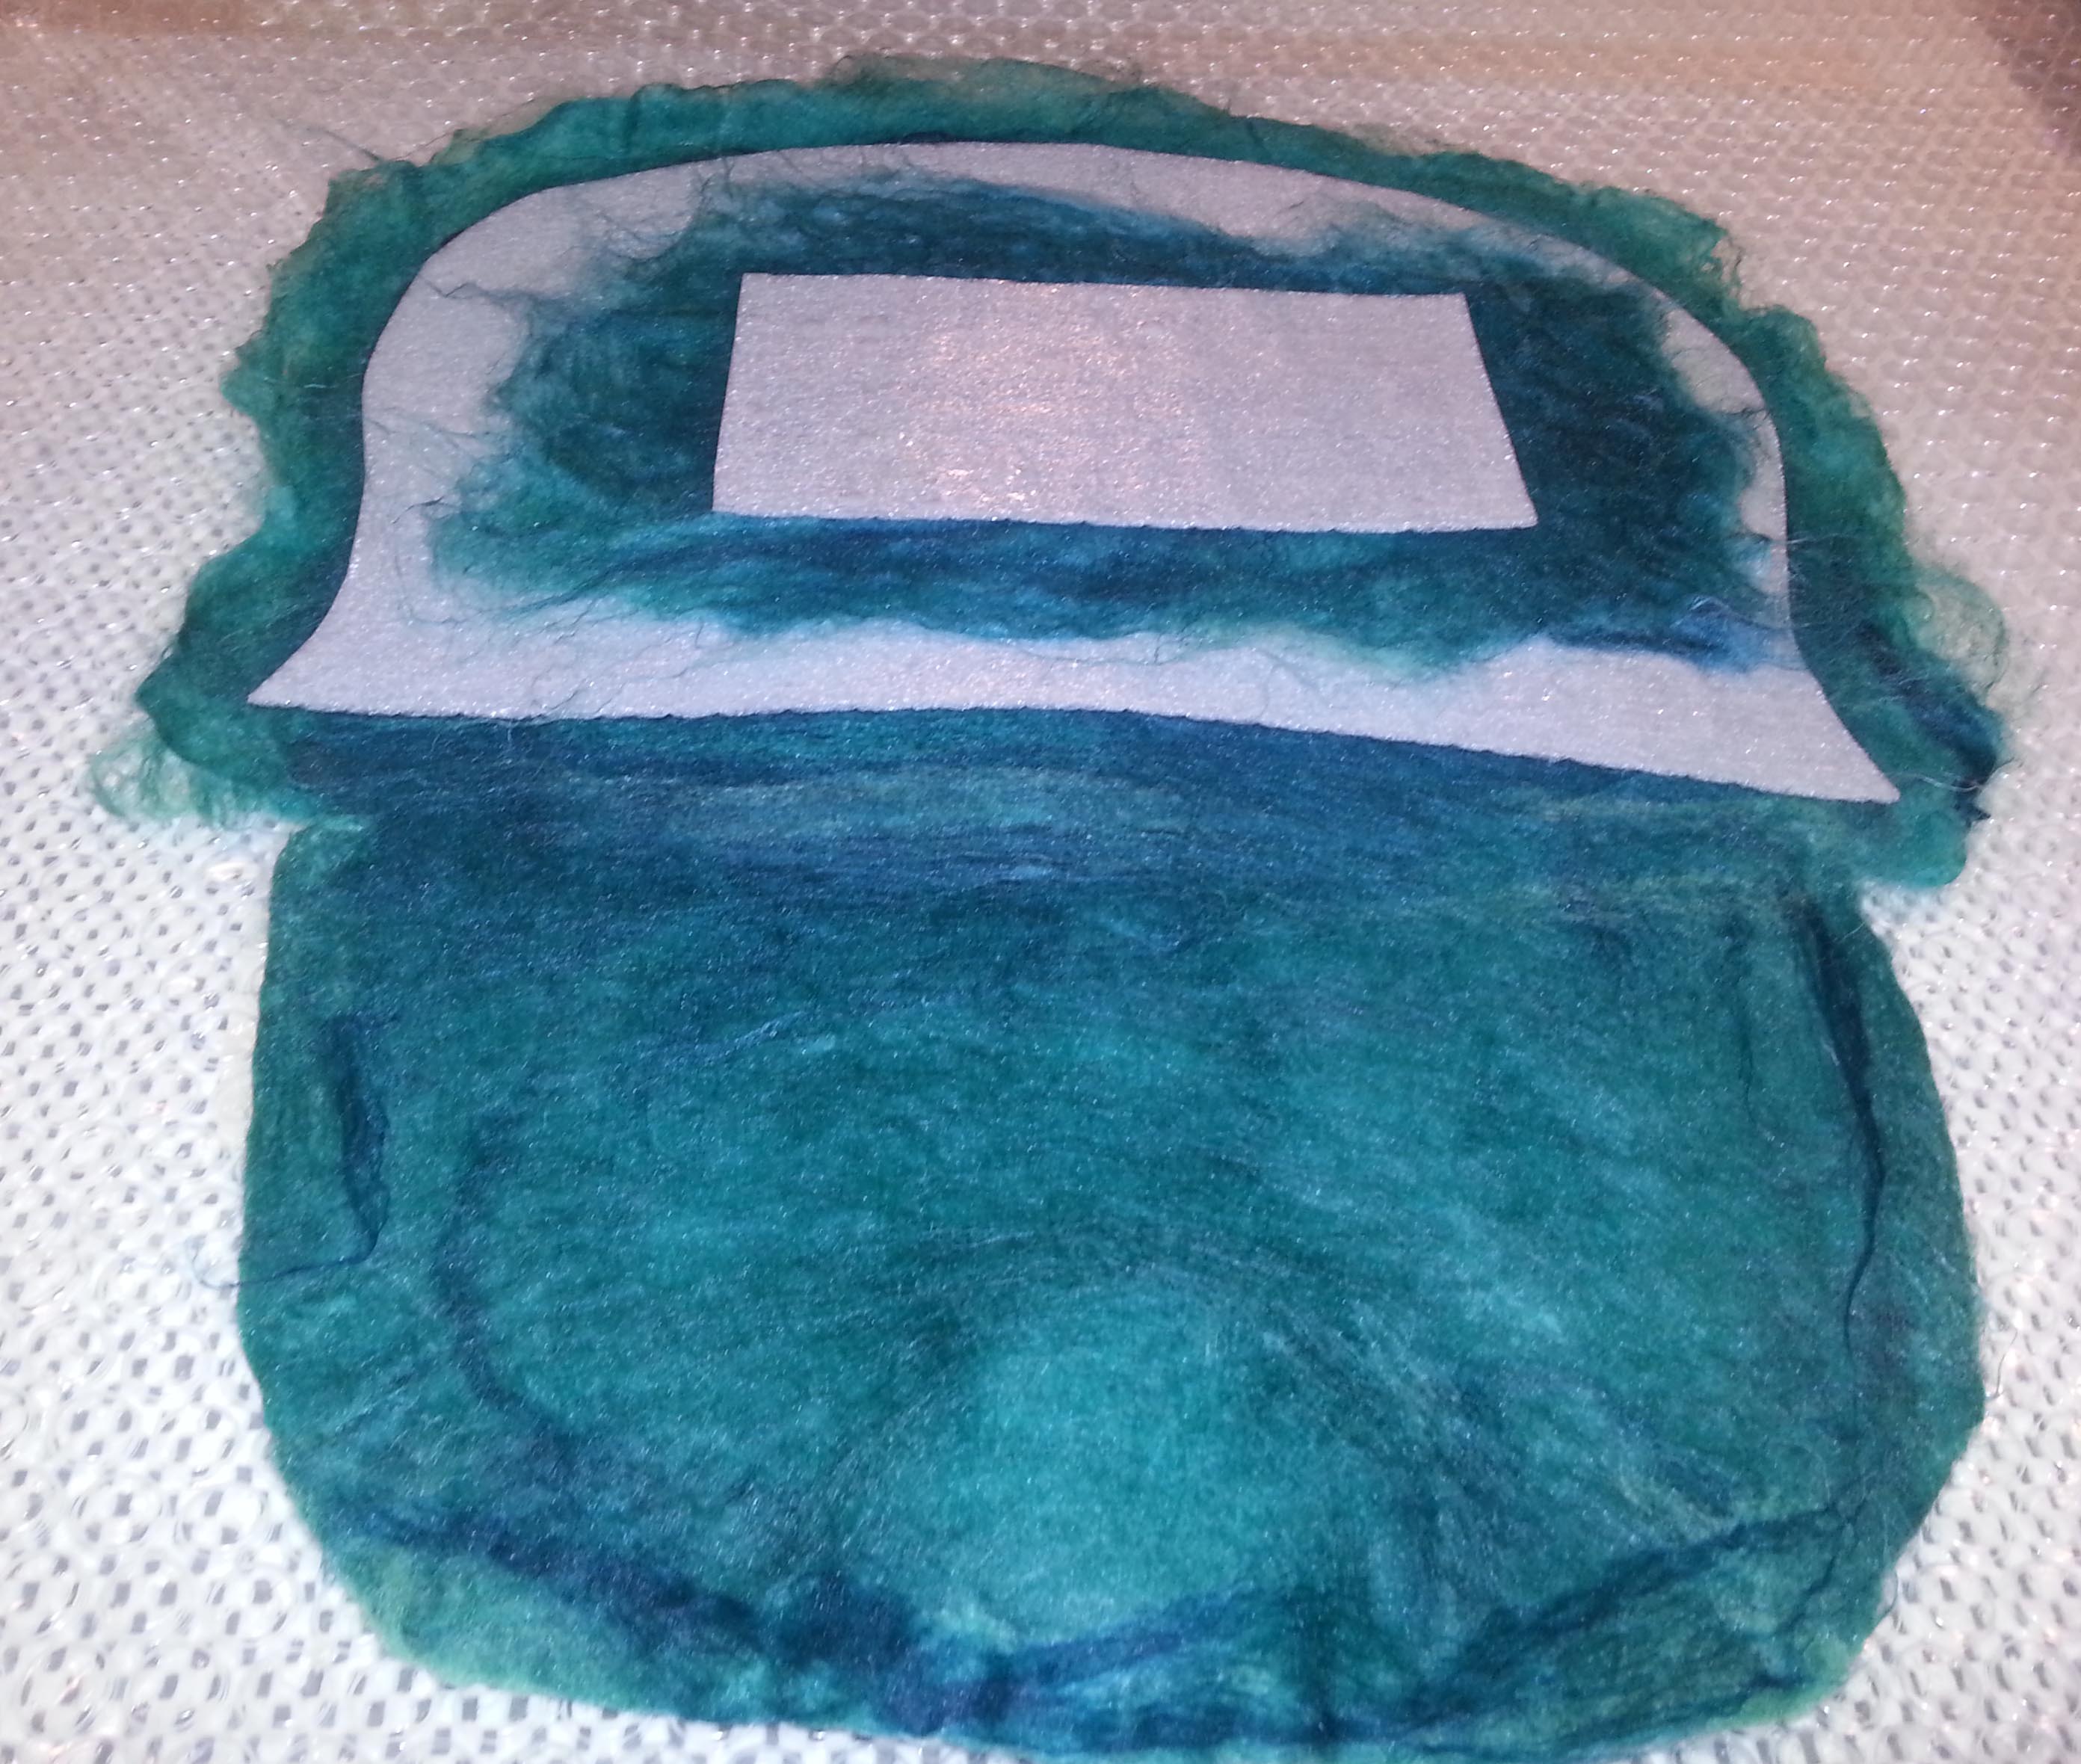
Although I know the body is fairly flat, I started out with making a resist.

20160410_160606a

The eyes were a challenge because they have an unusual shape with a cutout (spiracle) behind them.  I  made tight ball which encased a glass eye and a rock for the spiracle portion, then covered it with the yellow merino.

20160409_153744a

I used one layer of corriedale as my base on each side, then used a white batt on the underside. To give the back some height in the middle I added extra layers. Once I was satisfied, I attached the eyes and a piece of a batt to attach a tail.

20160410_170128a

The tail was next. I used a corriedale core and covered it with a batt, then rolled it into shape.  I tried to use roving to make the blue stripes, but the rolling moved it around to much, so I striped it off.

20160413_150658a

The tail also includes the stinger near the end. The tail is actually one and a half times the length of the body.

I had to do some studying of the anatomy to try to get it close to reality.  The nostrils, mouth, nasal flaps and gills are underneath.  I didn’t add claspers or pelvic fins.

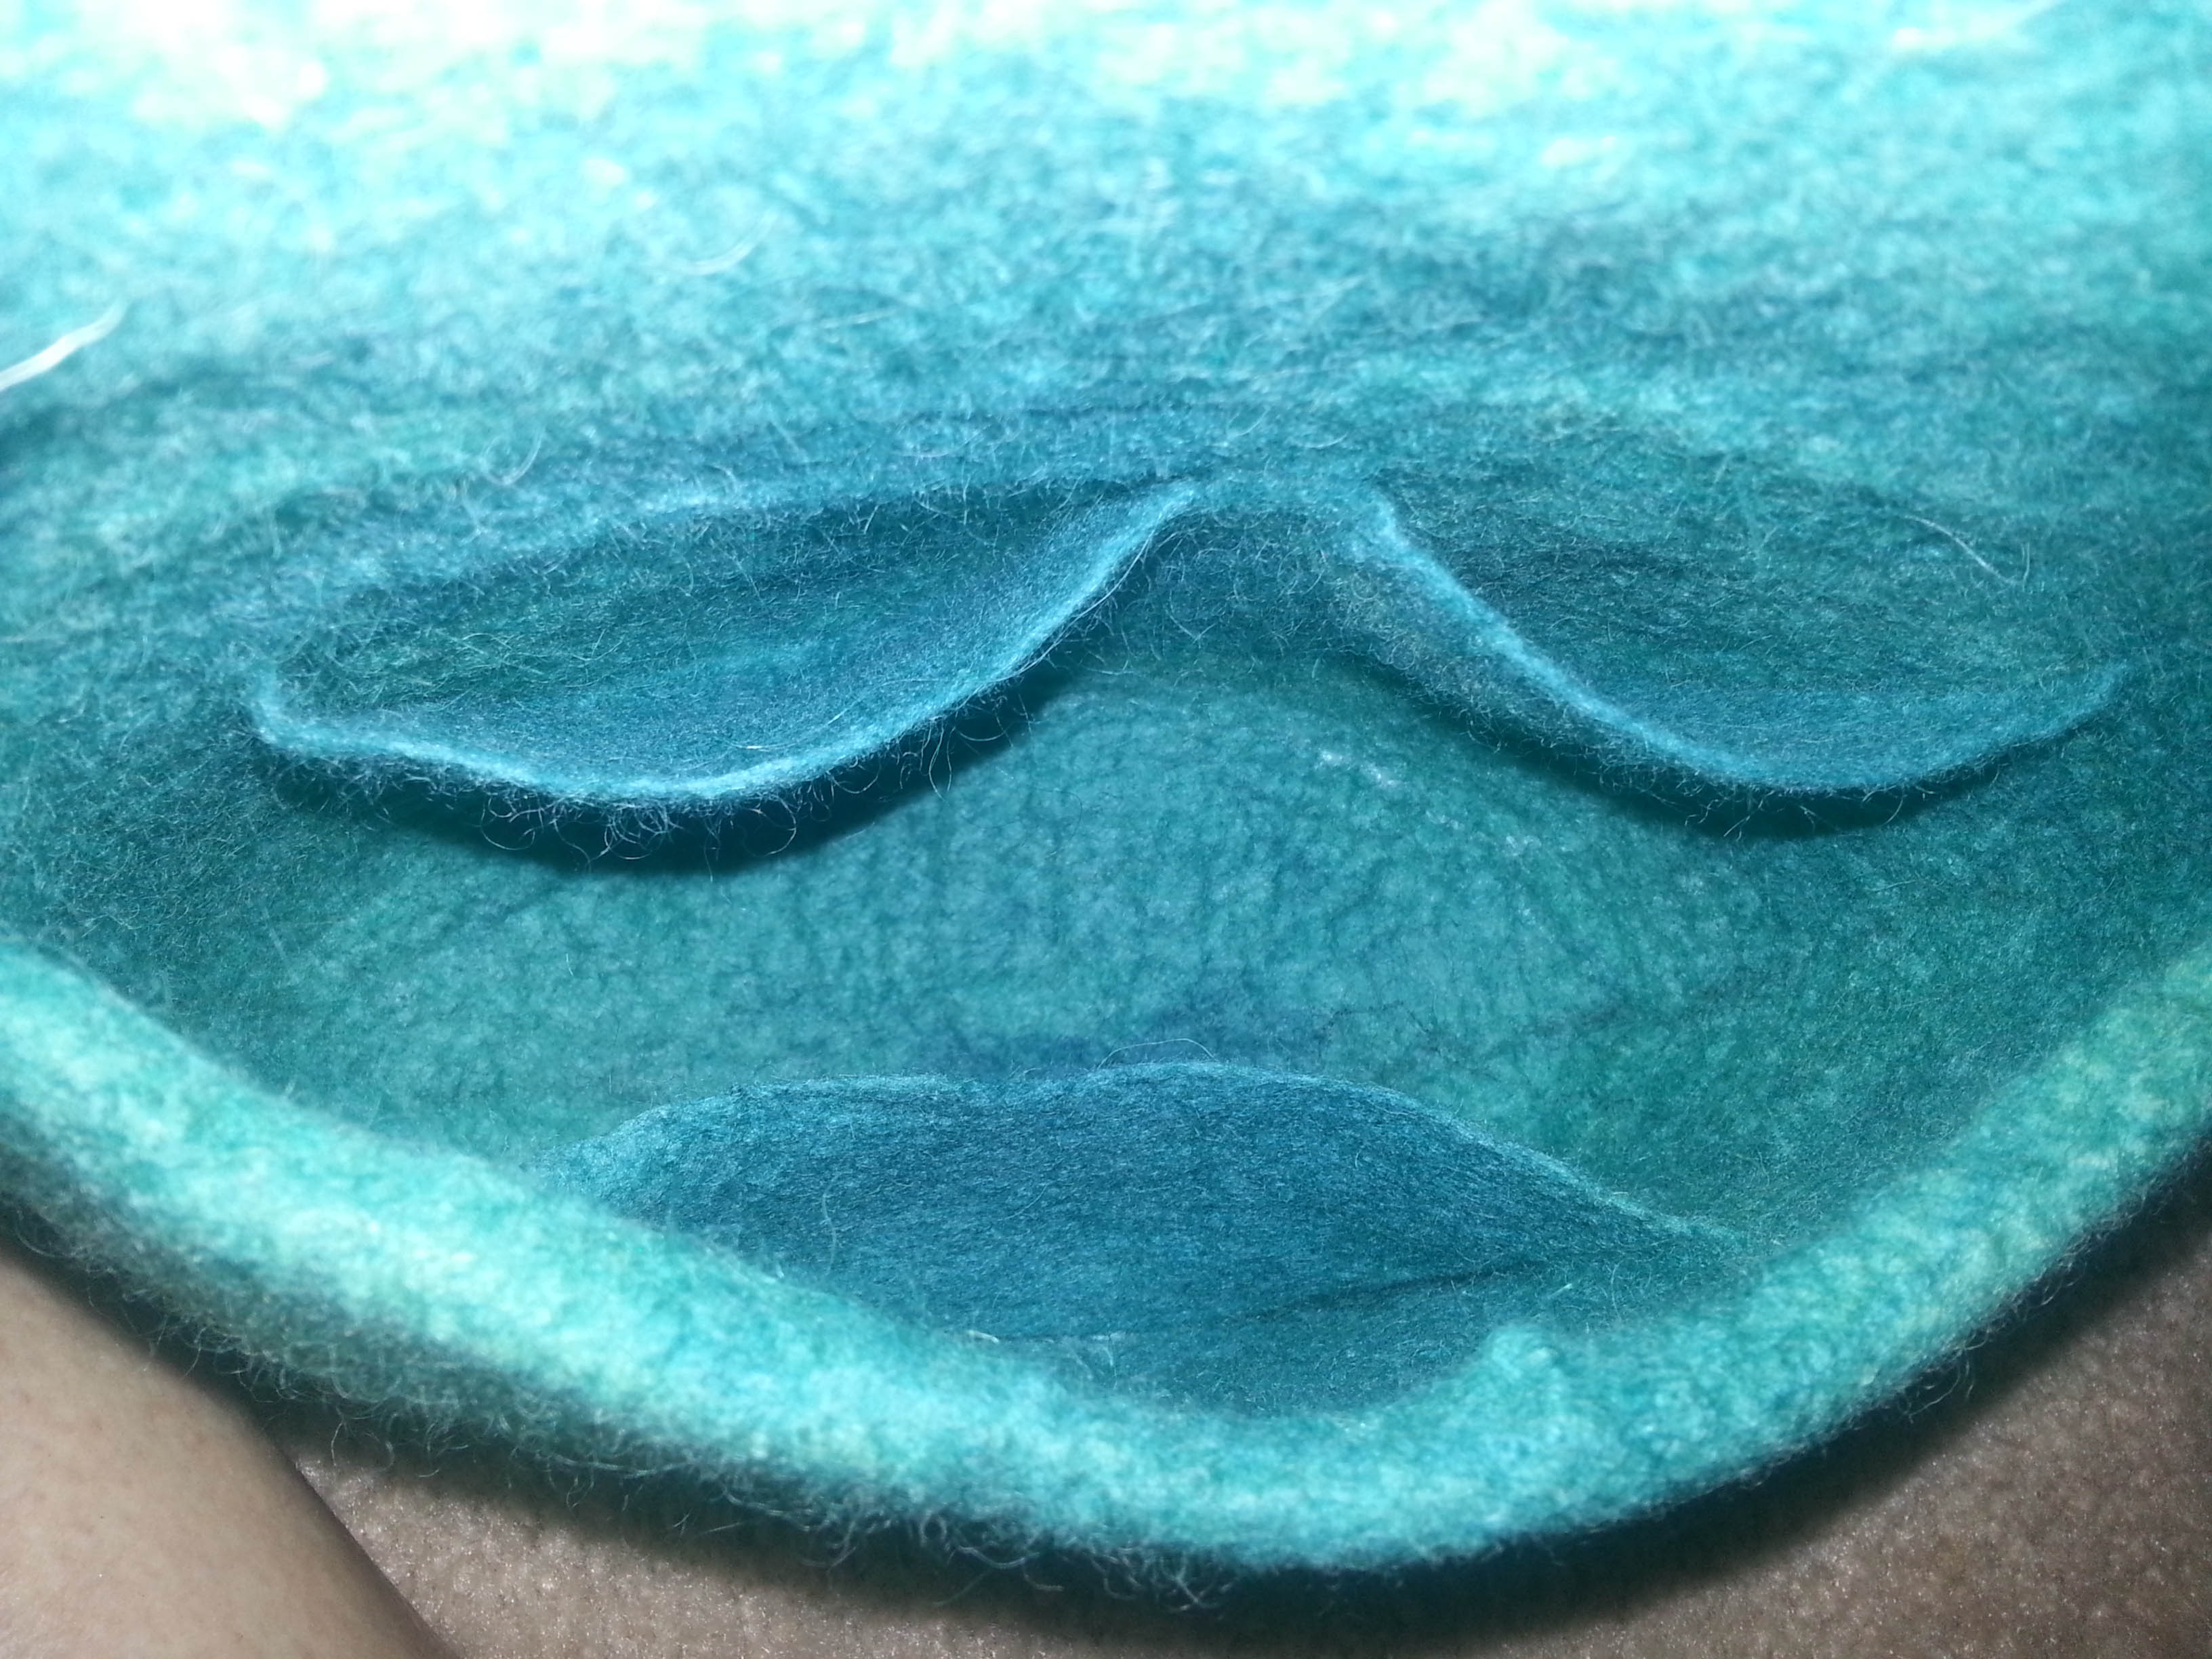
Next was decorating.  It took a long time to cut out the spots from handmade prefelt in various sizes. I  placed a batt over the top taking care not to overlap to the underside which would stay white.  Then came the spots.

20160413_164020a

There was a lot of rubbing before rolling.  I used a gray roving to highlight the mouth, nostrils and gills on the underside.

Once the felting was near complete, I cut out the resist, the gills, mouth then finished the fulling. The eyes came last. They were a bit tricky. The glass bead and rock had moved during the felting.  Removing the rock took a little  doing and I ended up using a tweezers. A little needlefelting helped finish off the eyes and put stripes on the tail.

20160421_141911a

20160421_141902a

20160421_140852a 20160421_140906a

I wanted to show the ray in motion so I put two plastic bottles under the flaps while it dried, but even after drying as soon as I layed it down the ray went flat. Plan B was to use Modge Podge to hold the shape.  It did the trick, but I wasn’t happy it remained white.

20160430_112347a 20160430_112519 A_edited-1

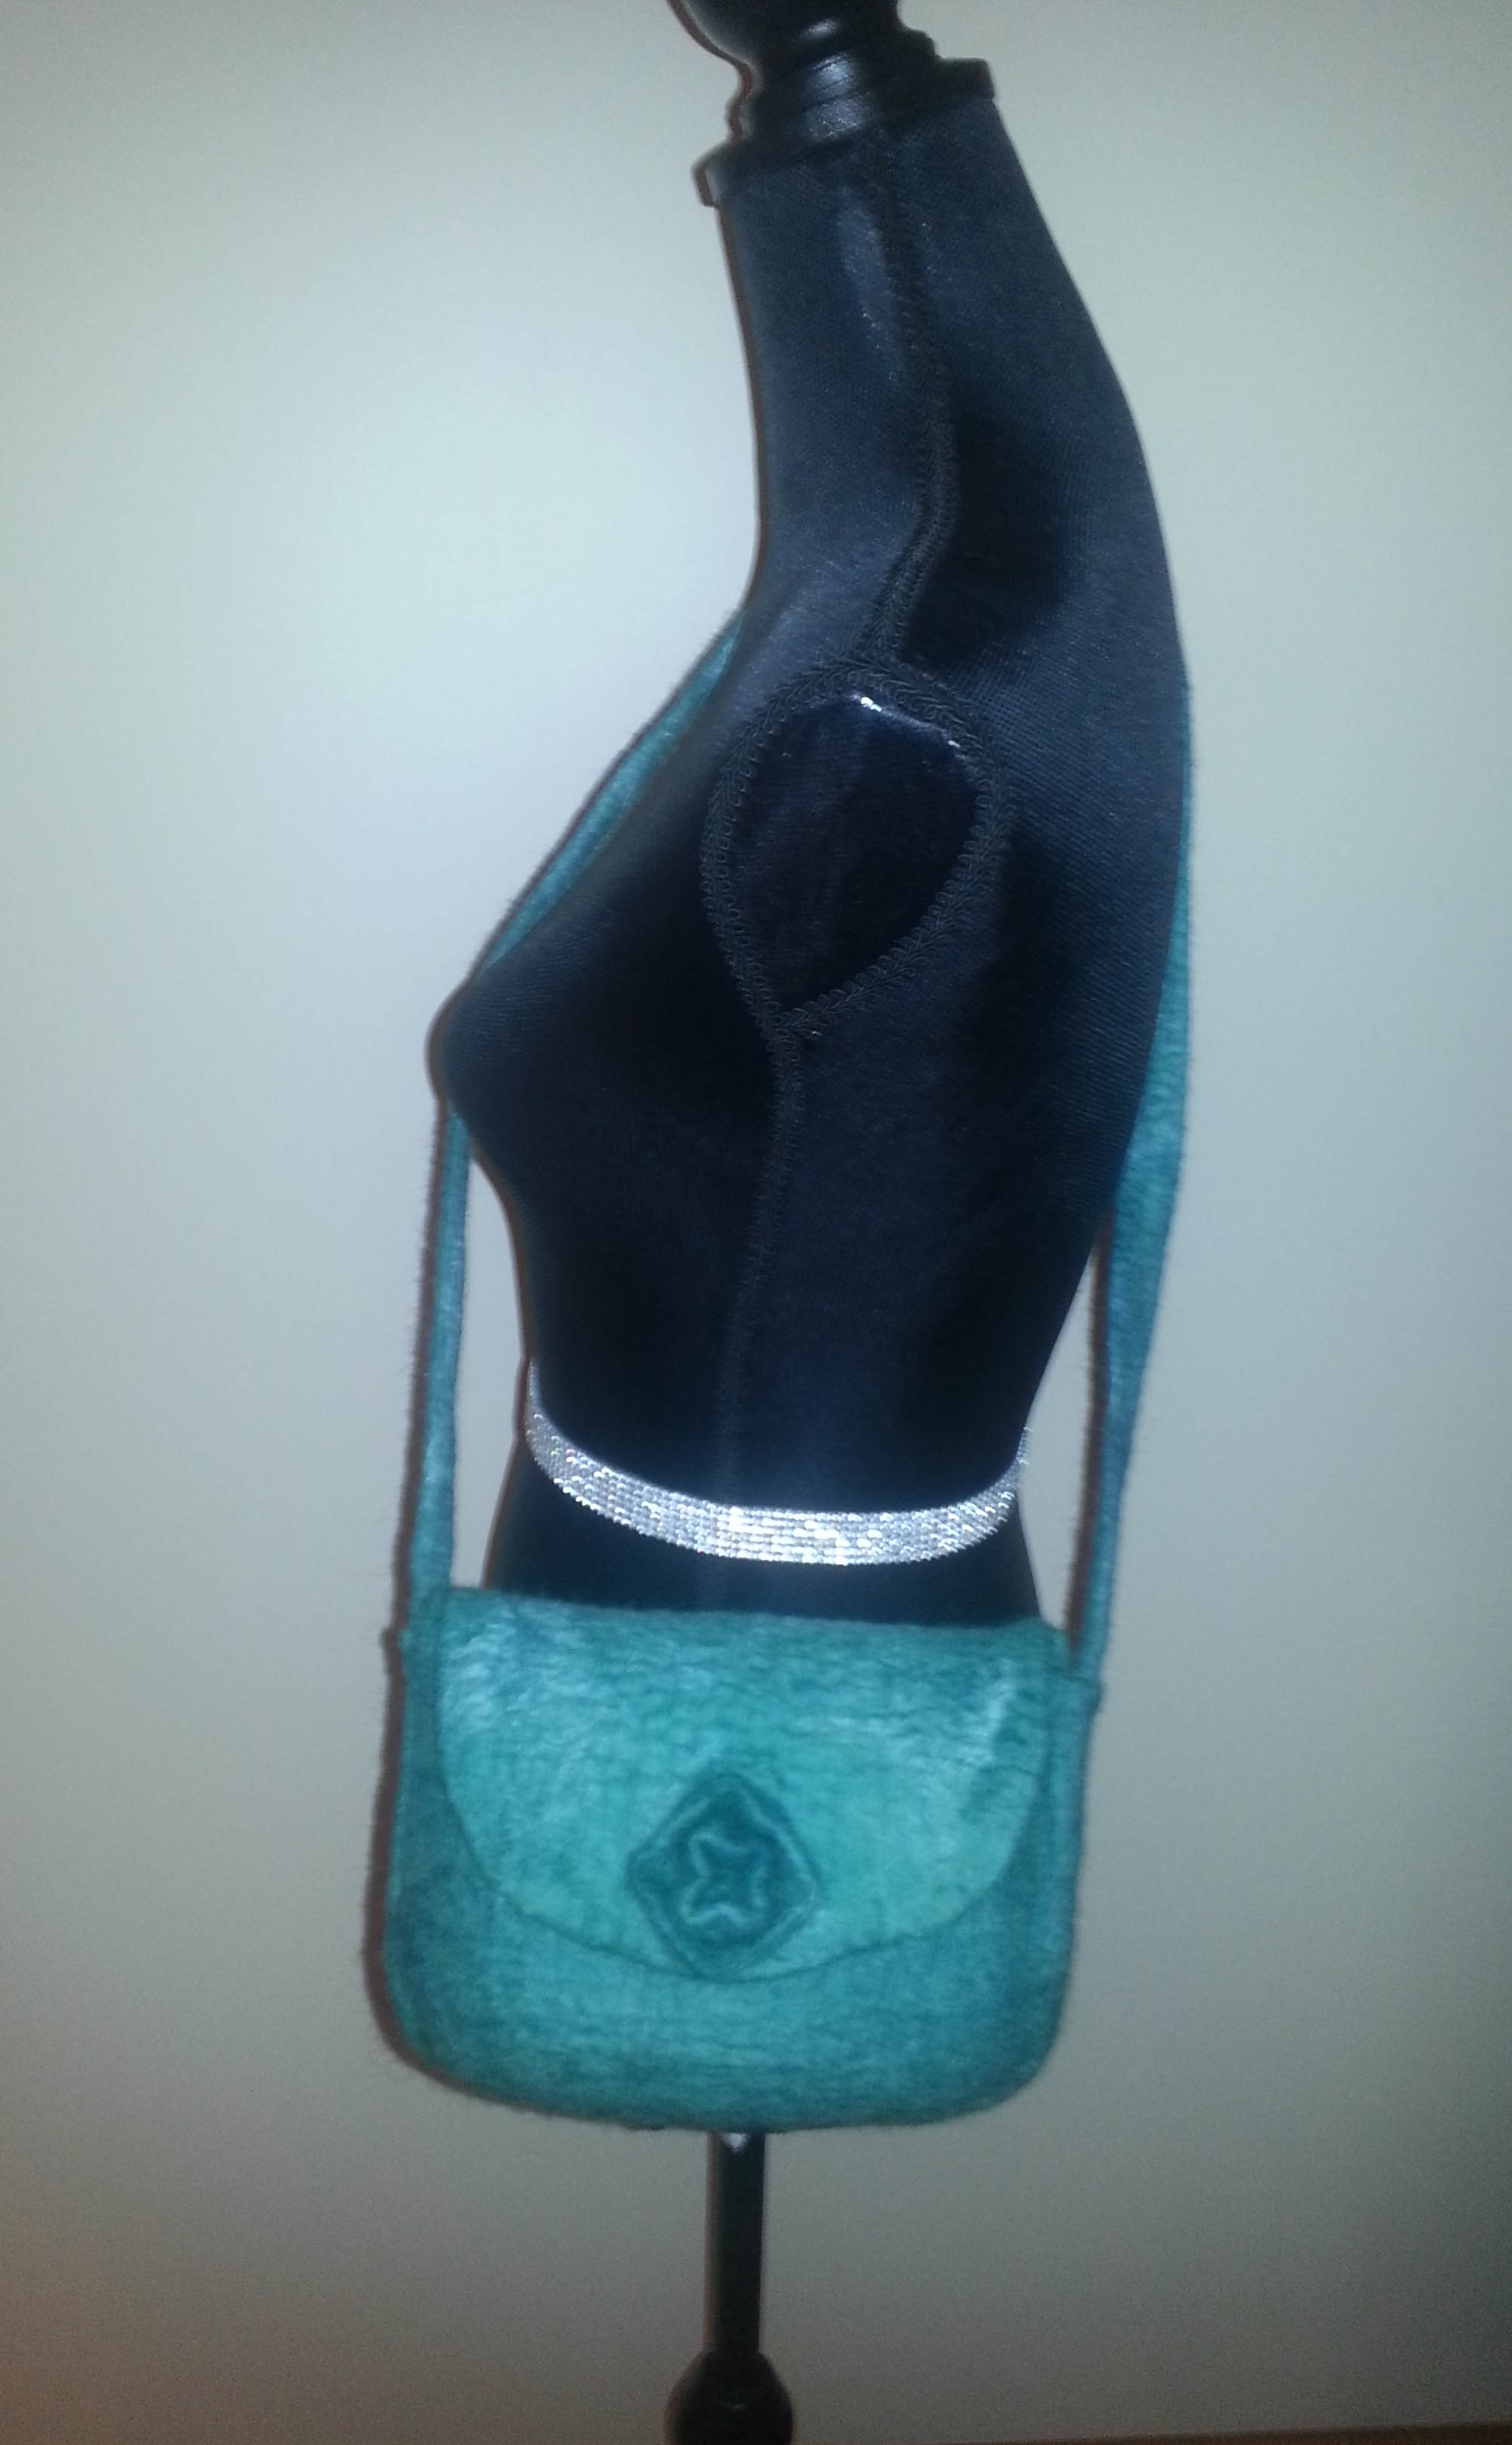
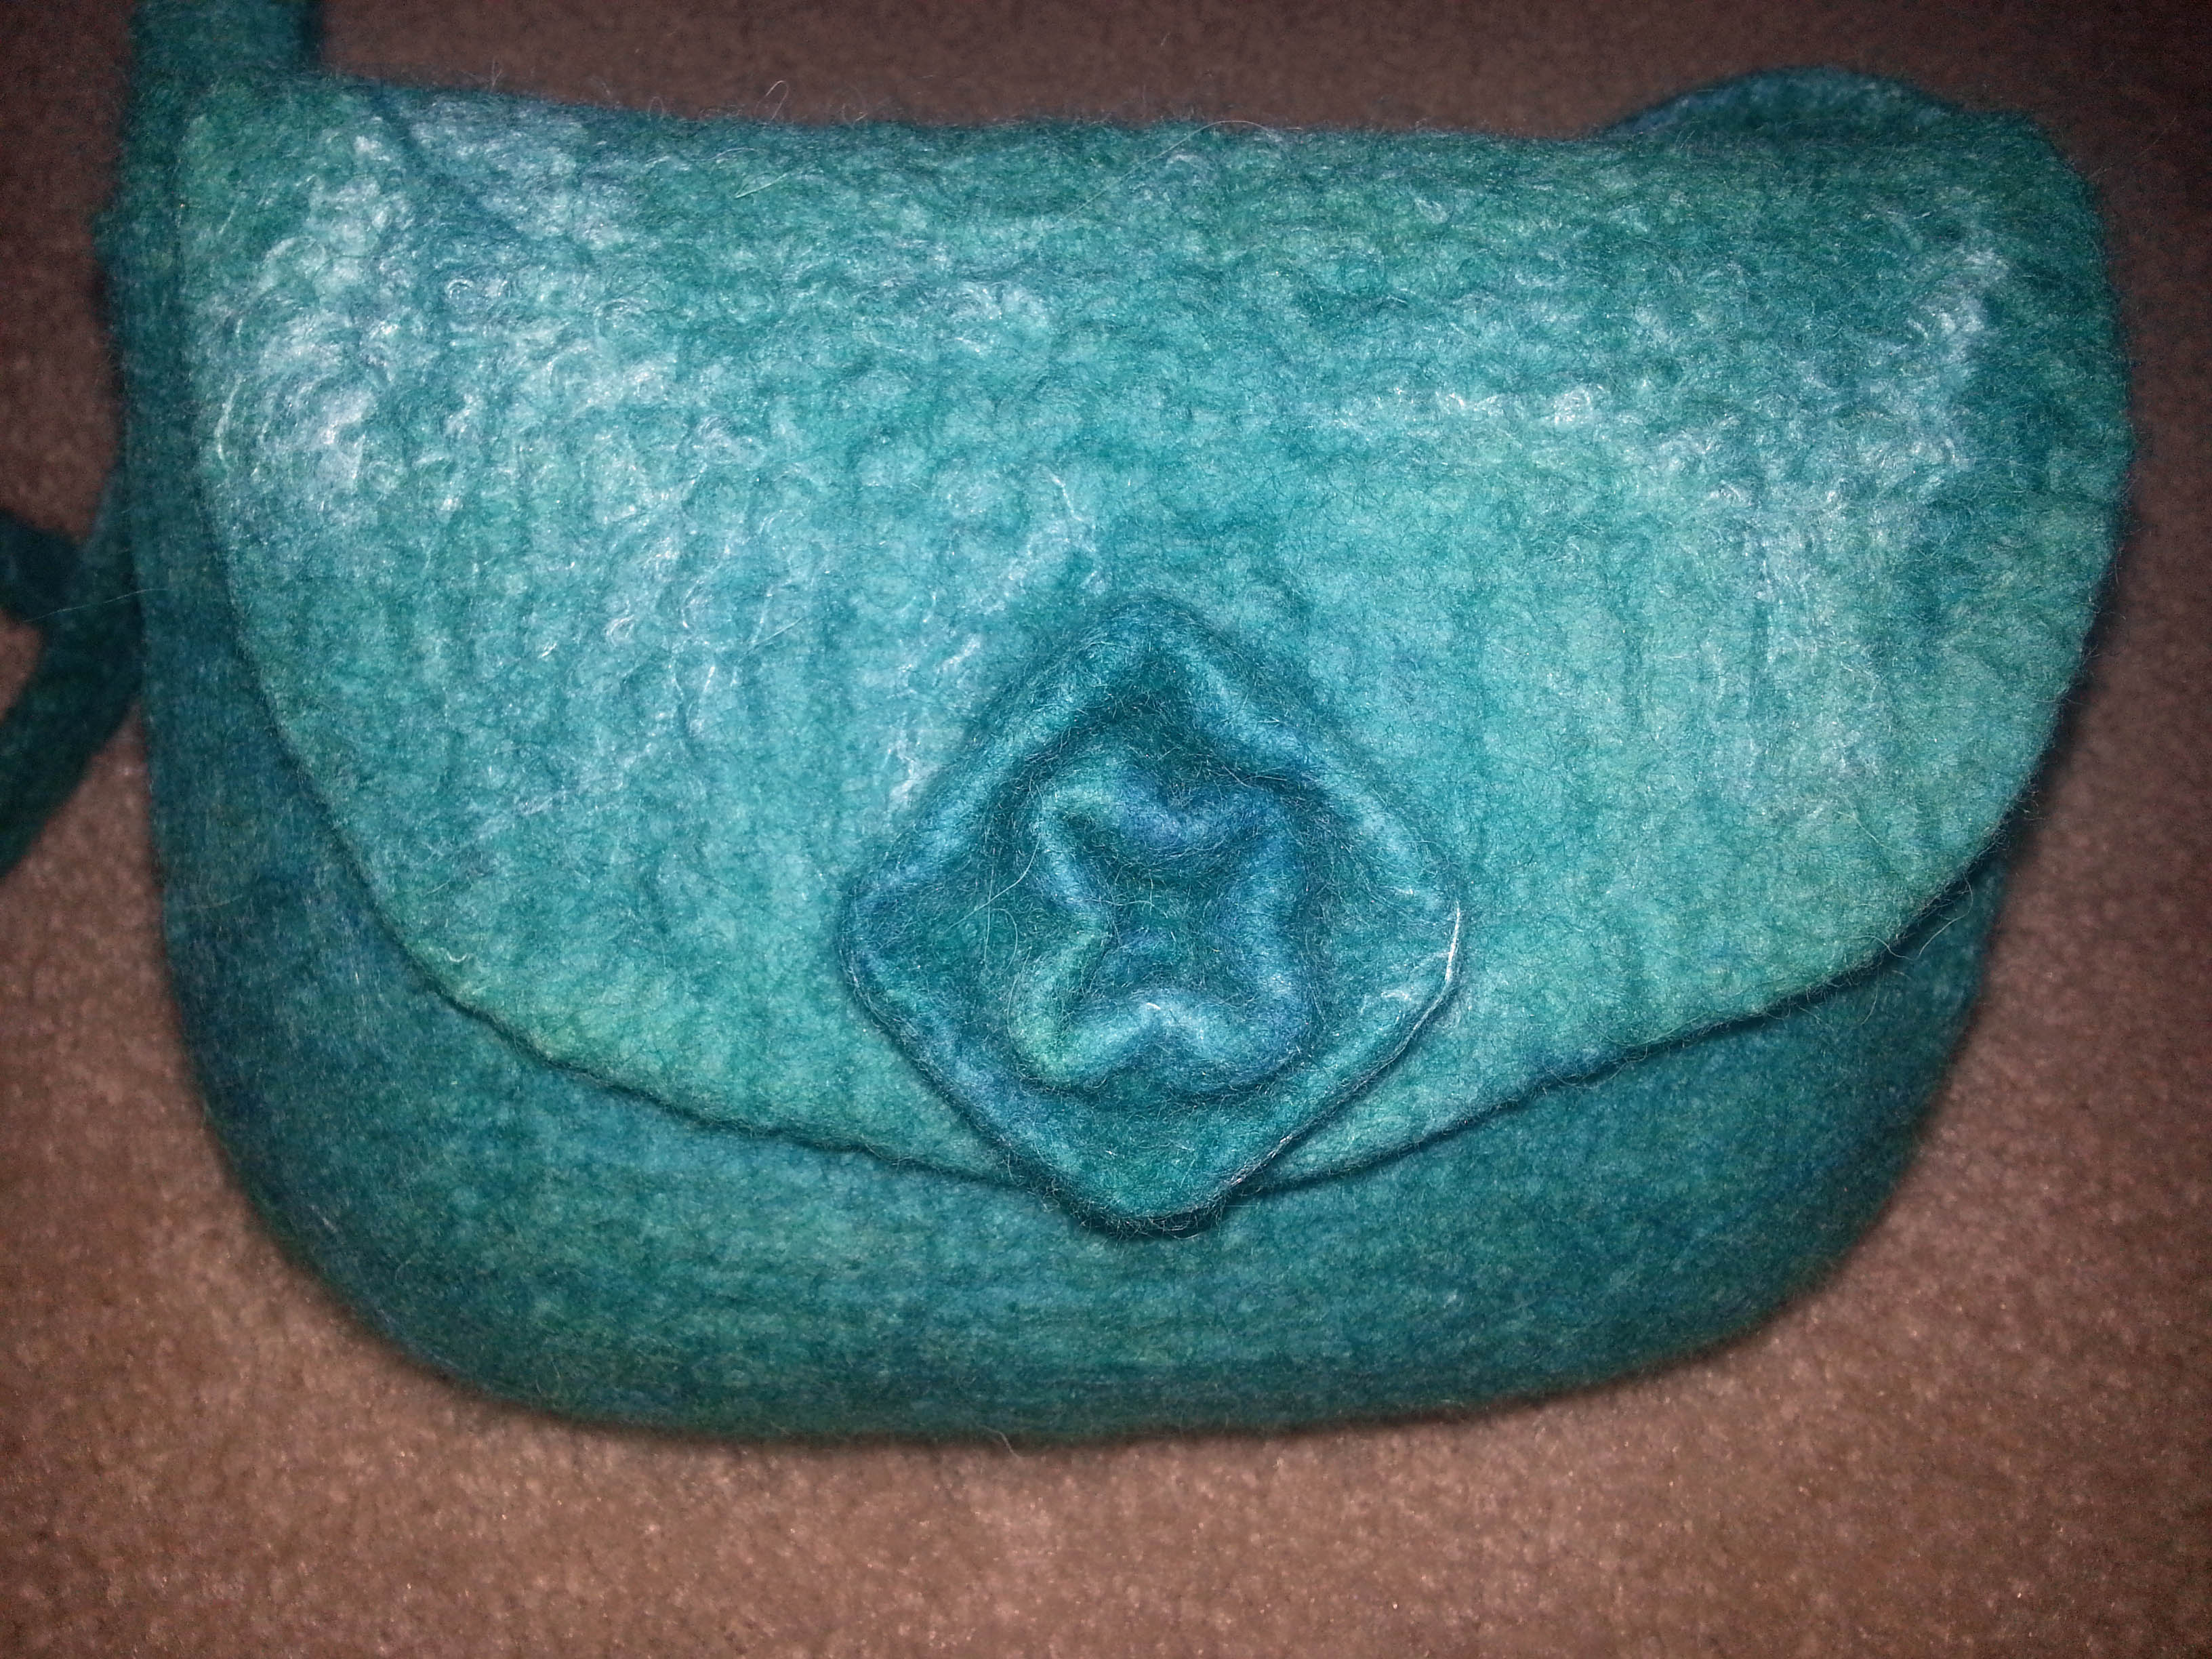
Here he is hanging on the wall near my work area.  It’s hard to tell, but the wall is a light blue.

20160429_160634a_edited-1

I sometimes wonder why I come up with these types of projects. I did enjoy the learning process though.  What challenges have you had lately?


Ooops!

Ooops!

We’ve talked a lot lately on the forum about projects not turning out as planned.  Sometimes we have happy accidents like my scarflette that turned out better than I had planned.  However, that’s not always the case.  That’s why we all have UFOs.

Last year I decided to design a credit card wallet. I spent a lot of time measuring and making resists and batts, cutting prefelt and designing a master pattern complete with shrinkage built in.  I wanted it to be functional enough to be able to put most of the things I use in one place.

20150429_161653 20150428_113623 20150429_163547I didn’t have a wallet to use as a model, so I winged it.  I used the prefelt as the base and began adding resists then the batts on the inside.  To keep track of where my folds and placements were I used pieces of threads to help keep everything in line.

On the inside I wanted three long pockets, then eight credit card slots. There is one resist under the red batt.

20150430_154427Then I added the second lower pocket offset about a half inch, and began putting the credit card slot resists in.

20150501_151307

20150501_152541Once I finished adding the slots, I turned it over and added resists on the front. I wanted a license holder and a pocket.

20150501_160550Then after covering in black merino and decorating with some red silk throwsters waste, I began the felting and fulling process.

The hardest part and one of my big mistakes was cutting out the resists. I decided to use an Exacto knife to cut the top large opening.  Guess what?  Yes, that’s a pen sticking thru.  I couldn’t figure out how to take a pic with my finger thru it.

The lower hole is where I wanted the pic ID to be.  Unfortunately, it wasn’t large enough to put in the whole ID and cut out a window to view it.

20160226_12570820160226_125521

The pocket on the front was also too small an opening to put anything in there that wouldn’t fall out.

20160226_125849

On the inside the larger pockets were functional, but I made a mistake with the credit card pocket by making each row a little deeper.  Duh, what was I thinking?  All credit cards are the same size!

20160226_125616


There was room for cash and a checkbook and coupons, if need be.  However, the credit cards were a disaster.  I couldn’t reliably put them in there and think they’d stay put.

20160226_125503Folded over it doesn’t look bad on the front.

20160226_125843 The back is a different story.

20160226_125849

I had considered trying to save it, but I don’t believe it would be worth the time since many of the proportions are off and there a gaping holes. However, I did learn a lot from the experience.

  • Try not to make the project too complicated
  • Use a model for size proportions
  • Never use an Exacto knife to cut out a resist

I hope this may help others when they are planning a big project in the future. 🙂


Gone Fishing…

Gone Fishing…

I don’t know if its spring or summer or something in the creative cosmic atmosphere, but it seems fish have become a theme for art lately.

Cathy (Luvswool) and I got together before she went to her Colorado residency and I went to Florida a few weeks back.  We wanted to do something different together.  We remembered the cool fish Galina ( Felicity) did a while back on  her blog and decided to try that. (Thanks for the inspiration Galina!)

We each made our resists beforehand.  Of course, we were busy chatting while deciding on colors.  It took a bit before we got started.

Cathy chose yellow and blue.  I went with my teal (I have sooo much) and purple.

2015-06-24 13.32.28

We each used three layers (one layer of domestic 56 batt in between) and tried to get the fish mouth like Galina had hers not too successfully.  I guess we need practice. We also used gems for eyes.

I made separate prefelt for fins and tail.

When I got to the prefelt stage on my fish, I cut out and attached the tail and fins. I couldn’t find the resists for my gills when it came time to take the resists out.

2015-05-20 13.27.53 2015-05-20 13.28.20

We weren’t trying to make exact fish, but have fun coming up with our own fantasy fish.

IMG_1425 IMG_1424 IMG_1423

Cathy did get the gill resist out, but it ended up too wide, so she embroidered it to close it up.  She also added some roving around the eye and needlefelted it to get it to stay.

IMG_1426 IMG_1427

I decided to work on another fish that week and ended up with two more just experimenting with colors and embellishments. I managed to get gills on the second one. I also added bottom fins by needlefelting them on. The eyes were hard to get even on each side. I got a little better at the eyes, but they’re still not perfect.

2015-05-20 15.53.05

2015-05-20 15.51.32 2015-05-21 14.49.53

2015-05-21 14.41.21

2015-05-21 14.38.37

2015-06-24 13.27.29 2015-06-24 13.28.50

I’m not sure how I’ll display them.  I originally thought I hang them in the bathroom, but I don’t think my husband would approve of flying fish.

Have you done any summer or fish themed projects?


Felt Fan Fare

Felt Fan Fare

Over the summer I collected a number of items at garage sales and thrift stores to try new projects in felt.  One of the things I was intrigued with was a paper fan.

I removed the paper very gently and used it to make the pattern for the felt using a 30% shrinkage factor.

image


I cut out two sides from prefelts then cut out the rib resists from flooring foam and placed them on the one side of the prefelt then covered it with the second side and decorated it with silk and throwsters waste. The trick of course would be to keep the ribs in place while felting.  I did a lot of rubbing in all directions on both sides until I could see the felt sticking together between the ribs, then did my rolling, rinsing, etc.

image

image

Because the actual ribs were thicker than the resists, I placed wooden skewers in the resist slots then creased the fan the way I wanted it to dry and basted the back with thread and tightened.

image

image

The real challenge was getting the real ribs into the slots since the fan was held together with a non removable pin with two round heads. I’m sure there is a technical name for this, but I don’t know what it is.

I worked on it for hours trying to get all the ribs started then in and up to the top. I even enlisted my husbands help for an extra set of hands, but that didn’t help.  I was very frustrated and left it for a while then came back fresh and finally got it to work. The first and last ribs are glued on to the wood.

While my husband I were in California in July, we visited the Japanese Gardens in Los Angeles and I had purchased a cute little wooden fan stand.

image

I had visions of possibly producing fans to sell, but I’m not sure it’s worth the effort unless I can develop an easier way to thread the ribs into the fan.

What projects have you started only to find it was harder than you thought?

From Batts to a Handbag

From Batts to a Handbag

After my four days of dyeing experiment, I carded a bunch of batts with the different fibers I had dyed.  I decided I wanted to do something a little challenging using the batts. So, after doodling around with a few ideas I settled on a handbag using a couple of the techniques I learned in Fiona Duthie’s Surface Design Class.

I didn’t have a pattern. So, I used the general shape of the purse I carry now and added 30% for shrinkage and made a template. It took a lot more planning than I had anticipated so I got very engrossed in making sure I had everything organized and followed each step in the right order. Unfortunately, I worked intuitively and forgot to write down the procedure and take pictures at each step.

I wanted to use fiber for the shoulder strap, but I also wanted it to be strong and not stretch.  I made the shoulder strap first using a tightly woven scrim cut with the grain between layers of wool.  I left long ends unfelted and wrapped plastic at the ends to try to protect it from the water, not that it helped. This would be the part I would felt to the bottom and sides of the handbag so it would be all one piece.  Then I  used a dowel to roll the strap until it was partially felted.

handle end rolling handles


Here is one side of the purse with scrim lining between the wool layers, resist and a resist for one of the inner pockets. I wet one side then proceeded to lay out the other side working backwards from inside out. Laying out more pocket resists, the back and back pocket. I know that sounds strange, it was a little mind boggling.

layout

The decoration for the flap had to be done first before attaching it to the bundle to felt. The middle was felted by hand and the circle of fiber around it was left unfelted in order to add additional  fibers to felt into the bundle.

decoration

The handles were laid out on the bottom and the sides then worked on the sides first to ensure they held together during the felting process.

It was quite a thick bundle and once it was felted enough, I cut out the resists and continued to full and shape it until it sat up by itself.  When dry, it had that “thud” of being completely fulled.

hangingcloseup front Three inside pockets.

insideOne back pocket.

top view

backI wonder if I could duplicate this again?  Maybe if I do I’ll write a tutorial.  The one thing I would do differently is to put the shoulder straps on the inside of the bottom and sides rather than outside.  That would be another challenge. What do you think?


Easter Baskets

Easter Baskets

With Easter around the corner, I decided to make Easter baskets for my grandsons this year.

Since I didn’t have a container the size or shape I wanted, I chose to make a resist using Rosiepink’s “How to Make Vessels with a Resist” ebook.

I wanted to put a different design on each side, but have both the same. A bunny on one side and a chick on the other.  Then I made a resist design on paper and cut a template from plastic flooring material.  After sketching out a design, I made some prefelts in colors I didn’t have because I decided it would be easier to control the small design pieces.

prefelt

I cut out the designs from the prefelt and needle felted them together using yarn to decorate the eggs.  I used an extra white layer underneath the bunnies because I didn’t want the background colors coming through after fulling.  I also used another layer under the bottom of the eggs to level them out.  Before laying out on the resist:

chick and bunny

At the last minute I changed the position of the eggs making them vertical instead of horizontal.  When I put the designs on the resist they were too tall!  Back to the drawing board to make a bigger resist.  I added another two inches in height to accommodate the height and shrinkage.

Since they are baskets, I wanted to make them look like it.   So, I alternated background colors on the first layer.  It got tricky on the second layer because the roving was laid out perpendicular and the colors didn’t match because of the staple length.  I found the sparse spots and filled in those colors first then proceeded with the second layer design careful to alternate the side colors as well. I used four layers total one side at a time.

First layer
First layer


After I finished felting, fulling and shaping, I noticed my bunny and chick designs were too low.  I’m sure the kids won’t care, but I’ll know better next time.  I was very pleased with the final result.  Although, the bunnies need some whiskers. Any suggestions?

easter baskets 2

To finish it off, I made basket handles by braiding roving, then felting and fulling them.  I also used Zed’s “Polymer  Clay Simply Made” ebook to make “egg” buttons. That was fun, too.  I still have to put them together.  The handles are soft which was intentional so that we could easily pack them and use the buttons to remove the handles.

What spring or Easter projects are you working on?

Thanks to Lyn and Zed for creating such easy to follow tutorials!

Surface Design Using Resists

Surface Design Using Resists

Like Ann, I haven’t been very well lately and haven’t had chance to do anything other than tidy up the mess I let accumulate while I was writing my notebook tutorial 🙂
We always seem to be talking about surface design on the forum: stitching, embroidering, embellishment fibres, beading etc. And there have been quite a few projects using resists lately too: Lyn’s pod that she posted about last week, Nada’s resist Slipper tutorial, and Carole from the forum showed us her gorgeous sculptural vessels with lots of surface design and embellishment.  A couple of months ago, Nada reminded me of some projects I’d done using resists to create surface design, so having nothing new to post about, I had a look through my photostream for some examples and hope you don’t mind revisiting some old stuff!
I think this was the very first piece I made using resists to create surface design. I wanted to have a go at trying out lots of different ideas at once, so made a piece using six resists to try out different cuts/shapes.

resist sample (1)I wanted to try out using resists with more contrast between the top layer and what it revealed underneath. This one has green/brown/mossy shades revealing slashes of orangey brown shades of wool with embellishments of silk noil, bamboo, silk hankie and  soya fibre.

orange and green (1)This burgundy piece is cut away to reveal orangey mustard shades with soy bean fibres.

burgundy and orange (2)I think this next piece is probably one of my most adventurous. The resists and cuts were fairly straightforward, but it was quite big, very thick to make it stiff enough to support itself, and I used a flat resist – not somethng I ever have much luck with for a 3d shape!

danglie (2)This last piece is one of my favourite vessels. I love the colours and textures and was really pleased that it came out just how I’d imagined!

vessel (2)If you’re interested in using resists in felting, Ruth wrote a post early on about using flat resists for different hat and vessel shapes. Also, Lyn and her daughter Annie have written a brilliant PDF guide to making 3D vessels using flat resists.

%d bloggers like this: