The felting part of the scarves is all done. I have moved to adding buttons. A friend helped me pick out all the buttons at our guild social On Monday night. At one point we had lots of buttons out of the bags on the table as we poked through them in search of just the right button. Unfortunately no picture of that. Jan got a great close up of this button we were trying on this scarf. Actually all these pictures were taken by Jan Scott except the 2 of her and her new wheel.
Here is a picture of part of the social. There was spinning and weaving and knitting and wheel adjusting, probably other stuff too.
And Jan brought her new wheel. It is an electric spinner and it fits in a small plastic container. It is as portable as a spindle. There were lots of oos and ahhs as she showed it off.
And lastly 3 great pictures of my scarves, thanks to Jan.
I hope you like all the pictures. Now I have to get on with the finishing, the hardest part.
I personally like the feel of silk. So, I decided to learn to make a silk ruffled edge on a scarf. This was an experiment for the ruffle and using a few other techniques with different fabrics and yarns. While I’m not a pink person, I thought if this turned out well I’d give it as a gift or sell it.
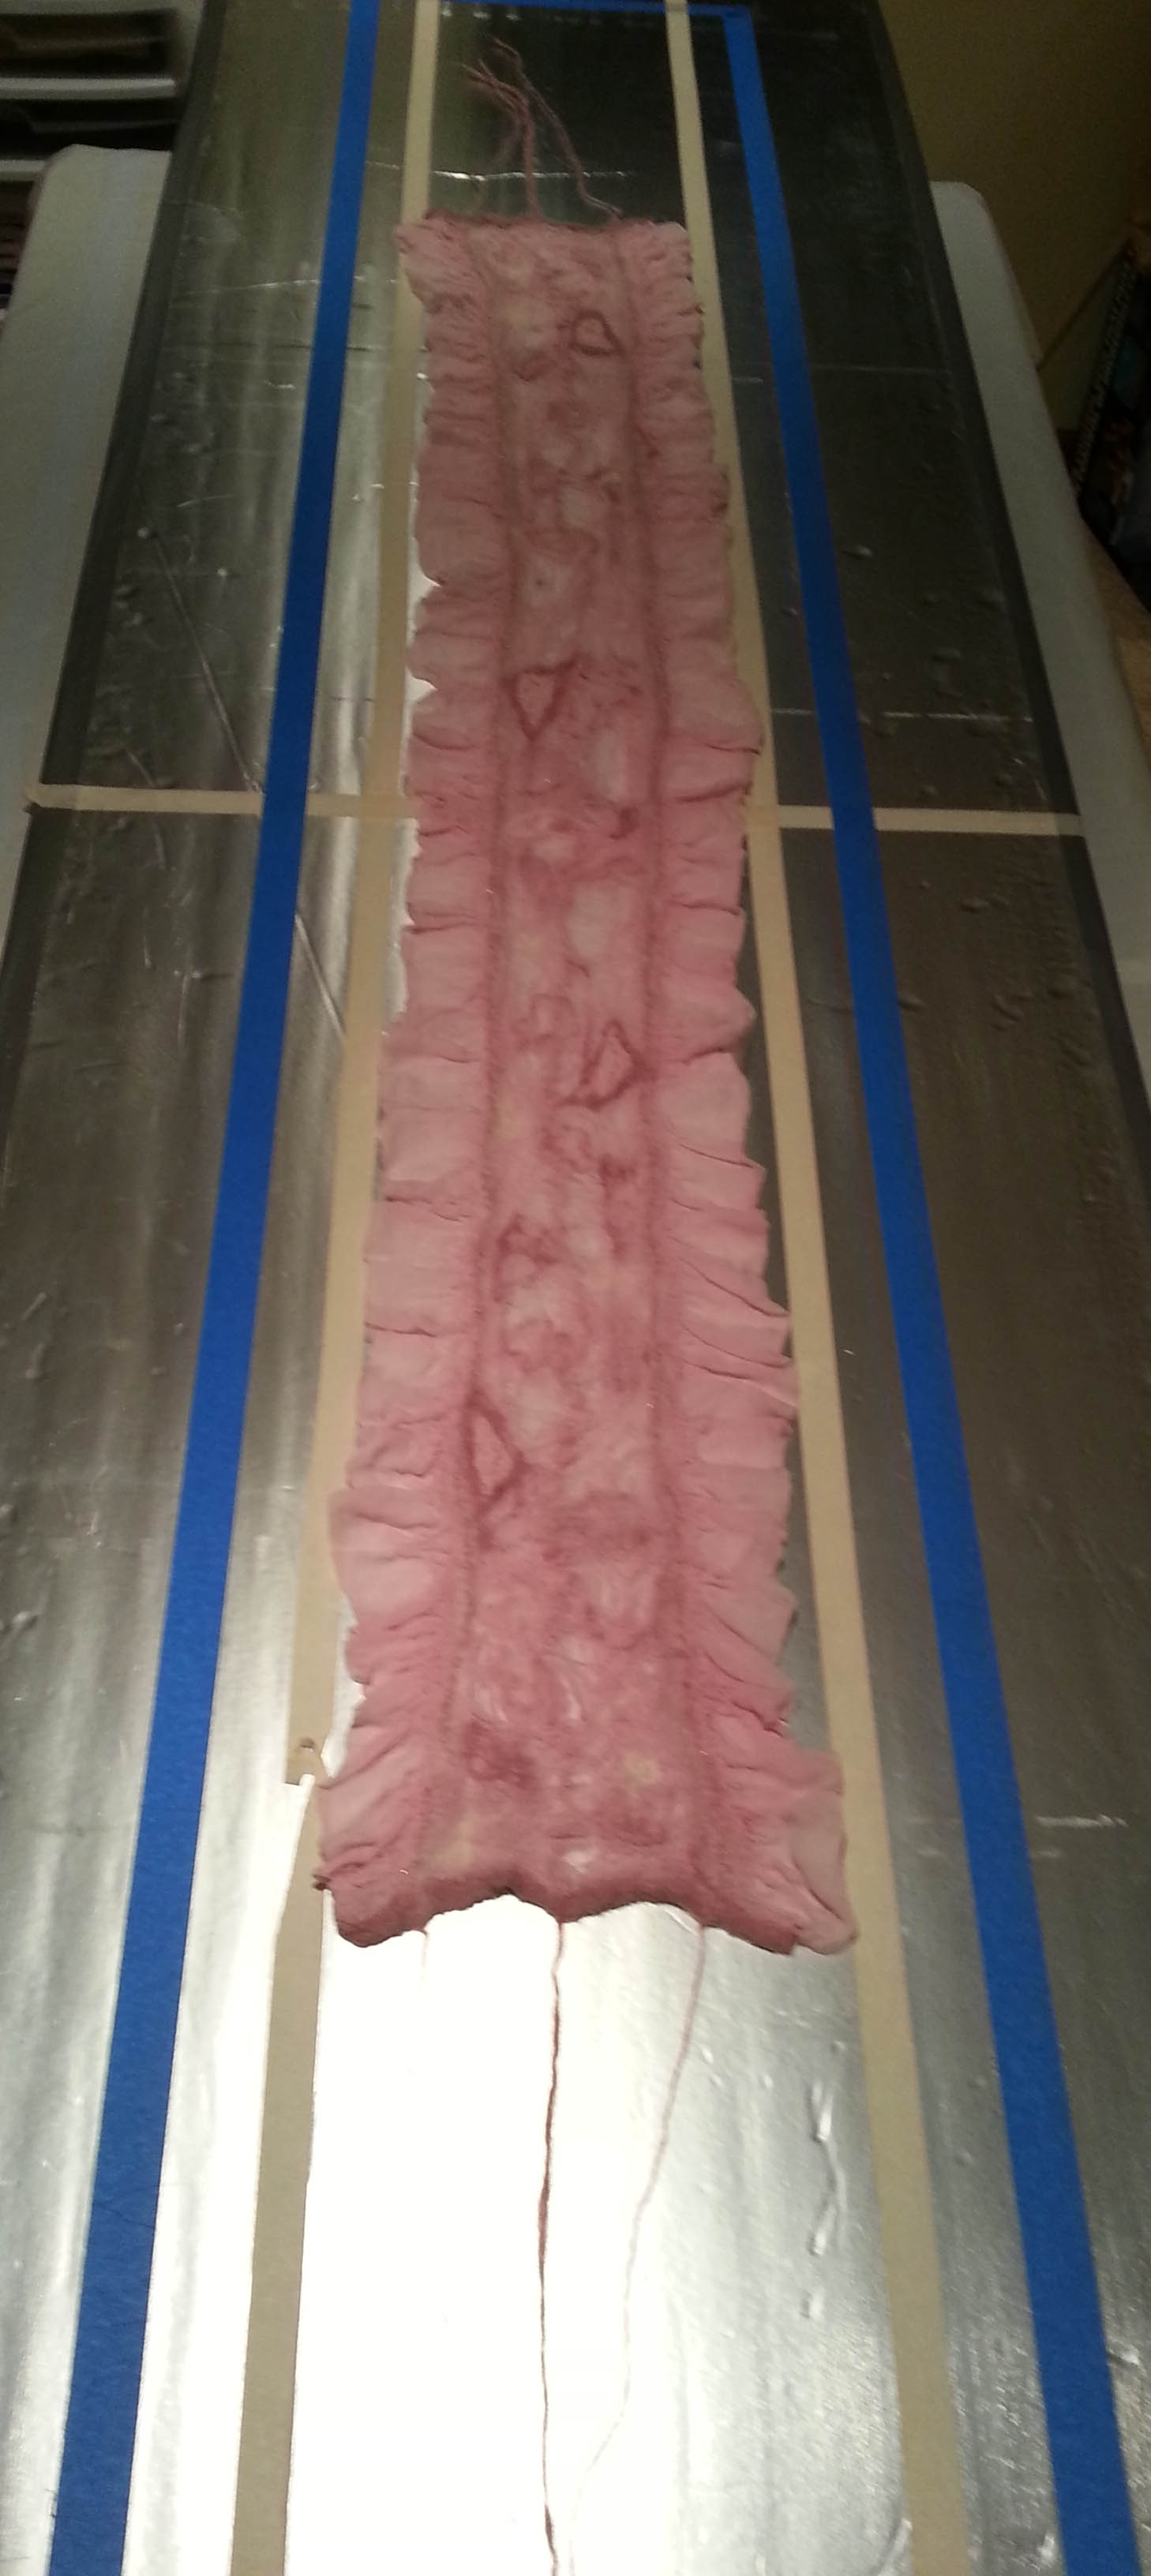
Before starting, I decided to make the scarf two-sided. So, I had to use flipping boards which I marked off with two colors of tape. Blue to show the outside lines of the ruffle and regular masking tape for the place to join the edge of the silk ruffle and the inside design area.
I used a piece of hand dyed pink chiffon. The chiffon shrank a little with the dyeing process, so I allowed for some more during felting. The piece measured 20 1/2′ by 86″ (52 cm x 218.44 cm) to start with before folding over 2″ (5.08 cm) on each side for the ruffle. I used a ruler and iron as I went along . To make sure the silk edge stayed down, I used fabric glue along the edge. This dissolved during the felting.
The flipping boards are from insulation board I bought from the local hardware store. They were kind enough to cut it in half lengthwise for me. I covered the edges in duct tape to protect them from water damage.
I carefully laid the silk open edge up following the lines on the board. I put wisps of pink and white roving lengthwise along the ruffle edges careful to have a little over each side of the raw edge. Because the wool will shrink lengthwise it gathers up the material on both sides creating the ruffle. I used some pink mohair yarn in a design down the middle and left fringe hanging on both ends. I covered the raw edges with wisps of wool.
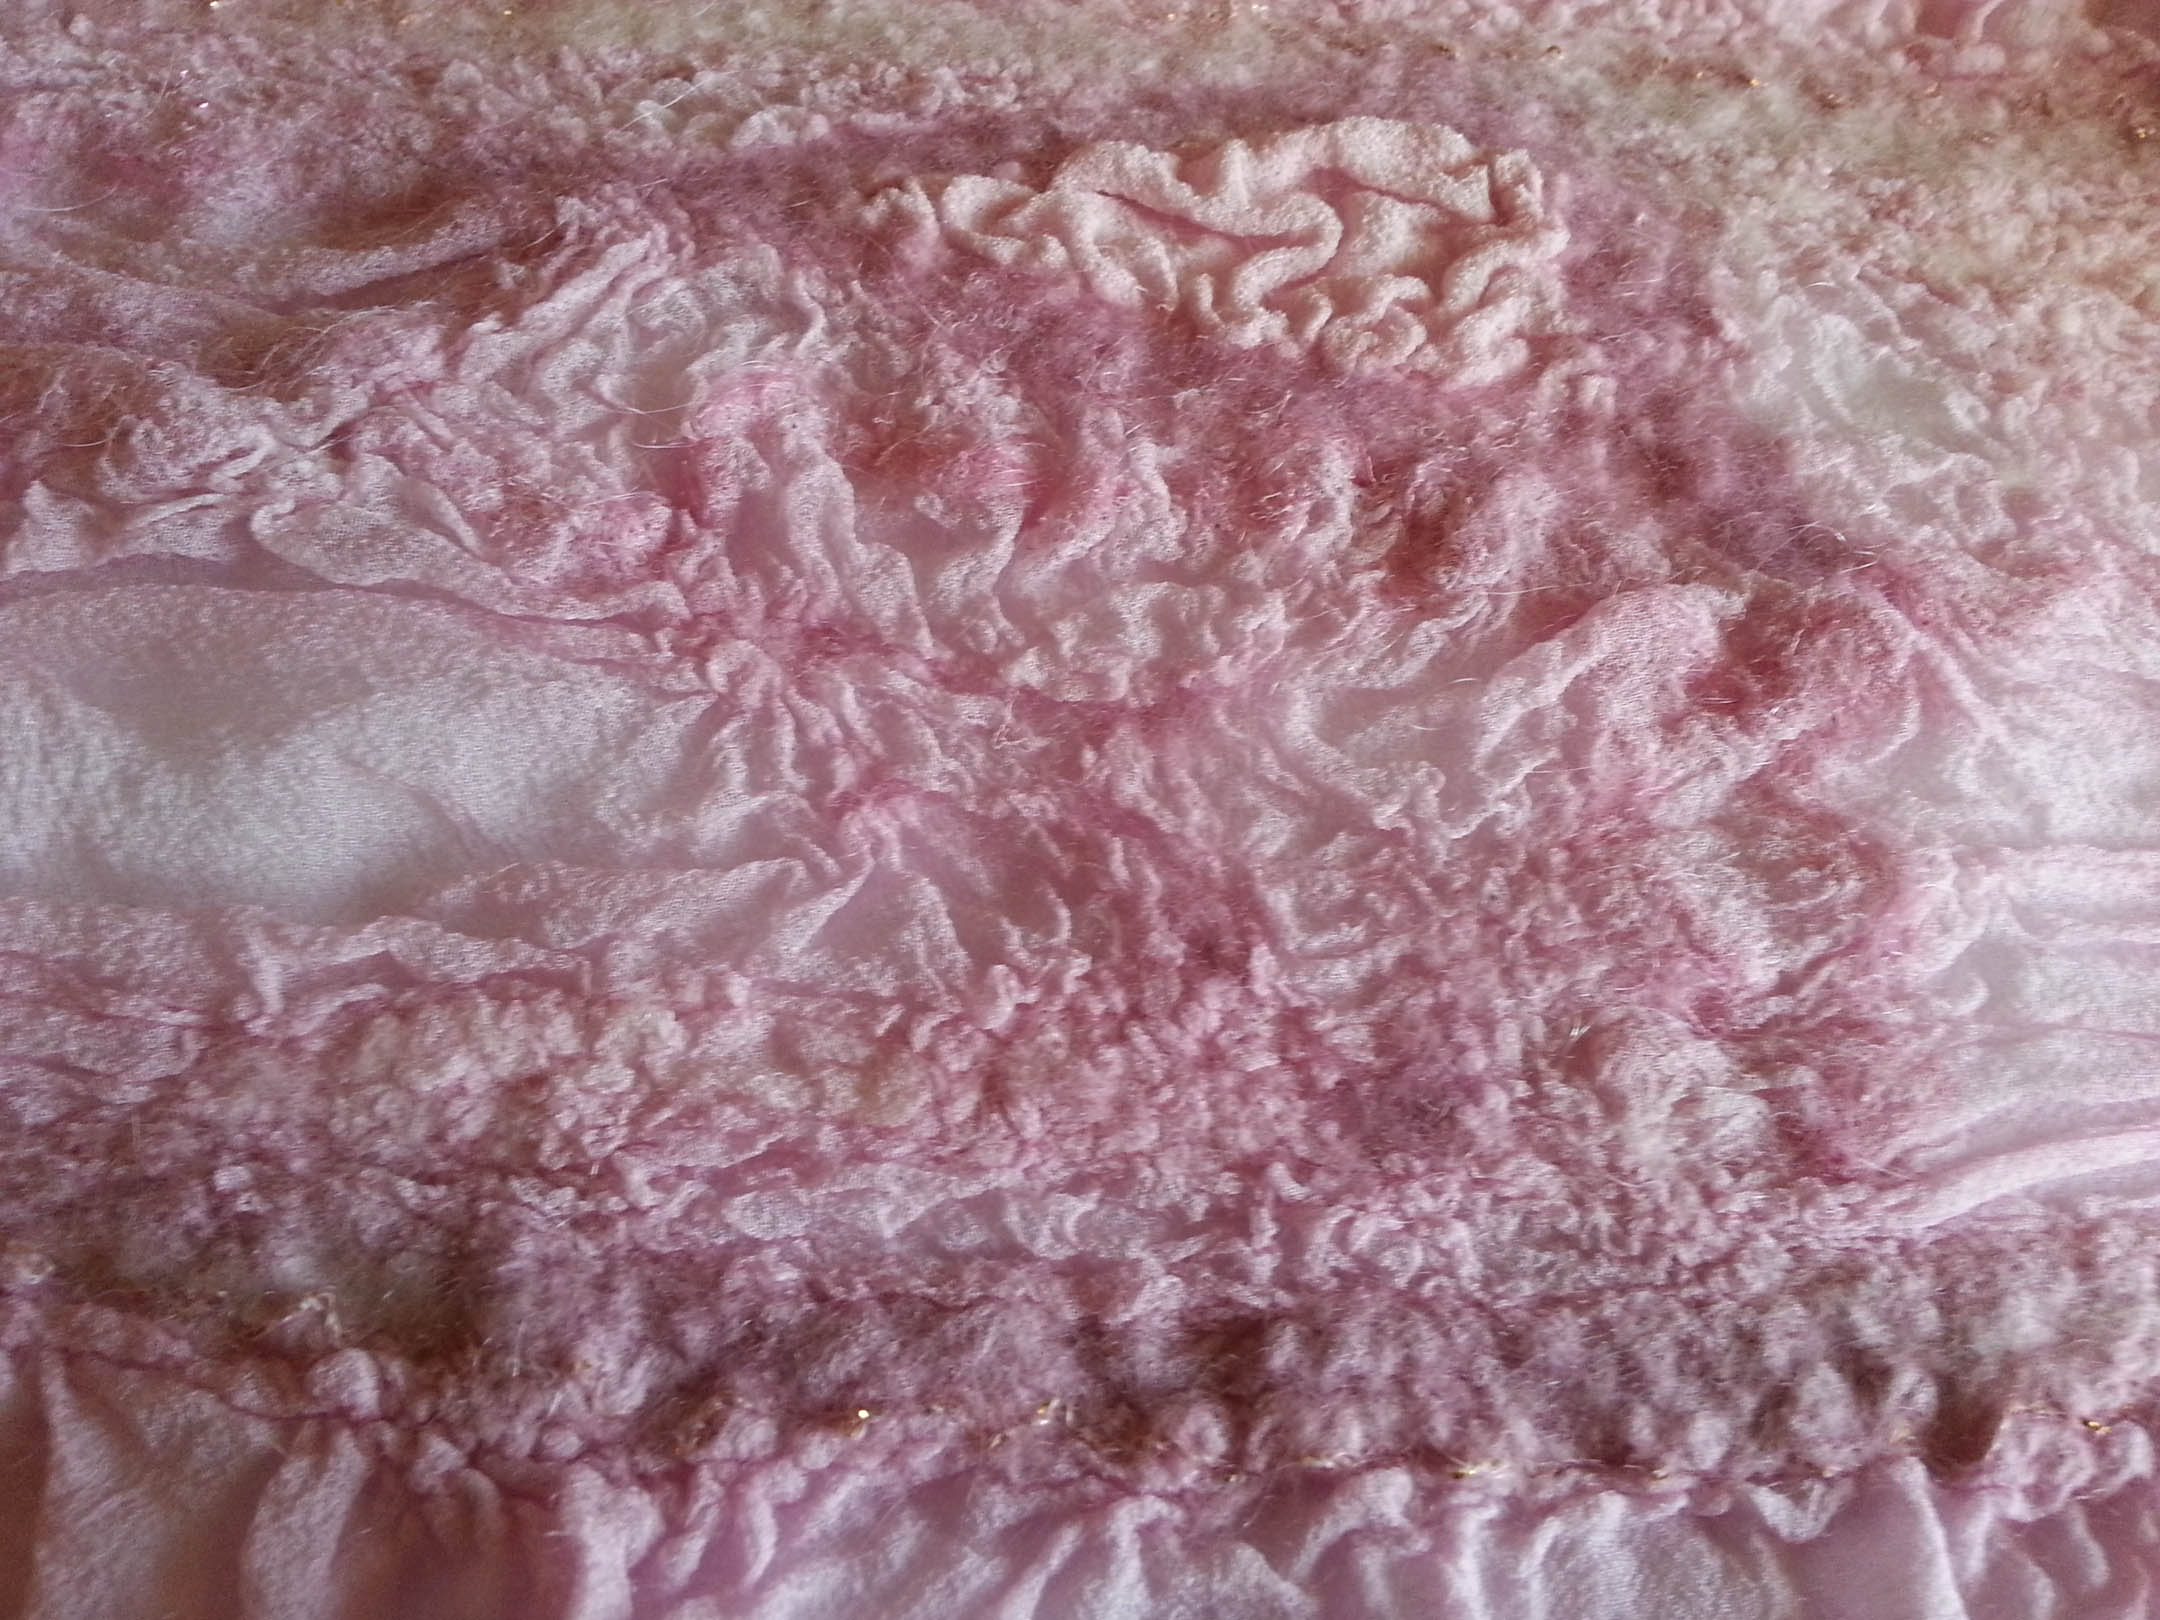
I used some tencel in addition to random wisps of wool for ruching and two different yarns to decorate the first side.
When the first side was done, I very carefully rolled plastic wrap (out of the box) over the first side. I cut it off with a scissors a little longer than the design. Since the wrap as not as wide as the design, I had to overlap a second layer in the center to cover the width. Rolling the wrap helps keep the design in place and creates less static than trying to pull a piece off and laying it over the design. Using my hands, I gently pressed down along the design to remove any air bubbles. You could also use a rolling pin or foam noodle.
I covered the plastic with bubble wrap bubbles down. Then I placed the second board on top being careful not to disturb the design. I secured the boards with panty hose tied tightly in three places along the board. Then I carefully flipped the boards. It’s best to do if you have help, but not necessary if you have enough room to do so without juggling it around. Any kind of ties would work as long as you can secure them tightly without disturbing the design. I just had an abundance of old pantyhose.
My table is shorter than the boards, so I made sure the boards were centered over the table. The last thing I wanted was for the scarf to go sliding to the floor. After removing the ties, I used a chop stick to gently lift it slightly to make sure the design hadn’t been disturbed and lifted up slowly. Any static can cause the silk, wool and decorations to shift.
On the second side, I used pieces of silk gauze and a sparkly open weave fabric (different shapes with wool under and along the edges) and a pin/gold mohair yarn along the center of the ruffle seam on each side leaving fringes on each end. I covered the raw edges of the ends with wool and used some of the pink/gold yarn across.
When I was satisfied with the design, I covered this side with netting and began wetting it down with room temperature soapy water (for me this usually turns cold quickly since I work in a cold basement.) For this project, I used a sprayer with a few drops of Dawn dish soap being careful not to over wet it. Then I used a foam roller and rolled over the scarf to help disperse the water more evenly. I checked for dry and overly wet spots. I used a sponge to pick up excess water and applied more water to dry areas.
Then I began rolling, starting at one end using a foam pool noodle cut to size. I rolled for ten minutes, unwrapped and started the roll from the opposite end. I did this several more times check to see how well the fibers were starting to felt on both sides and everything was evenly wet. I started with light pressure and increased a little more with each roll. When I thought the fibers were starting to felt, I flipped it over, removed the plastic wrap and started again alternating the direction of the rolling and increasing pressure.
There were a few spots of the dark pink yarn in the center that weren’t sticking, so I re-wet those areas with soapier water and continued to roll. Now, I would just run the soap bar over the netting and rub.
After I finished rolling, I used hot slightly soapy water to full on the glass bead board rubbing in all directions, but particularly lengthwise along the ruffle lines. I flipped it over and repeated the process. Then I took it to the sink and ran it under hot then cold water while scrunching it up and throwing the wet scarf in the sink. (I can’t help myself, I love that part.) I let it sit in a vinegar water bath for 15 minutes, then rinsed and laid it out on towels to dry.
The next day I measured the scarf. It was 9″ x 55″ (22.86 cm x 139.7 cm) without the fringe. The shrinkage was approximately 36-38% in each direction. There were a couple of spots that needed attention so I needle felted them down.
Side 1Side 2
I learned several things with this project. The more wool you use along the ruffle line, the more ruffles you’ll get. The ruffle didn’t shrink much, so the next one I made used a narrower ruffle and more wool along the ruffle seam and I got a much better ruffle. I didn’t use that as an example because it was black and it would have been hard to see. The pink was good to use for a first time because I could see where I had the design on the back side. While I was satisfied with the ruffles and ruching, I wasn’t in love with the scarf. But it was an excellent learning experience. I hope this process will help those of you who would like to try a ruffled silk scarf.
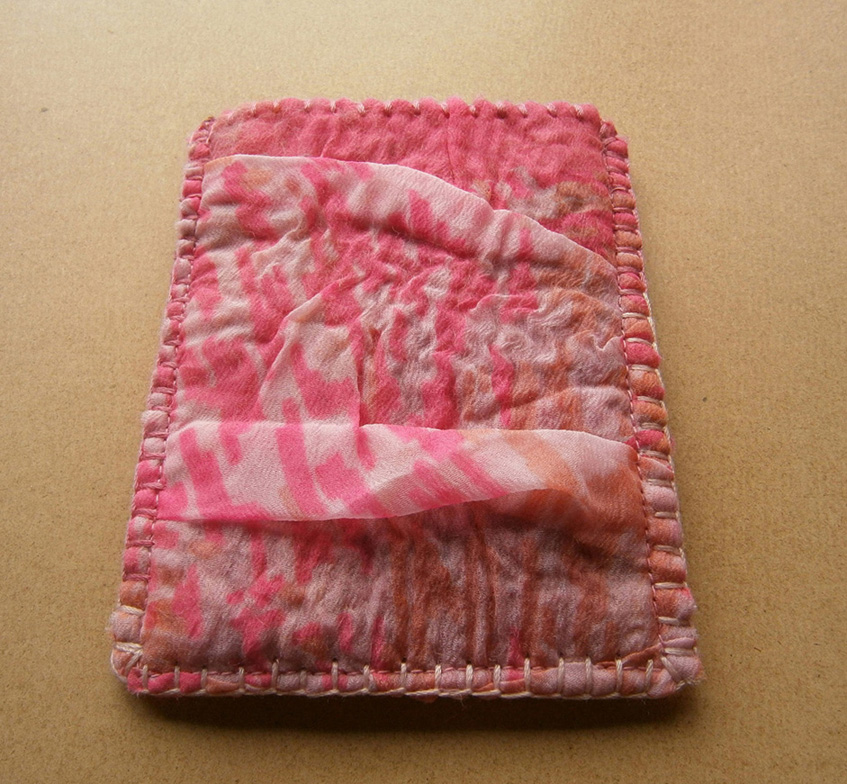
I’ve been trying to some of the projects I started before I began working on my polymer clay e-book. I had a few purses and glasses cases cut out or part sewn up. The first one I finished was a ruffle camera case. It hadn’t even been cut out, so I did some measuring and cutting then discovered my electric machine won’t work 🙁 I cleaned out the bobbin case and took the parts off and wiped them and put them back, but the needle won’t pick up the bobbin thread. From what I can tell it is timing or something and I don’t think it’s something I can fix. So, out came my ancient electric Singer without the electrical parts. It’s slow going but it works, for straight stitching anyway 🙂 This is the front of the case:
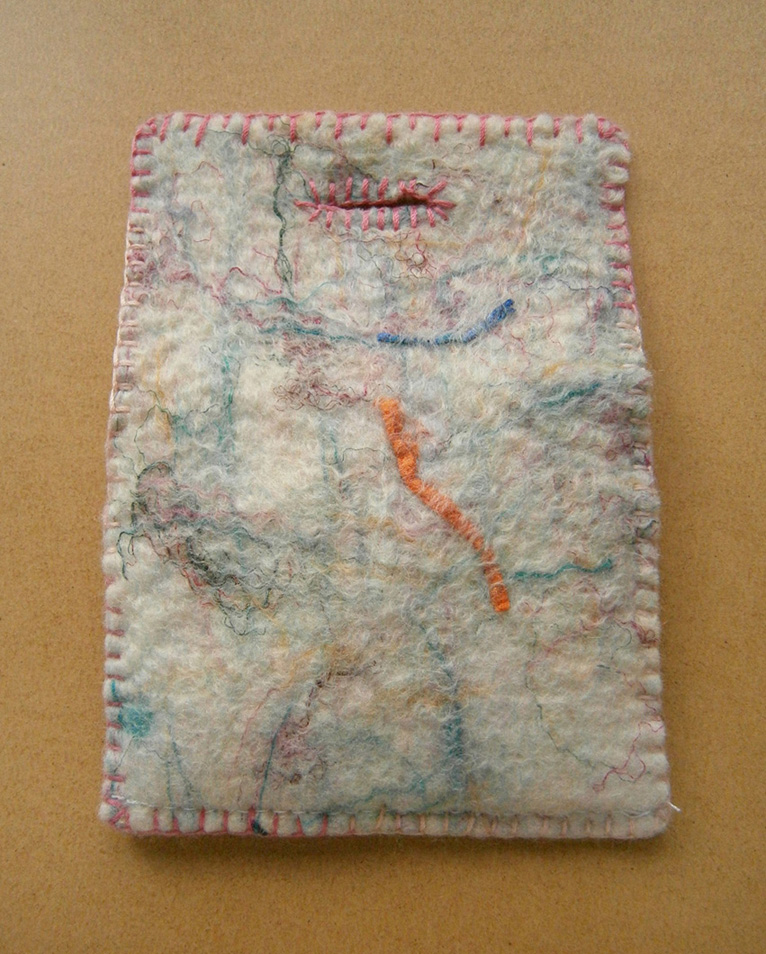
And this is the back:
This was one of the purses I hadn’t even blanket stitched, it’s made from the same piece of felt as one I made earlier. It’s a slubbed wool which I added some cotton and silk threads to and some strips of rolled edges from silk scarves. Front:
Inside:
The felt this wool makes has a really nice texture. Back:
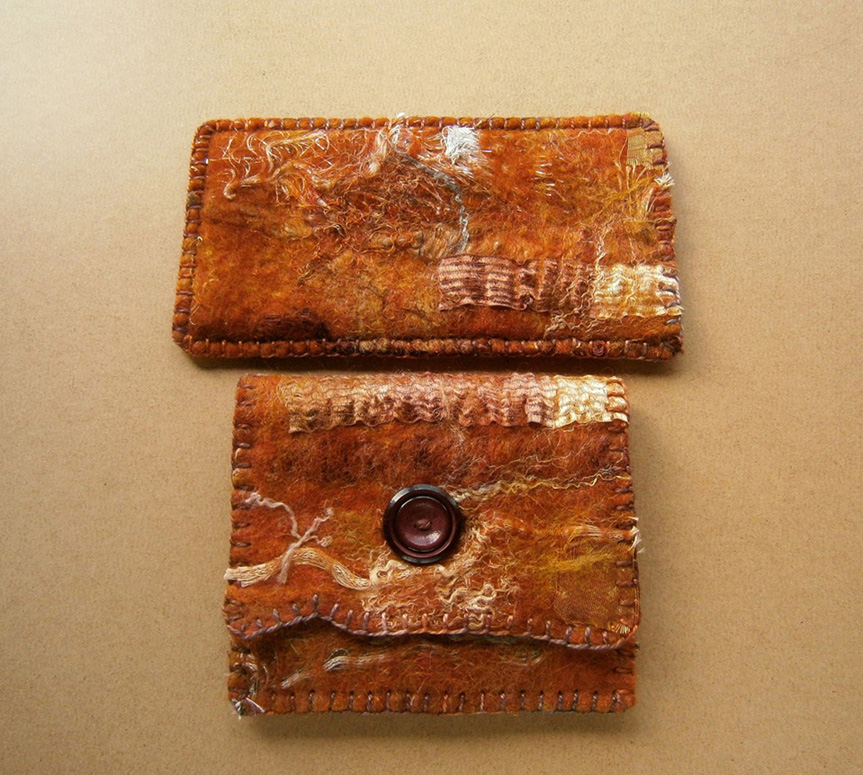
A piece of coppery bronze felt that I made a while ago was just big enough to make a purse and matching glasses case.
The winner of Polymer Clay Simply Made is…. Anne L. Congratulations, Anne! Please leave a comment so I can send you a download link. Thanks a lot for all the entries and all the nice comments too 🙂
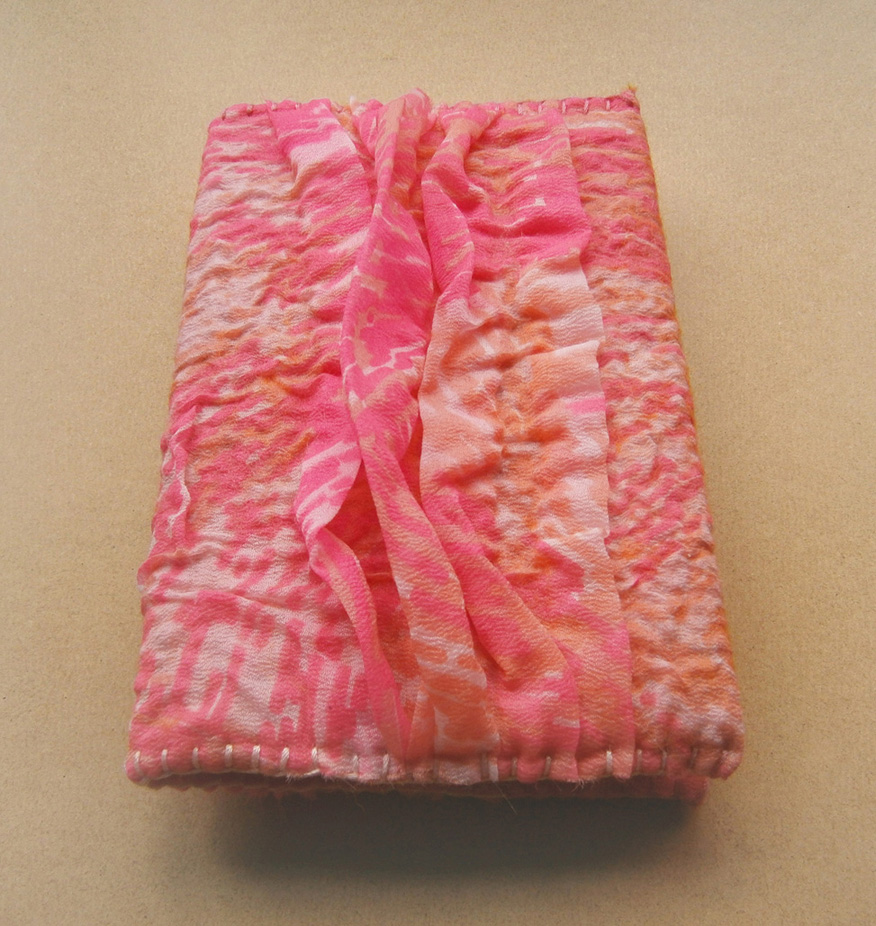
I thought it was time for a well earned rest after finishing the Polymer clay book, we had a ridiculous heatwave here too, so it was far too hot to blink without sweating. I took refuge downstairs where it was a bit cooler for a few days and then had a look through my felt box to see what I could work on next. I found the pink nuno pieces I made for Ann’s Challenge and decided to work on those. I started with the larger piece I made for a notebook cover. I’d measured carefully when I made the piece so I’d get the ruffles just on the front and back. This is the front:
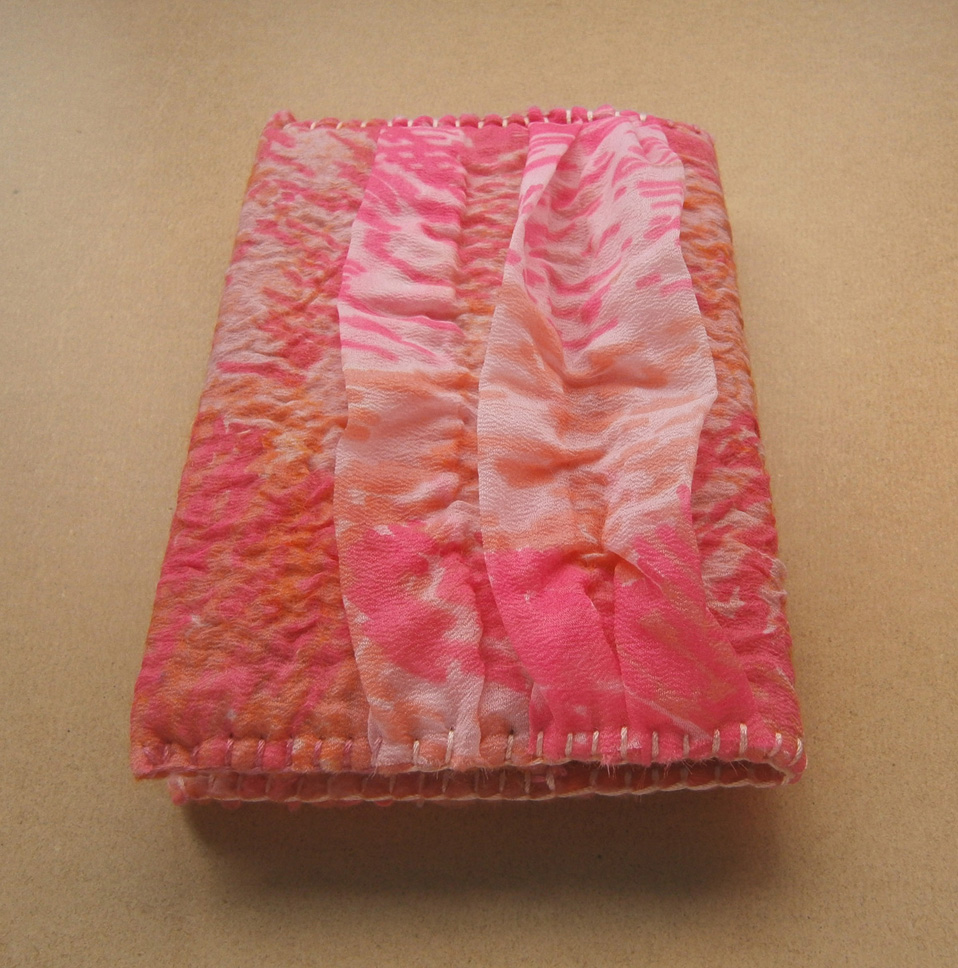
And this is the back:
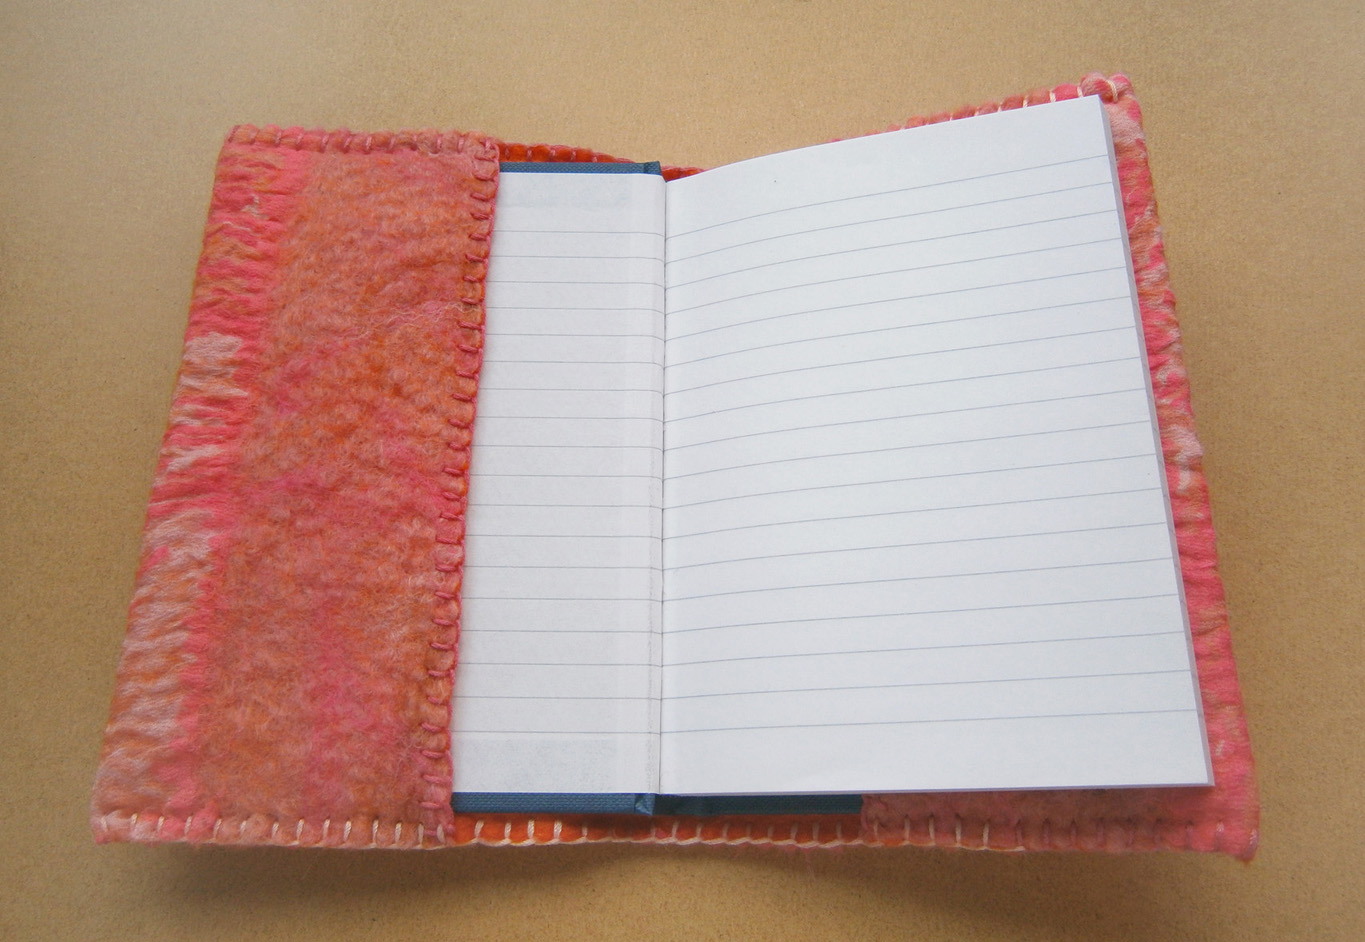
I must have measured properly because it worked out well. I didn’t want any of the ruffles where the flaps for the inside would go.
I’m going to swap the notebook for a red one, then list this on etsy. I’ve already cut the other piece for making a camera case, so as long as it stays cooler, I’ll work on that next.