Browsed by
Category: workshops

October Workshop Peg Doll Looms

October Workshop Peg Doll Looms

We do not sell or know of a supplier who sells the peg doll looms. Sorry we can’t be of more assistance.

October Workshop Peg Doll Looms

How did I ever manage to get anything done when I was working?

I have been working on importing and exporting File maker databases for the 2020 workshop and the guild library. I did 2 options for the workshop flyer for Elizabeth, our workshop coordinator, to choose from and will restart the workshop 2020 catalogue in the requested sort order after I have written my blog post. There was much fussing but with a bit of help I got the files exported in a format for the guild website and handed that part of the job off to the rest of the workshop team. <deep breath> I need to celebrate! Isn’t there a workshop coming up I really wanted to take when we were working on the catalogue last year? Yes! It was #1949 Peg Doll Loom Weaving with Mariann Hegedus as the instructor. Oh no! It’s about to run and we don’t have enough students! Quick, bug Elizabeth and Kelly and post it on the Facebook page! Yes, we now have enough students!


On Saturday I arrived early like usual and discovered a line of people blocking the door to go into the building! Oh, there is a huge fabric sale happening and they have leather hides and scraps!  Oh well, maybe I can make a quick run in at lunch. (i was able to get a bag of scraps of leather before the sale closed). now on to what i was actually there for.

  1-2

Mariann had brought the little Peg Doll looms in for show and tell and their cute shape piqued my interest. She had brought them back from a visit to Hungary. She said they were used to weave sleeves and had examples of dolls and puppets she had woven on them.

  3-5

She had a book with good pictures but unfortunately it’s in Hungarian. I did an online search to find more info but I mostly found Peg looms which are not like the peg doll looms. I did find 3 books; two of which might be the same (I don’t read Hungarian and I suspect  that one is the hardcover and one the paperback version?)  The book with the green cover is the one she showed us. Even not being able to read the language it was still educational to look at. There were a lot of more advanced techniques to try with this loom.

  6-8 szövés kereten szádfán karmantyúfán

     9-13

The concept we were working with was not too taxing in one way; how can you screw up under then over then under than over….(plain weave).  Let me tell you we found a lot of ways to mess that up! But the light bulb eventually went on for all of us.

This loom allows for plain weave, weft face or tapestry and all the two harness finger manipulations. I started to think about Butinay!!! Maybe the next work will have some!

If you sew the bottom (or top) end together you get a pouch. If you add a circular base of fabric or leather you get a cylinder that would be good to put a spindle or other small equipment in.

Warping is not too difficult. Keeping the tension snug and even is important. You wind your warp around the pegs up and down until you have gone around twice. (You can change colours as you go.) Each peg has 2 loops on it so that would be pairs of threads. The exception is the first peg, which needs to have 3 threads in one group.  This gives an odd number so you can create a continuous plan woven cloth as you weave.

1414

Now wind a butterfly and starting at the bottom weave every second thread.

15

15


16 -19

20

20

(This is a very old needle felted sheep I made years ago standing with the new loom and second weaving.)

I suspect I may have not interpreted the instructions as spoken.  When I took the weaving off I stated to loosen my first row of weaving! ( I thought about this and decided to modify the instructions for my second attempt. – third row I used a crochet hook between the loops and created a loop which I went through capturing the first and second row before going on to the next bit of weaving. Let that try to unravel!!)


I was admiring the bands of what looked like inkle banding in one of her samples. So I tried it. It looks complicated but it was achieved by alternating a gray row with a blue row, then compacting the weft to make it weft faced.


21 21

One of my classmates finished her bag during the workshop I decided to purchase the loom (she had a couple more of the smaller ones available for sale) so I could make my bag taller in hopes of having it fit a spindle. As you can see, the top comes off the loom.

22 22

Here is the second one that was completed. I gave a piece of the leather scraps I had purchased at the fabric sale (yes, I made it in time to buy a bag of leather scraps)

23 23

I kept going, adding a fringe and switching to a long needle that is either an upholstery needle or a dollmaking needle (I’m not sure which) but now it is a peg doll loom needle. So I have plain weave and various stiffnesses of compacted weft face weaving. I also added a fringe. When I took off the weaving, the bottom (which suddenly became the top) started to unravel. I fixed that inappropriate behavior by a quick overhand blanket stich and then tightened up the plain weave so I could put a lacing cord through and use a edging stitch to stabilize the lower side of the lacing spaces. I think the purple cord will work better or I may make a blue and grey kumohimo band to use as a tie. I have decided on the grey leather to make a circular base .

24 24

I had enough fun that I bought the loom and started a second project immediately. There has been a bit of chatting amongst a few of the guild members who are curious with this cute little loom and we have a few ideas on modifications to allow taller bags to be woven. I will let you know if anything develops from this curiosity.

Now I have to get back to the Guild catalogue and I accidentally seemed to have driven to Carleton Place winding up at the wool growers Co-op after visiting a Friend in Kempville. It was a wonderful visit and now I have a car that smells of wool and 4 more fleeces to wash before the snow flies, and more bulbs to plant and the guild Sale Ann is running to help with. Maybe it’s time for bed.  I have so much to do tomorrow!

2526

25- 26

 The two coarse fleeces I took which are actually nice and soft.

2727

Some of the fleece that is coming in to be sorted

28 28

Some of the fine grey and dark brown I didn’t buy but I did buy a light and medium grey!

29 29

This is the rest of the Not-White fine bin. I will tell you more about this wonderful source of fiber another day right now it’s time to sleep.


Sublimation printing with Dawn Dupree

Sublimation printing with Dawn Dupree

This is a guest post by Kim Winter of Flextiles.

A couple of weeks ago I went on a sublimation printing workshop with Dawn Dupree, a well-established textile printer based in south London near me. She specialises in multilayered collage, often made using sublimation printing techniques,  like those below.

Sublimation printing uses a heat press and solid ink, usually painted on paper, and only works on synthetic fabric. You put the inked paper face down on top of the fabric, sandwich it between newsprint to prevent the ink from getting on the heat press, then press it in a heat press for around 30 seconds.

The heat causes the ink to sublimate to a gas and also opens the “pores” of the fabric, allowing the gas to penetrate. As the fabric cools down, the ink returns to a solid state and becomes part of the fabric. Unlike with heat transfer printing, the colour does not sit on top of the fabric so doesn’t crack or peel off.

You can buy ready made dye papers in different colours, and you can also make your own papers by painting them with dye and leaving them to dry. The colour of the paper is usually very different to the final colour on the fabric – the fabric is much brighter! So it’s better to do some sample testing if you are after a particular colour.

You can create collages in several ways. The simplest way is to cut the dye paper into different shapes, or use stencils to create a negative outline. You can also use transfer the dye to a photocopy in the heatpress and then use the photocopy to create an image on fabric. Carol’s pieces below, based on the beautiful work by her daughter Alex, used these techniques.

You can also transfer the dye to other items, such as lace, doilies, or yarn, like Gabriela and Maritza did below.

With the heat press you can also add foil to highlight various parts. Catherine’s multilayered piece below included foiling.

I wanted to see how shibori techniques worked in the heat press. So I took a piece of Vilene and folded it in a series of knife pleats in one direction and then the other. I printed this folded piece in one colour, and then unfolded it, repleated it along different folds, and printed with another colour.

Below you can see the folded Vilene on the right after printing with two colours. The purple dye paper is on the left.

Below is after printing withe four colours:

And this if the final piece after printing with five colours:

I also tried stitching. I stitched a piece of white polyester with five rows of running stitch, pulled up the stitches into pleats and then printed it with pink dye paper.

This is what it looked like when opened up.

I removed the stitches, pressed it and restitched in different places, and printed with a second colour.

I repeated this twice more. Then I tore the piece in half and foiled one half (the piece at the bottom).

I noticed that the papers I used for printing retained a very clear image of the stitched fabric. So I used them to print on other pieces of fabric, which looked amazingly 3D.

I hope you enjoyed this post, even though it doesn’t include any felt! Please note that the post is being scheduled to publish while I am on holiday, so I may not be able to respond to comments immediately.


Card Weaving Class

Card Weaving Class

This last weekend I took a Card weaving class at my Guild. Judy Kavanagh was the teacher. I am not a weaver but this looked so fascinating I wanted to give it a try.

After Judy explained generaly how it all worked and how the chart we would use to thread our cards worked we picked our colours and made our own charts for the colours we had picked.

We used playing cards to make our cards. First we cut them square and then we punched holes in the corners and labeled them so we could thread them correctly.  We wound a short warp (the long threads we put through the holes) I don’t have a picture but you just wound threads around the 4 corners of a warping board. We could have used anything with about a 1.5 meter circumference.

Then following our charts we  threaded the cards. It looked a bit of a mess to start, but after making sure all the cards were the right way and I straitening them we were all set.


Some of us tied to the cabinet doors and others to the looms.  We started weaving.  It got very quiet as we all concentrated. The shuttles we used were made by Judy. I bought this one because I really liked it and didn’t want to give it back.

We rotated the cards 4 turns forward weaving between each turn and then backwards 4 turns weaving between each turn so that we made lozenge shapes in our weaving.  We tried variations on that.

Here is a short video (taken by Judy) of me actually weaving…..  applause here. LOL

Ann doing card weaving from Judy Kavanagh on Vimeo.

You can see that mine is smaller than the others. Judy said to beat the weft (the cross fibers we are putting in) very firmly. It seems we have different definitions of firmly. No matter, the only thing I didn’t get to try because of it was making my weaving round like a tube. My weaving was to inflexible. You can see the little broken thread sticking out on the right hand side of the right hand picture. That is where I tried to pull it into a tube and broke the thread instead. if you click on the picture it will pop up bigger so you can see it better.

It was cool. This was only 10 cards but you can do as many as you like. There is a free program that you can use on line to make patterns for up to 64 cards I think it is. https://twistedthreads.org/ You have to join to play with it but its free. You can get very complicated, turning some cards forward and some back at the same time. You can spell out words and do very complicated patterns and pictures. If you google image card weaving patterns you will see so many. I couldn’t chose which to show you.


West Carleton Fibre Guild’s tour of the Puppet exhibit

West Carleton Fibre Guild’s tour of the Puppet exhibit

Although the Ottawa Valley weavers and spinners guild is the largest guild in eastern Ontario, we also have many smaller neighbour guilds. One of the closest neighbours is the West Carleton Fibre Guild who hold their meetings on a Tuesday afternoon in Dunrobin, Ontario (just a bit past the west end of Kanata).  But the September’s meeting was special.

1 door of the museum

Back door of the Almonte Textile Museum


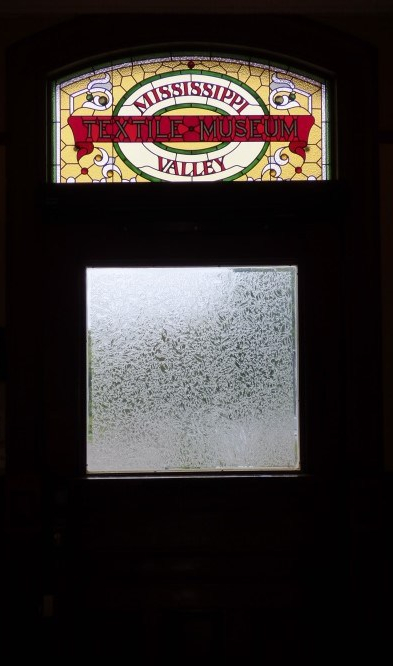
They had a field trip to the Mississippi Valley Textile Museum in Almonte. The trip was planned so they could have a special tour of the Puppet exhibit by Noreen Young.  At present there are 3 exhibits at the museum.  There permanent display of Mill equipment and modern weaving looms, a spectacular quilt exhibit and Noreen Young: a Puppet Retrospective.  With 150 examples of some of her life’s work in puppetry.  She is internationally known and has received the order of Canada for work with producing, writing and puppeteering in many children’s and educational programs.


2 Poster for the exhibit            3 fist puppet in the exhibit

Poster for the exhibit.                                   First puppet in the exhibition (a rod puppet with detachable legs

4 Noreen with her first puppet Noreen with her first puppet

She gave us a tour through the exhibit explaining different puppets and giving anecdotes of her work with them.  She was asked if she had a favorite and told us her Granny character, Mrs. Gertrude Diddle and Gloria Gopher she was particularly fond of.  She took some down from the display and showed us how they moved and what they voice sounded like.  She did the voices for most of her puppets but occasional had to lip sink to a voice actor which was harder.

Almost all her puppets were to be worked with the puppeteer below holding one arm up to operate the mouth and the other hand controls the rods to move the hands. She showed us how it was important to make the puppets bob as they moved or it looked like they were skating along or floating in the air witch just wasn’t right.


Her earliest work was in the 60’s “Hi Diddle Day” 1967 to 1976. These puppets are in a glass display case with a couple more the puppet cast.  Not all the puppets are in display cases though.


Displayed on shelves with monitors showing bits of the program they were used for beneath them were the Puppets for “under the Umbrella tree” which ran on CBC, Disney and Canal Famille from 1987-1997.

7

8

She explained about the studio being an old garage and having a lower ceiling than studios usually had.  So the puppeteers had to sit on rolling boxes since they could only raise the live actor up a certain height before the ceiling was a problem.  For most shows she said the puppeteers stood on the floor with the live actors raised on platforms so they could interact with the puppets.  The head bands the puppeteers are wearing holds their mikes.  This insures the mike is always the same distance from their mouth as they switch between looking up at the puppet and down at their scripts.


There were puppets from series I didn’t remember but am now sorry I missed. “Bats” from a 1987 Pilot.

12

Also “Wacky Palms” from 1994 about a small boutique resort in the Bermuda triangle.  Run by a cow with a theatrical past and with an eclectic staff.  Strange things happen when a time portal opens and havoc is unleashed upon the hotel.

13

She said that some of her most effective puppets had elements of movement such as the feathers for hair, parts that dangled or the way the fabric moved with the puppet.


Noreen was also known for her Caricatures of real peoples.  Her Prince Charles from 1975, created for “What’s new” a kids news show for CBC, is very recognizable.  She also made a copy of the mayor of Ottawa.


222324

She has made caricatures of may Almonte area people (about 50 on display) who have been used in various puppet shows in the area.  She was the artistic Director for “Puppets up!”; an annual international puppet show from 2005 to 2016. International puppet shows from across the planet performed in the tiny town of Almonte.

There are some puppets that can be interacted with.  It will take 2 people to run them one is the head and hands and a second person runs the feet.

She did puppets for and educational spot about food nutrition.

This is the Granny Bride puppet she made for a friend in 2000.

30

I didn’t recognize this group of puppets but it looks like an interesting cast.

31

Her last work was with a puppet opera called “sleeping rough” which was performed in Ottawa 2018 as part of the series music and beyond.  (https://www.youtube.com/watch?v=RVQGUjLM-WU&feature=share )


Most of Her puppets are made by sculptor the head in plasticine then casting it.  She uses the cast to create the flexible, expressive rubber faces she uses in her puppets.

She has given 3 workshops on making puppets during the run of the exhibit and has another lecture to do before the exhibit closes. My husband was lucky enough to get a spot in one of her workshops.  She said he was very well prepared and had amazing focus making his puppet Blacksmith.  He said he had a blast and was very glad he had gone.

40
Glenn Martin Blacksmith puppet


This exhibit made me smile!  I couldn’t help but feel happy looking at all the puppets many I recognized. I am sure you would enjoy seeing them too.  Keep an eye out for Noreen she says she drops by regularly to the exhibit.


The Exhibit runs to September 22 2018 so if you have a chance jumps in the car and ask the GPS to take you to the Mississippi Textile Museum https://mvtm.ca/?exhibition=noreen-young-retrospective


MISSISSIPPI VALLEY TEXTILE MUSEUM
3 Rosamond Street East, Almonte, Ontario K0A 1A0

Phone: (613) 256-3754
Email: curator@mvtm.ca

Fall/Winter HOURS

  • Tuesday to Friday 10am – 4pm
  • Saturday noon – 4pm
  • Closed Sunday & Monday

Museum Admission: $7.00
Members admitted without charge. Children under 12 are always free.


Ruffle Scarf Workshop

Ruffle Scarf Workshop

Last week I taught a Ruffle Neck Scarf workshop. This was the first time teaching it and it went very well. I was worried about the timing but it all worked out. I thought the class at the Mississippi Valley Textile Museum. They have a nice big classroom with lots of light. and water.

As usual, I forgot to take pictures early but here are two of them being laid out

You can see the template they used to get the layout right and keep it even from one end to the other. I drew it with the outline to follow and a line on them to let them know when they had shrunk enough.

Here they are using the plastic under their scarves to make nice edges.

And a shot of the class working.

Here are the results. I really like the ones where you can see the wool that migrated through the silk.

The Class was a lot of fun. I made the written instructions more detailed than normal because I want to make it a kit. If I ever figure out video iI would like to make an online workshop.  If you were to buy a kit for a ruffled scarf would you want it to be a short neck scarf or a long scarf? the only difference really would be the amount of wool included and the length of silk. I was thinking a short scarf but include the sizing to make a longer template too. I am wondering about the template I usually use thick plastic to draw it on. but it is too bulky to fold flat and too big to ship cheaply rolled up. Should I include a template on thinner plastic or just the instructions on how to draw it up on whatever you want to use?