Browsed by
Category: Stitching

Kantha Embroidery Homework

Kantha Embroidery Homework

I had a request for further photos of my Kantha embroidery homework from my stitch class. Although my initial tries at Kantha weren’t all that enjoyable, I have really learned to appreciate the stitch. It takes a bit of practice but is well worth the effort.

This first two photos are NOT by me. The photo above is a stitched sari from Penny Peter’s collection that we got to study in class. I just wanted to remind you of what elaborate patterns Kantha can make.

This is another sari from Penny’s collection. I just love the endless possibilities of pattern that Kantha involves.


Here is one of my samples showing different ways to make a Kantha circle.

Here is a leaf pattern.


And this is bending stitch. I used a stencil pattern that I made several years ago in the shape of a nautilus.

This last sample is showing shisha stitch and flat stitches and is technically not Kantha but still based on Indian embroideries. I used Canadian pennies as I didn’t have any shisha mirrors. I’ve enjoyed learning how to use the Kantha stitch. If you have tried it, I’d love to see your samples.

Not quite what I’d imagined

Not quite what I’d imagined

I mentioned the other day that I’ve been working on Ann’s Abstract Challenge. I had a folder full of ideas and photos that I’d worked on, but couldn’t quite see how they’d translate into felt or maybe fabric. After looking at the photos with me, my girlfriend suggested looking at something more simple and bold, like maybe a cup. So I started looking at different photos, found some with simpler shapes and lines, bolder features. One that I really liked was a simple photo of a shell. It was almost colourless so I gave it a blue tint.

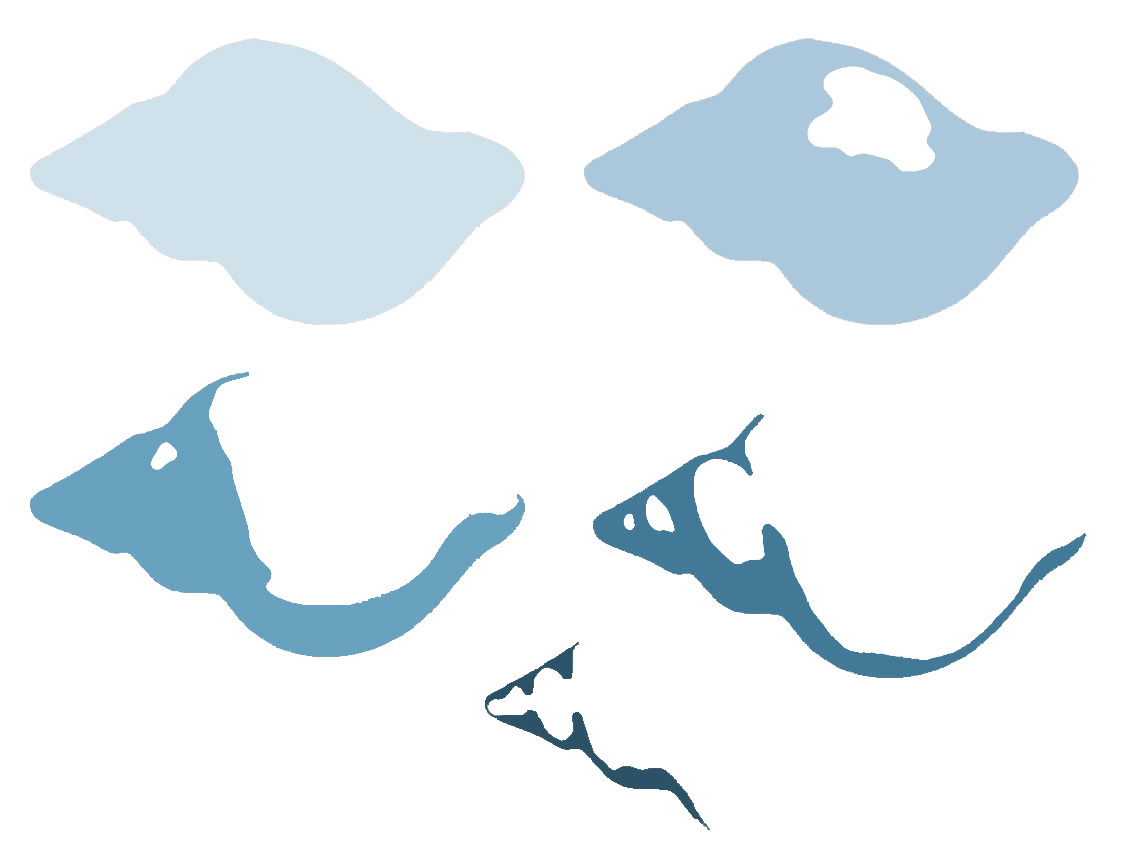
I then played around with it until I was happy with an abstract design.

This seemed like a perfect picture to try with my idea of layering organza. So I worked out how many layers I’d need and what shapes those layers would need to be. I wanted a black background, so I thought it’d be a good idea to have a base layer of white felt the same shape as the first organza layer.

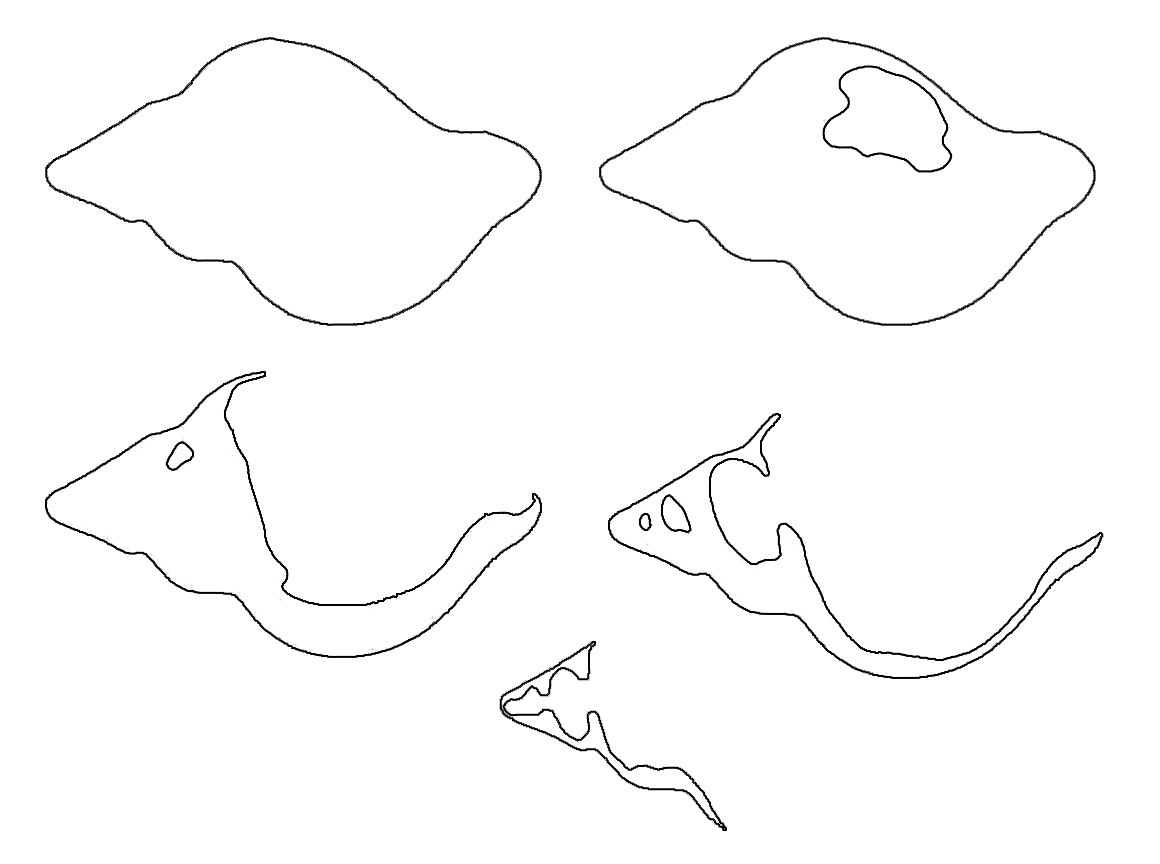
I then made the shapes into outlines, so I could print them out and trace the shapes onto the pieces of organza for cutting out.

I chose the colours of organza I liked and layered them together to see if they would work.

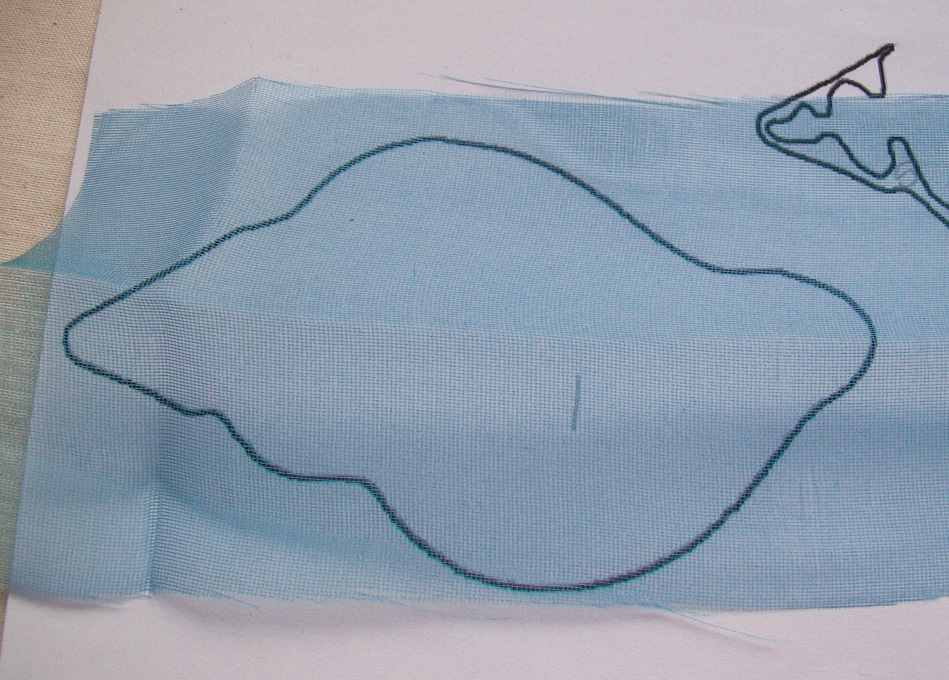
I then traced all the outlines onto the organza pieces and cut them out. It was then that I started to realise this wouldn’t be quite as simple as I’d first thought. Some of the organza was very thin and distorted while I traced, so I had to re-do a couple of pieces.

Layering the shapes together wasn’t easy either, they just wanted to slide about, so I started with sewing the first couple of layers together. That seemed to go alright. It wasn’t looking as tidy as I’d hoped-the organza was fraying, but the abstract design had outlines around the sections/layers, so I hoped these would hide the edges. When I started to add the 3rd and 4th layers, my sewing machine (hand cranked ancient Singer 🙂 ) started to make weird noises. When I looked at the back of the piece, it was a mess, all the thread from the spool had looped up underneath. I don’t know if there was a tension problem, but I decided to abandon it as a failure.

I left it on my work table and tried to think of other ways I could interpret the design with the supplies I’ve got, but all I could think of was using 5 shades of blue cotton fabric, which I don’t have. Looking at it in daylight this morning, it didn’t look quite as bad as it did yesterday, so I decided to put a bit of effort into finishing it. I had to patch up the second layer, as it had frayed so much it wasn’t attached at the edges. I also had to recut the top layer as when I was sewing it on by hand, the thread caught on it and tore it. It didn’t really turn out how I’d expected and hoped it would, (maybe some fabric stiffener and a bigger scale would help?) but it wasn’t the complete disaster I thought it was yesterday 🙂

How would you have interpreted the abstract shell picture differently? Would you have used different fabrics, or maybe wet felted or needlefelted the design? If you’d like to use the design, please feel free to do so. I’d love to see what you come up with.

What I am working on.

What I am working on.

A while back I showed you some multi coloured batts I made from all my leftover bits.  I felted 2 of them with the intent of making some tablet and ereader covers. I haven’t made the covers yet but I have felted them. I only have a picture of one.

blue/green batt before felting
Blue green batt felted up.

I also made this nuno piece. I didn’t like the blue wool much and its been hanging around a while. It was wool dyed to exhaust a dye bath. so I put this nice piece of  to colour silk on top and nuno felted it. I think it will make a nice bag.

Before felting
After Felting
Close up of texture.

I will be going to a medieval fair later this summer. one thing they need is a way to hide their modern electronics but stay in costume. one traditional piece that they can ware is a belt pouch. I am working on making them. I sewed them with my machine but to make them look period correct I need to add stitching to cover that up the machine stitches and I want them to be strong and not stretch out of shape if people over fill them.

Group of belt pouches.
This is the back where you can see the slits for your belt and the stitching to hide the modern sewing machine stitches.
What i’ve been up to !!!

What i’ve been up to !!!

I really don’t have a huge amount to blog about at the moment, but I have added to my tree project in my mixed media course.  I”ve added some more stitching with some leaves and flowers  in straight stitches and French knots and I did try to be very clever and create a picot stitch, ( on the right up the trunk )  I haven’t done one of them before  but I want to do a vine going around and up the tree and in a 3d kind of effect,  so this is my first attempt at that stitch and while I thoroughly enjoyed how it works I will more than likely take those few out and re-do. That was just a bit of practise,  I’ve also added a spider web and the dreaded spider ( sorry zed )  he’s a friendly one lol.   I know that its out of proportion but that’s ok to !

I am really enjoying this and although nothing is perfect  and its not supposed to be, I’m loving how its all coming together.  I still need to add more foliage and I’m not really sure what to do with the background but it does need something, maybe a shrub or to in the far distants.   I’m just taking my time with this project and as things come to mind I’ll be adding them in !


I’ve also been working on another little note book cover , adding stitches and beads and I think I’m getting the hang of it more now.  I made this sheet of felt a while ago and I’m cutting it up to make 3 covers ,  can I tell you how hard it was to cut into that sheet lol  I struggled, held my breath, closed my eyes and made the first cut, let out a big breath and i’m OKAY !!!!

This one has lots of added silks, threads and sari ribbon !

This is the first of the 3, I’ve added stitches and beads and also a couple of my very own hand made beads.  I think I’m getting a lot neater as I go and the reason I’m doing these are all in practise for my so called album cover that I still haven’t picked up again lol   Once I feel that these covers are good enough I might even put them on Etsy lol   it’s a  long shot but we’ll see  🙂  otherwise i’ll save them for gifts !

I havent added any stitches on the back and i’m not sure i will either, I’m fairly happy with the way this turned out and i can only improve “right”

So thats it for me and i’d love to see what everyone else is working on !!!

Kantha Embroidery

Kantha Embroidery

I recently attended the second session of Level 2 Hand and Machine Embroidery at the Gail Harker Creative Studies Center in La Conner, WA. If you are anywhere in the area, I highly recommend that you take a look at their classes. They have just moved into a new location and the barn studio is amazing. For this session, we concentrated on Kantha embroidery. It was developed in Eastern India and primarily uses running stitch to develop pattern, texture and line. The first set of photos are all from the collection of Penny Peters, who kindly let us study them, take photos and get up close and personal to these beautiful saris.

I particularly liked this pattern and the sheer number of stitches is amazing. These saris are approximately 3′ x 7′ and completely covered with running stitch.

We spent the first portion of the class studying and sketching from Penny’s collection into our sketchbooks.

Many of the designs featured birds or other animals.

In between all the dark-colored threads and stitching, this one had white background stitching. When viewed up close, this really gave life and movement to the piece.

You can see the background stitching here. Isn’t that a cool fish?

I loved all the variety of motifs in this sari. The background fabric is usually a solid colored silk and all of the patterning is done with Kantha or running stitch. Originally, none of these type of embroideries were meant for sale and were considered personal wealth. Each of the young girls would begin stitching at the age of 4-5 and being working on their dowries soon after that. I’m sure I would be a very old woman before I got married as each woman had to have multiple pieces of clothing, bags, table linens etc. embroidered before they married.

After we studied the various saris, we then began to try out Kantha samplers. This one was done on one piece of cotton muslin and held in the hand not a hoop. It is harder than it looks trying to get your stitches even and lined up appropriately. This sample took me about 4 hours.

This sample shows a variety of ways that you can fill a square. The one where the stitches go in a diagonal manner is called bending stitch and it is quite challenging.

This last sample is Kantha stitching in a circle. After the two above which were so regimented, this one was easy. Stitching in a circle without having to line up the stitches was very freeing. The texture of the piece can be changed depending on how tightly the threads are pulled.

We then developed our own Kantha design and tried our various ways of filling our design with stitches, what the colors were to be etc. I am still working on this project and I’m about ready to start stitching my little bird.

I now have a new appreciation for Kantha. I knew very little about it before the class. It is wonderful the number of designs that can be made with a simple running stitch. I’d love to see other Kantha examples, so if you’ve done some, please give us a link to see what you’ve made.

Hairy Alpaca Bag

Hairy Alpaca Bag

I thought I’d use my weird Hairy Alpaca bag for practising stitching. I’ve used some of the stitches from the first few weeks of TAST. First, I used Photoshop to work out the pattern I wanted to follow on the flap. I used a 6 point star and copied and pasted it, overlaying it to get the shapes I wanted. I scanned the bag so I could get the sizing right, then I printed the pattern out. I thought it’d be really fiddly, but I just held the pattern in place as I stitched around for the outline. I then filled in the shapes with very close blanket/buttonhole stitch and straight stitches for the tiny blocks.

For the front part, I used rows of chain stitch to make a border, then filled that it with herringbone stitch. Just for something extra, I added little straight stitches where the herringbones crossed.

It’s not very easy to sew on, it really does feel like hair! And the bag is so small, it’s easier to keep one hand inside and sew two handed 🙂 I’m not sure what I’ll add next, I might see what other stitches come up on TAST before deciding.

Stitch Homework

Stitch Homework

I am heading back to La Conner, Washington at the end of the month for my second class in my Level 2 Stitch Class at the Gail Harker Creative Studies Center. For part of the homework after the first session, we were assigned to make pages for a felt stitch book. The felt is hand dyed as were the threads. My color scheme was  a triad of red, blue-green and yellow-green. The red is really hard to photograph. I have two books with 8 pages each. The pages are marked where the book will be bound. We’re learning the binding method in session 2. The covers of each book has a sample of each stitch that is included in the book. I had run out of enough felt to make a rectangle so I just used scraps. I thought it might pull the book together better as the color scheme is a bit over the top at times! Click on any of the photos for a closer view.

Second Book:

Beading & Felting

Beading & Felting

Beading and Felting

I know there are some spectacular bead artists out there and this week I thought I’d try my hand at some beading, I’ve been following Robin Atkins blog called Bead Lust

http://beadlust.blogspot.com.au/

 Her work is so beautiful. I’ve never really wanted to learn about beading before but since getting into more of the mixed media side of things it’s made me more interested in the beading process, of course not on the scale of Robins though , just enough to try to work into my pieces.  Robin has been beading for a long time and she has written a couple of books, she has now put out her first book as a free book for anyone to read, so since I was following along I thought I’d take the time to read it.  She explains her methods of beading and basically works free hand with no pre conceived ideas, or nothing set in stone.  So having read that I thought I’d give a small piece a go, mind you I don’t have thousands of beads to choose from so I started this little one with one of Zed’s hand made buttons and went from there.

It definitely helped to read her book as I was under the impression that I should have some sort of design in mind before I started, but I actually found it so much easier not to.  This is only a small piece I know but reading her book  gave me the courage to have a go !!

I’ve also made a couple of small note book covers, inspired by Zed once again, and I wanted to  do something else with my flat pieces of felt and not just wall hangings.  The first cut was the hardest I must admit, spending all that time rubbing and rolling the felt only to cut it up in the end. These 2 covers were made with the one piece and then cut in half so I had the 2 different colours in each cover.

I then embellished with embroidery stitches learned from the TAST 2012, so I used Blanket, Fly & Cretan stitches and then added some beads in too.

I did not have any success with creating skeleton leaves so we’ll leave that for another day lol

I hope everyone’s had a productive week and I’d love to hear what you’ve been up to.

TAST 2012

TAST 2012

Take a Stitch Tuesday

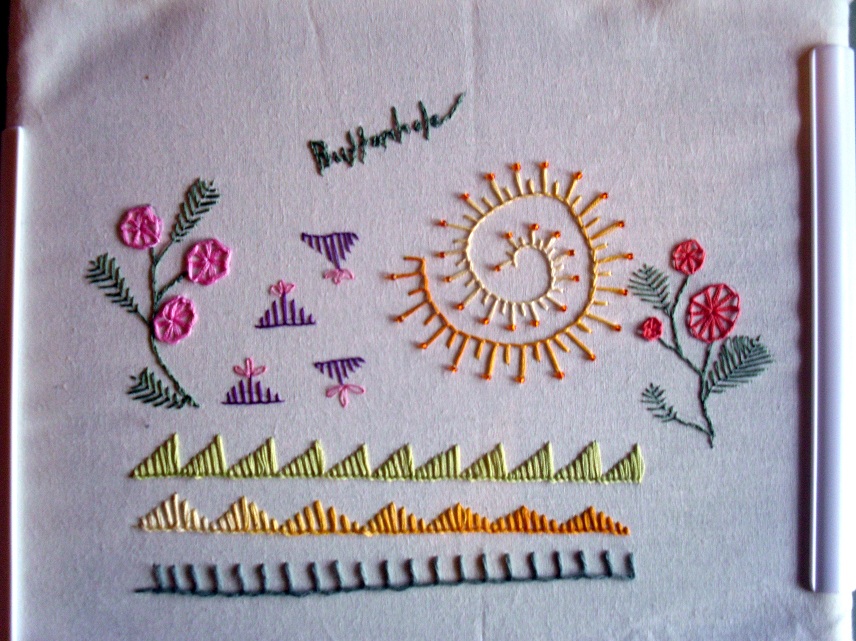
Or TAST is from Sharon B’s website introducing a new stitch every week for the whole year. I’ve decided to do this as I love stitching and only had a few that i knew. I’m wanting to use a lot more stitches in my mixed media so I’m having fun with this and hopefully I’ll be able to finish the whole year .

I’m using a square frame  and stitching on calico,  I’ll turn this into a book of stitches that I can  keep as a reference.

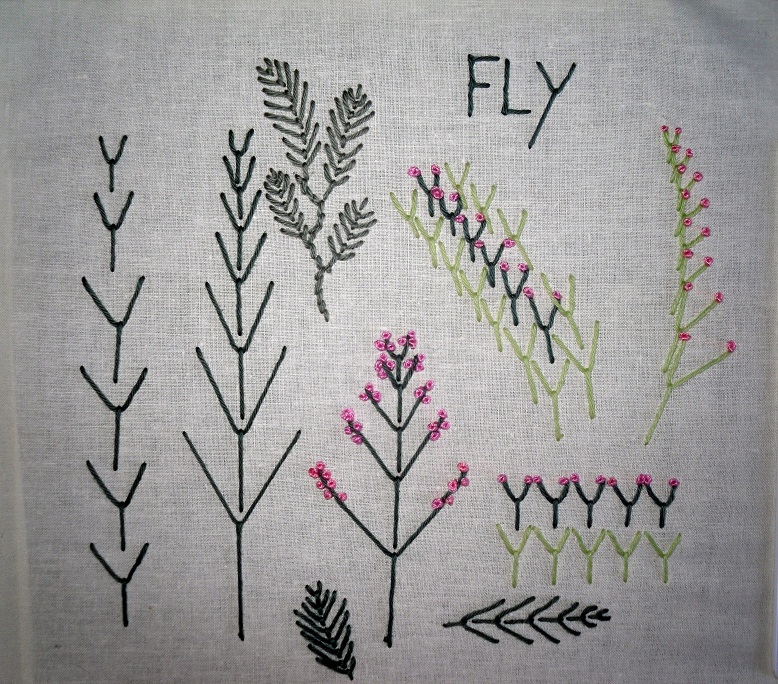
The first week’s stitch is called the Fly Stitch

The second week’s stitch is the Buttonhole Stitch

So who’s up for joining me in learning our stitches every week?  You could just do a sampler and make them into book marks or tags.  You can also share your pics on our flickr site  http://www.flickr.com/groups/feltingandfiberstudio/

If you’d like to  join in then follow the link to Sharon’s site at Pin tangle and lets have some fun    http://www.pintangle.com/