Browsed by
Category: Repurpose

Todays task is dryer balls

Todays task is dryer balls

I got a call form one of my outlets that they are out of felted soap and dryer balls so todays job is dryer balls.

First I make middles out of old or failed felt experiments. They might as well help make some money.

Next is wrapping them in some wool and popping them into the cut off leg of some pantyhose.

I do 3 white and one with coloured stripes per set.

The coloured ball doesn’t nothing different but looks more attractive when they are bagged for sale.

Next is a trip through the washer and dryer.

When they come out you have to peal them out of the nylons.

Once they are all peeled its back into the nylons to go through the washer and dryer again to get rid of the fuzzies.

I will bag them and put a simple topper on them. Sorry no picture as I haven’t got that far yet.

Next is the soap. I get really clean hands.


Heart Cards

Heart Cards

Happy Valentine’s Day to all of you who celebrate it. I have been working on creating some simple heart cards from felt and fabric in my pursuit of “using stuff up”. My stash includes hoards of printed felt and fabric. So I decided to combine the two with a bit of free motion machine stitching to make some Valentine’s Day cards to sell.

I started with a pile of fabric from orange to purple. I thought it would be good to have some contrasting fabric for the hearts.

First I cut out a stack of felt backgrounds that were the right size for my cards. The cards are smaller than I usually make and the pieces of felt were only 3 1/4″ x 5″. The photo on the right shows one of the pieces of felt sitting on the paper note card. Next I chose the fabric to go with the different colors of felt. I then put fusible web on the back of the fabric with the iron to give the fabric a bit of stiffness. I wanted to be able to free motion machine stitch hearts on without using a stabilizer and I hoped that the fusible would give enough stiffness. I ended up leaving the paper backing on, then stitching and then removing the paper backing.

I then free motion machine stitched the cards. I was using white bobbin thread and didn’t have the tension exactly right but it’s good enough for me. The photo in the middle shows the back of the stitched fabric with a portion of the paper backing still in place. I removed all the paper backing and then cut out the hearts. Then I fused the hearts to the felt and fused the felt to the paper card. Fusible web sure does make things easier.

And here are the cards after I finished fusing them all together.

I put them in cellophane sleeves, luckily I had the right size although the envelope was a tight squeeze. Now they are at the store ready to be snapped up by customers (hopefully). Do you make cards for specific holidays? How do they sell for you if you sell them? Or do you just give them to friends and family?


A Felt Christmas Card

A Felt Christmas Card

I sent a card to my partner for the Christmas card on the forum. holiday-exchange-2017   She has it now so I can tell you all about making it.

First I went through my old felt bin to find a thickish piece of felt and cut out a tree shape. It’s a blueish green even if it doesn’t look like it.

I then cut out some red prefelt I had for the background. I did 2 layers for each of these. I did the extra on so if this didn’t turn out I could go with plan B. 

Then I roughly cut out a tree shape form a silk scarf I got at the second hand store. I then layers the pieces and wet it all and trimmed the silk a little.       

Even with 2 layers the prefelt is not very thick so I added red merino to cover the extra silk and make it thicker and more sturdy. I cut the wool to give it a nice straight edge to put up against the tree and give a nice clean line.

After that was done I flipped it over and wrapped the excess around to the back. I wanted to make sure the tree would stick to the finished felt  so I did some poking with my felting needles.

This after the fulling.  I blocked them to square them up. The blue colour of the tree came through the silk more than I wanted so I gave it a shave to bring the green back.

I went through my stash looking for some fuzzy gold yarn to use as tinsel but instead found this yarn with beads that I think looks like lights. I sewed it on and then added some shiny pony beads as Christmas balls and a star.

I thought it looked ok but lacking something.  So I added some 3D sheep. I think they improve it and make it look finished.  

I printed off a post card template from the internet and using fusible web ironed it to the back of the felt. I forgot to take a picture of that but I am sure you all know what the back of a postcard looks like. I like it and my exchange partner seemed to be very happy with it. No I just wait for Canada Post to decide to get mine to me. I am hopeful it will arrive before Christmas.

Here’s  wishing you all a great holiday season,

Ann


Felted Mistletoe Ornaments

Felted Mistletoe Ornaments

I hadn’t done much felting lately as I have been trying to get all my Level 3 Art and Design homework completed. So I decided I would make a holiday wreath because I had lots of nice Wensleydale locks that were already dyed green from making my umbrella tree. I thought I had a wreath form so I went out to the garage to get it and lo and behold, no wreath form. Instead I found 9 whiffle balls with jingle bells already inside them that I had used for Christmas ornaments a long time ago. So I decided maybe I could cover them with felt and still make a wreath by attaching them together somehow. I wanted to use things that I already had without buying anything new.

I searched through my wool and found a variety of yellow, yellow-green, green and blue wool. I created three batts on my drum carder. I took photos but none came out so I’m sorry I can’t show you a photo of the batts. I covered the whiffle ball with a portion of batt, tacked it in place with a felting needle and then covered that with Wensleydale locks.

Here’s a photo to show you how much wool is on the outside of the ball before felting. Very squishy!

Next I tied them up into a leg of pantyhose. This is the same way I make cat toys. Then I threw them in the washing machine with a load of wash.

Here they are after felting. I was still thinking that I would make them into a wreath but when I laid them out, I just wasn’t impressed with it.

Here’s a closer look so you can see the locks. So what to do now? I definitely needed to add more color than the green so I went to my studio to see what I had in red. I found burlap ribbon with red threaded through it that I was sent to try several years ago. You can see more about the burlap here. I decided I would make individual ornaments and make them into mistletoe.

So I machine stitched the burlap together around a hanging ring. The rings were actually the only thing I bought for this project. Everything else I already had in my studio. The little snowflake “buttons” were stitched on by hand.

I then cut some mistletoe leaves out of several pieces of hand dyed felt that were left over from making a couple of hand stitch books. These I hand stitched together and added a few clear E beads to represent mistletoe berries. I used beading thread for the stitching and to put all the parts together. It was interesting threading a big long darning needle up through the whiffle ball to connect the burlap ribbon to the top of the ornament but I got the construction all worked out in the end.

I connected the ball to the ribbon with some pewter beads that I had in my stash and added the red bow from scrap felt left over from some felt poinsettias. This is a link to the tutorial on how I made the poinsettias.

And here they are, felt mistletoe ornaments to hang and steal a kiss from your sweetheart. I’m selling them in the shop so we’ll see how they go. I still have no holiday wreath for the door but I did use up some more scraps and supplies languishing in the studio.

What are you felting for the holidays?

Odds and Ends

Odds and Ends

This past weekend, my husband and I drove up to Wisconsin for a weekend away.  I had hoped we’d see plenty of fabulous fall colors I could share.  Unfortunately, Wisconsin is suffering from the same drought we have here in Illinois and we arrived a week earlier than the peak.  Many of their trees have lost their leaves already, like ours here. But here is one fallish pic entering Wisconsin.

I haven’t been too productive this week.  But I do have a few projects I have put finishing touches on and haven’t shared.

I signed up for Ruth’s Printing and Stenciling on Felt class, so I managed to make a couple of handmade prefelts to play with.  I have plenty of commercial.  The purple was some unknown fiber batt. I decided to use a silk hankie to give it a little sparkle, but it didn’t.

The turquoise is commercial prefelt with some throwsters waste which isn’t very evident.

I think I will be able to use both sides just to experiment. I like the sides without the silk better.

I also made a thicker light blue batt with some mulberry silk.

I have no idea what I’ll be printing on any of these and have gathered a bunch of samples and other UFOs to experiment on.

Here is a failed coaster that had gold fabric felted in that I did a little free motion practice on.

A while back I had felted a bunch of samples from scarves.  I couldn’t find the post with the original scarves. One of them had dots which I wasn’t crazy about. I had done both sides and didn’t care for the inside either.  However, after felting the dots weren’t obvious, they looked more like flowers.  I made it into a little case and did a little embroidery on with with some silver floss for a little bling.

  The back:

The front has a little bit of black organic edging.

Nothing exciting this week, but I got to re-purpose a few things.


Working Small

Working Small

I’ve been trying some new things to work on that I could do easily and fairly quick. Right, haha.

I had seen some crochet and bead earrings online I wanted to try.  I used the same Aunt Lydia’s variegated cotton thread that I used on one of the scrubbies  I posted about recently.


It turned out out to be a little fiddly, but I got the hang of it and was pleased with the results. I especially like the variegated thread since it makes it easy to wear with several colors. My favorite ocean like colorway.  Here they are lying flat.


But then I thought they would nice hanging. So I scoured my house for something to hang them on.

Can you see the beading?

I keep pulling out my felt scraps and wonder what I can do with them.  I had some prefelt leftover from making business cards covered with throwsters waste to add a little bling and just enough to make two earrings.  I cut out two squares and played around with how to use them.  I like dangling earrings but not too big.  Since it was prefelt I didn’t want to add beads on it and weigh it down.

So, I used a head pin put a few beads on it then attached the prefelt around it just sewing it closed in the back. And finally attached the hooks.  They aren’t perfect but they are handmade.

I started another round pair with beads, but got frustrated and put it aside for another time.

I still have piles of scraps.  I’ll have to play with them some more and figure out what else I can use them for. Unfortunately, many pieces are too small to match and are odd shaped.  What have you done with your scraps lately?


Finishing the Panels

Finishing the Panels

Last week I showed you two large panels I made using scraps.  Since then I created three more.

One long panel.

20161116_145808  20161118_122459

20161118_122511Two short ones.

20161116_145815 20161118_122422

20161118_12244120161116_145808

20161118_122349 20161118_122404

Here they are laid out on the floor.

20161201_214933-1


Here’s the final project.

20161204_142831 20161204_143117 20161204_143049 20161204_143029 20161204_143002 20161204_142938 20161204_142841


So, whats underneath?

My Simplicity Needle Felting Machine naked.  Sorry about the lighting, this was our first snow and kind of cloudy.

Now you see it.

20161204_142455Now you don’t.

20161204_143002

I was amazed that I got the sizes right.  I purposely left the edges organic.  Its a little lopsided but the top of the machine is narrower than the bottom.  Now I can change it around for a different look when the mood strikes.

Did you see that coming?

We have three spots left for sponsorship to keep our forum ad free, if you’re interested, please visit the forum and leave a response under 2017 Sponsorhips.  Thanks!

Creating Panels for a New Project

Creating Panels for a New Project

I had such a good time using my scraps and embellishments for my coupon case, I decided to do a larger project using panels.  And using up more of my scraps.

Here is the first large panel.  I started on white prefelt and added  bits of leftover batts creating a cloud effect for the background..

20161113_155937

Then I added silk selvage, pieces of cheesecloth, silk pieces,  scraps of scarves, metallic fabric, yarns and a little of this and that, topped with threads  and a bit of wool wisps to secure the threads.

20161114_140636

The next panel I forgot to take a pic of the cloud background.  But for this one I used silk selvedge, silk scraps, cheesecloth, boucle yarn bits, mohair, prefelt offcuts, and pieces of leftover roving amongst other things including threads.

20161114_140725

It was fun just picking out things from bags and literally throwing it on. The textures are great.

20161116_144454

Closeups:

20161116_144517 20161116_144529

I love the way the threads cross over and look like roadmaps.

Here is the first one finished with closeups.

20161116_144611 20161116_144649 20161116_144633

I was surprised the prefelt just grabbed everything.  I had to shave each panel to get some of the glittery stuff to shine again.

Three more panels to go, so stay tuned.

Have you done your 4th Quarter Challenge yet?


4th Quarter Challenge 2016

4th Quarter Challenge 2016

Like everyone else I have a ton of scraps, threads, cut offs, etc.  I finally got around to organizing them somewhat into like piles.  As you see I had a lot to choose form. The first pic is a tub full of scraps etc.

20161102_155352


I pulled out some and put them on the table to pick from.

20161102_155330

I decided I needed a store coupon case to keep in my purse.  I recently got a new purse and none of the pockets were sized large enough to hold some of these coupons.  I have a separate coupon holder for groceries that I only use when I grocery shop.  But I never know when I might pass by a department, fabric or specialty store that calls me in to shop.

I wanted it thin so I only used prefelt on both sides of the resist. With back problems, I don’t carry a big purse and try to keep it as light as possible.

I picked through the scraps and threw a little of this and that until I was satisfied with the look.  Then I topped off each side with some wisps of merino to help keep those rayon and cotton threads and silk bits to felt in adding merino over the sides to fold over. The yellow is silk selvedge.

20161105_155136 20161105_161012 20161105_161203

I spent a lot of time rubbing so as to not disturb the little bits and thread.
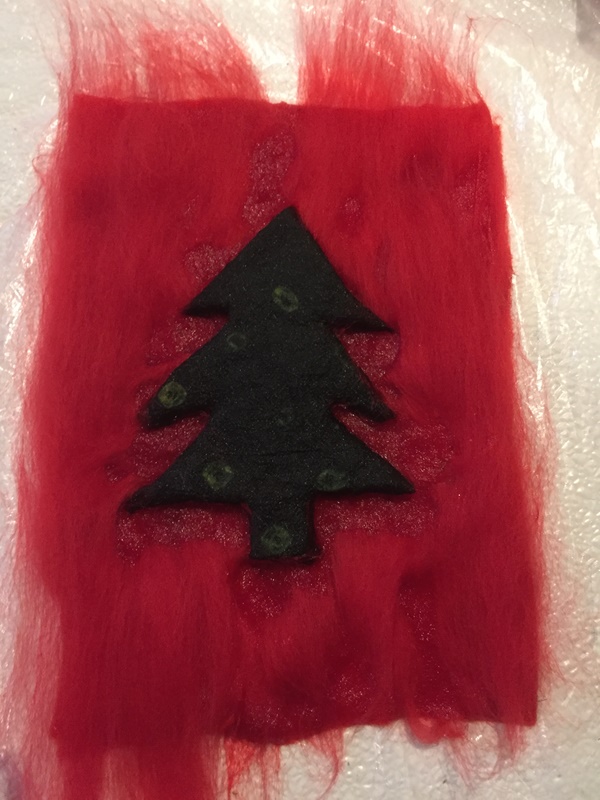
While still wet:

20161107_161500 20161107_161511

The purple fringe got a little wadded up in the felting process and the edges of the flap and sides of the holder needed to be straightened a bit.

20161107_161523

After drying I still had some wild threads so I needle felted some down and cut others.  I also straightened the fringe and needled it down. I think for my use it will be fine.  Here is the finished front:

20161107_163732 20161107_163607

Back closed:20161107_163746

Now I’m ready to shop.

20161107_164205

Here’s another piece I started as an experiment.  I don’t care for dots or the colors of this scarf, so I decided to cut off a piece and see how it felts because I have two more scarves I do like and didn’t want to experiment with them.  I used some silk scraps and angelina on one side and the scarf on the other.

20161012_160157

I liked the dot side after felting. It doesn’t look so dotty, but more textured.  I may do some stitching on it. The silk side I got carried away with the angelina and don’t care for that.  I’m not sure what I’ll do with it it’s fairly small.

20161014_115349 20161014_115356

It was fun experimenting with the scraps.  I’ll probably do more. Have you started your 4th Quarter Challenge?

Easing into the Third Quarter Challenge

Easing into the Third Quarter Challenge

I’m working on some projects for the Third Quarter Challenge, but had completed this project earlier which also falls into the Second Quarter Challenge.

While going through some old craft boxes, I found a piece of crochet I did many, many moons ago as a young woman.  I set it aside with my felting supplies.  Every once in a while I’d pick it up and set it on some roving or prefelt, unsure what I wanted to do with it.

20160524_155442

It was definitely acrylic, so I used a small tail on a prefelt when I was making samples and it felt in very nicely.  However, because it has such great dimension I didn’t want to lose that either.  Finally, I made some gray batts with merino and corriedale and decided that’s what I’d do and use a resist under the center so I wouldn’t lose that nice dimension.

20160525_161056 20160526_120551

I purposely left the center open so that would be firmly attached.

Here is the result:

20160609_122225 20160609_122247 20160609_122257 20160609_123401_001 20160609_123157

20160609_123548

I don’t know why this one looks orange.  Lighting I guess.  But you can see where some of the gray migrated up through crochet piece.20160609_123520_001

My next dilemna was what to do with it.  I tried it over a small pillow, but didn’t like the way it pushed the design up.  Then I tried a couple of pre-made square frames.  But I didn’t like them either.  The frames were either too wide, the wrong color or not big enough.

There was something lacking.  I just couldn’t put my finger on it.  Then I tried stitching a design around it.  That gave it a little balance, but I’m still not sure.

20160823_134235-1

I may take it to a professional framer and have something like this done.  I tried a new program — Ribbet to super impose a frame.  I know the top and bottom are  cut off a little but it was just to see if I liked it.

20160609_123347

Or this?

20160609_123347 2 frame

What do you think?

At least now I have a piece of my crafting history preserved and not stuck away in a box.