Browsed by
Category: Fiber Preparation

Learning to Use a Drum Carder to Make Batts

Learning to Use a Drum Carder to Make Batts

Our guest artist today is Cathy Wycliff aka Luvswool.

After several months of taking a hiatus from felting–due to a work project and family health issues–I was starving to get back into it.

Fortunately, Marilyn suggested a lesson in carding batts. I don’t own a carder and my experience with blending fibers has been minimal, that is, using my dog brushes to blend a few bits of wool roving. Last Friday, Marilyn came over with two carders: a Louet Junior with a very coarse cloth (40 tpi?), and a standard Brother with fine (120 tpi) cloth.

I felt more comfortable beginning with the Louet, and grabbed some neutrals to begin the carding process. I used these fibers with no particular plan for my first batt: Mystery fiber chunks and fibers, possibly some Finn hand-spun; hand-dyed vintage yarn (early 80s); small amount of Domestic 56s and Navajo churro–all in various neutral shades, mostly gray.

IMG_0404IMG_0401


IMG_0395 IMG_0394

Then it was time to move on to the Brother for some finer carding. This time I went for color: Indigo-dyed Domestic 56s, dark blue Merino, hand-dyed mulberry silk, white Tencel, green mystery fiber, possibly Corriedale. The machine was a bit more sensitive, and so the fibers needed to be fed more carefully onto the drum.

IMG_0389IMG_0396 IMG_0400 IMG_0399

I tried the Brother once again, using slightly different fibers and colors: Hand-dyed Indigo Domestic 56s, dark blue Merino, white Tencel, unknown white fiber (possibly cotton), and Milk protein. Marilyn suggested we make two passes through with the fibers.

IMG_0398 IMG_0397

Some things that surprised me about the carding experience: it took a lot of time and was more difficult than I imagined; the fibers don’t necessarily cooperate, in that bits get caught on the smaller drum; and finally, it’s probably a good idea to have a plan of what you want to make with the batts before you begin. This was an experience I really enjoyed and I have made a couple more batts with the Louet coarse carder, which Marilyn generously has loaned me. The neutrals below were passed through three times.

IMG_0406 IMG_0405 IMG_0412 IMG_0410


More mystery fibers in green and yellow.


Thanks Cathy for sharing your first experience with carding batts.  Do you still have carder envy?  Personally, I am happy to have the carders.  They have come in handy more than once.  I love making batts just for fun.  I don’t always have a use for them and often give them away.  Its always a creative learning experience!


Carding My Green Leftovers Together

Carding My Green Leftovers Together

When I have a lot of little bits I like to card them together. First I pull them all into small lengths. This pictures make the wool look very blue. I think maybe because the table is very yellow.

wool ready to card

I mixed up the colours in a big tub

IMG_2403 web IMG_2404 web

IMG_2405web

Next I feed it through the carder

first time trough the carder

This is what it looks like as it comes off onto the storage drum. This is what the batt looks like. It is about 7 feet long and 18 inches wide.

IMG_2409 web I want to blend it more so I peel of thin layers of the batt and feed it back through the carder.

IMG_2410 weband at the other end

second time through the carder You can see, at the top of the picture, how thin the web of wool is as comes off the carder to form the batt.

IMG_2424 web This is probably the closes to the real colour. It is more green but it is very blue green.

IMG_2420 webHere is a close up you can see some of the different colours. and how the wool is not as aligned as top but not as mixed as a bat made from wool that hasn’t been processed.

There is always some wool left on the drum take off drum and I let the carder run to clean out the last of the colour and get what looks like a rolag  as well. I ran it through the carder in a narrow stip.

IMG_2414 we IMG_2415 web

IMG_2421

I think I like the first time through the carder better than the second time through. I think it will make a nice hat. The small amount I will probably spin at a demo this summer.

From Raw Fleece to Carded Batts of Wool

From Raw Fleece to Carded Batts of Wool

Our guest author/artist today is Zara Tuulikki Rooke.  She generously offered to take us through the process of preparing fibers from her own sheep to use for felting.

As I enjoy felting, I feel very fortunate to also be able to keep a couple of sheep. My four ewes are crossbreeds, from traditional Swedish breeds including the more well-known Gotland, and the perhaps internationally less well-known Rya and Finull. In any case, they do have really nice locks.

Photo 1

In Sweden, the common recommendation (with exceptions for certain breeds) is to shear the sheep both in the spring (to remove the thick winter fleece before they have their lambs and before the summer) and in the autumn (when they return to the barn and start spending more time indoors). The summer fleece (sheared in the autumn) is considered to be of higher quality. It has been grown while the sheep have been out grazing nutritious green grass, and not full of hay and straw like the winter fleece. Below is a photo of their summer fleece, sheared last autumn. The lighter, brown tips are from bleaching by the sun (and probably some dirt as they are unwashed).

Photo 2

My ram is from an old breed called Ă…sen. His fleece is straighter, without real locks. This breed can have a variety of fleece characteristics and different colours in patches on the same individual animal. My neighbour also has a ram of the same breed, and the darker fleece (black-brown-grey) on the photo below is from one of her lambs.

Photo 3

In addition, I also buy raw fleeces from pure Gotland sheep from a farm in a neighbouring village. The photo below shows some of the variation you can get between individuals, both in colour and in the size and shape of the locks. The lambs are born black, but later the wool turns grey and the once black tips are bleached by the sun. Or rather, they grown an increasing proportion of white hairs – there are no grey hairs, just different proportions of white or black hairs making the fleece look grey.

Photo 4

To a felter, this abundance of raw fleeces must seem like an ideal situation. And I certainly think it is. But, the process of turning raw fleece into carded wool is quite time-consuming. And that is what this post is really about.

After shearing, the fleece needs to be skirted and sorted, to take away wool that is too short, dirty or tangled. The short wool can either be from the head or legs of the sheep, or the result of what we call double-shearing (i.e. shearing a patch a second time to even it out). You usually also need to remove a fair amount of grass seeds and other vegetable matter that gets stuck in the fleece. That can take a lot of time, but it helps to do the sorting on some kind of wire mesh that allows small bits to fall through.

Then comes the washing. I try to get as much washing as I can done outdoors in the autumn, after shearing, up until the temperatures drop below freezing (in the North of Sweden that can be quite early in the season). I leave the wool to soak overnight in net-baskets in an old bathtub filled with cold water. The next day, the water will be really brown, but that just shows how much dirt you can actually clean out from a raw fleece with just cold water. I change the water at least twice after that, allowing the wool to soak for at least a few hours between changes, until the water no longer looks dirty. In my opinion, washing the wool in just cold water is sufficient if I am going to use the wool for wet-felting. During felting it will anyhow get washed again with hot water and soap.

Photo 5

During the winter, I do the washing in my bathtub indoors (which prevents anyone in the family taking a shower/bath for 24 hours), and then I usually use lukewarm water. If the wool is very dirty, I also add some washing powder (the type used for knitted wool items). The main rules when washing, to avoid felting the wool in the process, it to avoid too hot water, or quick changes in water temperature, and to disturb the wool as little as possible.

After washing comes drying. The net-baskets are easy to just lift out of the water and then I usually hang them up for a while to drip off a bit. If I am washing a smaller amount of wool, I often use one of those contraptions meant for spinning water from salad. Then I lay it out to dry, on a wire mesh or on towels on a clothes drying rack. Drying takes time, usually several days. It helps to turn the wool over each day and fluff it up a bit each time. It may seem dry on the surface, but wool has an incredible capacity for retaining moisture.
Finally, you have your washed and dried wool, ready for carding. However, some locks do need to be teased first. This means pulling apart the locks/fibres – and you will probably find even more grass seeds now. The photo shows washed locks, before and after teasing. It´s an extra step in the process, but if the locks are tangled in the tips, teasing really does facilitate the carding.

Photo 6

I own a drum-carder, which really does save time compared to using hand-carders. The wool is feed in under the small drum, which in turn feeds it onto the larger drum, as you turn the handle. After two or three runs through the drum-carder, you can finally lift off a batt of lovely, fluffy, carded wool. Then you can start felting!

Photo 7

It does take a lot of time and effort, and I do swear about grass seeds through the whole process, but each step also has its own charm. I often find it very relaxing to sort, tease and card wool. It provides an opportunity to really feel and look at the locks – and to plan what to do with them. And at the end of the day, when I look at my washed locks and carded batts of wool, I feel really wealthy. Perhaps, in part, because I know how much time and effort has been invested into those locks and batts of wool.

Thank you  Zara for such a wonderful tutorial with exceptional pictures to show us the whole  process from fleece to wool batts!

Carding Batts

Carding Batts

This last weekend I did some carding. I was making Monet batts.

First my daughter and I pulled apart small bits of wool and mixed it up.

mixing colours

Then onto the table and spread out ready for a trip through the carder.

ready to card

This is after the first pass through the carder. I split the batt into layers and put it through again.

first time through

This after the second pass through

second time through

I made 3 mixed colour merino batts

Batts3


I recarded some over dyed brown and white Romney wool I had .

Batts2 batts1


And one mixed colour Romney batt

mixed batt

They are fun to do and great for felting or spinning textured yarn. I was thinking I didn’t do anything for Felt United Day, October 4, but I guess I did. Did you do anything?

A Day in the Life of a Fiber Mill

A Day in the Life of a Fiber Mill

Last Friday, Cathy (Luvswool) and I took a lovely drive out to Belvidere, Illinois to tour the Illinois Wool and Fiber Mill.

Nestled in the midst of farmland, we were surprised to turn into a  homestead driveway. I guess we were expecting a huge factory, but it was a quaint store and small facility crammed with custom made machinery.  The idea for the mill started when Jane Zeien’s family purchased two ewes  for a 4 H project.  The family enjoyed working with the sheep and began raising Cheviot, Hampshire, Shetland and Cotswold sheep. They decided to expand their services to help promote the industry.

The Illinois Wool and Fiber Mill can handle everything from washing fiber, blending, picking, carding, pin drafting, custom dyeing, preparing batts and spinning.  All types of natural fiber are welcome  unwashed or washed.  And no order is too small and each fleece is processed individually.

Jane greeted us and led us into her workspace and into wool heaven.

We were surrounded by fleece waiting to be processed in a variety of  breeds and blends and piles of roving in a potpourri of colors and blends.

The picker has a big enclosed space behind it where the fleece piles up ready for the next step.

PickerThe carder dominated the center of the room.

front of carder carder back


Batts can be made on the carder by changing out the parts on the back of this machine shown here making roving.

This is the pin drafting machine.

pin draftingDepending on the job finishing the wool can be done on the spinning machine, then the skeining machine.

Spinning Skeining machineWhen the tour was over we visited the shop where everything is related to sheep from skins to finished good by Pendleton and Woolrich along with handmade items, books, roving and yarn. If you want to learn more about the mill visit their website http://www.ilwoolfibermill.com/

Of course, we both bought some new wools to play with. One of my treasures was an English Merino wool batt.

Eng Merino batt

Here are Cathy’s new treasures —

Cathy treasures


Using A Drum Carder

Using A Drum Carder

Recently on the Felting and Fiber Forum, Leonor was asking those of us who’d recently bought drum carders what we thought of them. I said I really liked mine from the Classic Carder company and didn’t tend to get fibre building up on the small drum, which seems to happen for some and I said I’d try and do some videos when I got chance. Yesterday I found time to do some videos. The first one took almost an hour to upload to youtube, so I have done some edited versions and I will try to upload the others when I have more time (it took 4 hours this morning). The first batt I made is using ‘texturey’ wools and fibres. They are mostly ones I have hand dyed myself, scoured wools like Bluefaced Leicester, Wensleydale and Falkland, carded Icelandic, some Alpaca, dyed Devon tops and some hand dyed silk tops and silk noil.

OLYMPUS DIGITAL CAMERAThis is the video, sorry the light isn’t brilliant.

This next video is showing commercial wool tops being carded, these go through a lot easier, and the end ‘batt’ is a lot neater and smoother, more like wide roving than a batt. You can use the drum carder to make your own blends from wool tops which are usually more expensive than single colours. Depending on how you put the wool through will depend how ‘stripey’ it is or how blended.

I like to make blended batts with some texture and some wool tops. This next video shows about half of the texture batt being blended with the wool tops batt, I think I added some soy tops, flax and ramie to this too.

OLYMPUS DIGITAL CAMERA

I don’t often do this, but for demonstration purposes, I put the texture and tops batt from the previous video through again.

I used a shower curtain on the table while making these videos, I hoped the white would help lighten them a little, I don’t think it made much difference, but it does show up some of the dust that collects under the carder!

OLYMPUS DIGITAL CAMERA

Very Pink

Very Pink

My sister got me some wool tops for Christmas. Even before I’d seen the colours, I’d decided I’d make her a book cover from whatever she chose, thinking she’d probably choose her favourites. She chose a selection of pinks, not the colours I would have chosen for her, but pinks it is 🙂  I Picked out some shades I already had that I thought would work, I already had a salmon pink, some cerisey purple, reds, maroons and a nice lemon. Then I started to make some batts with my carder.

OLYMPUS DIGITAL CAMERAAt first I made up some batts without any other fibres blended in, I’ll use these for the bottom layer which will be inside the book cover. I split them in half lengthways after I’d made them, then rolled them up.

OLYMPUS DIGITAL CAMERAThis is one of the lighter batts before I split it and rolled it.

OLYMPUS DIGITAL CAMERAI used some soy top, viscose, a small amount of banana fibre, black bamboo and dyed silk tops to blend in to make the batts for the top.

OLYMPUS DIGITAL CAMERAI rolled these ones a bit differently

OLYMPUS DIGITAL CAMERAI picked some fabrics to embellish the surface with, some silk strips, organza, dyed cotton gauze and some synthetic lacey stuff I bought years ago which looks like it might be meant for tying back net curtains. In the 70’s 🙂

OLYMPUS DIGITAL CAMERAI picked a few more embellishments too. Some silk throwster’s waste, dyed bamboo fibre, commercial art yarns and fibres taken from unpicked yarns.

OLYMPUS DIGITAL CAMERAI’ll show you more pictures when I’ve started to make it 🙂

What I am working on

What I am working on

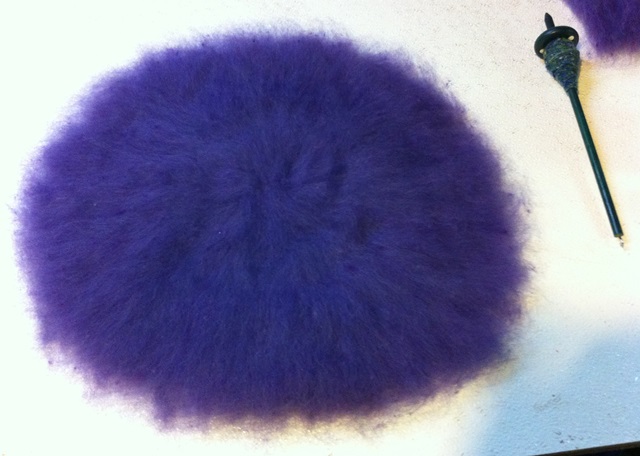
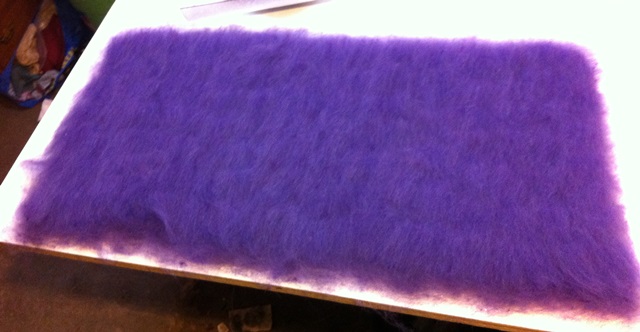
I was sitting here wondering what the post would be today when I realised it was my turn to post.  So you might guess I am running a little behind. It has turned cold her so I thought  better make myself a hat. Normally I can make several hats in a day. Not this one. It is a never ending project. I started the hat on Friday. Now its Wednesday and its not done yet. First I made a larger template than usual because I wanted to make a scrunched up hat.Then I looked for colours. I have nothing I want in large enough quantity to make a hat. That means the first thing is to blend all the purples together to get enough wool to make my hat.

Before Carding
Before Carding
First time through the carder.
Third time through the carder

Here it is all the wool laid out on Friday.

layout top layout

The yarn on my spindle in the picture will end up on both parts. I also have a similar hand spun yarn in pinks that will go on the hat. I forgot to take pictures of that on Monday. Last night I sewed it up into tight scrunches ready to be steamed and ironed.

sewn up sewn up top

The part that is not sewn will be turned to the inside with the top attached to it.  The top was sewn towards the center. My hands were sore after the sewing do my plan is to do the ironing today and then I have to sew the top on and see if it looks any good on me. I will show you the finished hat in my next post. What have you or are you making for yourself ?

Meeting Sara From Sara’s Texture Crafts

Meeting Sara From Sara’s Texture Crafts

We have something  different for you today. We have a very special post in our Meet the Community category. Sara from Sara’s Texture Crafts has kindly done an excellent video for us telling us all about how she became interested in  textiles, felt, fibres and wool and what led her to becoming a supplier. She also describes what goes on behind the scenes in a typical week at Sara’s Texture Crafts and what inspires her.

Thank you so much for doing this, Sara, it was great to meet you and a fascinating insight into your passion and business 🙂

Please visit Sara’s website to see the wonderful products she has for us fibre addicts 🙂

Recent Things

Recent Things

I made some mixed white wool batts on my drum carder recently. I like to use different wool breeds together because they felt differently to each other so you get interesting results and it’s different every time. I made 3 batts altogether and used Lincoln, 23 mic Merino, 18 mic Merino, Norwegian, Texel, Cheviot, Devon, Teeswater and Shetland wool tops.  I also added in some carded mixed lambswool and Falkland fleece for texture, and Border Leicester, Mohair curls, Bluefaced Leicester, Wensleydale, and Alpaca for crimp and curl. I also added some silk for extra shine.

OLYMPUS DIGITAL CAMERAI thought I’d use the batts as the inspiration to put together another wool and fibre pack, using white/natural as the theme. I added some cotton scrim and some of the ‘luxury’ embellishment fibres I have: Bamboo staple fibre, Egyptian cotton top, Ingeo, Banana, Ramie, Flax and Milk protein fibre. And also some silk fibres: silk threads and throwster’s waste, silk carrier rods (don’t they look so ugly before they’re soaked and separated?!) and one of my favourites, silk noil. I love the way it felts, but I also love the way it smells and sounds as it’s separated and stretched out 🙂

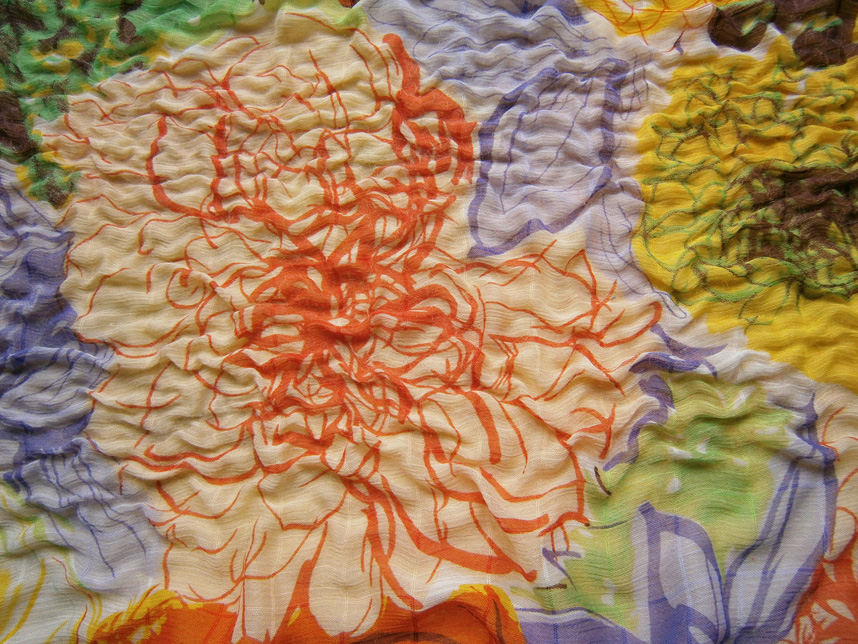
OLYMPUS DIGITAL CAMERAI went to Abakhan on Wednesday for some supplies (they were out of delrin clips!) and I couldn’t resist getting some gorgeous georgette fabric in a few designs. This is one of them:

OLYMPUS DIGITAL CAMERAI also couldn’t resist the braiding, so got 3 designs:

OLYMPUS DIGITAL CAMERAI hadn’t had chance to do much over the last few weeks so I decided to make time on Friday and laid out and felted a nuno felt piece with one of the new fabrics I bought. I knew I should have added some wool around the edges of the fabric, but I laid it out upside down, with the fabric on the bottom and knew I’d mess up if I tried to flip it 🙂

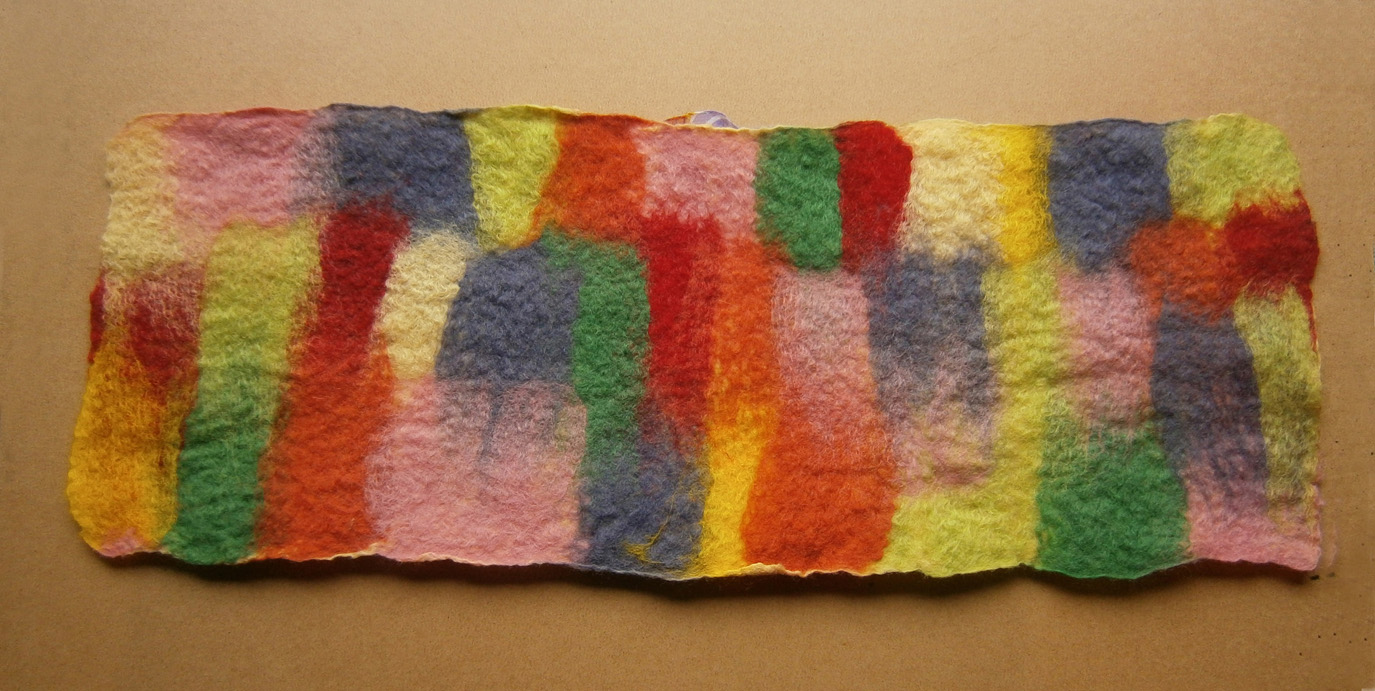
OLYMPUS DIGITAL CAMERAI picked colours from the fabric to make a muti coloured patchwork back:

OLYMPUS DIGITAL CAMERAIt textured really nicely:

OLYMPUS DIGITAL CAMERA