Browsed by
Category: Fiber Preparation

New Drum Carder

New Drum Carder

At least once a year I’ve contemplated buying myself a drum carder. But after seeing the wool blends Ann carded a few weeks ago, I seriously considered it, and after looking at a link Judith gave me to ebay, I bought myself a gorgeous handmade Ash drum carder from the Classic Carder company. I wasn’t very good on my first few tries, but I soon got the hang of it 🙂

OLYMPUS DIGITAL CAMERAI thought I should have an ‘aim’ instead of just going mad and making lots of nice coloured batts, so I decided to  work out roughly how much wool I’d need for one layer if I’m making a piece of felt big enough to make a cover for an A6 notebook. I got my template out, chose a coppery bronze colour theme and then laid out the different coloured wools in different proportions.

OLYMPUS DIGITAL CAMERAI then gathered all the colours up, weighed them and kept notes. I’d usually think to do this after the fifth time of laying out colours, so I’m impressed with myself 🙂

OLYMPUS DIGITAL CAMERAI added some small amounts of flax and soy top to a couple of the lighter colours, and it’s not very obvious from the photo, but I added black bamboo to the natural brown merino.

OLYMPUS DIGITAL CAMERAI was impressed with how it looked after just one turn through the carder, but I wanted it more subtle than it had turned out, so I put the wool through again. I really like how it turned out the second time. I’m so glad I finally got a carder. It looks gorgeous, is incredibly well made and turns out the most gorgeous batts.

OLYMPUS DIGITAL CAMERA
I’ve been thinking for a long time about making up ‘experimental’ or ‘inspiration’ fibre packs to sell on etsy. Working out what to put in there to make it worthwhile with our postage prices was difficult, but Marilyn recently suggested selling wool as well to make it more of a kit. I had a think about how to do it and came up with the idea of including just enough wool to do one layer, a nice blend for the top. I thought this batt would be perfect for the first one as it’s the same colours I used for my coppery bronze piece that so many people liked. It gave me an excuse to get out my favourite shades of organza too.

OLYMPUS DIGITAL CAMERAI measured and weighed the organza, picked out some matching cotton gauze, novelty art yarns and silk throwster’s waste like I used on my coppery piece, and also made another little batt to make sure there was enough. But I think after lots of weighing and measuring, the pack is finished. I just need to write up the description when I get back later today, but then I’ll list it on etsy.
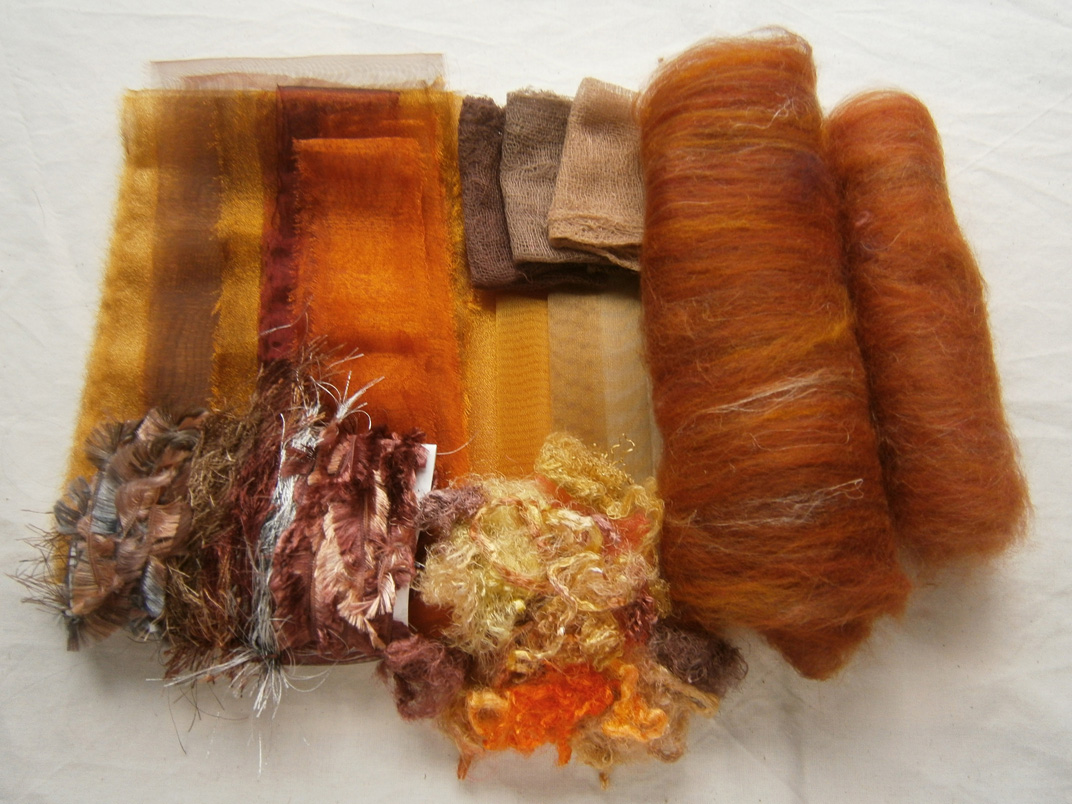
OLYMPUS DIGITAL CAMERALet me know what you think of it, is it a good selection of fabrics and fibers?

Carding Some Wool

Carding Some Wool

I dye most of my own wool. The problem is that I tend to felt my roving a bit when I am rinsing. That means I have to recard it. I had some not very pretty pink that I got bought cheap because it was a little felted. I recarded it with some other colours.

pink precarding

This is the wool combination I will put through the carder. the carder is big. There isn’t that much wool only about 150 grams, so I only use part of the carder.

pink into the carder

This is the first run through.

pink out of the carder 1

After I take it off the drum I split the batt and flipped each section to run them through again.

pink out of the carder 2 pink finished

This is the second time through and the final ball of wool.

This is all the wool I did.

carded wool

There are a couple more blended wools in there too. Now I have to make them into something.


Bits and Pieces

Bits and Pieces

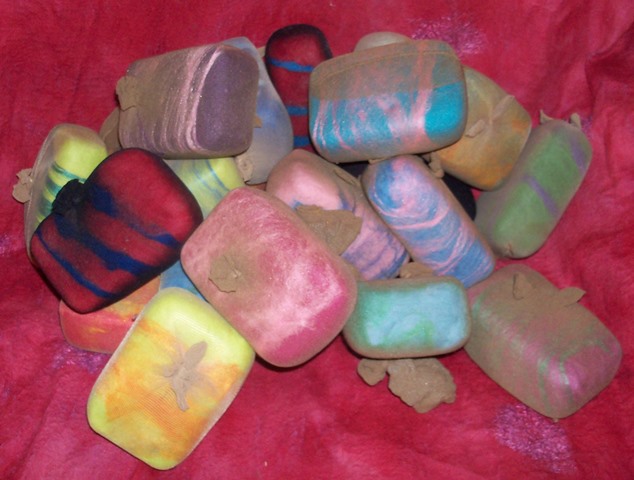
This week has been about getting things moving towards upcoming shows. I spent an afternoon wrapping soap in wool and putting them in little nylon bags ready to felt.

soap

I sent another afternoon getting sheep parts ready to felt. The body parts are roughly needle felted then wet felted. The legs are wet felted.

sheep parts

This is what they look like when they are all put together and their wool is added.

sheep small

Lastly I have been soaking a fleece. I have no idea what kind of wool it is. it was a bag given to me a couple of years ago. Here it is getting a rain water rinse hanging in my apple tree. That wasn’t on purpose but the thunderstorm came in before I got it back into a bucket for its first rinse.

wool hanging


Prefelt

Prefelt

There are two kinds of prefelt. One is needled prefelt. Commercial prefelt is done this way. It is needled just enough to hold together.  I use this sometimes, it works very well. I get it in small pieces and by the yard from Dreamspin Fibers. http://www.dreamspinfibres.ca/  (shameless plug for a friend).

The second is wet felted and this is easy to make yourself. Lately that is what I have been doing. You layout your felt as usual but you stop when it is just holding together.  Rinse it out carefully and let it dry. it is till fragile but strong enough to cut out shapes when you don’t want the fuzzy edges that traditional layout gives you.   I have been making  small pieces and some from the ends of some batts that are not big enough to do much with. They are very helpful when you want very definite shapes.

prefelt on table

I don’t have any exact plans for them but they are very handy to have around.


Wool Gathering

Wool Gathering

This past weekend, my husband and I went to pick up 200# of wool and took it to the processing plant. This is the wool that I will be using to build a yurt this summer. It was really exciting to get started on this project.

MINOLTA DIGITAL CAMERAWe got up early on Saturday morning and drove to Florence, MT which is about 3 hours from our house. We arrived and the little white trailer is where the wool we were buying was stored. We loaded it on to our trailer and strapped it all down.

MINOLTA DIGITAL CAMERAHere are a few of the sheep that were on Suzanne’s farm.

MINOLTA DIGITAL CAMERAMost of the wool is this dark color. This is either a Targee or Black Welsh breed of sheep.

MINOLTA DIGITAL CAMERAThe dogs wanted to get in on the act, so here is Suzanne trying to calm them down a bit.

MINOLTA DIGITAL CAMERA

All of the bags of wool were labeled with the sheep name for the fleece. This is Sophie and there was also Elmo and Ernie and a few others I have forgotten.

MINOLTA DIGITAL CAMERA

Here’s some of the darker wool. I got a mix of Targee, Black Welsh, Romney and BFL.

MINOLTA DIGITAL CAMERAThen we took off for Hall, MT. We had to make a stop for a cargo net to go over the tarp as we were afraid all the wool was going to blow away. Once it was strapped down more tightly, we were back on the road to Hall. After another one and half hours of driving we arrived at Sugar Loaf Wool Mill.

MINOLTA DIGITAL CAMERA

Here I am helping to unload the wool from the trailer. It was cold and windy.

MINOLTA DIGITAL CAMERA

Once we got inside, Ed weighed all the bags of wool. We had 206#.

MINOLTA DIGITAL CAMERA

Here’s Sue and her assistant adding up the wool amounts.

MINOLTA DIGITAL CAMERA

Here is the carder and it is really huge. Ed was really nice and turned on the carder to make a batt that will be similar to the ones I will be getting back. The videos below show the carder at work. I wasn’t able to edit the videos because I need a better editing program but I think they are worth watching if you haven’t seen a big carder running before. The videos are fairly short and the last one shows Ed cutting the batt off the carder.

MINOLTA DIGITAL CAMERA

This is a rolling felting machine that Ed built himself. I need one of these 🙂

Felt bird houses are coming along and a fun demo.

Felt bird houses are coming along and a fun demo.

Slowly the bird houses are coming along. They are now decorated, wet down.

birdhouse 1 birdhouse 2 birdhouse 3 birdhouse 4 birdhouse 5 birdhouse 6

They have been rubbed and rolled and stuffed into the tops of pantyhose. They are ready to full. With some luck that will be tomorrows job.

Two days this week I was at the Ottawa Valley Farm Show. I was demonstrating spinning with a few friends. I took some mixed batts I made buy collecting my odd bits together and running them through the carder. They have lots of colour and neps.

spinning batts

On day one I spun up 2 very bulky singles and one medium weight single in pinks.

wheel spun spools

Today I plied the 2 bulkies together. My wheel is not designed for such bulky yarn but with perseverance  and a few choice words under my breath I got it plied.

bulky being plied bulky plied

After that I was tired of pink so I switched to my drop spindle and the blue green batt.

sinndle spun blue spoindle spinning

I am afraid I don’t have anymore pictures that turned out. We were right in front of a big picture window that was a very nice spot but not good for taking pictures as you can see from the picture of me spinning.

I think I’ve done really well with working and playing with fiber this week. I hope I can keep it up.


Dyeing Silk with MX Dye

Dyeing Silk with MX Dye

I dye my own silk and one of the ways I do that is with MX dye. MX Dye is a fiber reactive dye and works on cellulose or plant fibers like cotton , linen and hemp. It also works on silk. As far as I know silk is the only fiber that you can use both weak acid dyes that are for protein fibers and the MX dyes on.

Scarves blowing in the wind.

I like to use the low water dye method. With this method you use a jar and just a little water. What I do is scrunch or twist or pleat up my silk to be dyed. In this case they are all about 2 feet wide and 8 feet long. Then you pack it into the bottom of a jar that is big enough to hold the silk and the dye (1/2 a cup) and the fixative (1/4-1/2 cup).  It is important that it be a snug fit for this method to work.

I mix up 2 colours of MX dye in 1/4 cup of room temperature water. Pour them over the silk in the jar one at a time making sure they silk is covers with liquid. If it floats as you can see a couple of my jars did you need to carefully weight them down with something non metal. Metal will effect the dye. Once the dye is in the jar you don’t want to disturb them. You don’t want the dyes to mix completely and give you a solid colour.

dye in jars

I am very impatient. So I usually go do something else for 20 min to an hour then I come back and add the fixative. With MX dye you have to raise the PH to get the dye to stick. The cheapest thing for this is PH up from the pool store.  You can use washing soda( not bicarbonate of soda) or order it from your dye supplier but pool chemical is cheap especially at the end of the season. I add a tablespoon for each cup of water including the mix water. Stir to dissolve and then pour it into the jar.  You should leave it for an hour to react but I am impatient as I said and usually dump everything out after about 20 min. Rinse the silk in cold water then hot soapy water then one more cold. Here are some results.

I am sorry the pictures aren’t better but the wind wouldn’t cooperate.  They were dry in about 10 min. If you want really good detailed instructions I would read about it on Paula Burch’s site. http://www.pburch.net/dyeing/lowwaterimmersion.shtml

Washing Some Wool

Washing Some Wool

This weekend I decided to wash some of the masses of raw wool I have. This is a small piece from one of my sheep she is a mixed breed meat sheep. Here it is before washing.

Raw wool

I put it a large tub with hot water and dish soap.

wool soaking
wool soaking, close

Here is the water after the first soak. The problem with a dark fleece is you can never see how dirty it really is. Here is the water after the first wash.

dirty water

I washed it 3 more times  then gave it a rinse. The water was still to dirty and I washed again. So I had to wash it 5 times.  Then I rinsed it twice, the first rinse had some vinegar in the water.

washed wool

Here it is all dry. I don’t know if I will card it or use chunks of it to make something primitive looking.

Stock Solutions for Accurate Dyeing

Stock Solutions for Accurate Dyeing

There is another way to do small or large amounts and get the same results each time.  The easiest and safest way is to make a stock solution.  It’s safest because dyes are most dangerous in there powder form, when the powder can fly around and land incredibly far from where you are measuring it.  It’s best to use a mask when measuring the powder. You don’t want to inhale the powder. You need to keep records so you know what you did. What I do for acid dyes is measure 10 grams of acid dye powder into 1 litre of boiling water.  This solution will be good for up to 6 months in sealed jars. Remember to labels your containers very well so everyone knows what they are. It’s best if you keep them separate and away from any food so there are no mistakes. This gives you a 1% solution so you can use 1cc (measured in a syringe for ease) of die solution for every gram of dry dye stuff (wool roving for instance) I want to dye to a medium shade. If I was pale shades I use half as much and for dark shades up to 4 times as much. This is the most accurate method. This can be hard if you don’t have a scale that measures very small amounts. Now if you’re not that precise that’s ok. As long as you use the same amounts every time you make your solution so if you use 2 teaspoons of dye in 1 quart of water and use a syringe to measure you will be fine. When you dye something write down how much wool you had then how many cc’s of each dye you used to make the colour. I used to keep a small sample of each batch on a card with the amounts of dye used so I could reproduce it when I wanted too.

A weekend of dying
Direct Dyeing

Direct Dyeing

Direct dyeing is a method where the dye is applied directly to the fibre. This can be done with very small or fairly large amounts of fibre depending on what utensils are available to you, but it is particularly good for smaller amounts. One advantage is that the fibres don’t move around so there is less tangling or felting. Another advantage is that very small amounts of dye can be made up, reducing the risk of waste.

Dyed Silk Throwster’s waste

 I have written a step by step tutorial with lots of photos and a table to help work out very small amounts of dye/solution. I apologise to anyone more familiar with imperial measurements, the quantities used are so small that the tiniest measuring spoons are used and they are metric, so it was easier to stick to one measurement. And also US and UK fluid ounces differ, and even cups have metric, US and Canadian versions 🙂  If anyone needs a converter I find online conversion is excellent for everything.

Direct Dyeing Tutorial, please click for PDF