What Do I Do With These Weird Colored Fabrics?
Comments I’ve received in some of my previous blog posts have asked me to share some of the makings from my various fodder explorations. Sometimes it’s very hard to cut into any of those things we’ve spent so much time making. We need to save them as samples, right? They become too precious to us to even think about cutting them up!
I recently got a little push from that mentality.
One of the quilt guilds I belong to (Contemporary QuiltArt Association https://www.contemporaryquiltart.com/) needed to replenish their fiber art pieces for their fundraising stash. At the last in person meeting I attended, I picked up two yards of fabric that had been hand dyed by two past members and wasn’t selling at the fundraising events as raw yardage. We were asked to try to add surface design techniques to the fabrics to see if the pieces would sell better as yardage if they had another layer on them. The other option was to make some fiber art pieces using that fabric. I decided to try using up some of my own stash and collaging onto the hand dyed fabrics. I had picked an orange color and a grayish color. I decided to focus on the orange fabric first because I like orange! I wasn’t having much luck finding colors to match from my stash until I came across some of the printer ink pieces I had made in a Lorna Crane (https://lornacrane.com/) online class I took from Fiber Arts Take Two (https://www.fibreartstaketwo.com/). FATT has great YouTube interviews of a variety of artists from Australia and Europe. The fodder from Lorna’s class was in my PRECIOUS category.
These are the brushes I made after taking Lorna’s class (before they got ink all over them!)
Pretty primitive but very effective!

And here is some of the fodder I made using those brushes and Epson printer ink. I didn’t have any ink for her class, the delivery of my order was a week or so away and I really wanted to get started on her process. I had purchased the wrong ink for my Epson printer and was going to send them off to the thrift store when I started wondering if I could use them. I did a bit of research and it looked like they might work. Each color was 65 ml. I just had to figure out how to get the ink out without spilling it all over the place before I could get it into a more accessible container.
I also used the brushes I made to paint the ink onto the paper and added some other mark making and acrylic paint layers.

This is a mixture of inked paper and fabric pieces made into scrolls. Each of the scrolls is 3” wide x 35” long. I have quite a bit of leftover paper and fabrics plus these scrolls, so I think I have enough for my 5” x 7” series. (In the end I couldn’t cut the scrolls for use in the 5 x 7’s but DID cut them up for use in some 12” x 12” pieces).

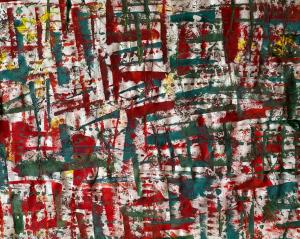
The printer ink made some unusual colors on the fabrics and papers.
But the background fabric is unusual as well. I tore pieces at 7” x 9” so I would have some play room for fussy cutting the finished size. I could get 6 pieces out of one 9” tear. (At this stage, I was thinking “OMG what am I going to do with the other 26” of this weird colored fabric??”)

I’m still learning how to collage. It’s a combination of design principles and intuition and in my honest opinion not an easy feat. Especially when dealing with odd colors.
Here is a photo of them after working on them the first day.

Here is a photo of them after the second day. I was thinking about adding some blue to the mix, which is why you see my baggy of blues in the upper left. I found it difficult to try to add new colors in. They just weren’t working.

I was grateful to have the white window tool to view them as I worked on them. They look really chaotic to me without a frame to contain them.
On the third day, faces started appearing. I’ve been focusing on portraits in my current work so maybe it’s to be expected that faces started appearing to me.
How silly is this guy!?

I think one could fiddle with these for days, but I needed to keep moving or I’d never get this blog posted!
The next step was trying to figure out how to adhere the pieces to the background fabric.
The collage pieces are a combination of paper and fabric. I didn’t want to stitch them down so I thought I would use either Matte Medium or Soft Gel Matte to glue them down as well as put a layer over the top of the whole piece. I bravely took one of my least favorite 5 x7’s and started with the Matte Medium. Ack! The white of the organza fabric blended into the orange fabric after gluing. Would it dry back to white or stay orange? Of course, I should have tested the Matte Medium before I possibly ruined one of my 5 x7’s but I was living large that day! I’ve also had some experience with the Matte Medium on cloth so I kind of knew how it would look. I took a deep breath and left the piece to dry overnight. I was pleasantly surprised when I looked at them the next day. There is a hint of white but mostly orange showing up. I went ahead and used the Matte Medium on the other 5.
Here is a before and after comparison.
BEFORE

AFTER

Next, I needed to decide if I wanted to do any stitching on them. I ended up running some straight machine stitches with black 30 wt Sulky thread in a couple of the areas.
I’m pretty happy with how they all turned out. The guild will mount each of them behind an 8” x 10” mat board. Hopefully each of them will find a new home and make the guild some money so we can continue to have all our wonderful speakers each month.
They are going to have to really like orange though!
Here are the finished pieces.


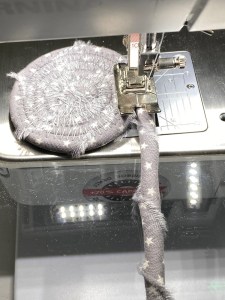
Now I need to figure out what to do with the gray fabric!
Happy Creating! Thanks for reading!
Tesi Vaara