Browsed by
Author: ruthlane

When I discovered felting in 2007, I finally found the creative outlet for which I had been searching. I love that the versatility of fiber allows me to “play” with a wide variety of materials including wool, silk, fabrics, yarns and threads. Creating one of a kind fiber art pieces to share with the world fulfills my creative passion.
Wash Silks from Brainerd and Armstrong Company

Wash Silks from Brainerd and Armstrong Company

My friend Paula found an amazing box at a yard sale. I’m not much one for going to yard or garage sales as I don’t have the patience for it. But luckily Paula found a box of silk embroidery thread that must  have been from a retail establishment. Believe it or not, she paid a quarter (25 cents) for it.
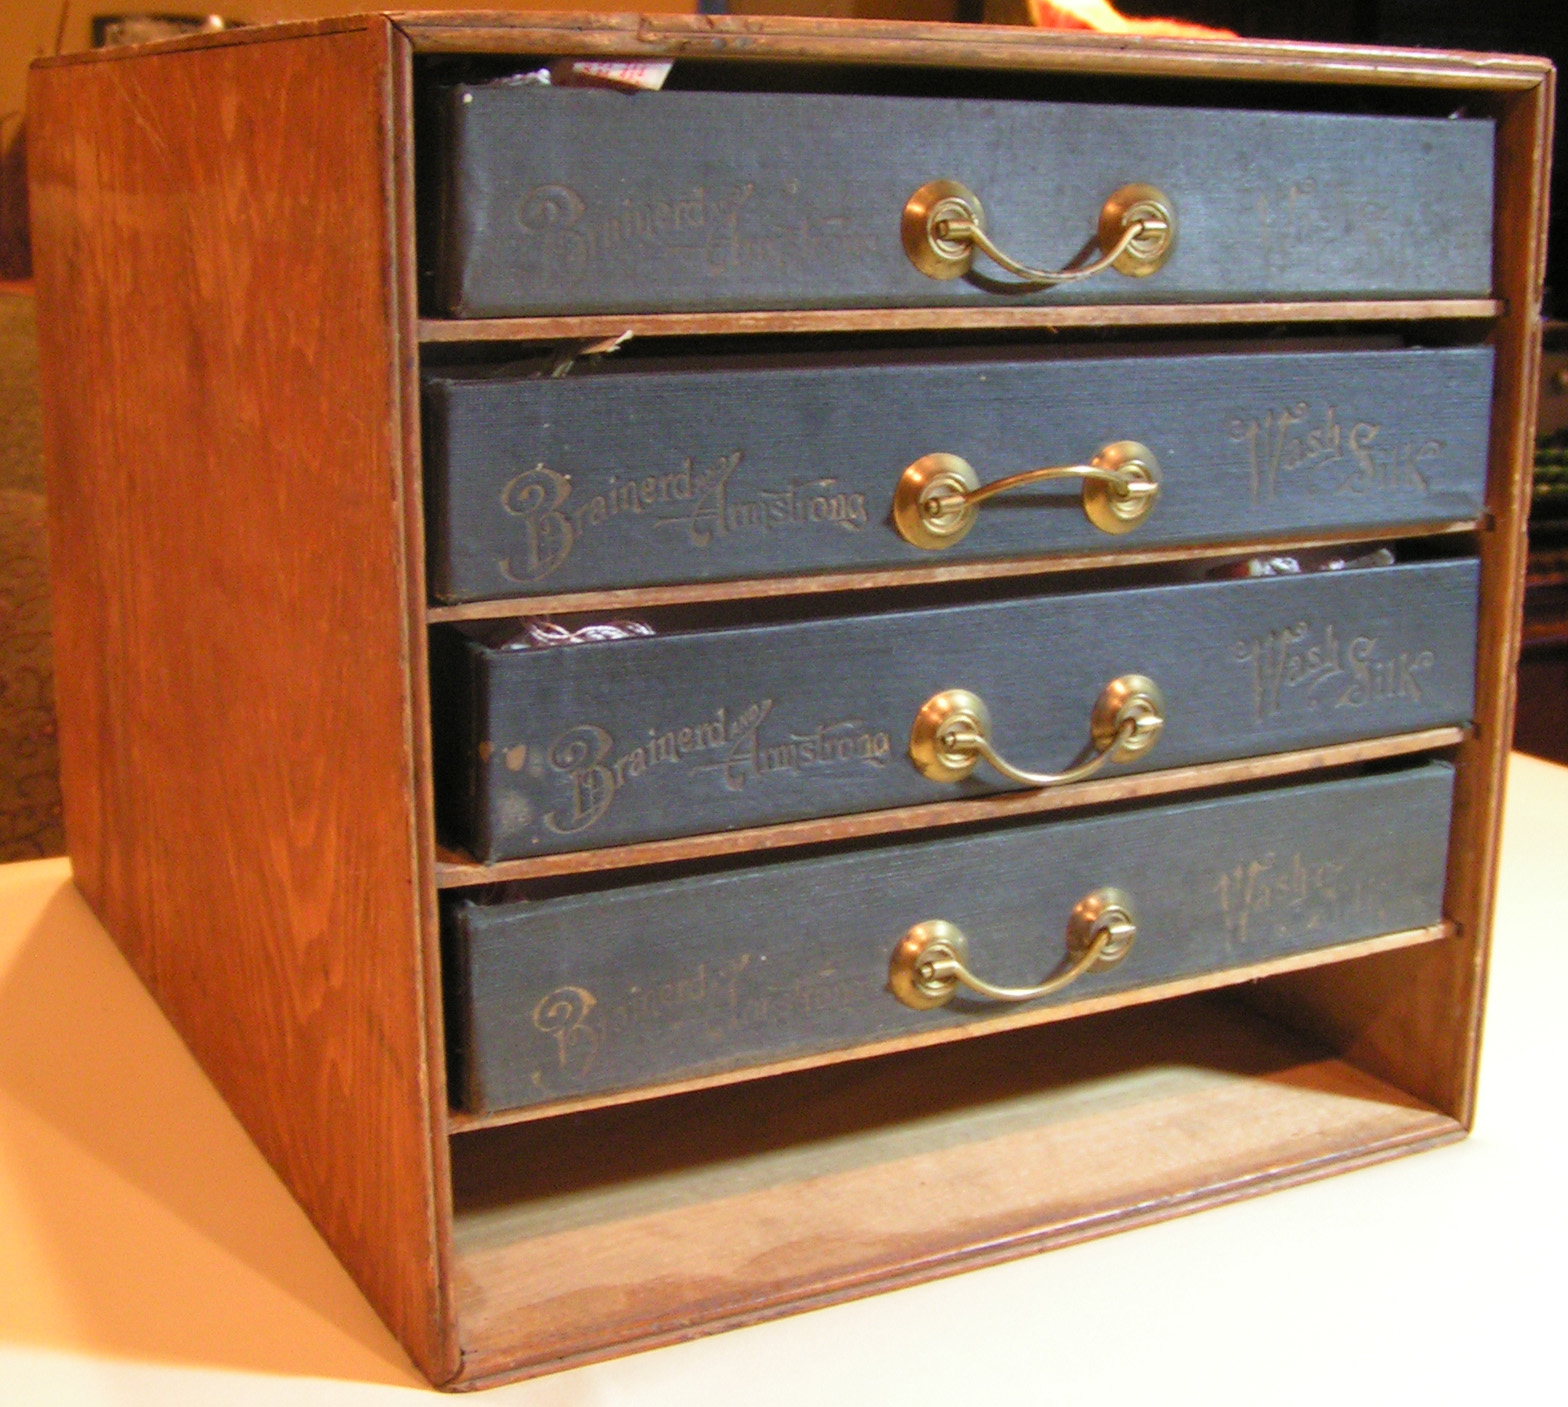
It is from the Brainerd and Armstrong Company. After a little searching on Google, I found out that this company was in business in the late 1800’s until 1922 in New London, CT, USA. They made “wash silks”.
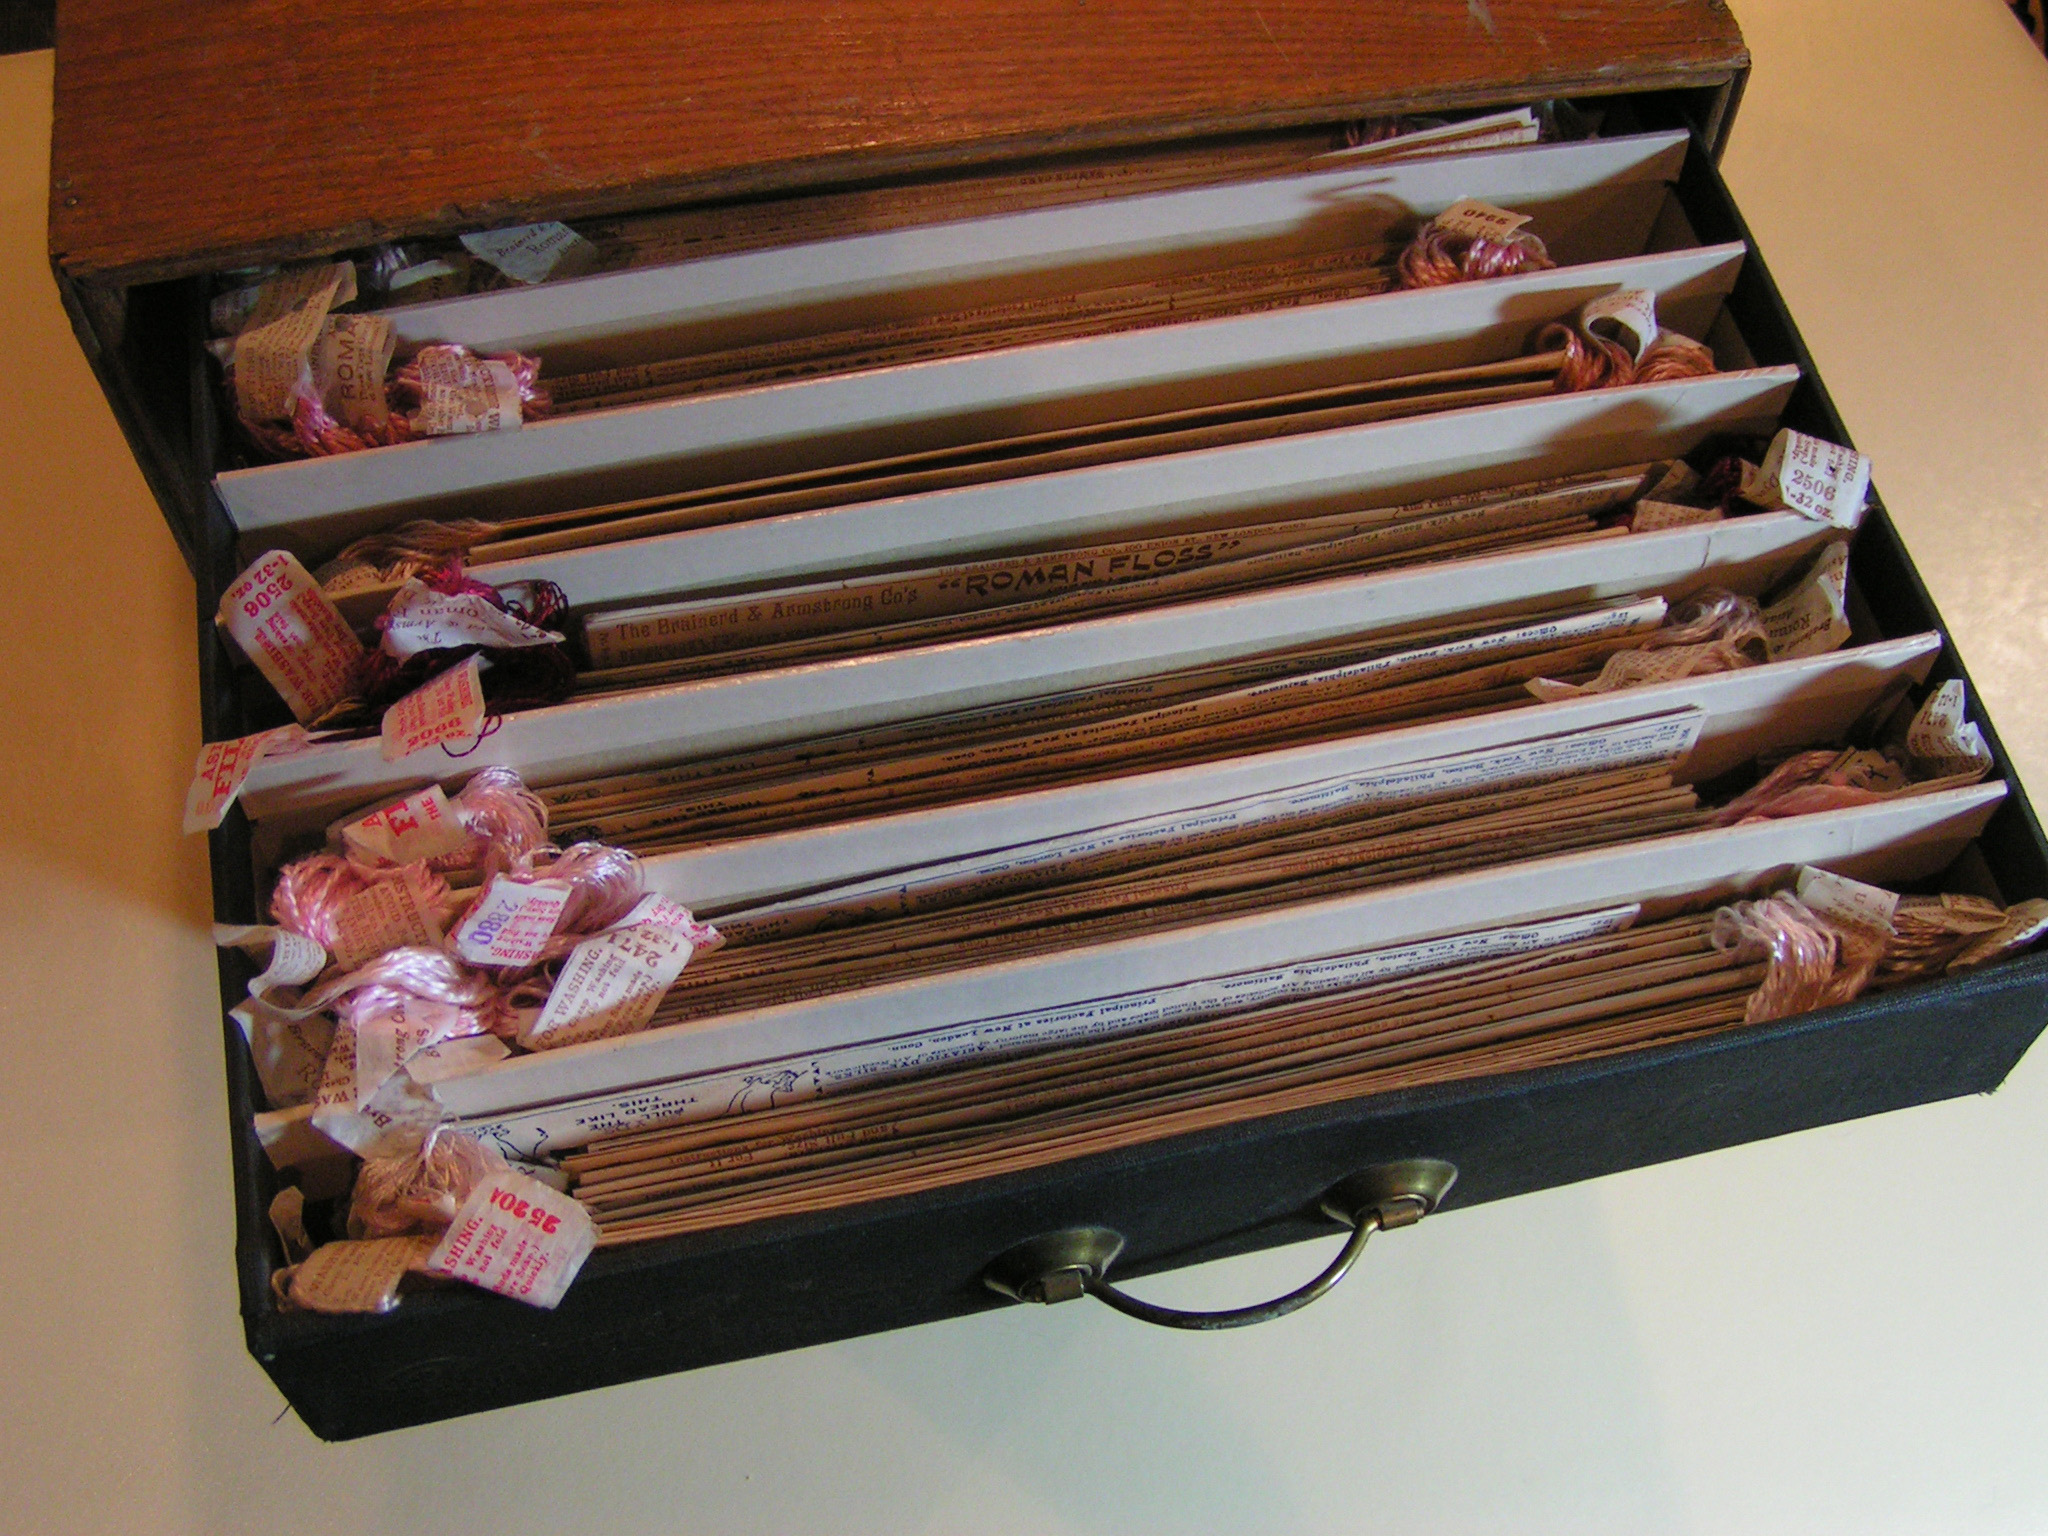
Wash silks were also called “society silks” and were used in silk art embroidery.
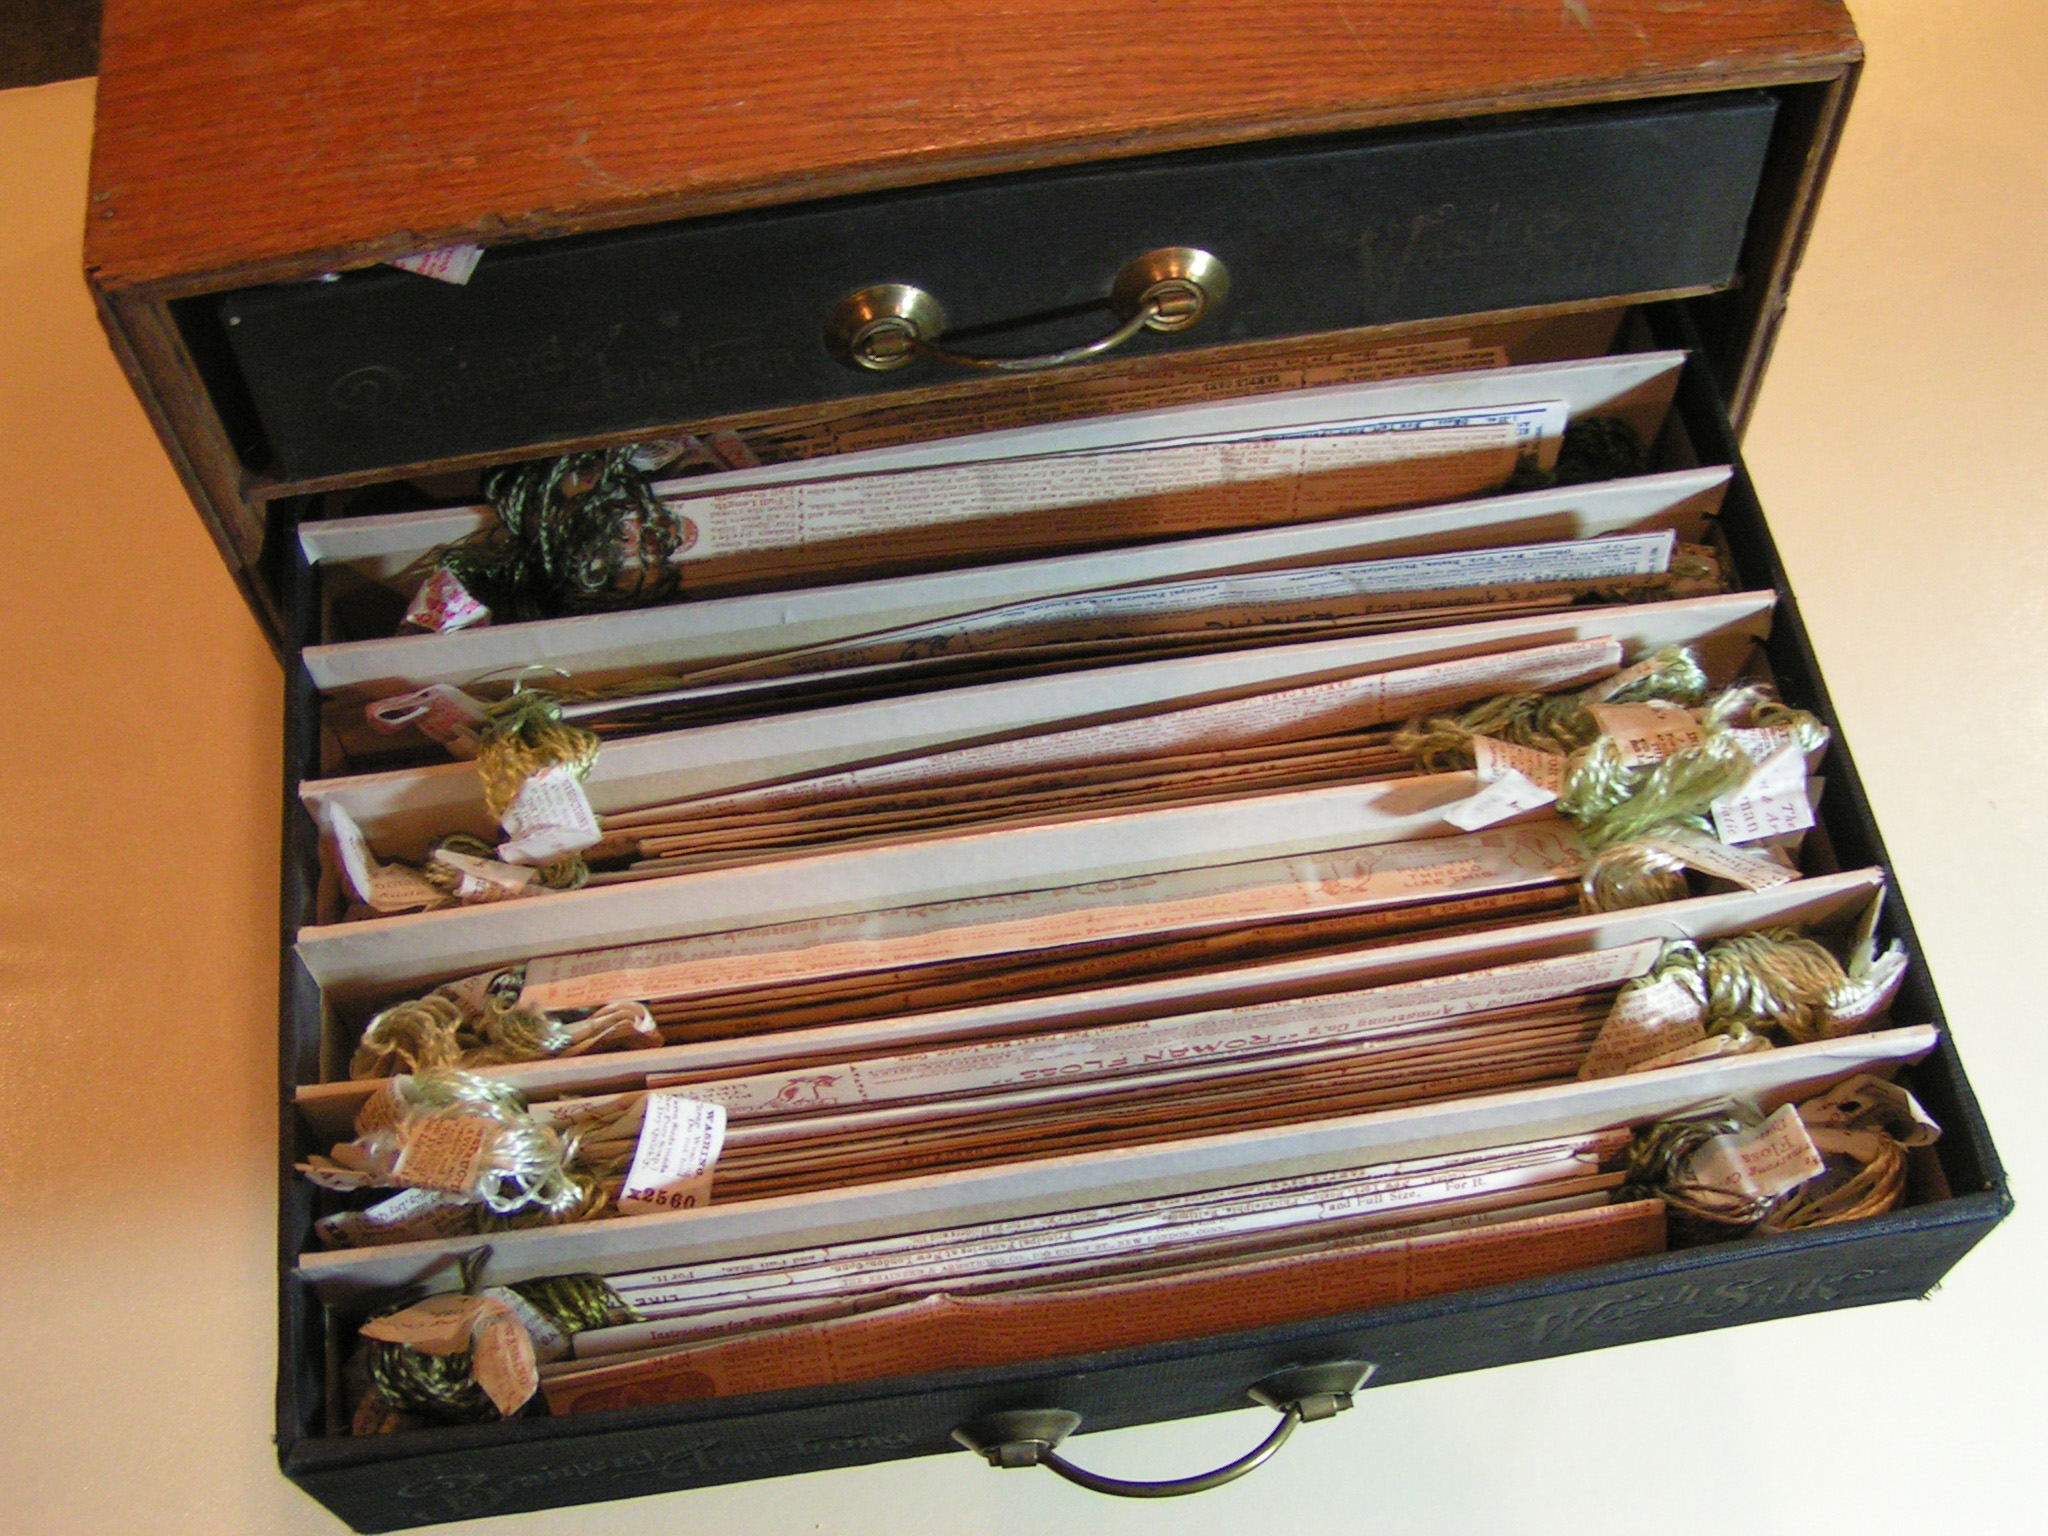
As you can see, the drawers are stuffed with little packets of thread. There are several different weights in a range of colors. I couldn’t resist and this box now belongs to me.
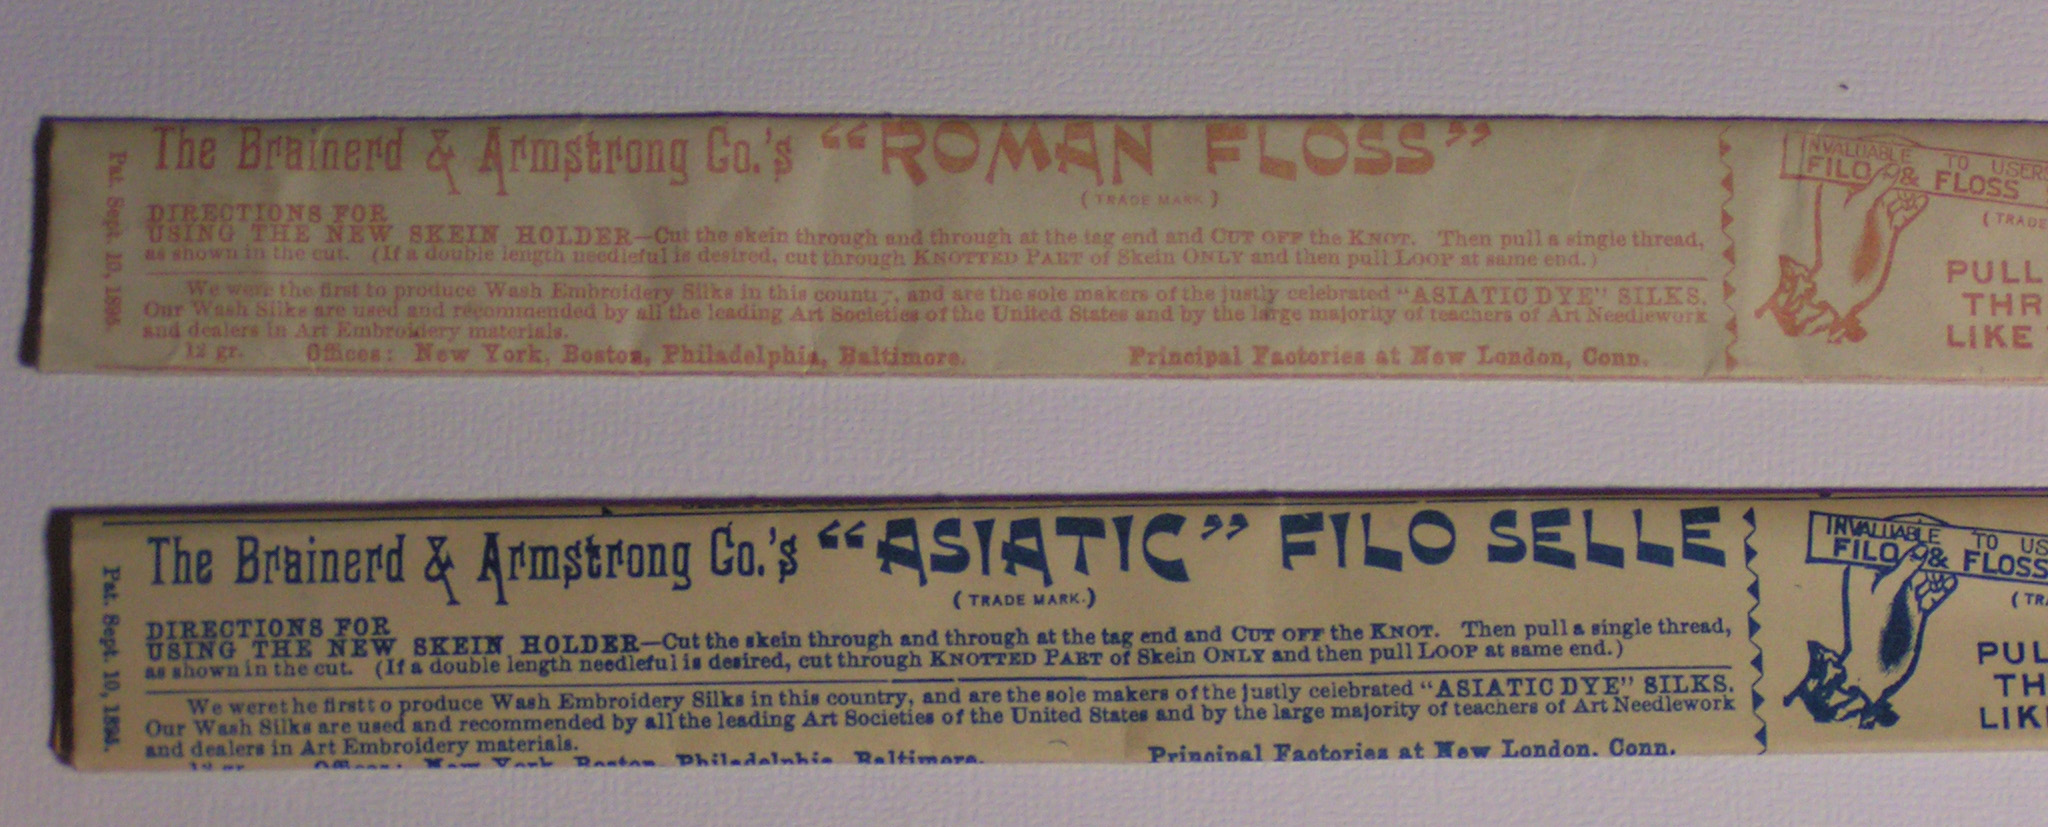
These packets have lots of information on the outside and are made specifically so the threads  won’t tangle.
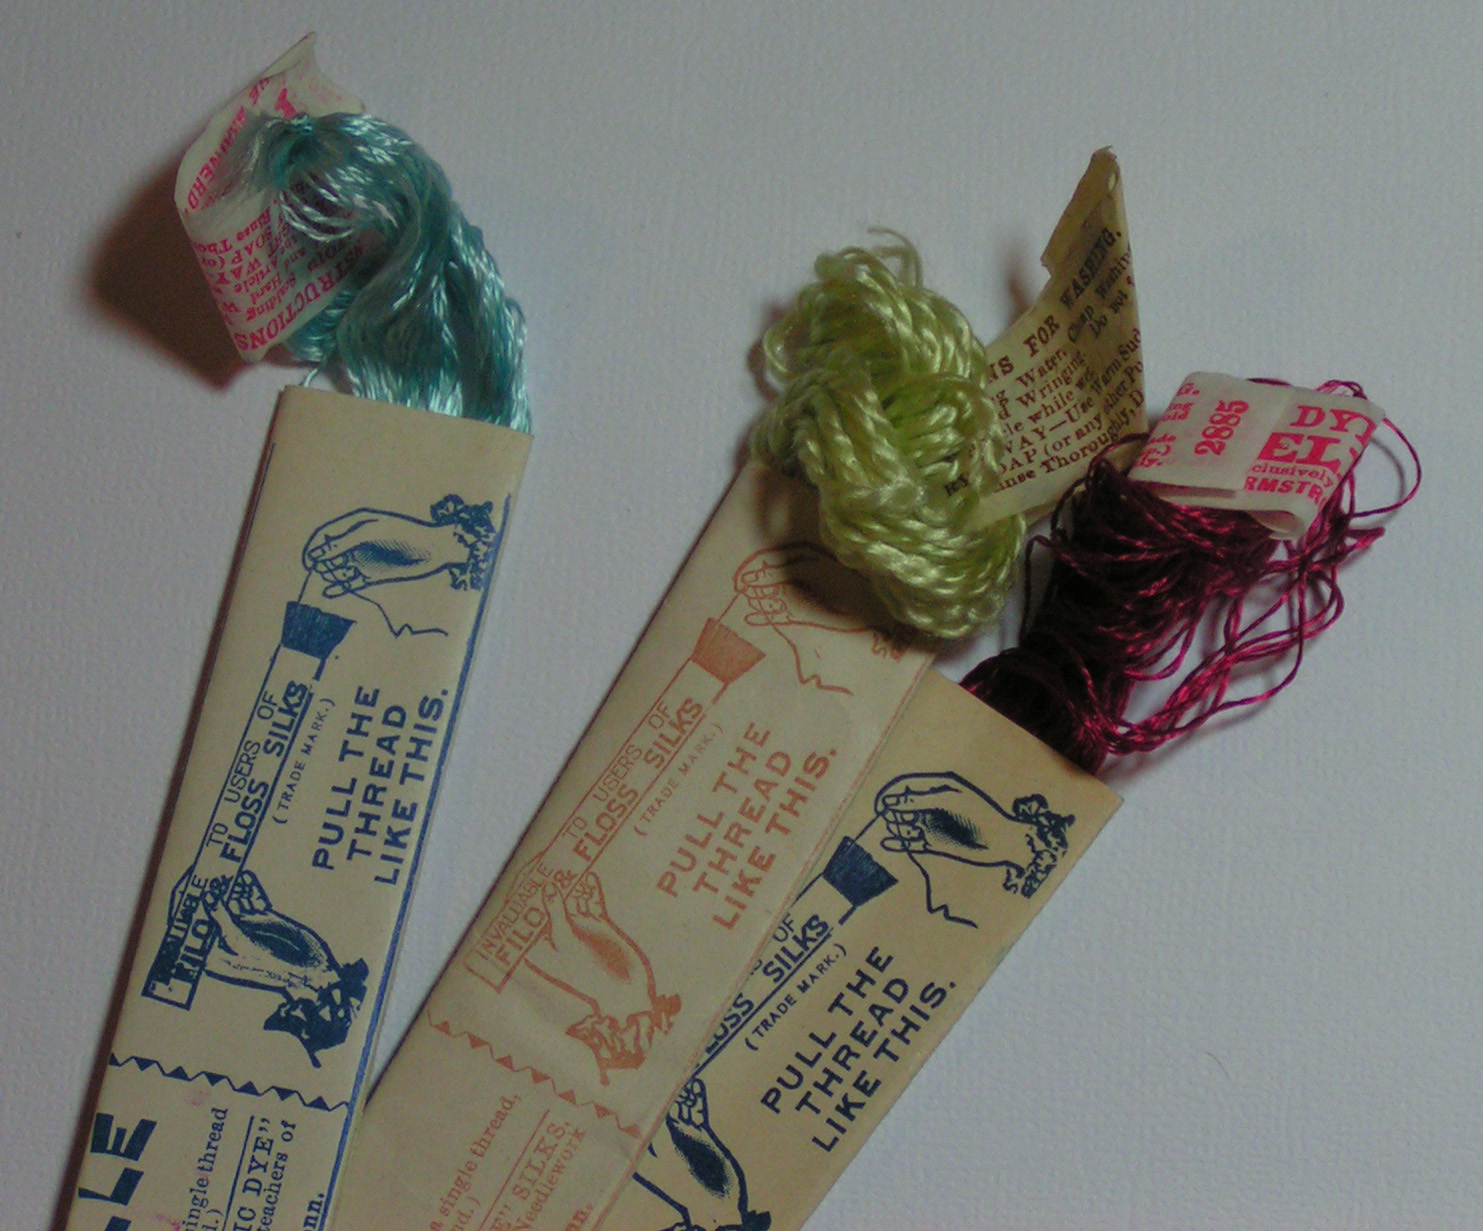
Here’s just a few of the colors. Most are in the pink/red shades but there are lots of greens as well as some purples and blues. I found several books on archive.org that were published by Brainerd and Armstrong. The first book, Embroidery Lessons with Colored Studies gives projects to work and has very generalized instructions. The second book is a general look at silk, The Story of Silk and Embroidery. You can download these book for free and they are actually quite entertaining. I wouldn’t recommend them as a stitch guide as the instructions are vague but it’s well worth the time if you are at all interested in hand stitching.

I don’t think I will be able to make myself use these threads but we’ll see. It’s amazing that they are in such good condition. What do you think? Would you use the threads or save them?

Count Your Blessings

Count Your Blessings

Here in the U.S. it is Thanksgiving. Most people stuff themselves with turkey and all the fixings, watch the Macy’s Thanksgiving Day Parade and football games on TV and try to get along with all the visiting relatives. Many of us forget to think about what Thanksgiving is really about. Giving thanks, being grateful for what you have and counting your blessings. I thought today I would take a little time to do just that.

I am grateful for the beautiful area where I live. Northwest Montana is gorgeous in any season and is such an inspiration in my artwork. I used to live in Florida and really missed the change of seasons, mountains, and snow. I might complain at the end of the winter about the snow, but I am happy to see it snow and I love to ski, so I’m praying for snow again.

Thank goodness for sheep! I am grateful for the wool they provide and the magical ability of the wool to felt. It still amazes me when I take a pile of fiber and turn it into a piece of felt. And isn’t it nice that wool is a sustainable product that doesn’t hurt the sheep to produce? Just think how many different types of sheep and wool there are in the world, isn’t it wonderful that we have all those varieties with which to experiment?

Iris Vase

Speaking of fibers, I am grateful that there are many different types of fibers and that I get a chance to play with them. Finding your passion is a wonderful thing and I hope that you have found something in your life to be passionate about. It has been wonderful this year for me to focus on fiber art and to participate in learning more about machine and hand stitching. It is a wonderful journey to be following and I hope it will continue to be as fun and fulfilling as it has been for me this year.

I am thankful for owning my own business and being able to make a living. Pursuing your dreams is not always easy but I am so glad that I took the jump nearly 15 years ago to start my own business. All the hard work has been well worth it.

My family is very important to me and I am grateful that I have a loving, supportive husband and two healthy and happy dogs.

I am really grateful to my friends here at The Felting and Fiber Studio. Thanks Zed, Ann and Karen for all your support, we make a great team! I am also thankful for all of you who read the blog, participate in the forum and post photos to Flickr. We appreciate your comments and hope you’ll keep coming back as we have loads more fiber fun in store for you.

Take a few minutes today and think about thankfulness and gratitude. With the holiday season upon us, it is easy to get busy and stressed out. Taking a few minutes each day to make a list of reasons that you are thankful can put a little peace into your life. Happy Thanksgiving 🙂

P.S. Take a look at this post by Christine Kane about gratitude.

Around the Web – The Holiday Edition

Around the Web – The Holiday Edition

I thought it would be fun to show some holiday crafting ideas. These aren’t all specifically felt or fiber but I thought it might help to spark some ideas for those of you who make your own gifts and holiday decor. Many of these ideas could be adapted to felting or fiber arts. I’d love to see what you’re making for the holidays so do leave a link if you’ve made something fun or post it on Flickr or the forum.

Charlie Brown Christmas Ornaments Tutorial

Leaf Garland Tutorial

How to Make a Googly Eye Ornament

Thanksgiving Blessings Chalkboard

101 Handmade Ornament Tutorials

15 Felt Ornaments to Make

Needle Felted Mitten Ornaments Tutorial

Needle Felted Rudolph Tutorial

Needle Felted Cardinal Tutorial

Yarn Organizer Sack

Fabric Boxes to Organize Your Studio

Fabric Coil Bowl Tutorial

Button Tree Christmas Postcards

Stitched Felt Christmas Ornaments

Stenciled Burlap Candle Holders

Stamped Christmas Ornament Tutorial

Stamped Christmas Ornament Tutorial (a different one)

Let Them Eat Cake This is not a tutorial or especially holiday oriented but I couldn’t resist!

Free Knitting Patterns for Christmas Tree Ornaments

Lots of Free Knitting Patterns for Christmas

Artist Statement? What’s that and why do I need it?

Artist Statement? What’s that and why do I need it?

Most artists that I deal with do not like writing an artist statement and many don’t have one at all. Since most artistic people are more visual than language oriented, writing an artist statement becomes a difficult task. So why should you bother? People communicate with language and when they are interested in your art and want to know more, the artist statement can be the start to that conversation. Whether it is something you give to potential buyers, give to galleries or is required for entering shows, the artist statement is essential for communicating what you do in your art and why you do it.


A good artist statement reveals more about you the artist, your inspiration and motivations, how you work, the materials you use and what your art means to you. To communicate this information, you need to keep the statement short and succinct in language that anyone can understand. Avoid using vague language that could be used by anyone such as “I am inspired by nature”. What specifically inspires you about nature? Is it the vast desert landscapes and the colors of the sunset? Or are you inspired by the textures of lichen on a rock? Use your thesaurus to find adjectives that specifically communicate the idea you are expressing. Find words that match the type of art that you create. Is your work comical or funky?  Think about the language that would fit and express that side of your art.

Start listening to what others have to say about your art. What words do they use to describe your work? Write the words down. Think about why you do what you do. What makes you the happiest about your work? Is there a specific method that you like the best? Why? Is there something that you do that never fails to inspire? Write it all down quickly like taking notes. Don’t try to edit the words when you first start. Just write it all down.

Once you’ve started your list of words and phrases, look all these words up in the dictionary and thesaurus and find more words to add to your list. Spend time on this search and keep thinking about your art. Ask yourself what your art means to you. Keep your list handy so when an idea pops into your head, you can write it down. Many times your subconscious can work on these questions while you are busy doing something else and  great ideas will arrive at the most unexpected times.

So do you have an artist’s statement? If you do, are you happy with it? Did you write it ten years ago? Take the next two weeks to get a list of words that describe your art and why you do what you do. I’ll discuss writing the full statement in my next column. Don’t miss this opportunity to better communicate with the world what makes your art unique.

The Rhythm of Autumn

The Rhythm of Autumn

The Rhythm of Autumn is a felted mixed media piece that I made several years ago. At the time I was making it, I thought I might do a tutorial on the process so I took a lot of process photos. It originally was going to be cut up and made into covers for various small kitchen appliances such as a toaster cover or a cover for a mixer. Once it was partially completed, I changed my mind in mid stream. So it ended up being a wall hanging. The final piece measures almost four feet across by 2 1/2 feet wide. Due to all the changes I made in the original plan, it took over a year to complete.


This is the original layout. I think I used mixed 56’s wool but actually I can’t remember for sure. I partially felted the piece into prefelt.


Then I wrapped the prefelt around some rusty pipes to rust dye it. The prefelt was wet and presoaked in vinegar water.


Then I put the rolled up bundle in a pail of salt water and covered it with a plastic bag. I left it for two weeks to rust.

Here it is after two  weeks.


This is the entire piece.The sad part was that a lot of this luscious color washed out with the subsequent felting.


I added fabric  leaves cut out of commercial fabrics. These  were too heavy a fabric to nuno felt so I  stitched them on. I was originally  planning to machine sew them on but that proved impossible. So I  ended up hand stitching them down. That took a while.

Here’s a closer view after stitching and felting.


I had also added some silk bits prior to felting.


Here’s the entire piece after felting. I decided not to cut it up at this point but was unsure what to do with it.


This was an idea of adding more interest by putting darker lines through the piece with machine stitching. I used yarn to mark the lines through the piece.


I did end up cutting along the yarn lines and adding dark wool in the space between the  cut pieces of felt.


I covered the lines with water-soluble fabric and pinned it all in place.


Then I machine stitched a “pebble” design over the cut areas making sure that I stitched over the felt edges. The stitching would now hold the cut pieces together. Once it was all stitched, I washed out the water-soluble fabric.


Unfortunately, at this point, I had given up the idea of doing a tutorial so I don’t have a photo of the piece after all the machine stitching was completed. I wasn’t happy with the result and left the project uncompleted for a while. Then I took it to my local fiber group and Bunny suggested that I crumple the entire piece, stitch and stuff as needed to hold it in place and then make it a wall hanging. The photo above shows the mesh I used to back the piece. It is usually used for rug hooking. I crumpled the piece until I got the shapes I wanted, stuffed some areas with extra wool and pinned it all in place. I then hand stitched on the back side to hold everything together and stitched the mesh in place.


Here you can see some of the stuffed areas on the back.


Here is the finished piece. I ended up covering the mesh on the back with acrylic felt and applying a “quilt sleeve” for hanging. I guess the moral of the story is to never give up. That piece of felt you don’t like all that much can be turned into something entirely different!


Finding a Wholesale Show That’s Right for You

Finding a Wholesale Show That’s Right for You

Previously, I discussed finding retail shows and doing research ahead of time before jumping right in and signing up. It is doubly important to investigate carefully before taking the plunge into wholesale markets. Wholesale shows are much more expensive than retail shows and finding the show that is a match for your merchandise is a must.

In the US, there are several major wholesale shows that focus on hand crafted products. The Buyers Market of American Craft is one of the longest running shows and is held in Philadelphia in February. The American Craft Council holds four shows throughout the US  in February, March, April and August. Wholesalecrafts.com holds two wholesale markets called ACRE, one in Orlando in January and one in Las Vegas in April. There are many more smaller wholesale shows that are put on at a state level. Most of these are run through the state governments so check to see if your state holds a wholesale market for hand crafted goods. Many of the wholesale markets have an emerging artist program. This allows artists just starting in the wholesale market to have a smaller booth space and a less expensive investment.

I did check to see what was available in the UK and Australia. I found several sites that listed many gift shows in both countries. I did not see a specific show just for hand crafted items but it did appear that there were categories for hand crafted work. The Wholesaler UK has a list of shows as well as an online venue for listing your business. Canada also has several craft wholesale markets that I’ve seen advertised. Canadian artists are also welcome at the US craft markets. If anyone knows of wholesale craft markets in other countries, I would appreciate you leaving the link to these in the comments.

Researching the show in advance is very important. See if it’s possible for you to visit the show and just observe. Some shows do allow interested vendors to check out the show in person before deciding to apply for the next year. If you know any gallery or shop owners in your area, check to see which shows they attend. Find out from the buyer as much about the show as possible. See if they know of a vendor who would be willing to talk to you about the show. If you get to speak to a vendor, tell them what you make/sell and ask if they think your work would be a good fit for the show. Ask about attendance, whether they do the show every year, their likes and dislikes and if they get re-orders from the show buyers. Also ask about any hidden costs associated with the show including things like shipping your work to the show, union rules for the venue, and what is included with the show package. Talk to as many vendors of the various shows that you are investigating as possible.

Contact the show sponsors and ask for an application. Get applications for all the shows that you might be interested in attending. Compare the pricing, what the package includes and also think about how far you will have to travel, the cost of staying in the area of the show and how much it will be to ship your booth to the show. Most of this information is now online so it is easy to compare costs. Figure out what the total cost for each show is going to be and what the resultant sales must be for you to break even. Does it seem reasonable?

Booths can often be shared. Do you have a fellow artist that might want to venture into the wholesale market with you? If so, consider sharing a booth space. This works best if the other artist has work that is complementary to yours but doesn’t compete directly with your products. Sharing a booth space will cut down on your costs, set up and gives you a ready assistant in the booth when you need to take a break.

Another avenue to follow is to try trade shows that are specific to the product that you are selling. Perhaps if you sell supplies or kits, you might sell more at a hobby and craft trade show. Or if you sell items designed for pets, there are pet supplies trade shows. Think about what type of shops might best sell your work and find out where they shop for merchandise. Finding the right wholesale show takes some work ahead of time but will save you a lot of pain in the long run if you try selling at the wrong show for your work.

Print to Stitch Homework

Print to Stitch Homework

This slideshow requires JavaScript.

I’ve been busy stitching away on my homework for my stitch class. This session we worked on printing photos on fabric and then adding layers of sheer fabric and stitch to “enhance” the photo. I’ve still got a couple more to go and one hand stitch one that isn’t shown that I’ve been stitching on for almost 8 weeks and I’m still only halfway there.

Weather Challenge

Weather Challenge

I’ve been trying to set aside a little time to work on Karen’s weather challenge. I usually start off with inspirational photos and I was thinking I would use autumn photos.


Perhaps I could use a photo like this for inspiration. This was taken in Glacier National Park which is about 45 minutes from where I live.

Or perhaps this photo would work. I love the colors of the leaves in autumn. We get a lot of yellow leaves from aspen, birch and tamarack trees.


But then I woke up on Tuesday morning to this! Snow, almost four inches of it. This photo is taken in front of my house.


And this is from the back of the house. You can see the edge of the picnic table at the bottom right hand corner that shows the snowfall amount fairly well. So perhaps I’ve already missed autumn and should concentrate on winter weather. I always liked white on white. Hopefully, I’ll get further forward on this challenge soon.

If you get a chance this weekend, check out Artistically Speaking Talk Show. I will be talking to Rebecca Parsons about my book and other fiber art stuff. The show will air on October 28th at 6:30 pm eastern time. If you can’t listen at the time of the show, you can always play the broadcast later. There are also some other great broadcasts with other artists available for listening as well. Wish me luck! 🙂

Needle Felted Name Tags

Needle Felted Name Tags

I was invited to teach a mini class at the local weaver’s and spinner’s guild meeting on Wednesday. I decided to try the needle felted name tag project that Ann had suggested to me. Thanks Ann! It was perfect for a guild meeting because the ladies could all use their name tags for meetings and conventions that they attend.


I didn’t do a very good job with the photo taking but you can see the partially finished results. We started with a base of felted wool blankets, scarves or sweaters cut into pieces about 3″x4″.


The base wool was covered with whatever color of wool the ladies chose. Each one ended up different colors and they were all pretty quick in needle felting the backgrounds down. The excess wool was wrapped around to the back and needled in to make a nice covered edge.

We then spent a bit of time figuring out what we wanted the lettering of the name to look like. Yarn was used to form the lettering.


The hardest part was fitting the name in and not running out of space.


As you can see, everyone had a good time using a variety of colors and yarn choices.

Tacking down the yarn with a single needle helps to get the layout. You can always pull it back up if it doesn’t work out. Tara used roving to make “fatter” letters. She was considering whether or not to outline the letters with thin yarn to give it a bit of “splash”.


Julie used a felted, fringed scarf and kept the fringe. Didn’t it turn out cool?? To finish off the name tag, you just glue or stitch a pin back on the back side about a third of the way down from the top.


And here is Shelley’s name tag. She was going to add a charm or button at the top. She hadn’t quite decided. We had a great time and hopefully they were all inspired to add a bit more felting into their repertoire!


Selling Both Wholesale and Retail

Selling Both Wholesale and Retail

Many times artists choose between selling on a retail basis or on a wholesale basis. You can do both, but you need to avoid a few pitfalls when you sell both wholesale and retail.


Galleries often prefer to work with artists that only sell on a wholesale basis and don’t sell at any retail venues. That way, the gallery is assured that customers can only buy the products from them or another gallery. However, when you have been selling retail and then want to venture into the wholesale market, you may want to be able to sell both ways.  You will need to reassure galleries that buy wholesale from you, that your retail prices will not undercut their pricing structure and that any customers who approach you personally after seeing your work in a gallery will be sent back to the gallery for the sale.

I have said this before but it won’t hurt to repeat it. Your pricing needs to be consistent. You can’t sell at a retail show for a lower price then what the galleries can sell your work after buying at wholesale. Your prices at retail shows should be made by marking your wholesale price up by 2.3 – 2.5 or higher. Keystone (the amount that stores mark up a wholesale price) used to be 2.0 but it is really hard to make a living any more with that low a markup. Most galleries mark up around the 2.5 mark. So if you are going to sell your work wholesale, you should not be selling your work in any retail venue for less than 2.5 times your wholesale prices. This includes retail shows, online sales or any other retail venue where you sell your work.

Developing a good relationship with your galleries is important if you want to continue to receive orders and business from them. You need to check with customers who contact you directly where they first saw your work. If they saw your work at a gallery, that gallery needs to get the sale or a commission from you if you sell directly to the customer. Perhaps the gallery doesn’t have a specific piece that the customer wants to buy. You still need to have an understanding with the gallery that if you sell “their” customer a piece, you need to give them a commission or a portion of the sale. They are promoting you and your work and you need to be supportive of them. Work out in advance what their policies are about commissions and special orders. The selling percentages may be different from the normal pricing structure. Again, if you get to know the gallery representatives, this will be a big help when issues arise.

I know that some galleries refuse to work with artists that sell their work in online retail venues. Customers are computer savvy. They can get your name from a tag on work in a gallery, google it and find all the online venues where you sell your work. Many customers then attempt to get a better price from those venues or directly from you. If your work is priced the same or higher than it is in the galleries, these issues won’t be a problem for you. So as long as your pricing is consistent, selling retail and wholesale is a viable option.