Browsed by
Author: Antje

Cute distractions and stashes

Cute distractions and stashes

I am writing and scheduling this post ahead of the imminent new regulations to be announced in two days time by BJ….so typing with fingers crossed, is a little like patting one’s head and rubbing one’s tummy!

The reason for my contortions is that we are expecting to meet our newest member of the family, now 8 weeks old. The visit was not originally on our calendar as they live out of the country, but circumstances have intervened – our daughter has fractured the head of her femur and if it shears off, she will need a joint replacement. C-19 totally prevented me from getting to them (Arrrrgh 😤😭) so with doctor’s certificates they are coming with wheelchair and baby et al for some much-needed help and TLC.

The imminent visit is having an effect here in the house….a grand clear-up! Whilst my garden archaeology (finding what once was 4 years ago) is on hold, I have been tackling large sewing projects put to one side ‘for when I have time’ – the ones that have piled up for way, way, too long.

In addition to this activity, I wanted to create a personal little welcome for our Grandson. Thinking of a friend’s story with her grandchildren whereby on their visits she always has a little something tucked into their pillows I decided to make a ‘pocket’. It is a work in progress….


Drawing out the letters and reversing them ready to draw onto Bondaweb. If I’m making one it makes sense to make one for our next youngest grandchild too (sadly, also an out of country resident!)

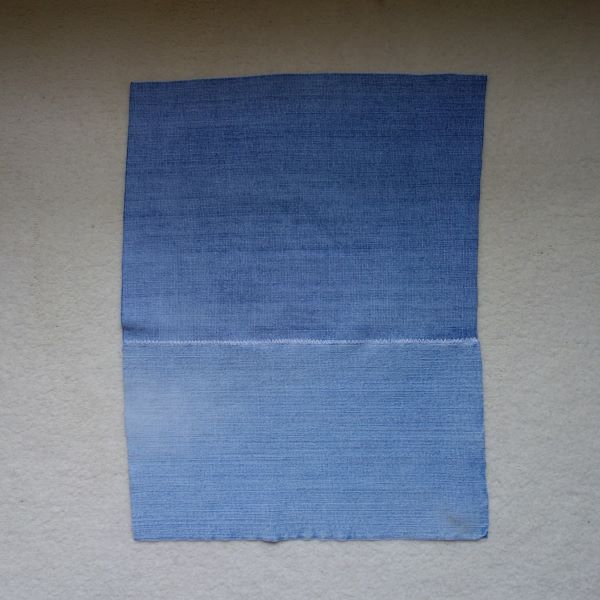
Fabric for little boys….denim of course! I took an already de-constructed and very worn pair of jeans from my stash.

I fiddled with the fabric to work out the construction….as many of you will have read previously – I often work things out as I go along, my thought process being like filtered coffee. Thankfully and necessarily, the filtered result came quickly!

I much preferred the back of the fabric (rather than the old, worn, almost see through, bleached front) so joined the pieces of leg fabric to allow for my construction.

Left overs bits….some for my stash box, threads from painstakingly pulling out threads to find the grain edges (for possible use in felt pieces etc) and some ‘fiddled with’ pieces for future sewing activities!

Then it was into my stash box to find appropriately colourful bits of fabric. It is here that I have to admit to having several stashes, all ironed and tidy – for large, medium and small pieces of fabric and another box for tiny bits….a ‘neat-nic’….guilty as charged!

Sadly, no photos, but I cut out the fabric letters and ironed them onto the base to start my appliqué stitching. Deciding to use Perlé thread, it was a dive into yet another stash to find the right colours.

In the meantime, my vast stash of ribbons, edgings and bias tape let me down – I just couldn’t find what I needed.

You will have now realised that I have many ‘stashes’ (hence the title of this post) and like so many of you I’m sure – all my stashes have been collected over many years (read that as decades!). Where would we be without them? But I digress….

I can count on one hand how many trips I’ve made into the high street since March, but this was totally an ‘essential’ trip! Strangely I can’t remember shopping for decorative haberdashery items for sooooo long that the prices took me totally by surprise – ‘how much for a metre?’ In the second shop I finally found my ‘ah-ha, that’s the one’.

Stitching then commenced. The back shows the faded jeans and my attempts to keep the stitching neat.

Tadaa….thus far!

Once all the hand stitching is complete, I’ll add interfacing and lining then tape the edges – I’ll post the finished ‘pocket’ next time.

I hope, by the time you read this, that I will be a less frustrated mum finally able to care for her offspring (with no more crossed fingers) and also a proudly doting Grandmother too….definitely a cute distraction!

‘Seeing’ – Nature

‘Seeing’ – Nature

In a previous post (A yarn & preparation experiments https://wordpress.com/post/feltingandfiberstudio.com/34915) I told you of painstakingly unpicking 2 items of commercial knitwear in a bid to gain some interesting sequin yarn. Strangely I haven’t yet used that yarn but rather the waste!

Somehow, I couldn’t face throwing away the manmade yarn and, as shown in the previous post, I had crocheted some waste into large ‘mats’ (also, as yet unused), the remaining yarn languished in bags until I had a vague idea. I wound the various lengths 10 times around two fingers to make little 2-3cm bundles….hundreds of them, or so it seemed. I spent many, many, evenings making them.

Using two bundles together I crocheted through the middles to make 2 large mats (yes, more mats!) approx. 45 and 50 cm diameters.

02b

I’ve mentioned before that I have a Coloured Ryeland fleece, bought years ago in naivety, having been seduced by its colour. Not wanting to throw it out, I have found it is useful as a ‘stuffing’ wool. I have to say here that I’m not a needle felter, so I just use one type of basic needle to prod and poke the fibres as required.

For the 2nd quarter challenge I had thought to make a cushion (possibly, a purpose made cushion to fit my mother’s wheelchair to give her a soft seat?), so my vague idea was to use the waste yarn and Ryeland to create the internal pad – prod them together, throw into the washing machine and taadaa!

I hand carded batches of the fleece then set to needle felting these to the ‘mats’. The mats were then sandwiched together with 3 layers of wool between – laid concentric, radiating and concentric.

I laid radiating batches to the outside to which I’m now adding a concentric layer. You are up to date!

As I write this post it now has 6 ⅞ wool layers and is about 2cm squishy firm (if that is not an oxymoron). This is an evening activity which seems to take up an inordinate amount of space on my sofa, more so because surprisingly the ‘pad’ is increasing in size and is now 55cm (22 in) and firm right to the edge.

But now comes a dilemma….I actually like the pad and my thoughts are drifting….more later!

Over recent weeks I have been working, when time permits, on our textile group’s challenge for 2020 – to use a plain paper book to practice our drawing, sketching, creating etc to produce a journal. I’ve chosen to title mine ‘nature’ and have thus far been exploring flora which I love. Fortunately, parts of my garden (and my neighbour’s) offers some wonderful opportunities.

An update – I am gradually resurrecting my garden when time and weather permit.

Recently though, living in the countryside at harvest time, I have been plagued by the thrips (or thunder flies – 2mm long and about the thickness of a hair!). They tend to fly within 3m of the ground and 1m into an open doorway, particularly if it is sunny. They get everywhere – unscrew a container and they are actually in the thread and even into supposedly sealed boxes! Having very sensitive skin, I can feel each and every one and for a week/10 days end up running around the garden like a mad woman, as if my hair is on fire under my hat – they use my blond hair as a landing strip and keep taxi-ing!!!

But I digress….

Rather than concentrating on simply sketching I’ve been exploring patterns. I always doodled in school and can remember one time being asked an unexpected question from the teacher who had come up behind me – as I got the answer right I was never stopped from doodling again. Zentangling is however new to me (some ideas I have borrowed from the internet) so I’ve had a play.

All of this has led me to do more detailed studies, thus far on poppies and sunflowers (having enjoyed my vase of sunflowers, bought by my EPH, I couldn’t just throw the spent flowers away!) – so I’ve been pulling them apart, hammering them or slicing them up, recording my findings along the way.

33
One of our members has been doing basketry….so Kim, my discovery is for you – the stem, emerging after only a week in the vase, revealed very strong fibres!

The results have been very interesting, offering a wealth of pattern opportunities.

Back to my dilemma….

I’m now seeing an oversized sunflower to complement my oversized felted seeds that are all in shades of grey!    Mmmm!  🤔 Possibilities!   Sorry mum, you’ll have to continue with the other cushion!

Creativity old and new

Creativity old and new

Imagine if you will Inspector Clouseau with a huge magnifying glass….that’s me looking everywhere for my felting mojo! Nada. But I did find some ‘energy’ – woohoo! So with the recent good weather and this found bit of energy I have been in the garden….but still as Inspector Clouseau!

In my defence I have sewn a batch of 18 then a batch of 15 masks for our village (whoah, the folded version is fiddly, you just get going and then have to keep stopping the sewing machine, and particularly as at one point I’ve been sewing through 13 layers of fabric – in hindsight I wish I’d chosen the shaped masks!). I’ve also finally made lining covers for two large upholstered sofa cushions. A three year out-standing project now ticked off my to do list. The stuffing had expanded and was taking up so much room. Also, in my defence I’m mulling over how best to create the cushions I mentioned in my previous post (https://feltingandfiberstudio.com/2020/05/12/a-yarn-and-preparation-experiments/), to make use of the waste yarn, (which I have rolled into hundreds of circles and now crocheted together). Sometimes my thought process has to filter through many layers!!! Although, even with my magnifying glass, I haven’t found my mojo, I haven’t really been idle.

So, I will briefly show you my recent endeavours – to find what once was….my former creative garden – hence Inspector Clouseau. Due to illness 4 years ago my ‘arty’ garden became lost and is only just emerging. Some plants that should only have been a metre high have been 4 metres high. Mother nature has had a field day, with green thugs smothering and killing so many beautiful ‘specialist’ plants. But I am determined to stay positive and see the bare soil as an opportunity for me to source new plants when we finally emerge from our lockdown.

01

Somewhere in here is a path, you can just see a watering can in the middle of the picture below. I’m about halfway into this corner of the garden (we have 7 corners!), having already macheted my through to this point several weeks ago.

Tadaa. A path, complete with the watering can! The rain we had weeks ago was welcomed by the weed seeds and the part area I had previously weeded is covered in weeds….again, shin high (by the watering can). It is true what they say about one years seeding = seven years weeding, because if you look closely these weeds are giving way to a fine carpet of yet more, over the very bare surface!

01d

02a

This corner is still a work in progress but the last two days of my heavy manual labour (good for removing bat-wings!) has seen the chest-high nettlesagainst the far wall and other thugs dug out and some creativity brought back.  Before anyone inquires of the brown plant in the pot – it is dead!

02b

This has all been current activity and not of the fibre kind, so I thought I would go back to some old creativity.

Many years ago I had a function to attend and I wanted to ‘jazz’ up a black dress. At that time burning through layers of organza/voile was popular.

I’m an avid collector of interesting images, whether from a magazine or my own photos and often reference and use these images to inform various pieces of work. The process is simple – trace the dominant lines. If the image is too small, or the colour confusing, enlarge it to a black and white copy. This can then be flipped, rotated, mirror imaged, cut and random pieced etc etc.

01a

01b

Thankyou Tesco – part of your magazine lives on as your photos will become more design inspiration!

For my dress embellishment I recorded inspiration from various places and finally traced the lines from 2 landscape pictures.

03

04

Using leaves and autumn leaf colour as further inspiration I selected appropriate pieces of organza/voile and cut some into snippets.

The above tracing for my sleeve embellisments is a portion of the Chinese terraced rice field picture.

A base layer of organza was laid down (there are no photos as this was done long before I ever thought to take ‘stage’ shots), the various coloured snippets were scattered over in sufficient number to build up about 3 or 4 layers, then another continuous piece of organza was laid over to ‘trap’ the loose pieces. On top of this sandwich a piece of clear, water dissolvable fabric was laid, onto which I had drawn the design. If any snippets were extremely out of place they were adjusted before everything was pinned in place.

08

Following the design, I machine stitched over the lines using a simple running stitch, ensuring that I also stitched the edges. The collar and sleeve leaves were all undertaken as one piece.

At this point I have to tell you I was creating this piece in my talented sewing buddy’s (SB) house who was also using the same method to create her own piece.

After completing all the running stitching, the dissolvable fabric was washed away and the piece was dried – easy with a hair dryer.

Then it was onto the fun element….using a soldering iron to burn away successive layers of the organza. On my traced design you can see the shaded areas that I used as a guide for the full cut-outs (the tracing is handed to the finished piece). This is delicate work, requiring concentration and a delicate hand….SB was not quite so delicate handed and gradually she ended up with a smaller and smaller main body of work until all that she was left with was a piece the size of a small mobile phone and lots of pieces. She kept burning through all the layers! We have recounted this memory many times and each time it produces fits of giggles.09b

Having decided I’d burned enough away I then reinforced the edges of the cut-outs and added decorative satin stitching over the running stitches.

The final flourish was to add beads to the collar and sleeve leaves.

The collar is still intact (some of the photos here were taken today), in fact I actually wore it this last festive season. I mention this because the model is sooooo much younger. It wasn’t until I checked the properties of the old photos that I realised I was 14 years younger!!!

I’m sure many of you tackled this technique – oh so many years ago – what did you produce?

A yarn and preparation experiments

A yarn and preparation experiments

I must really be dedicated to TFFS, ‘why?’ I can hear you ask from here.

Firstly, I need to explain that, in these difficult times with many additional challenges to ensure my elderly mother remains safe, well and fed, my creative mojo ‘up and went’, I don’t know where, I didn’t see it go – leaving me in a ‘creative paralysis’. It has been quite reassuring, reading in the previous posts and comments, that so many of you are sharing the same mind space. So, with this post due, I had to come up with ‘something’.

Secondly, my Windows 10 has been updated since my last post. Fine, no problem. Until I came to process my original photos to the size required for this post – the long-winded method I used before now doesn’t work. Aaaargh! Nearly 3 hours later I have been through the wringer, but come out the other side with the photos done, a new app loaded, the satisfaction that I have learnt something new and an easier way to do it….woohoo!

So on to my ‘something’….

Back in February on a trip up to Scotland I had a brainwave. To explain – a long time before, I had seen a dress by a Russian felter who had used a specialist yarn as decorative embellishment.  I was hooked and researched where I could buy this yarn. Finally, I found it on an auction site except both the quantity and cost were too much (500g £30). The image however never left the recesses of my mind.

00

Then Taadaa!

Exploring the charity shops (I know I’m not alone here) I found a silver/grey cardigan then in another, a caramel/gold jumper which each had a double (actually one had a triple) thread that if I was careful could be unpicked to provide the very yarn.

01

I hope you will be amazed, and give me lots of kudos for my next actions. I spent weeks very carefully unpicking the commercially sewn hems (yes, you’ve read that right. Cutting the hems would simply have given me hundreds of short lengths of yarn!), then unravelling the fluffy, fiddly, snaggy, matted, non-cooperative yarns. The final result of which was balls of both the silver and gold sequin yarn, complete with crimp.

02

By then we went into total lockdown.

What to do with the fluffy yarn – surely it must have a use other than feeding the bin?

About this time, I saw another felt sample that had used a piece of loose knitting to create some texture. Lyn then posted the second quarter challenge. You can see where I’m going here….combine felt and leftovers….I could make a cushion to use outside.

However I totally dislike knitting, but can crochet anything (including years ago, crocheting a very masculine, outdoor man’s jacket with no pattern). Being in lockdown I didn’t have the extremely large size of needle that would have been ideal but went ahead with a very simple circle. It took much patience as in the unravelling process I had had to cut the fluffy, snagging yarn very regularly in order to keep the sequin yarn continuous. So, my lengths for crocheting were about 60 cm (2ft).

03

I made 2 large circles and a sampler. Attempting to ‘open’ the crochet up I wet each piece and stretched it with pins on the carpet. In hindsight not 100% successful.

At this point I decided to use the sampler and undertake a few experiments in one go –

  1. Felting crochet and wool,
  2. Use quilt batting complete with its backing,
  3. Try some hair from Raffles (lockdown has meant we’ve had to clip him),
  4. Layering of the wool shingles herringbone style as one layer,
  5. Trying some manufacture’s waste (I don’t know what it is),
  6. No rolling to felt the piece (yet more online info watching Russian felters).

In a previous post I talked about felting onto pure wool quilt batting that I had stripped, painstakingly (literally and definitely not to be repeated), of its backing.

06a

Using the microwave turntable I cut out a 34cm circle of the wadding and layered home-carded Shetland wool in a circular herringbone pattern onto it. Onto this I layered some manufacturing waste of shiny synthetic material, some other wool fibres, the crochet piece, more wool, Raffles fur, a silk mix yarn, viscose fibres and finally wisps of Merino wool.

I followed the felting technique seen online – gentle rubbing followed by scrunching the piece together and apart in all directions, then flapping it on the table and palming followed eventually by scrunching in the hands. Part way through EPH suggest I quit as I was quite exasperated that it wasn’t working, particularly when it didn’t seem that the wool had adhered to the quilt batting – but I’m stubborn!

In attempting to peel the entire quilt batting off I realised it had only missed by 7 cm. So using a suede wire brush I fluffed-up the batting and the underside of all the top layers….success. I then remembered my previous lesson/note to myself from using the batting before – FLUFF IT UP FIRST!

It was obvious at the felting stage that some elements hadn’t adhered.

After felting I did full it by rolling, although it had already shrunk significantly.

As an experiment it has been very informative.

  • I hadn’t caught the yarn down fully
  • The fluffy synthetic yarn hadn’t merged with the wool fibres in some places
  • I’d forgotten to put some intermediary wool fibres between the viscose and crochet.
  • The ‘fluffed-up’ manufacture’s waste provided no useful gain. However, the waste used ‘as is’ retained its sheen very well, I just need to use more wool fibres to lock into it.
  • Raffles fur also mostly ‘disappeared’…if only that happened on him!
  • From the point of view of the batting it was, finally, very successful.
  • In all, I liked the new method as it was more relaxing and as I could sit down – much less pressure on my delicate back.

23
The beautiful sheen from the viscose and waste

Armed with this knowledge, and the shrinkage rate of 20%, I can now continue with planning my cushion….watch this space.


Meeting the challenge & fibre fellowship

Meeting the challenge & fibre fellowship

Our first quarter challenge is to create a piece of jewellery. Unlike some, I do like jewellery and have an eclectic taste from traditional to contemporary….sadly I can’t encash any and make my fortune!!!  These days, I no longer have the need to wear jewellery on a daily basis, so I rarely buy anything; if I do, it has to meet my criteria – does it fit my taste, and pocket, and will I enjoy wearing it many times – however last November I saw a brooch cum necklace and allowed myself a birthday treat.

I have enjoyed wearing this necklace and had an ‘ah ha’ moment – an extension of something I have been undertaking for a while – to explain….

Way back when, I went to our local annual sheep fair and, wanting some grey wool fibres, bought a beautifully coloured fleece ranging from pale silver/dark grey with cream/fawn tips – a Coloured Ryeland. At this point I didn’t have the knowledge I have now (I can hear your cries from here!) but learnt very quickly that this wool is ‘extremely’ hard to wet felt. So over the years I have been using bits of the fleece for various projects, mostly as core wool; the fibres are very course and springy but needlefelt well.

Needing a small portable ‘fiddle’ project for much time spent in waiting rooms, I have been making embroidered felt beads and ‘acorns’ etc for nearly 2 years. I won’t re-invent the wheel, describing the process of embroidering the beads, as Rosiepink has a great tutorial – https://rosiepink.typepad.co.uk/rosiepink/2019/04/how-to-do-simple-embroidery-on-felt-beads.html

I’ve been twisting then needlefelting the Ryeland locks to make a ball then adding Merino wool etc as a top layer (this uses fewer expensive fibres – I’m frugal by nature!) before wet felting several balls/beads at a time – the more the better which I roll under a metal tray.

Some of the many felt balls/acorns awaiting embroidery – definitely a conversation starter in waiting rooms or conferences.

Then the ‘ah ha’ moment came and I repeated the process but as a flat disc. Deciding how thick and the diameter of the core before adding the top layer, has been one of experimentation, but I final got there.

The top layer of wool I have been needle-felting to the core (to ensure firm attachment), before adding any decoration, then wet felting as normal.

Once dry I have had the perfect ‘fiddle’ project, ideal for chilling in front of the TV. I digress here but….when I was about 12, a teacher walking from the back of the class forward, unexpectedly stopped adjacent to me and asked me a question. I replied with the right answer. She never stopped me doodling designs on paper ever again! The decades have definitely elapsed, but I still need to keep my fingers busy!

Work in progress

The delight of embroidering onto felt is that it is easy to hide the thread tails (great for a neatnik) and anything goes so to speak….such as utilising some of my many beads, and threads.

These embroidered discs still need a brooch back attaching to them, then they will be perfect for a pendant necklace, wearing as a brooch or pinning to a scarf etc. I’m now hunting for suitable cords to complete the necklaces for stock.

My fiddle project had a recent trip to Scotland where I met with a fellow Felting and Fiber Studio (I must not say FFS!!!) author Leonor.

Realising that she had moved to within 25 miles of our family destination I made tentative contact. I was delighted with her invite to visit that followed. What I thought would be maybe 2 hours of chatting turned into intense conversation and howls of laughter….that was just us….our menfolk were having an equally absorbing time with art as their topic….5 hours just evaporated as did the generation gap, only further commitments parted us all.

The sharing of ideas and knowledge underpins the FFS (sorry Leonor!) fellowship and promotes friendship across the miles. We definitely will be closing those miles again in the near future, in the meantime we are making do with emails.

BTW I can confirm that the final layout, from Leonor’s post – https://feltingandfiberstudio.com/2020/02/06/studio-space-final-layout/ – was not!

It had evolved again and is a wonderful light filled space of which I’m very envious.

Have you met the first quarter challenge yet? If so please share your work with us on the forum.

New fabric from scraps

New fabric from scraps

Or….the reason to never throw anything away!

The new year has started, in fact it is speeding by way too fast, I’d actually like for it to slow down a bit – that said there are a few days I would not wish to repeat. In Lindsay’s recent post she was indulging in an Experimentanuary with some great results. I however have decided that the new decade (we won’t go into the argument of does the decade start at 0 or 1!) needs a new approach and have embraced ‘Tidyanuary’. I am tackling something (whether a kitchen cupboard or simply a pot of pens) every day and employing the positive rather than the negative. So, I’m asking myself ‘what do I want to keep, what has particular memories or value to me?’ – I’m definitely seeing good results….by 2030 I’ll let you all know if I have finished the task!

For this post and in line with the above (so – using things rather than just storing!) I thought I’d revisit a technique I learned years ago – making new fabric from scraps (some of them being not much bigger than a thumb nail!). The technique is nothing new but is good fun, simple and relatively quick and allows you to have fun with the sewing machine. It was seeing Ruth’s playful colour samples and my stitch trials that prompted my ‘ah ha’ moment, more later.

Before I begin I must repeat a quote EPH (Ever Patient Husband) found recently….’buying craft supplies and undertaking a craft are two completely different hobbies’. Need I say anything here?

I created this piece in 1995 (yep something else stored!) and I certainly suffered for my art….I had to eat lots of chocolates with beautiful wrappers!

So the technique for making new fabric from scraps….

Very simply – place little bits of Bondaweb (Wondaweb in the States I think) on some base fabric. I usually use fabric from old bed sheeting/curtain lining, or similar, to back various projects where I won’t see the fabric but need it for stability. I only dot little bits of the Bondaweb here and there as I have found that covering the base fabric in its entirety makes the whole thing too stiff for me. It is also a way of using up any bits that have broken off. Depending on how precise you want to be with the next stage, it isn’t a must to iron the Bondaweb down yet.

Even simpler – you can forget the above and use iron-on interfacing. There are advantages and disadvantages….whilst it is quicker and obviously sticks more of the fabric down in one go, I have found that heavy/close machine stitching can ‘cut’ through the interfacing making the work fragile.

Then comes the fun – place scraps of fabric/ribbon/threads onto the base fabric in a random or more considered design. Place non stick parchment carefully over the scraps & iron. It will still be fragile at this point and not everything may be fixed in place.

It is fun auditioning the scraps – anything goes. I decided to cut the interfacing square so created another fabric snippet with the surplus bit.

Over the entire design place a piece of sheer fabric – voile, netting, crystal organza, etc. There are two options for doing this….1. Use more small bits of Bondaweb randomly placed to ‘tack’ the sheer in place, or 2. Pin the sheer in place. The choice of sheer texture & colour creates interesting effects to the design. Looking at my work from 1995 I think that a layer of sheer over it would have improved the piece by softening the stitching and hence the overall design.

Warning – I have in the past ironed Bondaweb to the entire piece of the sheer and then adhered it to the scrap design….not something I would recommend for the following reasons – it makes the whole fabric too stiff, it dulls the overall look/finish of the sheer, it dulls the vibrancy of the colourful scraps, and it remains tacky which in turn impedes the top stitching.

Now it is onto having fun with stitching which can either be by machine (it’s quick – so definitely my preference), by hand or a combination of both.

I quite like the reverse of the piece too. I used just 2 thread colours, a few decorative machine stitches then some colonial knots and seed stitches.

Just seeing what it will look like framed.

Like many machine stitchers I use scraps of fabric to trial my stitches – over the years some of the pieces have actually looked quite interesting, but I just threw them away. A few months ago, whilst tidying my table area, I came across some coloured paper that had been glued to a base fabric. Then Ruth started posting about her colour samples. Suddenly I had my AH HA moment that put these three separate things together.

I layer scraps of worked paper, sweet wrappers, fabric or threads etc onto a base (either method as above) sometimes adding a sheer (loose threads definitely need a sheer!), and then set them aside. When I finally sit down to do some creative machine stitching I use one of my pieces to trial the stiches….ta da!

There is a silver lining (in this case gold) to having completely covered the sheer with Bondaweb first….heat bondable foil can be easily attached!

Using this technique a few years ago I made several needle cases as presents. Of the two that I kept, the scraps on the top case were laid randomly whilst they were laid in a more rectilinear fashion on the lower one. I stitched a ribbon cord around the perimeter then edged it with satin stitch.

I actually like both sides of each case so don’t know which to make as the front.

And the finale for all my stitch trials….I can use them to make cards! The above is still a work in progress though.

This is a fun technique, which doesn’t take up any room, I hope you are inspired to try it. For me it allows the perfectionist to take a holiday and, as I also find it addictive, I set time aside to create batches of the samplers.

How do you use your scraps? We’d love to hear and learn new ways of using them.

Experiments & Exhibition

Experiments & Exhibition

I almost missed my contributing post this time….so this is skidding in with only hours to spare!

The ‘what if’ part of my brain has been active of late so I want to share some of my recent experiments and why I’ve been so busy – making everything else a blur.

A recent purchase (having seen someone on Pinterest using it in her work) was of some space dyed/variegated wool – Merino wool by Malabrigo.

Anyone here in the UK working with wool and fibre will know that, compared to other countries, it is expensive to buy. With this in mind I decided to see just how far I could ‘stretch’ this Merino. With all my test pieces I work to a 30 x 30cm paper template covered in plastic – easy to see under a bubble surface.

When I learnt to do orienteering and map reading as a child I learnt that you have to walk to the stairs before you can climb them!….you are now scratching your heads and wondering at the relevance of this statement….map references are given with the horizontal East-West first followed by the vertical North-South….I know….you are still scratching….!

Remembering my ‘stairs’ I always lay out my fibre horizontally first then vertically as the second layer. Tada – you can now stop scratching! I also add (assuming I remember) a thread to the left side to remind me which is the top and front of my experiment.

Using the variegated Merino I weighed out just 3g in total and then drafted out my shingles very very finely enough to cover the 30 cm square template with 2 layers. For the second piece I again weighed out 3g total of the variegated fibre but this time loosened and stretched it to cover the template. They were felted and fulled then ironed. Shrinkage of the 2 pieces was similar-ish (approx. 30%).

As I wanted to see how fine I could actually make the felt and what the shrinkage would be, I am pleased with the results which in practice would be suitable for a scarf as they have good drape.

Again with cost saving in mind I tried a further experiment using natural wool wadding (Hobbs I think). This wadding is normally purchased for use with quilts and comes with a fine fabric to one side similar to interfacing. In terms of yardage it is much cheaper to buy than wool batting so I wanted to see if I could get it to felt and how it would compare. I spent 2 evenings with this ‘knee warmer’ carefully peeling off the fabric – I finally achieved it with only a couple of weak areas in the process – but I also achieved some sore fingers too!

I cut two 30 x 30cm squares of the wadding. Over the first I laid out 10g of Shetland fibres in 2 layers and over the second piece I laid out 5g of Merino fibres, again in 2 layers.

The Shetland sample (total weight 20g) felted well by hand as the fibres are course, producing a sturdy, even, well integrated, flexible fabric although there is little drape. Shrinkage being approx. 18%.

The Merino sample (total weight 15g) was not so easy to felt by hand. If I do this again with Merino I think I would roughen the surface of the wadding prior to adding the Merino fibres. Shrinkage was approx. 10% which amazed me, so I actually gave it a session in the washing machine – but there was no change to the shrinkage! The fibres are integrated although the direction of the Merino fibres can still be seen, they almost look like embellishment. I’ve tried pulling them off but they are definitely anchored and being held fast. The sample has a lovely soft feel and some drape.


A last minute photo to show the drape – Shetland top, Merino bottom

Then I experimented further with synthetic Crystal organza – except I didn’t do a test piece as I was very time pressured!

I cut out two oval shapes of the organza and placed a fine herringbone layer of white BFL between them then felted using a lot of gentle hand palming, before fulling. I was delighted that both layers of fabric are well and truly integrated with the fibres (they can’t be pulled apart) and due to the stiffness of the organza and the little amount of wool fibre the piece has retained it’s flatness without crinkling….perfect for my needs. If I was to do this again I would ‘fluff’ the fibres as the herringbone gives the organza a ‘grain’.

Now an ‘experiment’ of a different kind – On the forum recently there was a discussion about signing work so I thought I would share my signing journey….

I do like to sign my work but signing 3D textiles is difficult. Over about a year I looked at so many different techniques/methods without any jumping out at me, so I let the ideas percolate.

My signature (whether my full name or my initials) has not changed over the last 40 years so I decided to stick with them. I must have signed hundreds of times on several sheets of paper then chose the best and transferred it to the computer, where I then drew it up digitally, playing with a few ideas before settling on my preferred option.

By this time I had come to a decision – to get a 2 x 2cm stamp of my initials signature made. I sent off the details and drawing and 10 days later a beautiful brass stamp came back. My reasoning for choosing brass is that it will allow me to do several things – 1. With care (as it is not rubber) dye stamping, 2. Hot foil stamping, 3. Wax stamping and 4. Leather stamping. The results of these then give me different options for applying my signature to my work

Now to the time pressure I mentioned above….to create a collection of 5 seeds for an exhibition. The organza experiment had worked, thankfully, allowing me to produce (hours before some travelling) a large Honesty (Silver dollar) ‘seed’ which I took with me to complete – the exhibition was to be only 5 days after my return.

The Snape Art exhibition (25-27 Oct) was the first since 2011 and was a lovely exhibition including works from many artists from a wide variety of disciplines. I was actually one of a team of 4 tasked with setting up the displays of work for which artists could exhibit up to 6 items. Friday was an exhausting day with only a 10 minute lunch as we worked to create an interesting journey through the works. We placed the last number on the last piece at 6.50pm, got changed and were back on duty for 7.20pm ready for the preview evening at 7.30pm….I certainly slept well that night. I’m sure it will be like childbirth….we will forget the pain of setting it up!

The following are just a few photos of the exhibition.

And some of my felt works.

The event was well attended, and we have had some fantastic comments from the visitors including one who hopes it will be repeated next year….!!!

Have you exhibited any work recently?

Busy, Busy

Busy, Busy

Since my last post (which only seems like 10 days ago) I have not stopped. Over a hot drink I decided to evaluate the supporting evidence of said busy-ness. Firstly, and with a smile on my face, I have to admit that I have been to France for a week. Why? I have been on Grammie duties with our 13 month grandson (our youngest – by 2 weeks!). He was a delight but then I’m a proud grandparent. On arrival back home I then had one week to prepare for our group’s annual textile exhibition (held 26 Aug). This means not only finding the resulting artefacts from the group’s various workshops but also actually completing them.

I know I’m not alone with having UFOs. In my case I manage to carve out special time for workshops then with the day finished I set my incomplete project aside promising myself to finish it but life just gets in the way! So still weighing up the evidence of my busy-ness I realised that in the last 6 weeks I had attended two workshops. Decisions, decisions….which to complete for the exhibition? Oh I nearly forgot each year the group has a challenge, this year it was butons….so I was also busy creating those.

Here is the evidence (you’ll have to imagine my very cute, happy, smiley, cuddly grandson though)….

My first workshop with Ailish Henderson (ailishhenderson.com) was titled ‘Stitched collage portraits’, with instructions to bring a photo of ourselves. I have never enjoyed being in front of the camera so that was the last thing I intended doing but instead took photos of our lovely 2.5yr old Raffles – a Cockerpoo, or as I like to say a Cockerpoopoo because his mum was a Cockerpoo and his dad a Poodle! But I digress.

It was suggested that we create a painting first then play with paper, fabric and other media to create a collage that we would then stitch to add the ‘character’.

Collage completed and stitching just commenced but sadly Raffles’ portrait remains a UFO.

Collectively there were some amazing pictures from our group.

My stitching buddy decided the portrait of Raffles was a good escape and decided to do her dog Izzy too. It is a great likeness….I’m sure Raffles recognised Izzy – his girlfriend!

I submitted both portraits anonymously as ‘Work in Progress’ to the exhibition….A visitor who knows our family later approached me and asked if that was Raffles in the exhibition….woohoo!

My second and latest workshop was with Justine Warner (Pearllovespaisley.co.uk). We were to create moorland layered landscapes, for which I had bought a card of a favourite local view just a few miles from home.

Justine clearly explained and demonstrated the process which was to use layers of recycled fabrics, yarns, scraps, threads etc to create our chosen landscape.

Justine is actually known as the ‘tie lady’ because she uses old ties in her pictures combined with many other fabrics (look closely and you can see the ties in her work above). Starting with a calico/cotton square approx 40 x 40 cm, strips (about 3cm) of torn or cut fabric are laid from the top down to replicate the furthest away layer – in most cases the sky.

In addition to anchoring my sky fabrics I had to stitch lots of lines using different colours.

Once the farthest layer is complete the idea is to continue forward tackling each layer in turn until the forground is reached. Each layer has multiples of fabrics and stitching, stitching and yet more stitching.

Rummaging through Justine’s huge stash of fabrics that were piled on the floor was certainly great fun.

With all the stitching and constant changing of threads I had only reached the base layer of the foreground by the end of the workshop. However having finally got the hang of the method I made a promise to myself to finish this piece.

But before then….sorting, packing, travelling and much cuddling was next on the agenda!

Home and back to my project (with only days to go) I continued stitching the sky and hills adding layer upon layer of different coloured lines.

This is the back of the piece (post completion and having added iron-on Vilene) you can just see all the stitching – whilst I changed the top thread colour continually I only changed the bottom once. The stitching makes for a very stiff piece of work which tends to buckle, so the Vilene and ironing flattened it.

I remembered that Justine had suggested every piece should have some ‘bling’, so using some glittery netting and sparkling fabric, that is just what I did to highlight the areas bathed in sunshine (not easy to photograph). I then used some felting wools to create the variegation in tree colours and machine embroidered over the top.

With the trees complete the barn was the next, but to make sure I got the perspective right I scanned the original card and increased the size to match my picture then traced the barn and overlayed it.

But this threw up a dilemma – it seemed too dominant….so do I ignore the literal and use artistic license? After a lot of humming and harring……YES. Following this decision I simply concentrated on creating the small stone barn by staining some grey/white textured fabric with tea (Yorkshire Tea of course!) and appliqueing it with glue (stitching would be too much) to the scene.

Then it was on to the foreground to try and create a sense of depth using colour (different fabrics are trapped under netting), machine stitching and finally hand stitching.

My interpretation of the Swaledale picture – I am pleased with the finished result but it took maaaannnny hours to complete. I think Justine might argue that I had been too literal and could afford to make it less precise, but that is the perfectionist in me!

Yes, it made it to the exhibition (just) complete with temporary hanging device….Pheu!….but our dining room had fabric scraps, threads, wools, yarns etc absolutely everywhere!!!! EPH (Ever Patient Husband) was definitely that, fortunately he’s artistic too, so understands!

My picture in it’s raw cut state 40x40cm awaiting framing. On the left photographed during a bright day indoors with artificial light, on the right actually outside in the daylight (on the same background! Can anyone guide me to a better colour rendition solution?), similarly below. Although the mount is totally the wrong size it shows how it enhances the picture.

So I have evidenced my ‘busy-ness’ to you all – what have you achieved recently?

Experimenting and challenging myself

Experimenting and challenging myself

Intrigued (and often intoxicated) with different fibres and yarns that just dazzle me on the shelves to the point that I can’t walk past them (tripping over my storage boxes of yarn is testimony to this fact!) I thought I’d read Zed’s pdf book – The Right Fibre A guide to using embellishment fibres in wet felting – which I devoured from cover to cover. Since discovering the Felting & Fibre Studio I have long been fascinated particularly by Zed’s experiments which have given me the confidence to say ‘anything is possible’.

For those of you not familiar with The Right Fibre….


Zed’s book is really for those wanting to know what a fibre such as silk, viscose, jute, milk protein etc will look like when wet felted. It is not a fancy colourful ‘how to’ book. She splits her fibres into 3 groups Cellulose, Protein, and Synthetic and then with almost laboratory precision undertakes three different experiments with each one. Zed’s photographs are very professional showing both the overall look and, where appropriate, the texture, and she describes how each fibre reacts. Whilst the latter can be a bit repetitive, she is ensuring consistency – again quite a scientific approach!


In terms of the layout I am at odds with myself. Zed works her way through each fibre in its totality before moving on to the next, which means if I want to compare fibres directly I have to keep scrolling back several pdf pages. I love ‘books’ so perhaps in paper format I wouldn’t struggle so much. Now this is where I am conflicted – ideally I’d love to have all the fibres in a comparative table….

BUT…. to do that I wouldn’t be able to study and enjoy the photographic detail that Zed has captured! Also on the plus side for the pdf format I can enlarge the photos to my hearts content. Paper v computer….my dilemma continues.

For me this is a great reference book – Thank you Zed for producing it.

As I’ve already mentioned I’ve seen many of Zed’s posted trial and error ‘learning’ experiments, which has fed my ‘what if’ mentality and stopped EPH (Ever Patient Husband) (and friends for that matter), throwing anything away until it has been cleared with me – thus adding to my storage situation! They all just shake their heads, speechless and smile benignly at me. Here, I must admit that I have been a gatherer but have not yet put into practice the ‘what if’ – they are in my head but, as we all experience, life seems to swallow up my time.

However….


Recently on the forum a member asked a question about templates needed to make a short-sided basket/tray posting a picture of what she had in mind.


Several suggestions were made for a ‘U’ shaped template, but I went against the crowd (what a surprise!) and suggested a circular template. Then I thought I’d better put my mouth and money in the same place! So, sacrificing the finding and restoration of my garden I set to….

I had it all in my head and decided that I would create a large flat vessel using two colours of wool with decoration on the inside and outside. I created the circular template, gathered two lovely silky yarns newly purchased on my travels, and set out the decoration.

Using the upturned bowl in the centre I created a ring of radiating shingles of Merino wool onto which I laid some dark Norwegian and white Shetland wools. The reason for this is twofold. First – Merino wool is so expensive and this vessel would need a considerable amount of wool considering its size, so I decided to use the merino to simply ‘face’ the core wool. Second – I wouldn’t actually have had enough Merino wool to undertake this project. The Shetland wool is what I’ve drumcarded myself and is the skirting rather than the back wool staples, so I tend to keep it for core or hidden bulk. The commercially carded Norwegian I’ve used quite often in its own right but in this instance it was a good match to the grey colour.

I don’t work totally conventionally (!!!) placing any felt work within a plastic sandwich. This allows me to flip my pieces over. So with the open side half completed and wetted down it was flipped over, where I could then finish the yarn design, add the ‘face’ Merino in the pattern I wanted and again add the Norwegian and Shetland wools.


A spoon helps tuck under any fibres so that the circular edge remains visible and tight.


More core wool was added paying heed each time to the alternating direction of the wool, in total 5 layers starting and ending with radiating shingles. However on the open side only one layer was laid in concentric circles to help the differential shrinkage – to shorten the height of the side rather than narrow the opening.

On the final layer of face Merino I added the decoration using viscose fibre, handmade wool nepps (bits from drumcarding), tiny offcuts of synthetic fabric and some synthetic fibre that I salvaged when the end fell off my dusting mop.

Wetted and back under the plastic, the air was paddled out gently, before flipping over. A top face of Merino was applied, the edges flapped over and the decoration continued. Spoons come in very useful as the fibre tends to stick to my fingers!

Following the felting, which I start with sanding and rubbing through the plastic (I don’t use netting at all, or bubble wrap and as my plastic sits on a ridged surface, I only need to use enough soapy water to work the wool – I don’t lose it between the wrap bubbles) I continue with the usual rolling to full the piece, obviously paying particular attention to what was the template edge.

During the fulling stage the thin silky thread totally gave up the ghost (right photo) so I cut it off – note to self – this will need to be held down with wisps of fibre, similar to how the green mop fibres were being held in place.

Fulling continued with stretching the opening and rubbing the ‘tyre’ curved sides. At this point everything was going well except that the Norwegian and Shetland wools are slow to shrink tight (which in this case I needed) so the vessel was still larger than I wanted and it was getting late….solution – it went into the washing machine! At 10.15pm out from the machine, although shrunk, it was definitely not the carefully manipulated shape anymore ☹ (I should have taken a photo).

But some specific rubbing on the sides, stretching over a spring-form cake tin, and steam ironing with my new dinky steam iron, soon beat it into submission! Still damp I wrapped the sides with cling film allowing it to slowly dry over night with the sides supported. With the base measuring 24cm it now had a healthy shrinkage of 35%.

The following morning….Tadaaa! The sides are slightly undulating but I like that, and the decoration has carried through well with the integration of the main colour wools just softening the edges.

So I’ve experimented with different fibres and produced a straight sided tray vessel. I might add some hand stitching to it and then perhaps stiffen it just a little more.

What have you challenged yourself to lately?

Flowering gumnuts

Flowering gumnuts

The w/e of 11-12 May I joined other members of my local textile group to attend a 2-day felting workshop by Hellen Edwards. Her work is interesting, vibrant, and involves machine stitching on felt.

Typical of Hellen’s work

The thought of machine embroidery filled me with dread. In the past I have done free motion embroidery quite successfully but I’m not a regular practitioner so to speak, and last year attended two workshops involving FME, the results of which were constantly mangled threads that neither tutor could resolve, total frustration and (I’m ashamed to admit) me leaving early in tears! I reported my troubles to my machine service guy, he investigated and found no obvious problem. What!!!! So, it is me!!!

However, on collecting my machine he wasn’t there, explaining my woes to the lady serving I gained some new knowledge….not all machines like doing free motion embroidery (she had such experience over several years and several machines)….so, machines have their likes and dislikes too! Then came my AH HA moment – those two particular workshops I had been using my new machine. Note to self – Use old machine for future FME.

Hellen chose a photo from her floristry arrangement collection (flowers in vases) then gave instructions for the laying out of the wool, showing various tips and finally let us loose on our own work.

This is what Hellen produced during our workshop.

Most of us hadn’t known what we would be doing but I had researched Hellen’s work and then in passing found various images of gumnuts (eucalyptus) in flower. Although not the flowers in a vase scenario, Hellen was content for me to use my images….I know I’ve said it before, but….I’m not really a rebel!

Those of you who have read my previous posts will know I draught very thinly so I paid particular attention to that this time. Corriedale was a requirement on our supply list but as I have plenty of washed and carded white Shetland I planned to use that rather than buy in more wool. Onto three ‘good’ layers of the Shetland (realising that laying the ‘picture’ would be mostly vertical I actually planned the layers of the Shetland backwards, if that makes sense!) I added the merino, blending several colours together to create the leaves etc. Nepps were added for detail and some synthetic fibres for a bit of lustre.

Once our pictures were complete it was onto felting and fulling. From the photos you may just glimpse that I use a thin plastic below and (once wetted down) above my wool. I continue as if I’m working with netting. I find this method means the water doesn’t disappear between the bubbles so I use less and enables me to flip the whole package over very easily to work from both sides.

At the end of the first day we were given instructions to ensure that our works were finished and completely dry ready for machine embroidering the next day.

Having read the above you will understand that I really had to steel myself for the FME. But having dusted off my old sewing machine and having put the bad memories in a box, I set to. Ha! Although I’d dusted off my machine I had not checked the drawer where the embroidery foot was located….it was full of machine oil from a leaked little bottle, everything was soaking in it! This can’t be happening! OK, be positive, the upside – nothing will rust!

Finally everything cleaned, fingers included, machine threaded, needle threaded and….off….woohoo….success! All I could think of was ‘I love you, I love you’ as I patted my old trusty workhorse, my friend then started laughing….although I had thought it, she pointed out I had actually voiced it. 

There was a contended buzz in the room with only some chatter as we were all concentrating on our work and the end of the two days came all too quickly.

Our group with a wonderful array of work

Since the workshop I have continued with the FME, using my darling trusty machine for straight and zigzag stitch and applied the detail with hand stitching. I was lucky to have just the right colour variegated yarn which split and sub-split into fine matt and lustrous threads.

And on the way I purchased a great travel steam iron to use on my felt – it is really dinky (almost cute) and fits perfectly into the little crevices.

My Gumnuts piece is complete after only 2 weeks….an absolute first for me. It is not in the PINS (project in need of something) box and I am sufficiently pleased with it that it is awaiting a frame.