Browsed by
Month: November 2023

Sea Patterns and Acorns

Sea Patterns and Acorns

Sea Patterns

I was recently showing some felt pictures in my little harbour hut gallery in Whitstable. 

Hut 23, Whitstable Harbour Market

I had two sea pattern pictures and someone was very taken with them, but neither of them was exactly what he wanted.  He liked the overall ‘troubled sea’ impression of Sea Pattern (on the left), and the ‘frilly bits’ top and bottom, but he preferred the size in the frame of Summer Sea (on the right).

After some discussion he (Peter, we were on first name terms by this time) decided he liked the idea of commissioning a picture from me.  Now, I’ve written once before about my qualms about taking commissions, link below if you want to take a look.

The long and short of it is that I find it very difficult to know what someone else sees in a picture, which means it’s difficult to be confident I can produce what’s in their head.  Even aside from whether I can translate what’s in my own head into felt.  My conclusion when I was writing previously was that I would take a commission for a picture I’d happily make anyway, on the understanding that if the person didn’t like it, I’d take it into my stock and they wouldn’t have to buy it. So, for example, I’d happily do a picture of a local coastal bird in its environment, but I’d be reluctant to take on anything I didn’t have a feel for and/ or wouldn’t want to make or offer more widely.

This commission fit my criteria so I asked Peter to describe in some detail what he liked about his favoured picture compared with the other one.  He liked the less calm, more turbulent feel of the winter sea pattern. I agreed to take the commission and took a 50% deposit as I think it shows good will on both sides.

These pictures are made by creating two lightly felted cobweb felt pre-felts (one in white and one in blue) then laying them onto a (predominantly pewter-coloured) background and felting them together.  I’ve developed this technique over a number of years.  They’re quite difficult to control but I enjoy the results.

When it came to making Peter’s picture, I first made some blue cobweb pre-felt.  I laid out two layers of a pewter-coloured merino wool background with a few greenish wisps on the surface for a bit of extra colour.  I then put the wet blue cobweb pre-felt on top.  I say pre-felt but it’s very lightly felted – only one step beyond wet wool – so I can pull it about to fit where I want it to go. That’s one of the things that makes it difficult to control.

First layer being laid out
Base layers with blue cobweb overlay

Rather than making new white cobweb pre-felt I used some I’d made previously – which is where I think I went wrong.  I realised in laying it out I didn’t have quite as much as I’d have liked. The client wanted some turmoil, which I interpret as a lot of white, and I was in danger of making a picture more similar to the summer sea pattern.

Final layout

Indeed, although I like the resulting picture – which I’m calling Autumn Sea – I decided it wouldn’t do for the commission so I had another go.

Finished picture – Autumn Sea

I do sometimes get carried away with what I like or am interested in trying and forget what I’m supposed to be doing

This time I would include more white, so I made a new batches of both white and blue cobweb pre-felt.

Laying out wool for blue cobweb felt

Here you can see the dry background: pewter with some wisps of green and blue.

Dry base layout: pewter with blue and green

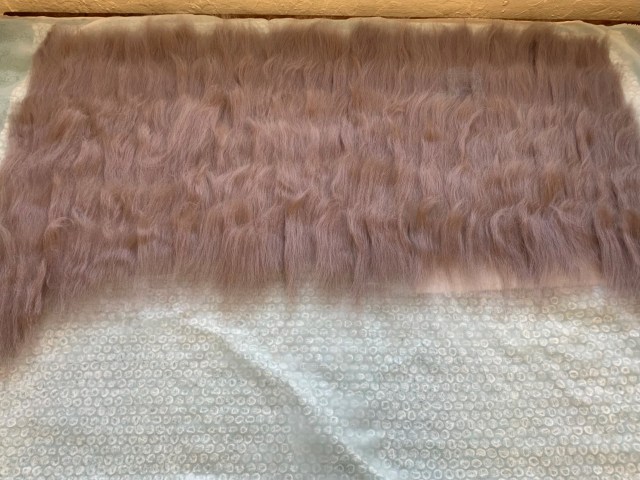
And here it’s laid out with first the blue and then the white cobweb added, waiting to be felted.

Picture laid out ready for wet felting

And finally here’s the finished picture

I sent Peter a couple of photos, fingers crossed, but reminding him that I’d return his deposit if he wasn’t happy. Fortunately, he liked it and asked if he could name it.  So, it’s called ‘Upon Reflection’ and it’s waiting for me to frame it so Peter can arrange to pick it up. 

Acorns

As a small aside, last month I participated in something called ‘East Kent Open Houses’.  People in this area open their homes or studios for 3 weekends in October to show their art.  I have two friends (Sue, a potter and Irene, a glass fuser) who I often exhibit with so we decided we’d show our work together in Sue’s lovely conservatory. Here’s a link to a video on Instagram if you’re interested in seeing what it looked like.  The potter is @suemortonceramics and the glass fuser is @irenesouthonglass.

https://gbr01.safelinks.protection.outlook.com/?url=https%3A%2F%2Fwww.instagram.com%2Freel%2FCyYOt1isWm_%2F%3Figshid%3DMzRlODBiNWFlZA%3D%3D&data=057C01%7C%7C70becf05589c404a8d9608dbdef23c61%7C84df9e7fe9f640afb435aaaaaaaaaaaa%7C1%7C0%7C638348904270177421%7CUnknown%7CTWFpbGZsb3d8eyJWIjoiMC4wLjAwMDAiLCJQIjoiV2luMzIiLCJBTiI6Ik1haWwiLCJXVCI6Mn0%3D%7C3000%7C%7C%7C&sdata=MJKi64pzispuI75cYcO9V3NkcQBcpqQFxXep0%2BtVqZw%3D&reserved=0

We shared the stewarding which meant I had quite a few hours with nothing specific to do other than sit in the lovely conservatory and wait for visitors.  I’m way behind getting anything made for the upcoming seasonal markets so I thought I’d make some acorn tree decorations. I first made these a few years ago when I’d visited a park that had a gorgeous oak tree with large acorn caps.  I’d picked them up without knowing that I’d go on to making felt acorns for them.  So, I popped into the studio and grabbed my needle felting gear along with a few different wools as I thought I’d experiment to see how much they varied.

I tried 4 different wools: merino tops/rovings, merino & silk batt, Cheviot carded sliver & merino & silk pre-felt. The first ones I fully needle felted.  They all felted well. 

Felted acorn shapes along with natural acorn caps

You can’t see a lot of difference in the photos and indeed there wasn’t a lot of difference. As the Cheviot carded sliver was by far the cheapest of the wools and produced good results, I decided to go with those.  I also decided I got the best results if I knotted the end, lightly needled them into shape until they held their form then wet felted them.

Needle then wet felting gave the smoothest finish and was also quicker than the fully needle-felted ones. Ultimately, I think I just like wet felting more than needle felting.  I’ve glued on the natural dried acorn caps and a hanger, so these went off yesterday to a pre-Christmas fair of cards and decorations at Creek Creative Studios in Faversham, Kent. More info on their website https://creek-creative.org/

Felted acorn tree decorations on a stand ready for sale

And finally – an exciting challenge for 2024

There’s a fantastic Michelin-starred restaurant near where I live called The Sportsman. Looking on their website they say they took over The Sportsman in 1999 with the intention of serving good food in relaxed and informal surroundings.  It’s a good description. A link to their website, if you want to know more. http://www.thesportsmanseasalter.co.uk/

It’s not a ‘posh’ place. More like an old pub in a beautiful slightly out-of-the-way spot by the sea.  As well as serving fabulous food, they also display local artwork on their walls. I contacted them a short while ago to see if they were interested in a display of my artwork.  I sent some photos and they invited me to bring some work with me and come along for a chat.  Happily, they liked what they saw and have booked me in for 6 weeks from 1 April next year. All very exciting but I hadn’t realised quite how much space I’d have to fill.  They casually estimated about 35 to 40 pictures should do it.  Gulp.  So, I now know what I’ll be doing in January, February and March…..

The Wool Revolution

The Wool Revolution

As avid wool enthusiasts (including a few shepherds) most of us are all too well aware that the cost of shearing a flock of sheep is rarely ever covered by the sale of the fleece. In fact the financial return on many fleeces is so poor, I know many farmers end up composting what should be a valuable and eco-friendly product.

Woven and felted wall hangings

Part of the problem is that many of these under-valued fleeces are typically at the coarser end of the spectrum, shorn from sheep bred for the meat industry. In some cases the situation is further compounded by farmers deliberately selecting sheep with coarser wools for their breeding program because their logic dictates, coarser wool = a heavier fleece per sheep and since wool is sold by weight, a heavier fleece = more $$$.

If, like me you make mostly wearables from wool, you probably see the fault in that logic, I know I value the lower micron wools far more, cheerfully paying a premium for them because they are less “scratchy”. However, this doesn’t mean there isn’t a place for the coarser wools too and as felt-makers and spinners perhaps we should not be so quick to dismiss them….

These coarser wools, also known as “strong wool”, have traditionally been used for various industrial applications that require padding that is fire resistant, for home insulation products, even the pads that piano hammers rest on.

In previous decades, one of the largest buyers of strong wools used to be the carpet industry, unfortunately the move towards synthetic carpets has seen the use of strong wools for carpets go into a steep decline. Currently there is a drive in New Zealand to support rural schools to replace their flooring with wool carpets, rather than the imported nylon carpet tiles the government wants them to use.

Large felted wall hanging

I fist met Liz Mitchell MNZM when she joined the Auckland Fun Felters (AFF), just a month or two after I did. Already a wool enthusiast, she was on a mission to discover new ways to use this fabulous, natural material and her enthusiastic interest quickly evolved into a dedicated promotion of strong wool.

Felt illuminated

Liz has had a very interesting textile career, as a fashion designer, with her own label, she was primarily focussed on hand-made couture and in 2005 was awarded the New Zealand Order of Merit for services to the fashion industry and to this day she is one of the best known names in New Zealand fashion.

A series of large wet-felted vessels

In recent years Liz has expanded her repertoire to include working with architects and interior designers to use strong wools, still in their natural colours, for a mixture of wall hangings, rugs and soft furnishings. Her diversification from haute couture to interior design is beautifully documented in her current exhibition, “This Raw Material” on show at the Corban Estate Arts Centre in West Auckland.

This exhibition is open until 9 December 2023 and is well worth a visit, I particularly enjoyed the interactive room where you are encouraged to touch, feel, sit on and even smell the pieces. When was the last time you went an art exhibition where they encouraged you to sniff the exhibits?!! 🙂

Biker jacket and hot pants – Agate wool Jacquard

We were all very proud to hear Liz has secured a grant to set up a “Wool and Natural Fibres Textile Hub” in Auckland, which will serve as a hub for wool research, education and creative exploration. An endeavour I am very keen to support. She has also set up a Wool Revolution PledgeMe to raise funds to support the new Hub.

Winter White Wedding Dress – NZ wool felt
Detail on Wedding Dress
75th Anniversary Moose bag -Needle felting on a ground fabric

75th Anniversary Moose bag -Needle felting on a ground fabric

History

For the last few years at least, you have occasionally, through the blog posts, been invited along to see what the local weaving and spinning guild is up to.  There are a few of us, on this blog, who are members of the Ottawa Valley Weavers and Spinners Guild.  (The guild goes beyond spinning and weaving, having also a number of felters, dyers, and other fibre arts). The Guild was started in 1949 by a group of local weavers after returning from a conference out of town. By the time I joined, over 30 years ago, the weavers had already been joined by spinners (and changed their name from OVWG to OVWSG).

I am sure you noticed that 2024 will be our 75th Guild Anniversary. There are a number of projects planned to help celebrate this momentous occasion.  (The compiled list of suggestions was quite long and the planning committee narrowed it down to 5 projects, there may be more!) Today I want to show you one of them.

One of the suggestions was a project bag to commemorate the occasion. We wanted a bag that was reasonably sturdy, big enough in size to hold a project and it would need to have a graphic and text element that would allow its use, even after the event.  Bernadette took over the quest for a bag to be printed on. I pulled out a lot of the ideas I had been working on for logo and bag options the last time I was asked to work on ideas.  I also did graphics for a few other ideas from members. One was Glenn’s moose antlers as a skein winder idea. I found a free clip art silhouette of a moose which was a bit pixilated and needed to be redrawn, but it would work as a prototype.   I added the yarn to the antlers and it was added to the other images up for selection.  It was the only funny one.  Although,  the octopus trying to weave spin and do fibre prep was funny too, but it was a bit too cluttered as an image. (I still liked it! maybe for a future bag?)

Glenn’s Moose idea was eventually selected, and suitable bags were found and printed.

2 large 1 small box 1) Three boxes containing the new bags arrived in the studio

The bags arrived mid-week. I found them when I arrived to work on the library and was asked to unbox and take photos of the contents.  So, I took pictures of the unboxing to let the rest of the guild enjoy the anticipation of discovering what was in the boxes.

This slideshow requires JavaScript.

2-11) the unboxing

A few close-ups;

This slideshow requires JavaScript.

12-14)close up of bag details

Part of the idea of the project bags was for those who purchased them to make them their own, by embellishing them. It could be as simple as sewing on some yarn through the red screen printed yarn on the bag. The weavers may want to make a scarf to add to the moose.  Or it could be more elaborate, adding a background to the image.

I would like to show you what I did. You probably remember how I have trouble keeping 2-D images not wandering into 3-D places.  First, let me mention this is a mid-weight canvas cloth and that I have not tried felting on this type of fabric before. I guessed on gauge and pulled out two T-38 333 needles, in case I broke one. (Which I did not, but I did manage to misplace one of them…. Maybe I should go find some footwear?) Next, where did I put my embroidery frames? I haven’t used them for a while…. Ah in the bedroom? I started with one of the middle-sized ones that fit the head and antlers.

15) Moose on bag set into 7-inch embroidery frame.

16) bag of unknown fibre, labelled with a warning it might be superwash. The (7) boxes of needles are in the background.

Now it is time to add wool. I found a mystery bag of charcoal fibre, which may be super-wash merino wool. Laying over the pre-printed shape I started to add the fiber.

17) starting to add wool to the ground fabric

The angle of the needle is perpendicular to the fabric.  I am felting into a very old block of foam that is 7”x 6” and 3 inches thick.

This slideshow requires JavaScript.

18-19) You can see there is good adhesion of the wool to the ground fabric.

Time to add the antlers, The bag said  “Finn sheep, roving – semi wersted”. I got it early this summer and it was 6.00/oz. the antlers I wanted to keep more 2-D so I could augment them with yarn later.

20-21) Inside and outside of the bag, the moose is already starting to turn a bit 3-D

I found it easy to follow the edge of the antlers and moose.  The wool is still adhering well to the ground fabric.

Once I had a base of felt established I started to create a more 3-D element, unfortunately having chosen the black fibre it is not as easy to see the contours.

22) Adding ear

I created an ear (I am pretty sure this is supper wash, it took a while to felt the ear) and added it.

23) 3-D view

I had now reached the edge of the hoop and needed to move it to continue working. I decided I did not want to put the areas I had already worked on under the edge of the hoop. So, I would have to locate the bigger hoop I was sure I had. There is a really big one in the basement near the furnace, but that would be too big to fit the bag… Ah, I found it in a different spot in the bedroom… why are most of my embroidery hoops in the bedroom? I have moved them to the office.

24-25) After some tugging and adjusting I got one side of the bag into the 14” hoop.

26) adding wool to the legs

I had to decide which legs were on which side of the silhouette. You could just leave the back-side legs wool-less. I didn’t investigate the gate of a moose, so hopefully I have selected the correct legs on the correct sides.

I continued to add wool but worked at a more shallow angle now and did not feel the needle entering the ground fabric. I added more wool to the back edge of the mandible, the withers, the back edge of the belly, the shoulder and hip.

27)3-D-ish

I am pleased with the moose and antlers, but I need to add an eye. I wanted a blue eye (I did not research so I don’t know what colour  Moose eyes should be. Yet!)

 28) added eye

It was not as visible as I had hoped. So added a bit of light bage (maori) fibre to the underside of the eye. That helped, I also loosened the thread that held the blue bead and it looks better.

Next, we need to add the yarn to the antler skainwinder. First I added threads for the back of the wrapping. (I did not wrap them but sewed them back and forth between the antler prongs. Sneaky)  Then I added the top of the wrapping. I used two shades of blue to add more interest. The careful application of blue has covered up the red from the original silk screen. If there is gaping I may try couching the strands in place.

29-30) close up of added yarn to the antler

Overall, I am quite pleased and hope this will inspire more moose embellishment! The project bags will go on sale at the Guild sale Nov 4-5th (2023) which is for me tomorrow (for you it would be today!)


Getting ready for the sale

Getting ready for the sale

So this week is the week before the sale I posted a few days ago. Jan, Carleen, Bernadette and I are all very involved in the planning and running of the sale. We are running around getting the organising done and trying to get our stuff ready too. Bernadett has a booth with another friend, she has to fill. The other 3 of us are in the co-op booth. It’s a booth for guild members who don’t have enough stuff to get a whole booth to themselves.

I have 3 things to put in the booth. Felted soap.

I have bags of sari silk in several colours

And lastly some spinning kits. I have only 6 of those the wooden wheels I use for them were back-ordered.

So now I am down to making signs and making sure I haven’t forgotten to do something critical to the sale. The weather has turned cold so that should help people start thinking about buying Christmas presents. Fingers crossed for a great sale for everyone.


Slow Progress on Forest Floor

Slow Progress on Forest Floor

I have made a bit of slow progress on my forest floor piece. If you missed my first post, you can see the beginnings here.

Nuno felt background with small stitch samples of running stitch and wrapped cords.

The next step was to do a bit of stitch sampling on the tree trunks. I had been making some wrapped cords that I thought might look nice stitched down to give tree trunk texture but they were too large a scale for the size of the trunks as you can see on the left side. Then I started searching for a stitch that I thought would look nice as texture on the bark. After looking at some complex stitches, I suddenly remembered the KISS principle (keep it simple …). So I decided to try running stitch. It is a much better scale and simple to stitch, the winner!

So I stitched on both trunks. The left photo was taking a look at how they were going to be on the background. I decided they still needed more stitching and added a bit more running stitch. I used a lightweight wool thread as I didn’t want to have a contrast from the wool trunk to a shinier thread such as cotton or silk.

Nuno felted background with stitched felt stumps, felt rocks and cheesecloth moss.

Now on to adding more of the foreground elements. Keeping in mind that I want to highlight the streak of “sunshine” from back left to right foreground, I placed three pieces of felt cut into perhaps rock shapes as well as adding some “moss” with cheesecloth. This is how far I have gotten. I think the rocks need some stitching to add a bit more shadow/darker values. That’s the next thing to sample.