Browsed by
Tag: felt boots

Slipper Workshop

Slipper Workshop

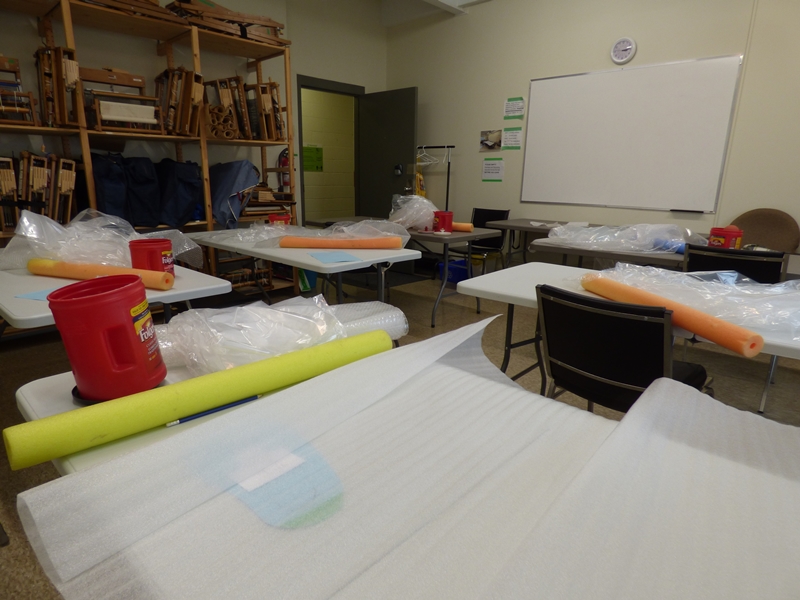
Not very long ago I taught a felt slipper workshop. There were 6 students including Jan. Here is the set-up in my guilds classroom It holds 6 tables reasonably well. You can see the table looms waiting for class on the left.


After we discussed the different styles of slippers, everyone traced their foot and sized up to make their template. We used floor underlay for the templates.


Everyone laid out both sides of their resist and got them nicely wrapped around

Then started embellishing them

Then it was time for felting. Start gently with some rubbing


Then rolling. No rolling pictures, you would think with everyone busy rolling I would have lots of time to take pictures but I guess I was too busy talking.

then more rubbing to heal the cut and on to fulling and shaping

And don’t forget to try them on to see where they need more work and in which directions. I brought new bread bags so they could try their slippers on without getting wet feet or socks.

Getting there

Here are some of the finished slippers.


Now you are probably thinking that at the top I said Jan was in the class but I haven’t seen her. Well, that is because Jan is the problem child of the class. She can’t just do what everyone else wants to do, and so she gets a section all of her own. Jan wants boot-style slippers. Ok, that’s no problem and you are wondering what’s the problem with that?  Well, she wants really tall rear entry boot, style “slippers”.

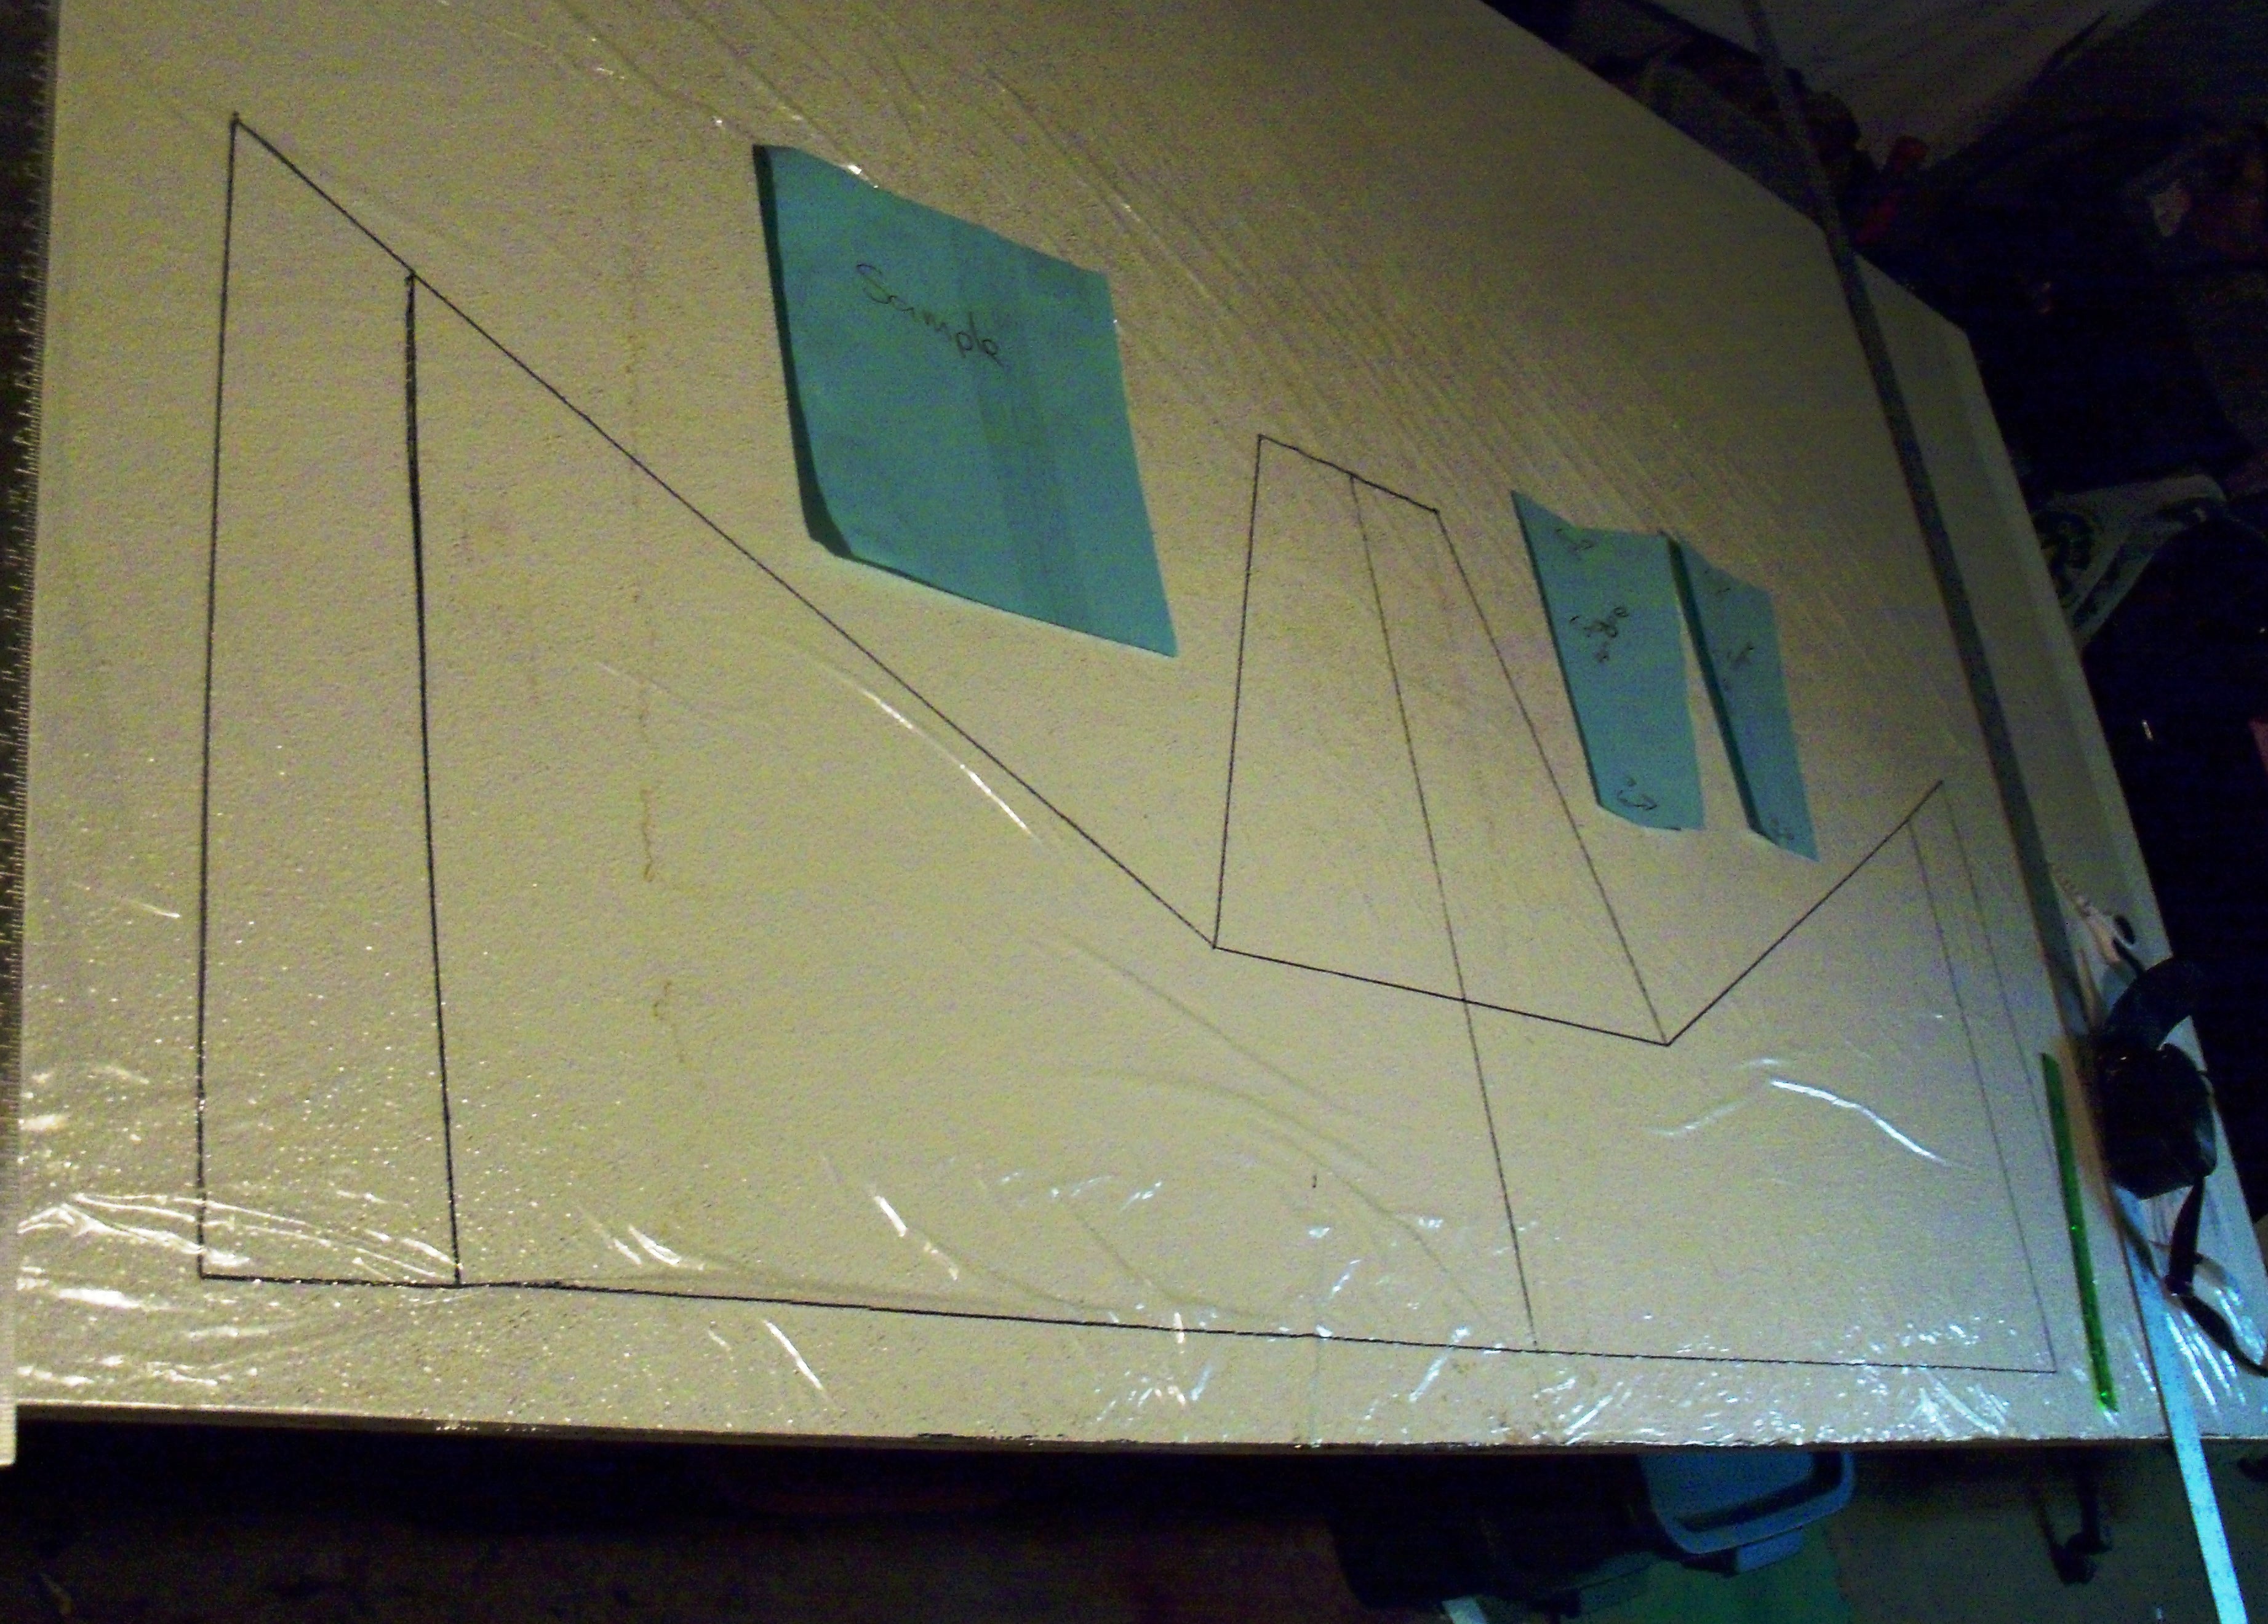
I had her come to class early so we would have time to discuss the how of making rear entry extra tall slippers. She says they are slippers and not boots.  You can see Jan’s diagram of what she wants in the first picture. I was explaining how the resists would work. This was best explained with a mini paper example.

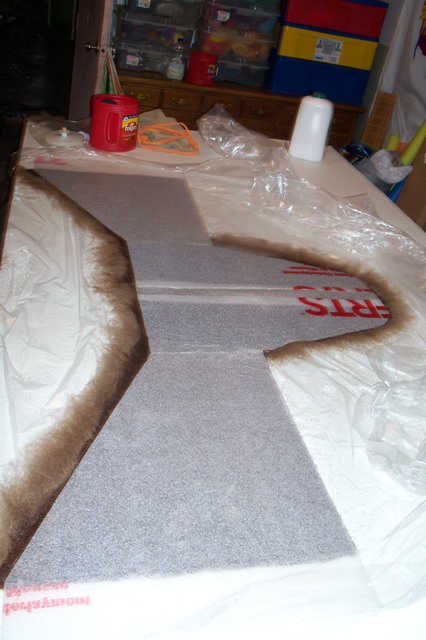
Jan’s foot pattern and then her mane resist drawn out.


Jan started laying out wool about the same time as the others but she had much more wool and resist to cover.

she did a lot of rubbing but I didn’t get a picture of that and then she started rolling. By the end of class, the slippers had started to felt well but were not up to fulling yet. So now the next step is for her to visit me over the holidays and finish the slippers. I think this means I need to sweet-talk one of my men to bring the dryer into the studio. I am not sure where it got stored. I am sure letting the dryer do some of the manual work is a good idea. Maybe we can work on the dinosaur bag while it rolls around and around. These slippers should be good for sorting out what needs to be tweaked to make some more solid boots. These are Corriedale but we would both like to make some good boots out of Finnish wool. Have you made booths? What wool did you use?

As a measure of how much effort and concentration went into these, Jan only had about 20 or so pictures to share with me. All the pictures of Jan’s work are hers except the last one of Jan rolling.

Wishing Everyone a Very Happy Holiday Season!

Remaking my Boots

Remaking my Boots

If you remember I am taking a felt boot class. http://feltingandfiberstudio.com/2013/02/12/felt-boots-progress/

The boots looked pretty good when done but I wasn’t happy. I kept putting of finishing them and so I sat down and had a good look at them to see what I didn’t like. Well, the way the resist is made just didn’t work. I ended up with the extra to account for your calf in the front not the back. So when you put them on you end up with a big fold in the back of the ankle.

gray felt boots wrong

Also because you make the tongue first and then wrap it around the front of the resist it gets felted in at an angle and that doesn’t change as you felt so when you pull the tongue up along the front of your leg you get a big fold that would be uncomfortable.  Her boots look fine and I haven’t seen any questions or complaints on the class blog so maybe if you don’t have big calves you don’t have this problem.

I decided to make another pair. I cut the resist at the ankle and turned it around. I also added a little more in the depth of the foot. I think I would rather trim it than only just have the fit.

boot new layout

I have finished the initial felting. Now they just need some more time and elbow grease to finish them. Theses ones are in a natural brown Finn wool.

Sewing, Felt Hat to Purse, Felt Boots.

Sewing, Felt Hat to Purse, Felt Boots.

Last time I told you about organising one section of my room and clearing off the table. My next area is the sewing area. It’s coming along. It started like this:

sewing area before

There is also a bunch of stuff on the floor under and around it that you can’t see in the picture. I have made progress but the shelves to the bookcase have disappeared so it’s hard to fill them up. I did switch the old singer that needs a part for a newer one. I haven’t tried it but it may need a cleaning. I still have the pfaff I can use. I want to set it up for free motion embroidery. It is a work in progress

As part of trying to do some fiber art everyday I have been working on converting a hat to a purse, well, 3 hats actually. The hats started out looking like this:

hat to purse 2

I cut the holy part off and did this:

hat to purse 1

This should add some interest with great texture.

Here is one that has the texture done. The colour on the left one is more what it looks like I think it’s called Laurel.

hat to purse 3 hat to purse 4

I had planed to get the lining in before posting but that didn’t happen. I will show you when I get it done. It will also get a zipper too. I haven’t decided if it should be a clutch or I should find some sort of strap for it. What do you think?

Lastly I have started my on-line boot class. It took me  a while to convince You Tube to let me see the videos and then my Internet went out for a week. So all I managed to do was my sample and get my pattern drawn out.  The sample of gray Finn wool shrank a little more than 50%.

shrinkage

There was a lot of measuring and some math to get the pattern the correct size for the shrinkage.  This is what it looks like at the moment.

boot patten

My mom came for a visit so I couldn’t lay out the boots today. I decided I want to make a leave motif on the boots when they are done so I cut out leaf shapes in white and black. the booths are gray. I stretched a couple with some vintage “artisanal silk”. I am told it’s not real silk but its pretty.  I don’t know if I like it. I was thinking of sewing some veins on with my machine to see how that looks. I have some dissolvable interfacing I thought if I put the leaves on that I should be able to stitch them.

leaves

So I haven’t been able to actually do some fiber art every day but I have been thinking about it everyday and getting to play most days.