
Felted Iris Flowers Part 2
Last week we got the petals to the point they were firm and reasonably thin. As I promised let’s look at the new equipment I am about to use.
I ordered a felting pad for ironing. it is a little firmer than the white felting mat I was just trying out. I also ordered the clover craft iron II (with accessories). I spotted it on at a lower price than I had seen it in previous weeks so ordered it. Checking on the day it arrived it was up in price over 10.00, while today the price is back down to 2.00 more than I got it for! Prices are acting very strangely lately.
Let’s look at the Felt Ironing Mat first.
 23 Wool ironing mat “14″x14″ Wool Pressing Mat for Quilting”
Yesterday I found out some felters are using these ironing pads as felting mats. Ironing mats, (about .5 inch thick) are thinner than the 1 to 1.2 inch felting mats. The ironing pad is a bit firmer than the white felting mat. It arrived folded, with instructions that include “do not fold”. If I use it as a chair pad I will likely flatten it quickly, but I tried it in its present state. It is about half an inch thick. I measured the white wool mat at about an inch thick. The grey wool mat was about an inch and a quarter. (See Photo below)
 24 comparing thicknesses
 25 (Ironing mat, White wool mat, Grey wool mat)
I did a brief test with the bad sheep picture. This would let me check the end feel of the needle entering the ironing pad, which is quite resistant but does work.
 26 needle test of the ironing felt mat
I suspect using the ironing mat may increase the strain on the arm/wrist/finger muscles with prolonged enthusiastic (stabbing) use for felting. I do not like ironing except for before sewing projects, so I am unlikely to injure myself using this as an ironing pad. This thought may come back to haunt me……
The Clover mini iron II and accessories came with a lot of instructions and diagrams. i read them over when they arrived then put everything away in a nice little box.
 27 Clover Mini Iron II
 28 I found a plastic box at Dollerama to keep the Iron and its attachment options in.
The iron is usually used with appliqué by quilters. The various attachments will get into small corners and the ball attachment will accentuate dishing shapes. The Iron is designed to flatten and smooth the surface of the felt, more like the commercial hot press felts. It may be interesting to try starches or misting with this too. (oh no a distracting thought escaped!)
There are other similar-looking devices which are used for Auto body repair and another for taking wrinkles out of leather goods (shoes, bags etc.). Check the temperature range on each type, you don’t want to scorch your felt.
One last thing to remember about the mini iron, from what I have read online, it is very important to keep the iron rest, (the plastic and wire thing that supports the iron tip), somewhere you will not lose it. I read many warnings that this part can mysterious disappearance and happens frequently.
Tiny Craft iron time!
Ok, now I am ready for the next step that I skipped with the prototype.
 29 I plugged in the iron and waited for the iron to heat up
After a couple of minutes, I tried it on the prototype. Hum it doesn’t seem to be hot yet. The wool is not warm? I wonder if it’s working? Did I get a broken one? Let me check…Ooops! OWW! No, it’s hot now.
 30 I guess this means the Iron is not broken. Owwww.
I carefully ironed each petal, first the prototype then the new petals I had made. There was a bit of thinning visible. I will have to try pressing a bit harder but i didn’t want to scorch the wool. Next flower I will try to get a wire that is closer to the petal colour since the black and green floral wires are still slightly visible, at least in the photos.
 31 Carefully ironing the petals
I took them in to show Ann on Library day. It was not as busy as we had hoped so Ann got her dry felting experiment done and I showed her skinny petals.

 32-33 Ann inspects the thinness. She said she had not anticipated them to be so firm.
There was one more step I had skipped in the instructions for making a rose from Tjarda’s Workshop. She had very carefully trimmed any fluffy, flyaway edgings on her petals. I recently purchased a few more variations on curved bladed scissors. I selected one with a short curve to the blade that seemed to fit the petal and started trimming. I think I was a bit more enthusiastic than Tjarda but did get all the fluff removed and smoothed the curves.
 34 trimming the edge fluff
 35 close up of scissor blade curvature
 36 Here is a before (R) and after (L) petal.
After trimming, I tugged gently on the edge of the petal to give a bit of the frill. The tugging is along the length of the edge.
The next step will be adding the last details to the iris petals and then assembly! But that will be another time, I have a bit more library work to do. So, while I am off doing that I hope you are enjoying spring and getting a chance to have fun felting.
Update; we seem to have had a week of mid-summer weather (not so good for the spring flowers). This weekend we made a trip to the first biggish Fiber Festival which was only a 3-hour drive away in Peterborough Ont! It was so good to be able to feel fibre in person! if you are interested I took a few pictures (121 actually) but promise I won’t inflict them all on you! I am sorry I did not get a picture of the beaver we saw sitting in the grass beside the highway (i was driving) I thought it was only a groundhog as we approached but saw the distinctive tail as we passed. What a fun Saturday! I hope you are enjoying your weekend too!

 1 craft felt – has the thickness of very thin prefelt
 2 Comes in a nice cardboard box with a wooden needle holder just like the ones I have been ordering from China.
 3 Close up of felt pillow showing value-added felting tool.
 5 Starting with a bit of sky
 6 Adding some hills,
 7 Red residue left from the back of my felted picture
 8 the second felt pad, came with 9 needles in 2 lengths
 9 Note the kemp which there is a lot of.
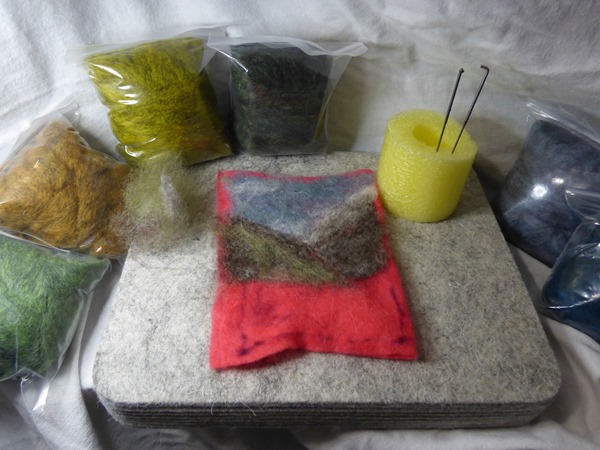 11 Testing felt pad 2
 12 Adding World of Wool fibre.
 13 Shortening the hills, adding foreground and water. This makes me think of the north.
 14 Here is the front of the picture
 15 You can see how the original rectangle has expanded with the added fibre. (What a mess! I will not frame this one with double glass!)
 16 Kemp transferring from the mat to the back of the piece.
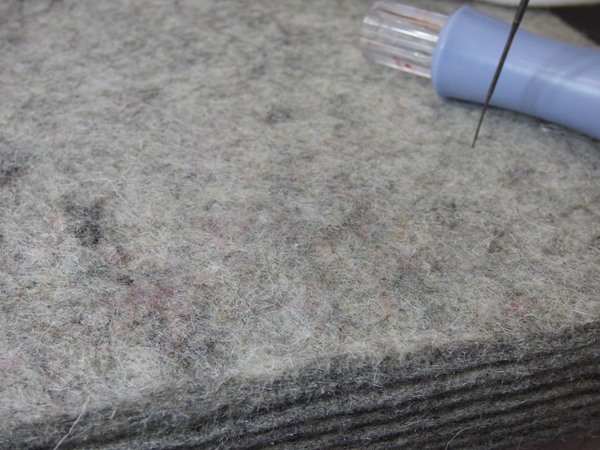 17 There was a small amount of red f transferred from the back of the picture to the mat.
 18 The new game “What is that smell?”
 19 “Sniff”
 20 “Oh my! Ode de Sheep Urine?”
 21 Testing it with a needle
 22 Admiring the little test picture
 23 The day-old tell-tail-tracks of tree migration
 24 The tracks end here where we find the noble wandering trees (their poplars) I am sure the rest will follow their lead in the next week or two! (yes I have a small portable forest)