Browsed by
Tag: stitching felt

Cases And a Cover

Cases And a Cover

I got a couple of cases made this week. I thought I’d made a mistake and forgotten to add the cord at the right stage for this first one, then remembered I wasn’t making a bag after all! I added a piece of braiding/trim and a split ring. This is the felt side:

And the back/fabric side:

I did change my mind about what I was going to do with the piece of felt I used on this next one. If you saw my last post, I’d planned to make a small shoulder bag. But as I was cutting it out, I thought it was too narrow to work that way, so also made this into a case:

I changed my mind about the fabric to use aswell, I wanted something a bit more sturdier, so chose what I think is upholstery fabric:

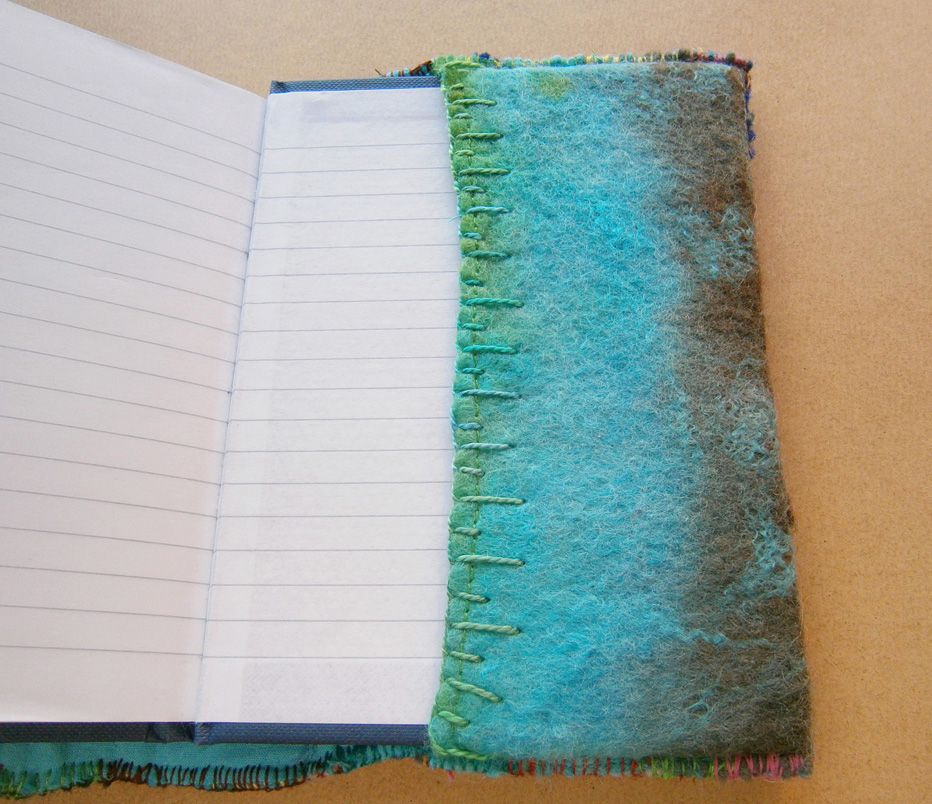
A while ago, I made a piece of nuno with lots of shrinkage and rippling. I kept looking at it and thinking it’d made a cool book cover, so that’s what I did. This is how it looked after sewing up, but without a book in, outside:

Inside:

I wanted to keep all the edges as they were, and only had to trim off one small part. I haven’t decided which side I like best, so here’s one side:

And the other:

I might go over the stitching again, I want it to be secure, but don’t want to zig-zag stitch it as I like how the edges look.

Latest Sewing Projects

Latest Sewing Projects

I don’t know about anyone else, but when I get my sewing stuff out, I make a right mess! So I like to get lots of things done at once. I cut out the pieces for some coin purses a few weeks ago, it took a while, but I got the tops of the inside pockets blanket stitched so I could move on to the next stage of joining the pieces together and sewing the seams on the machine. Here are 3 pink ones sewn up:

This is what they look like closed:

The next step is to round off the corners of the front flaps, then stitch all around with blanket stitch. I think choosing the right thread for the blanket stitch can take as long as the stitching sometimes! I had to make a make-shift table out of a cardboard box to put all the things waiting to be stitched, that stack of boxes on the right is about 9 of the thread drawers I have:

At the beginning of last year I made a nuno sample piece with some strips from a viscose scarf and a linen scarf. I thought it would make a nice pencil pouch. I made myself one a few years ago and use it almost every day. The idea is to use an extra long cord to wrap around to close it instead of a zip or other fastener. This is what it looks like closed:

This is the back when it’s opened:

And, inside, I lined it with some nice fabric I got a few years ago:

And, while the machine is out, I may as well … root through all those offcuts I tidied away. This is a bookcover I’ve been working on; the front, inside front sleeve, and the back is finished. Here, I’m planning the layout for the inside back sleeve. I thought I’d make enough for a future one while I was at it, so made it extra long:

Something Different

Something Different

I’m still trying to finish projects and WIPs so I can tidy my summer sewing stuff away. I found an unfinished project from years ago when I was putting some felt offcuts away. Hopefully, this link will show some of the pieces I made, if not search my photostream for ’embellished’. It inspired me to finish it off and make some more. So I had a rummage through my offcuts and found lots of nice ones, so many that I started to think that maybe I wanted to do something a bit bigger, like a notebook cover (surprise, surprise!). I found some thin pieces of felt to use as a base and sewed them together. I really wanted to make something the complete opposite of the carefully measured and carefully and neatly sewn notebook covers I usually make. So after spreading all the felt offcuts out, I got some contrasting sewing thread and set to work attaching the pieces to my felt base. I didn’t expect it to take as long as it did and I got through quite a few episodes of Foyle’s War while I sewed 🙂

When I’d attached all the pieces, I attached a piece of thin blue cotton fabric to hide all the stitching and thread. Then I folded the flaps in, machine stitched them in place, then hand stitched the top and bottom edges. I think you’ll agree, that it’s nothing like what I usually make 🙂  This is the front:

OLYMPUS DIGITAL CAMERAAnd this is the back:

OLYMPUS DIGITAL CAMERAI tried hard to make sure nothing matched, and that it wasn’t too neat or even, including the top and bottom edges, I just followed the edges of the base felt. This is the cover opened out:

OLYMPUS DIGITAL CAMERAI didn’t attach felt pieces to the base where the flaps would be, I didn’t want it to be too thick. The felt I used for the flaps was originally white merino and cotton which I experimented on with direct dyeing.

OLYMPUS DIGITAL CAMERAOLYMPUS DIGITAL CAMERAI also made a strap closure for it in much the same way as I made the book:

OLYMPUS DIGITAL CAMERAIt just fits around the book and clips together with a Delrin clip.

OLYMPUS DIGITAL CAMERA
I thought this notebook would stick out like  a sore thumb in my etsy shop, but surprisingly it doesn’t. But maybe that’s because it probably has a little offcut from almost every other piece in there with it!

%d bloggers like this: