This is the story of a Felting Emergency
The background:
Each year the local guild builds a year long workshop schedule. The main foundation multi-day workshops in weaving get scheduled first, then the rest of the multi-day workshops, then we work through the list of other workshops. Sometimes there are workshops that would be good to balance out a topic or that have been requested, but instructors didn’t list them this year. The workshop coordinator usually sends a couple emails or a quick phone call and tries to line up the missing ones. This year we needed a couple more felting workshops. I had taught needle felted sheep before and there was a request for felted landscapes. Great, I can teach that too. Oh wait! I need a sample! I gave away all my felting last year as Christmas presents. Hmm. Better make another sample, quick. Since I would need a picture for the workshop catalogue and we would also need an example for the web site. Luckily they could be the same pictures. I just had to make one, fast!
PANIC!!!
OK. Off to the photos I had taken and then a quick perusal of the internet image search. I dug back through the last few years to see what I had that would make a good landscape. I had a number of shots to choose from; some of the cottage, the Tay river (OK it’s a bit small for a river), some from the trip south to go blacksmithing, some just west of Westport (also with Glenn blacksmithing), getting lost at the north edge of the map coming back from a week blacksmithing in Halliburton, a couple from the Champlain lookout but it was cloudy so I didn’t like those much. I had a lot of tight focused pictures of leaves, pine needles, or milk weed but they’re not really what you think of normally as landscape. (If you’re not selling your piece consider looking at calendars with photos of landscapes, they often gives good compositions and subject matter)

West of Westport at a blacksmithing workshop (the building with the forge is behind me as I’m taking the picture)

The top edge of the map as we are about to get lost on our way back from a week of blacksmithing workshops at Halliburton.

Sumac on Iris by the transit way in fall. (Absolutely nothing to do with blacksmithing)

Pine tree I think it was Oakville on 6th line?
OK, let’s check the internet for some options. Lots of possibilities but only a couple of the winter shots caught my eye. One was from a video of snow in the farmland south of Ottawa. Ah, I like that one. And I found one of a winter fence. I have always liked the look of fences and it has large blocks of colour (mostly shades of white and grey) with a bit of detail to make it interesting. Hum, still needs something. Let me think on that while I transfer the image to my felt.
 Snow and fence south of Ottawa
Checking the image for viability.
Is this a composition that will read easily? What are the tonal values within the piece? How does it look if you colour block it? Copy the digital image into Word and go to the image tab when you have the photo active. Now change the photo to black and white.
 Is it still easy to tell what you’re looking at? Next go to artistic effects and try the option called cut out.
 It colour blocks the image to give you basic values.
There used to be an option called paint by number which was fun too but I can’t find it anymore. This step isn’t totally necessary but it gives you more clues whether this image will work. This helps reduce abandoned projects and general frustration.
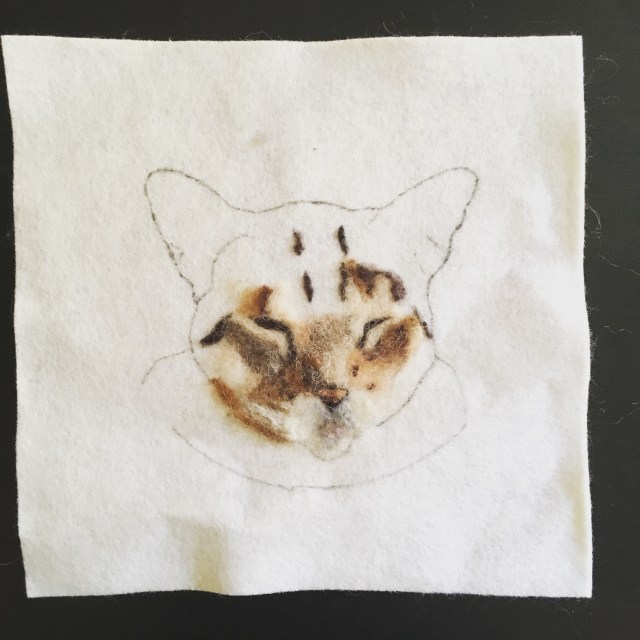
I had bought some felt at Twist festival and a couple more sheets at Almonte Fibrefest. I selected a blue and blocked in the composition with a medium fine Sharpy (a brand of permanent marker). Megan Cleland had used quilting markers (they got all over the side of my hand) with the light box technique. She had us trace on the prefelt but with thicker felt this would not have worked. If you are not comfortable doing a free hand drawing there are a couple of other options. I had found the thin prefelt too stretchy and had to be careful not to let it distort the image. So I chose the thicker felt for greater stability and less distortion.
I have worked with thick felt, felt I have made, a couple different weights of commercial felt and prefelt and even felt made from acrylic and what feels like sizing or glue (icky feeling to felt on but it did make a nice picture – see at the end of the post). If you can find and afford it, the real wool felt has been much nicer to work with.
Megan had given out the dollar-store garden kneeling pads to work on in her workshop and I found them excellent to work with. I will be watching for them to come back into stock this spring! You can see the rainbow one I have been working on. The handle is a handy place to stash bits of wool so I can grab bits of fiber as I need it.

I again was working background towards foreground then adding details. I took lots of pictures to check the progress as I went. The photos work like holding a painting in front of a mirror to check you have your proportions correct. I decided to take out some of the snow on the fences and found I wanted to add a bit more interest.


So, back to the internet. Let’s search snowy owls on fence posts in winter. Armed with reference photos I added the missing bird and continued adding detail to the foreground and shadows in the snow.


As soon as I added the tree trunks behind the field I was starting to be pleased with the progress.


I had an Ikea frame but the mat did not fit the picture. Next time look at the mat size and make the art to fit the mat.

It’s a lot cheaper and easier than trying to get a mat cut on the afternoon of Halloween. But I was eventually successful in getting an acid free mat cut. It cost more than the sheet of mat-board did so I may be investing in a good mat cutter if I continue to work in this flatter format. You can see how much better the piece looks with the mat in the correct size!

So I was able to create a speedy example of a felted landscape in time for the workshop display at the guild sale the first weekend in November. I also had a photo of the piece so I could put it in the catalogue and also on the guild web site. The Flowers are for an evening felting workshop with Ann McElroy and the sheep I am teaching again this year. As you can see in the very tiny print we will be having quite a few felting workshops this year!
For those of you, like me. whose eyesight isn’t up to the fine print, let me give you the list so you can see it. It really is a rather impressive list! I’m not suggesting you take them I just thought you might like to see what a range of felting is happening in Ottawa next year!
Felting Workshops 2019
Wet Felting
1913 Wet Felted Cozy Cowls (B) 1 Day, Sun, Feb 10, 2019 – J. Tulloch
1919 Jewelry Making with Felt (B) 2 Days, Sat, March 2 and 9, 2019 – J. Tulloch
1922 Custom Fit Wet Felted Hat (B) 1 Day, Sun, Mar 17, 2019 – A. McElroy
1924 Wet Felted Chicks and Egg (B) Half Day, Sat, Mar 23, 2019 – M. Hegedus
1929 Beautiful Wet Felted Flowers (B) Evening, Wed, Apr 10, 2019 – A. McElroy
1936 Luxurious Nuno Felt Scarf (B) 1 Day, Sun, April 28, 2019 – A. McElroy
1956 Luxurious Nuno Felt Scarf (B) 1 Day, Sun, Nov 24, 2019 – A. McElroy
1942 Techniques for Intermediate Wet Felters (I) 1 Day, Sun, May 26, 2019 – A. McElroy
Needle Felting
1902 Needle Felted Sheep (B) 1 Day, Sat, Jan 19, 2019 – J. Scott
1917 Needle Felted Flat Landscape (B) 1 Day, Sat, Feb 23, 2019 – J. Scott
1938 Needle Felted Fairy Garden (B) Half Day, Sat, May 4, 2019 – M. Hegedus
1948 Needle Felted Pumpkin (B) Half Day, Sun, Oct 6, 2019 – M. Hegedus
1958 Needle Felted King Winter (B) Half Day, Sun, Dec 1, 2019 – M. Hegedus
1960 3D Wet Felted Vessel/Pot (B) and up, 1 Day, Sun, Dec 8, 2019 – A. McElroy
I hope you have enjoyed my panic driven adventure in felting. The moral of my story this time is don’t give away all your examples as Christmas presents if you are going to be teaching a workshop in the topic!
Post script;
 This is the landscape I am working on at the moment. It is on acrylic felt. It is a bit stretchier than wool felt but not as stretchy as prefelt. I was expecting the acrylic felt to be truly hideous but it is not as bad as I thought it might be. There is an odd resistance and slight scraping sound as I started to work with it. Now that I have a base built up it is behaving better. There is still a lot to do on this new piece before its done but I am again pleased with the start. Now will it be a fox, wild turkeys, or deer that will accompany the hay bales? If you are not too bored by now maybe I can show you later? Have a great time felting!!!