Browsed by
Tag: felted lantern workshop

Felted Lantern Cover Workshop.

Felted Lantern Cover Workshop.

I got to teach a felted lantern cover class recently. It was mostly people who had never handled wool before. This class is fun, interesting and technical. This project requires a very thin layout, but if it develops holes, that’s ok because it lets the light out.  It’s a great one to use to practice thin layout.

I made a new sample with prefelt shapes on the inside and sari silk on the outside. I didn’t have a sample of either of those. It always amazes me how much the sill disappears when you wet it, even on contrasting colours

And the finished sample. The inside shapes worked really well. Some of the mwere swallowed by the scrunched-up part, but that’s ok.

I had eight students. I let them choose if they wanted to make it all enough to be able to make part of it scrunched, or just tall enough for it to fit the glass vase/lantern. I almost forgot to take pictures.  It was about an even split. Scrunching them makes a fairly simple design stand out.

I almost forgot to take pictures. Here they are laying out their wool, lots of different ideas.

Then, of course, there was all the rubbing and rolling

Here are some finished but still wet. I am not sure how I ended up with only 5 of them. I was sure I took a picture of each of them.

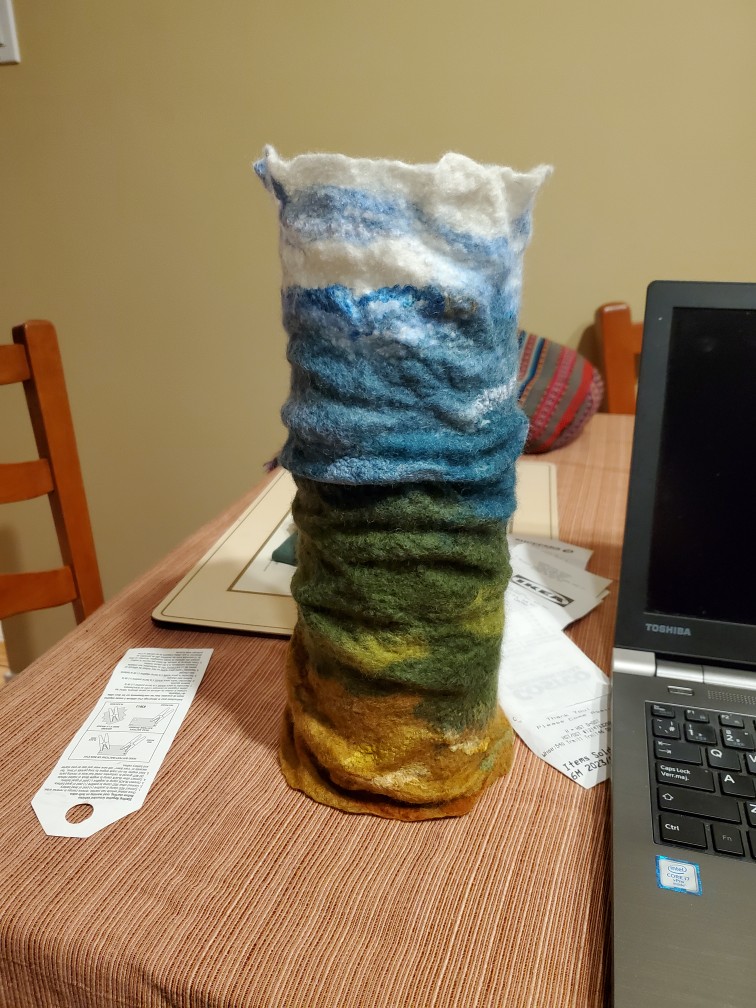
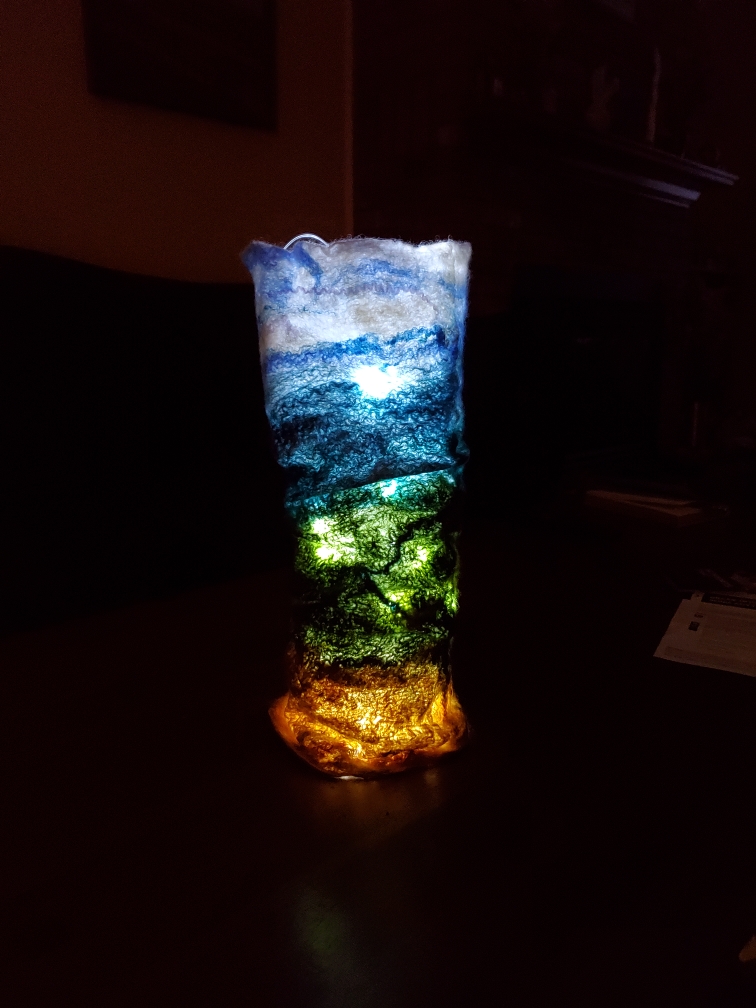
And here are some pictures my students sent me when they were all dry.

I think they look great. This is a great project if you don’t have a lot of time, but want the satisfaction of start to finish in one session.

Felted Lantern Workshop

Felted Lantern Workshop

This last Sunday I taught the felted lantern cover workshop that should have happened in December but was delayed. I was teaching at the guild I belong to, Ottawa Valley Weravers’ and Spinners’ Guild.

It was a half day class. the biggest challenge with the lantern covers is laying out the wool thin enough to let the light through but with enough wool to hang together. They don’t need to be strong because the lantern will give them structure. For this class, I provided a glass vase so everyone would be working to the same resist size. You can use a large pop bottle with the top cut off but I would add some weight to it to make it more stable.

I had 5 ladies for this class. I showed them two examples of covers I made.

wool felt lantern cover, blue, green, brown wool felt lantern cover lit up, blue, green, brown

Everyone wanted the longer one so they could add wrinkles

laying out wool for a felted lantern cover laying out wool for a felted lantern cover laying out wool for a felted lantern cover laying out wool for a felted lantern cover laying out wool for a felted lantern cover


I only just realized we ended up with just 2 colour palettes. the largest part of this class is taken up with layout and decoration. We discussed how you can add things to the inside of the cover that won’t show when it’s not lit up but will show as silhouettes blocking more light.  A couple of people decided to give that a try.

Adding embellishments to felt lantern covers Adding embellishments to felt lantern covers Adding embellishments to felt lantern covers Adding embellishments to felt lantern covers Adding embellishments to felt lantern covers

It is hard to see on the last one but she is adding white and blue silk hanky pieces to the wool. they disappear as soon as they get wet. They will show up again later. You can see them a little in the pictures below. I think everyone had a great afternoon.


Group shot of the students with their lantern covers.

finished wool lantern cover finished wool lantern cover finished wool lantern cover finished wool lantern cover finished wool lantern cover

Two of my students sent me pictures of their covers dry and lit.

Christine

lantern cover drylantern cover lit up

Janet

lantern cover dry Lantern cover lit up

I hope the others will send me pictures as well. One was very thin and delicate and I think it will look amazing lit up. If they send them I will add them here.

I did have someone ask why I like to make covers rather than making them with a bottom. There are 4 reasons, first making a nice flat bottom that will allow the vase to stand properly can be tricky. A cover that is self-supporting needs to be felted much more or be thicker to be stiff enough. Having an internal structure gives you something to put the lights in and attach the controller to. And lastly, the container inside allows you to add water if you would like to use it for flowers.