Breakdown screen printing has been around in the surface design world for a while now. I have discussed it on my personal blog but thought everyone here might be interested in the process too. My local group got together yesterday for another session of breakdown screen printing.

What you need to start is some print paste. Essentially, you use this to thicken fiber reactive dyes and you screen print with the thickened dyes. It only takes about a quarter cup of print paste powder to add to 2 cups of water. We used 4 cups of print paste for our “party”.
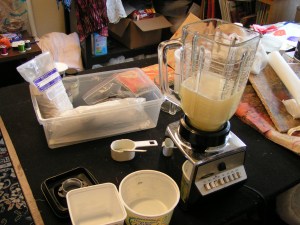
You can just stir the print paste into the water but it works really well if you use a blender because otherwise it gets lumpy. As Lyn told me, you don’t want to use the same blender that you make milkshakes in – use a blender that is just used for the studio.

Then you add dye powder to the print paste. This one has black dye in it. Then you squeegee some thickened dye on to the screen while you have the screen on something textured. You can use things like bubble wrap, texture plates or anything relatively flat that will press against the screen and give it different textures.

This is one of the screens where I used the black dye over texture plates. The textured part that sticks up a bit, keeps the thickened dye from filling that part of the screen.

So you get a textured screen that looks like this. Then you let the screen dry completely. I always do this step about a week ahead of time.

Here is Carole and Louise getting ready to print a screen. You can use clear print paste (with soda ash added) or you can use a colored print paste where you have added dye. The dried dye in the screen starts breaking down as you apply the print paste and you never know how it will turn out.

Louise is adding clear print paste and a little bit of blue print paste. She is using a squeegee to force it through the screen.

Using the fiber reactive dyes, you can print on cotton fabric or silk. The added soda ash causes the dye to set in the fabric. This screen that Louise is using is one she made using strips of Pellon Vinyl Fuse Matte. She fused the strips to the organza and then added green print paste to the screen.

This is one of my sketchbook pages that I printed with Louise’s screen.

Here is another screen that has black dye.

And the resulting print on yellow fabric. Each print is different from the next one as the dried print paste continues to break down. Bunny printed this one.

Here’s a sketchbook page printed from the same screen.

This is a screen that I made from a 6″ embroidery hoop, nylon organza and duct tape.

This is the print from the circle screen above. I used a fabric that was already dyed and clear print paste with this one.

Here’s another screen that I mixed black and green dye and let it dry.

This isn’t a very good photo but here’s a portion of the printed cloth from the screen above.
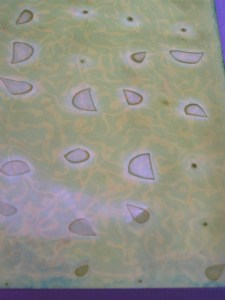
This is another screen that I used green print paste and let it dry. The squiggly bits are just stains from a previous experiment with blue glue.
 This is the resultant 4-5 prints from the green screen above. The green barely shows at all and just mixed in with the orange print paste. Most of my fabrics already had prior printing on them from previous experiments. Most were quite ugly so I thought I would try to improve them.

This is another sketchbook page from a screen that was mostly broken down. I did several of these and they reminded me of photo negatives.

This piece of fabric was printed over paper scraps out of a paper shredder. You just sprinkle the shredded paper over the fabric and then use a blank screen and screen colored print paste through it. You keep moving the screen and some of the paper bits move with the screen. These always look different after being washed out because there are still bits of paper stuck all over it. Hopefully, I’ll be able to get a photo of the finished fabric but it belongs to Carole so if I remember…
I have printed on wool before with this technique. You just need to use acid dyes and vinegar in place of the fiber reactive dyes and soda ash. You do have to steam the pieces afterwards but the process works well. Once I get these fabric and papers rinsed, I will post them on the forum. You do lose some color but they are always one of a kind prints. Breakdown screen printing is a fun process, messy but fun!
Edit: See final results here.


