Browsed by
Category: tools

Fabulous finger protectors I have found (Group 1)

Fabulous finger protectors I have found (Group 1)

Fabulous finger protectors, I have found

Needle Felting, Safety First, reducing the need for Band-Aids (so far in 4 groups)

While Needle felting is fabulous fun, it can get a bit, hummm, bloody, if not done carefully. Initial eye-hand coordination can be less than accurate, accidently glancing at the T.V. while continuing to stab or just excessive speed and depth enthusiasm may require another box of Band-Aids. I have suggested to my students that audio books or mellow music rather than watching TV or YouTube while working with needles will greatly slow the requirement for first aid. Sometimes initial enthusiasm for stabbing, with felting needles, may require further methods of separation (fingers from pointy bits).

I had originally started this investigation for options to use with the electric needle felting machines that Ann and I had purchased last year (wow time is moving quickly).  I expanded my looking to include protection while using handheld needles too.

Finger protection can be helpful when working in both 2-D and 3-D felting. Most of the Fabulous finger protectors I found are definitely not originally designed as felting tools. I would like to show you what I have found. With the increased appointments I am chauffeuring my hubby to each week my time to felt and write blogs has suddenly decreased.

Let’s see what I have found for keeping the pointy end of the needle away from your innocent fingers

Group 1 Brush cleaning tools

Let’s start with tools originally used to clean brushes, (usually used on hair brushes). I have examples of two shapes of these brushes, the rake shape and the well-spread bristle clumps.  I have them in both a plastic and wire bristle version.

This slideshow requires JavaScript.

1.1-1.2 Brush cleaning tools. (Not originally meant for felting)

I started with the mettle-toothed rake, it’s similar to the clover tool brush cleaner but has a lot more teeth. It held the wisp of wool as I used the needle to attach it to the picture. I had ordered a similar item but with fewer wires as well but unfortunately, they all arrived exactly the same. (The fewer wires may have given a better view of the image I was working on).

mettle toothed rake holds fiber as needle inserts it into felt picture1.3 “Hair Brush Comb Cleaner Tool”

The plastic version of this tool did not grab the fibre and gave a bit better visibility of the understructure you are working on. It is also less expensive than the mettle with a wooden handle version. I was quite pleased with this tool, and think it would be helpful for those who are a bit distracted when using needles.

plastic toothed rake holds fiber as needle inserts it into felt picture1.4 “Plastic Comb Cleaner”

The second type of brush cleaner is the flat clumped bristle wooden handled brush. It is similar to the ones I have seen used to clean suede shoes.

flat handled brush with clusters of mettle brisles holding fiber as needle is inserted into felt picture1.5 Small wire bristle brush used to hold down wisp of fibre as it is impaled by the felting needle (T-38-333, if you were curious)

I found that the twisted nature of the wire had a slight tendency to grab loose bits of fibre that I was working with.

fiber clining to tips of mettle bristles1.6 the wires were catching loose bits of fibre but did hold down what I was working on.

The plastic version did not seem so attached to the fibre I was trying to work with.

flat handled brush with clusters of plastic brisles holding fiber as needle is inserted into felt picture1.7 Plastic bristle brush cleaner with flat wooden handle.

Both were easy to hold and I could see the work surface with both of them.  They do get your fingers a bit closer to the sharp end of the needle but not unreasonably dangerously close. Of this group, I think the two plastic options were more effective but not so much so I would go buy either of them if I already had the mettle version. If you see either at a dollar or discount store take a look at them and see what you think.

The Clover brush tool is also in this group but has wandered off into one of the boxes or bags that came back from teaching last weekend, it is not to be found at the moment.   I have used it effectively to hold fiber while I worked as well as some of my students. The wire teeth are more flexible and have wider spacing than the brush-cleaning wooden handled ones I have recently acquired. Unfortunately, it was quite a bit more expensive. If you see one, second-hand, you may want to grab it!

green plastic handeled wire rake clover tool. originaly designed to clean the clover brush pad 1.8 Clover brush cleaning tool

I will stop here tonight and show you the next group next post. I am still very busy driving my husband to rehabilitation appointments, and doctor visits, as well as doing errands, shopping and trying to work in time to get my felt square finished and have fun writing blog posts. I have four groups of things, to keep your fingers and needles separated, in hopes of greatly dropping the profits made by the bandaid company (though IKEA used to have cute ones with cats on them!!)

Colour Palette in a Box

Colour Palette in a Box

I often work on the needle felting part of a project at home or at the guild.  I end up with bags of possible fibres I might need and they usually hang around longer than the project. Every once and a while I have to gather them up and return all the wool to my studio. Then start again for the next thing I am working on. As you know I tend to work smaller, postcard and trading card sort of sizes. That means I don’t need a lot of any one colour. Somehow I always grab way more fiber than I need.

I keep looking at the little boxes of fibre that Ali Express and Amazon sell as part of felting kits. I don’t need the wool or the needles (I have my own local, very knowledgeable, needle dealer- Jan) So I went searching for the boxes. I found them on Ali Express. ali express box for sale I bought 2 Like this.

plastic storage box

plastic storage box from the top

The boxes snap together so I took the lid of one and snapped them together.

front view of 2 stacked storage boxes.


Inside there are removable dividers.

top view of storage box deviders

I started adding small amounts of wool, a different colour group in each tray.

And this is what it looks like now. I do still need to add a few more colours but these are the ones I had handy in the house. I left the bottom one empty so I can add tools to it, needles, holders, and scissors to start. I need to sort my needles so I have a few of each in the tray and some of the handles.

storage box full of wool Do you have a good portable storage system for your wool and supplies?

Repairing my fingerless gloves

Repairing my fingerless gloves

After having a green Christmas, winter has arrived in Canada at last.  In the past week Ottawa has received a few dumps of snow.  There is definitely an Arctic chill in the air.  As a result I have been firing up the wood stove and layering up to try and keep warm.  One of my favourite winter indoor accessories are these Possum Merino fingerless gloves.  I have a couple pairs of these and sadly at some point some hungry moths have eaten some holes into this pair.

Pair of fingerless mitts with holes in them from moth damage
Fingerless mitt with moth hole
Moth hole in cuff of the mitt
Fingerless mitt with moth hole
Moth hole in the glove


Fingerless mitt with moth hole
Moth hole in the glove

A few years ago I repaired my husband’s fingerless gloves by darning them with embroidery thread. The repairs were functional but overall I was unhappy with the results. This time around I wanted to try a felted repair. Unfortunately I could not find my felting needles. I am sure they are safely stored somewhere in my house.

Felting needles

Luckily I was able to purchase a few needles from Jan.

Next I needed to find some wool. I picked out this lovely Gotland fleece from Dover Farm Canada.

Grey gotland locks from Dover Farm Canada.
Using my hand carders to card some grey gotland wool

I quickly carded up a few locks using my hand cards.

I now had a mass of loose wool to use for my felt repairs.

Small pile of carded wool

Patch 1 before fixing (hole visible)

With my tools gathered it was time to start work. I placed the glove onto a piece of foam (pool noodle). Then added some wool and started poking away with the felting needle.

And here is the first hole after repairing it with wool. The felting needle shows where the hole was. Now I have a nice solid glove again.

Patch 1 after fixing. No more hole. The felting needle shows where the patch is.
Patch 1 on the inside of the mitt.

Here I have turned the glove inside out and I’m showing you the back of the repair. You can see the grey fuzz of the new patch of wool.

After I completed the first hole, the new few were quite easy to do. I will include a few more before and after photos below.

Patch 2 being started. The hand shows the small amount of wool used for the repair.

Starting patch 2. In my hand is the small bit of wool I will use for the repair.

Patch #2 after fixing. No more hole. Yeah!

Patch 2 after fixing. No more hole. The felting needle shows where the patch is.
Patch 3 before starting.

Hole#3 before fixing.

Patch #3 repair in progress.

Patch 3 repair in progress. The needle shows where the work is being done.
Patch 3 after fixing. No more hole. The felting needle shows where the patch is.

Patch #3 after a bit of poking.

Patch #3 on the inside of the glove.

Patch 3 after fixing showing the inside of the mitt.
Patch3 after fixing. This shows the inside of the mitt and how fluffy the new wool patch is.

Patch #3 from the side. This shows how fuzzy the inside of the mitt after adding the felted repair.

It only took me a couple of minutes to repair my gloves. Gathering the supplies (felting needles, wool and foam) took more work than the actual repair.

Fingerless gloves after repair. No more holes!

My fingerless gloves after being repaired. I fixed three moth holes and one thin spot that I found when checking over the mitts.

After the repair the gloves look a bit shabby.

Fingerless gloves after repair. No more holes!

But they feel comfortable.

I am delighted that my fingerless gloves are fixed and hope they give me many more years of service. I also hope the hungry moths stay far away. But if they don’t, at least I know I can fix any damage they do.

Ooops! i got another felting tool. It’s A “Hey Truool”

Ooops! i got another felting tool. It’s A “Hey Truool”

Oops, I did it again. I was browsing for something else and accidentally saw something that caught my eye. Even worse, it was on sale for New Year’s!!!! Oddly, the same item had four different listings priced from $117.00 (Canadian) with only Chinese instruction in photos to $137.00 (Canadian) the only 1 of 4 that had some English instructions in the associated photos.  Since all listings were from the same seller, I started a long….. series of questions both technical and why the variation in prices. Was there a difference in motor strength? I was assured that all were the same and that it was just that there was a sale for New Year’s.

After looking carefully at all the pictures, with lovely but unreadable text, I had figured out some of my questions, then being pointed to the 4th listing with the English diagrams I was able to figure out most of the rest.

I showed Glenn what I had found and decided to order one. I suppose I should not hold you in suspense and show you this interesting addition to my collection.

smallish cardboard box with Chinese writing on it1) Mysterious Cardboard box arrived in the mail

I am sure this helps a lot and you know exactly what I got! No?

Ok, how about a peek at the end of the box that has some letter shapes that look more familiar?

the end of the same box says Hey Truool which is not too illuminating as to what is inside2) the end of the same box says Hey Truool which is not too illuminating as to what is inside

Yes, it’s a “Hey Truool”!!! (something to do with a sheep with eyes closed tight?) no? ok, let’s cut the tape very carefully, not to frighten the concentrating ram and look inside the box….

the box inside the outer box, has a line drawing of an electric felting machine3) the box inside the outer box,

Well, that looks intriguing, don’t you think? (Nice technical illustration line drawing but maybe you would like a bit more information?)

the inner box has irridesent ink for the diagram. its very cool graphic design and technical illustration.4) the inner box has iridescent ink for the diagram. It has a very cool graphic design and technical illustration.

OOOH love the interesting colour shift in the printing! Very nice graphics. Ok, I like the outside of the inside box but maybe I should stop admiring it and look further inside.

inside the inside box showing instructions and the end of the macheen

5) inside the inside box showing instructions and the end of the machine

ah yes, I see the problem…. I am likely just as dyslexic in Chinese as I am in English because this is as understandable as grade 1 English was when I was in grade 1. Maybe I will be lucky and there will be subtitles further in?

a close up of the open instructions absolutly no English instructions! but there is a lot of fine print so im sure it would have been helpfull if i could read it.6) a close-up of the open instructions, there is a lot of fine print so I’m sure it would have been helpful if I could read it.

No,….. this Chinese is all Greek to me. Well, let’s not get held back by a lack of reading skills, and continue on to looking at the implement!

the tool wraped in a translucent paper with more instructions7) the tool held gently in a protective surround of black foam.

Oh My, the excellent graphics and very nice packaging continue (sorry I really, really like technical illustration and when I bump into good graphic design and packaging I am very happy)

ok, what I am impressed with is the slightly translucent paper-like cover protecting the tool. It has helpful graphics and labels. Unfortunately not in English, but still what a nice placement and it would have worked fabulously if I could have read it. Maybe the most expensive version has English graphics?

turning the tool over to show the back of the protective wrapper has a predesigned tair away spot.8) the back of the tool showing the other side of the protective paper sleeve

There is a handy tear strip on the back, which I have refrained from tearing. (Instead, I have been slipping it off and on between uses.)

Now what is the little box to the side of the foam packing?

This slideshow requires JavaScript.

9.1-9.2) the little box at the side of the black foam packing holds the Accessories

Ahhh, Accessories!!! 2 large enough to fit my finger’s leather finger cotts! (some of the ones from China have some very odd notions as to the size of my fingers…. They think I am some delicate thing with tiny elegant skinny fingers….. Nope, that is not me.) The USB charging cord (a bit short but it works!) and the vile of needles.  ok, the last isn’t as important for me since I still have the remains of 7 different boxes originally holding 500 needles each.

At this point, I admitted I needed a bit more info. So, I messaged Ann about translation Apps for phones. I remember her saying something about, “Just take a picture of it, and the phone will translate it into English”.  She thought my phone probably came with one installed. After much rummaging into corners of my phone I had not visited, I decided it was still not as smart as it said it was… I told it to go online and find an app which it eventually did, then after more rude words I convinced it that yes, I did want to download it and use it. Unfortunately, my phone proved it was not as smart as the average camera and refused to copy or save the text. So I used my real camera and took bad pictures of the sections of translated text!! I may be a Luddite but I am a sneaky Luddite that knows how to use a camera.

translated text photographed from my not so smart phone. text on gray background highlighed in white, it is not a grate shot becouse of screen distortion which will also occor in next shot.10) translated text photographed from my not so smart phone.

I painfully read the text, which mostly made reasonable sense. The first part being generic, power tool safety instructions, and then we got to the part I wanted to know about.

more text from my not too bright phone, translated from Chinese to English still has screen distorion11) more text from my not-too-bright phone, translated from Chinese to English

First-time use: Do not charge more than 4 hours. It is charged when all the lights are on. If the lights by the power switch dwindle it’s time to recharge.  Recharge every 2-3 months if not in use. I also translated the other long instruction card which was quite helpful and checked back to the online info and compared it to the translations. (From previous experience with Microsoft’s spellchecking inability to handle something as simple as my spelling, I may be unfairly leery of Google’s ability with others’ spelling)

I read about the on / off button, and extended hold to power it off and on, while a light tap will pause and start it once it is powered on.  It has 5 speeds of operation, (one of the online info photos had the motor speeds for each).

I checked the stats for the machine and found more interesting info

last phone shot i promise!this gives technical stats for machine12) last phone shot I promise!

One of my original questions was about run time and rest time. The Orange Fly from Ukraine and the Silver Mettle felting machine from China both had run and rest times suggested so you didn’t offend your motor and have it die on you out of spite.

The person I was typing with suggested;

“20 minutes use, 10 minutes rest is suggested” Alibaba Translation

“the machine can run 1 hour after fully charged” Alibaba Translation

“it can be used during charging as well” Alibaba Translation”

The technical details say full battery time is 30 to 50 minutes, with a bit more reading I found it was due to which speed you are running it at. I suspect also, how many needles you are running since more needles will give more resistance to the motor.

Now, let’s move on to the part of the machine that had originally intrigued me. I am sure you remember the mechanics of the clover tool (Green) and the fake clover tool (Blue) with its protective sleeve, which retracts when used. The new felting machine also has a sleeve guard. This one retracts and can be set at different levels, which sets the depth of the needle penetrations. (This gives you the ability to set a constant working depth.) if you are wanting to work at a shallow depth make sure you are engaging at least the barb closest to the tip of the needle, without barb engagement you are not going to get very far with your felting.

This diagram is from the English sale posting;

Manufacters diagram showing adjusting depth gauge of machine13) Manufacturers diagram showing  adjusting depth gauge of machine

That is not the only interesting feature of this machine. Let’s look at how each machine deals with needle exchanges. With the other two, the orange fly is a bit tricky to change needles (it gets better with practice but it is not “Easy”) and the other mettle one from China requires the needles to have the top crank removed (cut or sawed off). This new one (also from China) has an easy needle-changing setup, no cutting or fighting with needles required). You can choose to run it with 1 to 5 needles, depending on what you are doing. I have tried it with three T-38 333 needles.

14.1-14.2)

This slideshow requires JavaScript.

14.1-14.2) Manufacturers diagram

The one warning I would suggest is carefully looking at image 2 above. I opened the needle holder while the machine was in a horizontal position. Oops, I almost lost the little mettle square you can see in image 3 above. Not to worry I found it and got everything back together.

Once I had it charged, (USB cord charging off my computer) I tried on the butt of Moose #3. It did felt a bit but Moose’s gluteals are extremely firm already so it was unfair to ask it to compact an already well-compacted surface.

I brought it with me to the social on Monday and got a few minutes after guild stuff, library and photography to try it out with a felt picture on my soft 1.5-inch thick wool mat. As we found with the other electric felting machines, the faster speeds were more effective. The tool is lighter and has less kick-back, than the mettle one from China, I was showing you last year. (Oh! Time is doing that spontaneous jump forward again…was that a year ago?) I had hoped to bring the 3 machines to the social and have Ann help me show you the features and go over how they compare. Unfortunately, she had been feeling ill on the weekend and although better was not feeling up to drive into the guild.

Hey Truool felting machine sitting on just started chickadee picture on top of 1.5 inch thick light grey wool felt mat.15) Hey Truool felting machine sitting on just started the chickadee picture

I will add this one to the chart I had with the others and will give you more info when Ann and I  can get together and compare them.  In case you were making a chart for yourself, I can give you this data to add to it. The “Hey Truool” is winning on ease of needle change and the ability to set the working depth is very appreciated. The Orang Fly with only one needle seems to run faster and is of a similar weight.  The Mettle one from China has the most kick back but I will admit it is working a bit better on a brush work surface.

So far, I am very pleased with this addition to my collection of felting tools. I am looking forward to showing Ann and getting her opinion too. It can be used with both 2D and 3D projects. For 3-D, I am still likely to work with single or double, hand-held needles, but it is always good to have options. I can see using this to build up and sculpt the underlayers (I may have to hand felt the layers closest to the armature but if it can speed up the understructure it will allow me to tackle more projects since I keep coming up with more things I want to felt!)

Hey Truool felting machine white box sitting in front of coffy machine at local guild social.16)  Hey Truool felting machine sitting on the counter as it attends the local Guild Social

If you would like to read the info from the manufacturer, the more expensive English instructions are with this machine’s listing. Scroll down to see them;

https://vi.aliexpress.com/item/1005006303168768.html?spm=a2g0s.imconversation.0.0.25b43e5fsgJIEw&gatewayAdapt=glo2vnm

The cheaper but less textually illuminating version is here, again click on “View More” to see all the pictures:

https://vi.aliexpress.com/item/1005006117756592.html?spm=a2g0o.order_list.order_list_main.11.793f1802E6SDAR&gatewayAdapt=glo2vnm

For both listings, you can ask questions in the “Message” button. (I am sure your questions will not be as difficult as mine were!! Their representative was very helpful and did try their best to help with my inability to read Chinese.)

I am not suggesting rushing over and buying one instantly, but if you are investigating an electric needle felting tool then this one should definitely be added to your list of considerations.  (I would give it bonus points for ease of needle changing and work depth adjustability. oh, and you can run it without the safety covers if you really want to. Good hunting for felting tools and Keep Felting!!

PS, there is a new version from the manufacturers of other felting machines from China. for the new version they are selling a replacement motor and an adapter that allows you to use regular needles. Unfortunately, from chatting with there contact person, the old version that i have will not work with the new adapter (DRAT!).

PSS, I have now seen a Moose project bag with a woven scarf and red yarn in his antlers! Once there are a few more augmented Moose project bags, I will do a post to show you them.


2024 Photo shoot!! New Tools, Ann and Jan get new toys!

2024 Photo shoot!! New Tools, Ann and Jan get new toys!

Just before Christmas, Ann and I were chatting about photo shoots for things we had made from felting.

I had been using my, by now quite old, camera (Lumix DMC-FZ70 by Panasonic) and an older Flannelette half sheet as my backdrop.  The sheet is attached to bulldog clips, which are hooked on S-hooks. This has worked but I can only set it up directly in front of my computer, so conveniently located but not portable. It also is limited in colour, white. I guess I could get another sheet colour…

flanelet sheet held up by bulldog clips attached to S hooks. Ring light sitting in front1) sheet clips and ring light

Close up of bulldog clip2) Close-up of bulldog clip hooked over a large S hook.

moose bag #3 posisioned in front of Flanelet sheet set up3) using this set-up for a photo of Moose bag #3

The sheet is working OK, but I think I can do better.

Ann and I had looked at full-size photo backdrop set-ups, but they require a lot of floor space, which neither of us has extra of. (if you have floor space why are you not adding more wool?) We had looked at the smaller photo boxes but they work for small things, so would not work well with a felt hat or Mer-person.

Then we spotted a tabletop version of the large photo backdrop, which looked like it may work. It has a tripod base with an extendable upright, which supports a crossbar. It came in a few size variations, and after looking both, at those available through Amazon.ca and Aliexpress I selected this one. I ordered it from Amazon and let Ann know when it arrived.

This slideshow requires JavaScript.

4.1-4.3) 2.2ft Wide 2.6ft High (adjustable height from 1.5ft to 2.6ft)

https://www.amazon.ca/Linco-Lincostore-Photography-Backdrop-Background/dp/B072FJR8QW/ref=pd_vtp_h_pd_vtp_h_d_sccl_2/146-5765676-4725532?pd_rd_w=oP80i&content-id=amzn1.sym.54a077ab-41be-4d2b-b691-c4848b60dd3b&pf_rd_p=54a077ab-41be-4d2b-b691-c4848b60dd3b&pf_rd_r=Q1ZVP4V01FF62GNX9MSZ&pd_rd_wg=7N0fP&pd_rd_r=4c28de17-cf4b-4d95-bd52-6a3f2cec3b85&pd_rd_i=B072FJR8QW&psc=1

This is one of the smaller tabletop versions.  It has a sturdy wide base and comes apart to fit in a small bag. There are other models, which are both higher and with a longer cross arm. After considering what projects Ann or I would likely want to photograph, the smaller tabletop version should work for most of the projects.

the stand comes in parts, base, cross pices and clips.5) Un-assembled stand and clips. In the background, you can see the white styrofoam that the backdrops were warped around for shipping.

the bag the stand fits in6) all the parts fit in a bag for easy storage and transport.

I could use the flannelette sheet attached to the crossbar with the clips provided, but I would like more options as a background. The size that seemed to be the best option for backgrounds was 57cm by 87cm. As I investigated the options I found that there are 2-sided options (with different images or colours) as well as lots with the same colour on both sides.

I found some I liked at Aliexpress and ordered two options which arrived much quicker than expected. One was black and white.  The other was two mottled tones of rose and grey, which I suspected would be a more versatile option.

two sided black and white PVC photo back drop 2 sided PVC back drop in mottled grey and rose 7.1-7.2) The first two PVC sheets I ordered cost C$7.24 each.

I had taken Photography as one of the practical art options at university, but it was more focused on experimental composition and darkroom work. I am now working with digital photography, the darkroom work has changed to mostly adjusting the colour balance and a bit of cropping. While I didn’t study studio photography, I have a rough understanding of the concepts.  It will be fun to explore this further.

The local guild Ann and I belong to was having a last social/spin-in of the year on Dec. 30th, from 1-4 pm. We decided to come in early, so she could see the stand and the backgrounds that had arrived.  I brought the two Moose bags and Ann brought the samples for her Valentine’s Day workshop (No peeking, she will be showing you shortly).

The 2 background options had been rolled tightly around a Styrofoam core. then wrapped in packing foam and plastic which did protect them during their travels. It feels like a stiff plasticized paper and is described as “PVC Double sides printing Waterproof Photo Studio Photography”.  Whatever it is, it left them not inclined to stop curling immediately after unwrapping. I think they will stop curling if I can store them flat rather than rolled.  With a bit of sneaky persuasion (some mettle book ends, a clip and a magnet), we were able to proceed with the photo shoot.

mettle bookend and extending handle with magnet8) mettle book end with extendable handled magnet, usually used to pick up fallen needles.

Ann and her phone using the stand and the backdrop 9) Ann and her phone taking pictures she will show you later.

Ann tried both sides with her bags but I only used the mottled grey. I had a bit of trouble with deciding how to display the handles of the moose bag while shooting Moose bag #1, Glenn’s Moose.

This slideshow requires JavaScript.

10.1-10.4) Moose #1, Glenn’s Moose

Moose back #2 black moose with tan legs and blue yarn wrapped in antlers11) Moose #2 Jetta’s Moose

With moose 2, Jetta’s moose, I figured out I could have the handles looped over the top bar wing-nut to keep them out of the way.

As you can see the hole set up is not large, easily fitting on a 6×2 foot fold-up table, but it is large enough to photograph a large project bag. Since the backdrop is only clipped on, if you needed more width, you can position it horizontally rather than vertically. When set up vertically you can use the curve of the PVC to not get a distinct edge as you would find looking at a backsplash and kitchen counter. If you want to have that hard edge change, You can use a second background as a ground to position your subject on.

diagram of hard edge from photo backgrounds12) 2 backgrounds, one is used as the background and one as the surface the item sits on.

The third way to use the PVC photo backdrop paper is as a surface to place your item and shoot directly down. When Ann shows you her photos you will see her doing this.

Since we had fun with this photo shoot, when I got home I continued looking at PVC backdrops and ordered a few more options. I hope you will get to see them for some upcoming blog posts.

This slideshow requires JavaScript.

13.1-13.5) This second group was from a different seller and should arrived Jan 18.  The cost was $6.65each

If you are photographing your felting and fibre arts, having a stand and a few backgrounds would be fun. Consider what size most of your work is, to decide what will work best for you.  I would suggest considering the double-sided PVC sheets since they give you more options than the single-colour options.  If you decide on the  PVC versions, they can be used with wet felting, while it is still wet!  (this would not work out the same with cloth or paper).

That said, You don’t have to invest a lot of money to photograph your work. you can still do a lot with a couple of bulldog clips, a couple of S-hooks, an old sheet and a couple of ring lights or even a couple of flashlights or a window. My last frugal idea was some heavy-weight Christmas wrapping paper. Although it is not as sturdy as the PVC sheets, it will work for a single or a few photo shoots. The wrapping paper comes in lots of interesting patterns. Some are double-sided, so don’t forget to consider the back too. Even better it’s on sale just after Xmas!

christmass wrapping paper rolls in two patterns14) Christmas wrapping paper Moose with hat and copper snowflake

If you are looking for something in between the PVC and wrapping paper for backdrops, I can think of 2 other frugal options. First, as I originally started my fibre journey as a weaver, I have a few rolls of cheap wallpaper stored with the table looms. I went for the ugliest, cheapest, rolls of wallpaper from a second-hand store. You could keep an eye out for the slightly less hideous patterns than I have, as possible backgrounds. And lastly, I have various weights of canvas left over from painting which can be dyed or have washes of paint added to it to make a backdrop. lightweight canvas drop cloths are large and could be cut up into many pieces. Oddly, I still look at something and see that it could be used in some other way. I am not sure I will ever outgrow the frugal “starving art student brain” setting.

I know we haven’t chatted yet about lighting options.  You can see one of my 2 mid-size ring lights in photo #1 (ring light from Dollerama and the stand is an articulating desk stand from amazon.ca). Your lighting choices will depend on what you are photographing, where you are set up and whether you want a diffuses or more raking light source. The topic of lighting options can wander off into a big blog on its own, maybe a chat for another day.

Do you have favourite photo shoot equipment you use or cool tips for photographing your work?


Question: What needle is that? (Part 1)

Question: What needle is that? (Part 1)

I had another question about needles. This time it’s about keeping track of your needles.  On a positive note, if you have this problem you have enough needles to get them confused, Congratulations!!  For those of you who only have a few needles and don’t have the problem of keeping track of them, I should give you the opportunity to expand your collection and be part of this discussion!


Where we get our needles:

If you are not buying from one of the various original manufacturers of industrial needles (Groz-Beckert and others) you are likely dealing with a reseller of smaller quantities of needles.  Let’s start by looking at the options for needle acquisition.

Manufacturers;

If you prefer to go to the source you will get the best price per needle but do you really need 500 to 1000 (minimum order) of the same needle? (The shipping cost for a box or two of needles can be quite painful too!) If you are teaching, and supplying your students their needles for class, as well as doing your own felting projects, then you may go through 500 needles over a not unreasonable length of time. If you are only buying for yourself, I hope you are not breaking needles in quantities that make the purchase of 500 needles a financially good idea. (If you decrease your rate of insertion (speed) and are attentive to entering and exiting the felt at the same angle, it will save you a lot of needles, and will likely require fewer bandages!) (Also, I have a blog post I’m working on about safety implements for those who are either over enthusiastic in their stabbing or are still practising/perfecting their eye-hand coordination. My hand-eye coordination occasionally still goes wrong too!)

Felting Needles set in needle bed (in industrial needle felting macheen)  1) Groz-Beckert – needle board

Original manufacturers sell their needles mainly to people buying multiple boxes of 1000 to fit in their large industrial machines, used to make non-woven fabric.  New needles are needed when the barbs become worn or a new type of product is required. (Different needle shapes and gauges make different types of non-woven fabric and can run the web through the machine at different speeds. Groz-Beckert has more than 2,000 needle options when you look at all the variables.) As you can see from the picture above these needles are not colour-coded since they have to fit into the needle bed extremely precisely.  They have all their identification information on the end of their shipping/storage box.

This slideshow requires JavaScript.

   2-4) Doer Needle boxes and Open box showing 100 needles wrapped in wax paper

One advantage of buying from one of the manufacturers will be, that you will hopefully have the entire needle code. This will give you more information about the needle and make it easier to get replacements when you are running low. The needles in the boxes above are from the Doer company and are wrapped in wax paper in groups of 100 needles all stored in a secure plastic box.

There is, unfortunately for us, a new trend with some manufacturers offering “added security” to their industrial customers. Instead of the helpful needle designation, they are adding “customer codes”. This is to cut down on industrial spying and fit with customers’ warehouse codes, which reduces getting mixed needles in the bed. Yes even in industry they can grab the wrong box of needles! “If needle types are mixed up and placed in a needle board, this can have a major impact on the end product. In a worst-case scenario, this can lead to instant needle breakage due to the needles being overloaded. The result is machine downtime, additional set-up time for equipping the needle boards, and scrap material, leading to increased costs.” Unfortunately, their solution may lead to less information for our resellers.

Buying from the manufacturer Pros: Cons:
Price; per unit cost is cheaper than resellers’ prices Price; minimum number of needles is usually 500 to 1000 of one needle size and style per box.  Also, a box and shipping can be quite pricy.
Information on needle specifications is usually on the storage box. For added security, ageist industrial spying some companies are dropping the standard “15x18x40x3 R222 G…” for “individualization” of package labels with no needle designations.
Companies not selling over-runs (from industrial orders) can sell you exactly the specifications you want, (overall length, working part shape,  gauge, barb type and spacing, and point type). Not all the manufacturers are interested in selling in “smaller quantities”, most have a 1 box minimum of each needle type purchased.
Keeping an eye on advances in the industry via the company’s websites, technical information or newsletters can keep you up-to-date with advances such as new coatings to prolong the working life of barbs or increases in the run speed of the machines. These innovations might be helpful to us if the needles have better flexibility while in use. Not everyone is excited about modification in barbs or reading technical papers.

Re-seller:

a selection of needles offered by various resellers. showing that there is no comom colour sekeem to indicate the type of needle 5) Sample of some of the resellers, note that the colour systems are different for each re-seller.

 Many of the resellers of needles will colour code the crank of the needle to match their colour key of gauges and shapes. “Harrah, problem solved we can all have chocolate now to celebrate!”….. Not so fast, they are not all using the same colour key!!! So if you have more than one reseller you are dealing with, you need to know if this gold one is from Seller A or if the gold needle is from Seller B (or C or D or E….)? Unless you have only one source, you again can confuse what needle you are about to use.

Where can we find resellers?

Look for needles at Local stores, Fiber festivals and online at Amazon, Etsy, out of China and Mr. Google can help too.  Try to support local stores so we can keep having local stores, if you can’t find what you’re looking for then check farther afield.

Most of the resellers are felters and understand the needles they are selling. They can tell you about the uses of different gauges and the differences between different shapes of the working part.  Some can even explain the basic concepts of how the spacing and type of barb can change the enthusiasm of fibre moved by that needle.

Pros Cons
Re-Sellers Are usually colour-coded There is no consistency to the colours used between most vendors.
Most have a selection of the available gauges and working  part shapes May not have the number of barbs or the shape or gauge you wanted.
You can usually buy single or small quantities The cost is more per needle than buying a box of 500 or 1000
Cheap “Bulk Needles” sold in lots of 25, 50 or 100 Mostly don’t list gauge, actual length or number of barbs(“S, M, L”)
May not know the exact specification of the needle, other than the gauge so hard to get exactly the same needle.
A Gift Fabulous Free Needle(s)! My not come with gauge (S.M.& L)

Might forget the gauge in the excitement of new needles

Now we have had a brief overview of where we get needles (and have given everyone a chance to get too many to keep track of), we can return to our question, Which needle is this?


The Needle:

parts of a felting needle labled.(6) parts of a felting needle

Let’s consider the needle. By now, we are reasonably familiar with the parts of a needle. There is a wide variation in needles used in the industry, with over 2 thousand options from GB alone.  The most obvious difference is overall length. The most common Needles (Triangles) come in needle lengths: 2.5”, 3”, 3.5”, 4”, 4.5”, 5” (most needles we see are either 3” or 3.5”, occasionally a 2.5” turns up.) so that may not be too helpful for us. If you have the option to have different lengths for different gauges that may be helpful but most of us already have lots of needles and almost all of them are the same length.

Let’s look at the shape of the working part, where the barbs are located.  We can group our needles by shape reasonably easily. (Triangular, twisted/spiral, Star ether quod or tri, crown and the less common to uncommon; Conical needle, Teardrop, Vario barb and fork.) Unfortunately, the way we use them is by gauge, working from larger diameter-courser gauges to smaller-finer gauges, which is much trickier to guess by eye. While a 32g is drastically different when compared to a 42g, sorting a bunch of 40g’s from the 42g’s or 38g’s is much more challenging.

Let’s do a quick review of gauges (you can skip to the end if you have this memorized!)

  • Courser needles (32g and some people also list 36g)
    • for courser fibre,
    • move fibre more quickly,
    • good for building the under-layers of sculptures and used for adding appendages/parts.
  • Medium Needles (36g to 38g)
    • For medium fibre,
    • Not as aggressive fibre movement as the course needles,
    • Good for under layers of colour for a picture or more fine-tuning the shapes of a sculpture
  • Fine needles (40 to 42g)
    • For fine fibres
    • For the final layer or finishing work in both sculpture and pictures
    • Moves less fiber but creates less resistance and leaves less dent entering the felt
  • Extremely fine (46g)
    • For fine fibres
    • For the final layer or finishing work in both sculpture and pictures
    • Moves the least fibre, but creates the least resistance and leaves less dent entering the felt

Other needles that may be in your collection;

  • Reverse (36 to 42g) barbs pull fibre as the needle is extracted. Good for blending and for pulling up under-layer colours to create a nap on the surface.
  • Crown needles are easy to pick out with only one barb per side very close to the tip. They are excellent for shallow surface work or working on something very thin (pestle or wing membranes).

You may notice some resellers are less knowledgeable about what they are selling than others. I have found sellers, mostly on Amazon and from China, that describe their needles as “small, medium and large” which describes the length of the needle rather than the gauge. The ones I have seen with this listing have all been Triangle-shaped. Unless you are looking for an unidentified gauge it’s likely better to look at the ones that give you more information.

Part 2 will continue  on September 12 with  Keeping track of your Needle Gauges

Have a fabulous last long weekend of the summer, and the fall fibre festivals are just around the corner!! (except for those of you who are just about to come out of winter and begin  spring!!)

Dose the twisted needle twist as it goes into the wool?

Dose the twisted needle twist as it goes into the wool?

Recently I was asked more questions about needles. (I do love finding out about needles, how they are used in industry and how we use them by hand. I hope you still have a bit of curiosity about them too, after all my enthusiastic chatting!) To answer the second question, I still want to get my hands on a forked needle (how can I be fair in my investigation if I don’t actually get my hands on one?) A quick review, In industry there are two types of structuring needles. Structuring needles are not technically felting needles (since they don’t make the felt) but are used to create surface texture on non-woven material.  One is the Forked needle, and the other is a crown needle (which we have chatted about before. If you don’t remember that chat you will find it here; https://feltingandfiberstudio.com/2022/07/19/a-question-about-crown-felting-needles/)    Since I have not had success locally finding a fork needle, let’s turn to the other question about needles. It involved one of the Needles found in the group of needles which do make the industrial Felt.

Does the twisted (also called a spiral) needle twist as it goes into the wool?

Ok, this is a question about mechanics, and how the needle works.  So let’s review the parts of a triangle needle and compare that to the twisted / spiral needle.

diagram of parts of a regular felting needle and a spiral felting needle1)Parts of a regular felting needle and parts of a spiral needle

We can see that all the usual parts are present with a spiral / twisted needle. The difference is in the working part. you can see both clearly have a triangular cross section in the working part but the spiral/twisted needle has that triangular shape rotating in the cross section through the working part.

diagram of a twisted needle close up2) Twisted Needle showing close up of working part

Let’s have a quick review of what shapes are most common in the cross section of the felting needles most often used by hand needle felters. Our most common shape is the triangle, but the 3 and 4-sided stars are also quite available. While some are not as common, there is a spiral or twisted versions of each of the three main shapes.

Common Cross sections of working parts of main felting needles3) Common cross-sectional shapes of felting needles

Let’s go back and look specifically at the spiral or twisted shaped needle. If you look at the cross-section of the spiral at various spots, you can see that it is a triangle rotating around a central point.

4) Cross sections of a twisted needle across section of the working part   5) Looking from the tip up the needle through the segments shows how the tip of the triangle changes position up the length of the working section. (i have updated diagram 5 to more clearly show the location of each edge.)

As you know with all needles, the barb is located on the edge of the needle. With most needles, the barbs are located vertically, one above the other, along each edge. There will be one, two or three barbs per side depending on the specifications for that needle.

The exceptions, for vertically stacked barbs, at present are; the Crown needle (which only has one barb per edge), the fork needle (that has no barbs and a cylindrical shaft) and the spiral needle (whose barbs follow the curve of the needle’s edge).  The last exception to the vertical barb rule, is more of a technicality; the conical needles has barb aligned vertically but because of the taper in the working part, it will engage fibre laterally (we can chat about that further in another note. If you are curious?)

So as the spiral/twisted needle is inserted into our felt how is it engaging the fibre it catches in its barbs?  it is grabbing segmentally as each barb enters the web of fibre. It will create more of a circular Spiral of engagement rather than the three barb points a regular triangle needle will engage.

Here are two ways to visualize how the needle’s barbs are grabbing the fibres as they enter the web. As you know the barb will engage (grab) the fibres it encounters which will be at or close to the surface of the felt web of fibres. For clarity of the diagram, I have had the barbs that are deeper in the web engaging with fibre closer to the barb. If I had more correctly illustrated the crossing fibres, which the barbs are affecting, all the fibres would be at or near the surface layer(and the diagram would be a confusing-looking mess!)

diagram of how barbs on sides 1 to 3 interact with fibers as the needle is inserted6) How each barb distorts the web in a different position as the needle is inserted

I am hopeful you can see the spiral engagement of one edge, then the next, then the third. I have added colours (Red, Purple and black) to the edges to try to make it easier to see how the spiralling of the triangle shape interacts with the order of the barbs as they encounter the fibres.

Here is another way of looking at the order of engagement of the barbs around the centre of the needle.

Diagram the order of barb engagement as the needle is inserted into the felt7) The order of barb engagement


A few more particulars about Spiral Twisted needle

If you read the technical details on the Groz-Breckert site, (one of the needle manufacturers, this one headquartered in Germany) you can find that Spiral/twisted needles are available in:

  • gauges from 38G to 42G
  • Length of 3 or 2.5 inches
  • Usually has 2 barbs per side, but only one barb style is common
    • has a modified barb arrangement (spiral location around the needle)
    • the needle placement gives higher fibre engagement
    • the needle is a bit stronger from barb placement (in the felting machine, both the “machine direction” (8%) and to a lesser degree “cross direction”(4%).)  It may be a bit less prone to breakage with small vector changes if used by hand!  it would still be better to try to go out at the same angle that you inserted the needle.
    • it is listed as having more chance of splitting fibres when using microfibers (we should be ok we tend to take our frustrations out on natural fibres such as wool, silk, alpaca, dog or cat hair)
  • Fiber transport is listed as “Substantially Higher” for a twisted needle, rather than a regular (triangular) needle (of the same gauge and barb shape).
    • It can move about 10% more fibre than a standard felting needle with the same barb dimensions. (It is More Aggressive when compared to the same gauge and barb style of a standard needle)
  • Uses industrially are; Automotive sector (visible areas such as trunk lining and other non-woven surfaces) and Filtration fabrics.

Doer Needles from China sample of 38G Spiral needle8) Doer Industries (China) 38G-222 Triangular Spiral (they also have 40G-222 with the same barb spacing.)

Hand Needle Felting Uses;

  • Good fibre movement(more than a Triangle needle of the same gauge and barb type)
  • Good for compacting fibre or generalized initial sculpting. You may find it a bit aggressive for fine detail at larger gauges. Try a finer gauge if you find it more aggressive than you desire.
  • Used on a sharp angle (surface work), good for catching loose fibres that need embedding
  • Good with short fibres will grab and embed them quickly
  • If you require a 42G needle but don’t have the patents that such a fine gauge requires, a 42G Spiral needle may be for you. (it’s a little bit faster!)

Watch for;

  • May not be as effective when multiple needles of this type are used close together (held together with an elastic or some holders with close spacing) you may find with medium to longer fibres you are trying to engage the same fibre with adjacent needles

Let’s consider the question, “So, Dose the twisted needle twist as it goes into the wool?” What do you think so far?

I know you will remember that the needle itself is descending in a straight line, it is not moving other than in one vector (up and down in this depiction). There is no rotational component of insertion necessary. The movement of the needle descending into the fibre is creating the spiral engagement (grabbing) of the fibres. So technically, the needle is not turning in a spiral but the engagement of the fiber is interacting in a spiral. Each barb has not rotated but descending in a straight line. The fibre cot by the barb is also descending in a straight line, but as each barb above it engages fibre it will be grabbing a bit that is offset from the barb below it. This gives an illusion of spiralling while engaging a more even amount of fibre surrounding the needle than a regular triangular needle would (with barbs stacked vertically in 3 spots). So the answer would be “the needle no but the fibre looks like it is from the surface but is actually not.” Well, now you are likely disappointed after such a long explanation. But there is one more thing to consider.

That being said, it is possible to turn a needle as you insert it into the felt. Rotating the needle can be used to grab flyaway fibre, or catch something that is loose on the surface. It involves rolling the needle between the thumb and first finger. This is not a good long-term technique since it is engaging little muscles that get tired more quickly than larger muscles and can be strained easily when compared to larger muscle groups. Instead of spinning a triangle needle trying to grab fibre, you may find that a Spiral/Twisted needle is a bit easier to engage loose fibre.

I hope this gives you an overview of the spiral or twisted needles. Their a bit more aggressive than an equivalent triangular needle,  so they may be helpful for finer gauge work if you are not patent. I hope, if you get the opportunity, you will try them for 2D or 3D felting.

PS; the needles will work without having to know all the details of how they work, but knowing may give you creative ideas and inspire you to use them to solve challenges while you’re felting. Even better, I did not add any exam questions at the end!!!


Craft Basket Makeovers – part 1

Craft Basket Makeovers – part 1

A good few years ago now, after I had acquired and learned how to use my spinning wheel, I was casting around for some means of storing the associated equipment in a reasonably respectable way.  The wheel and associated bits lived with us in our living room and needed to be tidy.

Quite by chance I came across a shop selling off cheaply a large deep cane laundry (I think) basket.  It was only going cheap because one of the handles was broken and it had no lid.  The much reduced price compensated for something which was no problem as far as I was concerned.

I used to work in Maidstone (Kent) and nearby there was a lovely shop called C&H Fabrics (sadly no more) which sold both dressmaking and curtain fabrics and haberdashery.  I could never bypass their remnant section – they almost always had something good and large enough to be really useful.  I managed to purchase several large pieces of curtain fabric of a design which was really “with it” at the time (most rarely  for me, I am usually following several years behind fashion fads).  This was during the time when Macramé made it’s first appearance and I was very “into” this.  So I removed the remaining cane handle and instead added two twisted cord macramé handles.

laundry basket without lid, with macramé handles, filled with spinning equipment


Then I set to and lined the whole of the basket using the curtain material, making sure that there were pockets around the sides of sufficient size to take threading hook, spare bobbins; flyer; carders; ball winder and my Neatsfoot oil – my wheel had a leather connection between the treadle and the footman – the bits that actually drive the wheel, and the neatsfoot oil is a good natural conditioner for leather and ok for oiling the metal parts.  The rest of the associated bits – fleece, box of carded rolags, tea towel used as a lap cover, cord for tying skeins and niddy noddy would just sit in the middle.

Now I needed a lid for the basket to keep the dust out (our bungalow was very dusty because part of it was still a building site).  So I cut two circles of the fabric and a circle of wadding.  I attached the wadding to the wrong side of one of the circles, by machine quilting around the pattern/motifs printed on the fabric. On the other circle, which would be the underside of the lid, I added a zipped pocket.  I then finished the lid by stitching the circles right sides together with another length of macramĂ©d cord attached to one side.  Then, after turning the circles the right side out, and hand stitching the turning gap, I attached the other end of the cord to the basket. The lid sat on top of the basket with everything safely inside; well except for the niddy noddy which was too tall and had to stick out of the side, so it made do with a length of cord to attach it to the basket.  My brother in law had made the niddy noddy for me, having already made one for my sister.  It is purposely on the large side because each circle of a skein wound on it would be 1 yard long.  This made it easy to calculate the skein’s length.

Lined spinning basket with lid folded open to shop equipment in pockets
Finished basket open

Finished basket with closed lid to show quilting, with niddy noddy poking out of top.
Finished basket, closed.

The fitted out basket sat comfortably by my chair and spinning wheel while I was working at home, but was a bit big to take with me when I went to my spinning group each week. Luckily my sister, having visited the Willows and Wetland Centre on the Somerset Levels, gave me a large basket which she had bought there.  The Levels is a large flat low lying area where Withy Willows have been commercially grown for basket making for at least the last 200 years.  In fact willow baskets and other items have been made there since pre-Roman times.  If you are interested there is more information on the area here: Somerset Levels (As an aside, Glastonbury Abbey, also referred to in the link, used to own much of Sturminster Newton where I now live, despite Shaftesbury Abbey being much nearer to us and owning most of the rest of the surrounding land.)

But I digress.  The basket which my sister gave me was intended as a picnic basket.  It was short and wide and it’s carrying handles positioned so that it was carried flat.

picnic basket on lawn with handles up
See how the handles work to carry the basket flat?

It was just what I needed to carry tops (roving?) and spinning equipment when I was away from home.  Of course it needed to be fitted out with pockets to keep everything tidy and safe.  I had sufficient fabric left of the remnants used for the large basket to make them match.  I lined the base of the basket adding pockets at one end for flyer and bobbin, lap cover and oil.  I didn’t want to spoil the look by using the plastic box for my rolags and by then I had learned basket making courtesy of the WI.  So I made a basket to fit, lined it and made a lid with more of the fabric.  The lid of this little basket was quilted in the same way as the lid of the large basket, and also attached with macramé cords made from fine crochet cotton, with a wooden toggle closure.

small handmade cane basket with fabric lid attached by macramé cord with macramé and wooden bead closure
Rolag basket in the sun

By this time I was also “into” Tunisian Crochet. I had been making ordinary crochet items for as long as I could remember but fell for this new (to me) technique. So in addition to storage for threading hook, personal bits, glasses etc., I needed storage for at least one Tunisian crochet hook – this looks like a knitting needle, but instead of a point it has a hook. I also needed somewhere safe to put large sheets of paper patterns, as I tend to use diagram type patterns and they take up a lot of room. So I set-to to line the lid of the basket with just one layer of the fabric, but with pockets, short & fat and long & thin attached. I sewed this onto the inside of the lid but left one of the shorter ends unattached so that I could tuck paperwork etc., inside.

Open lined picnic basket showing lid lined and with pockets, and with rolag basket and other equipment in the basket.
All my equipment (almost) in the basket.

Incidentally, the sharp eyed amongst you may have noticed that odd bit of hooked wire tucked away in the longer tube/pocket and be wondering what it is.  It’s a do-it-yourself lazy kate – a device for assisting with plying yarns from one, two or more separate bobbins.  An old shoe box (or a basket) and this bit of wire are all you need, poke the wire through one end of the box, slot the bobbin(s) on and poke the wire through the other end of the box.  It’s not the best way to do it, but if you put some tension on the yarn by passing it from the bobbin around the wire once before taking it to the wheel for plying, it works.

Oh and a quick boast – can you see the handle of the threading hook poking out of one of the lid pockets?  The handle was actually a light pull which I had made while having a go at wood turning some years earlier, and the hook is only an unbent paperclip – but it works ok too.

So that was my basket set up and ready for journeys.  Oh yes, the niddy noddy.  That was too big again, so it had to sit on top.

Closed picnic basket with niddy noddy on top attached by cords but with handles down.
Basket with niddy noddy (but the handles are down so I’ll have to remove the niddy noddy, put the handles up and replace it because the right handle won’t go over the end of the niddy noddy – then I can pick up the basket.)

Eventually the cane hinges of the lid, and the cane closure wore out so they were replaced with macramé cords.

Some time before I moved from Kent to Dorset in 1999, I wrote an article about these baskets and submitted it, with photographs, to the Journal for Weavers Spinners & Dyers as I thought it might be of interest to them.  Apparently not though; I eventually received a letter returning the photos (but not the article, so I’ve had to rewrite it!) and saying “… the Editorial Committee … felt that the article was rather too indirectly concerned with weaving, spinning and dyeing ….”   Oh well!

Covers for Carders

Covers for Carders

New Carders need new covers

In a recent post, I was asked about carder covers. I made mine quite a few years ago, ok at least 20 years ago, but had not got around to making ones for the other hand carders I own. (it’s just the others didn’t get out much and I got distracted, you know how that can happen I am sure!)  I had picked up 3 pairs second hand I think as part of a box lot at an auction.  They were ones with curved backs and not as old as some hand carders I have seen. These probably come from the 1970s. I have no guess as to the manufacturer. The only clue is a mysterious symbol on the back of each set.   “A”, “B”. “C”, I am afraid that these mystic symbols are not illuminating as to their origins. Luckily these strange symbols have not affected their ability to card wool.

Last week I picked up another hand carder, this one with significantly stiffer teeth than my present collection. I have also found that my safety carders have been coming with the Mers and will also need some safety covers (but not today). I have used a thin packing foam for the pet combs until I can make them covers too.

First, let’s have a look at the new carders;

My latest acquisition is made from a soft wood that is ruff on the end grain. I suspect it is probably pine.  The handles, although the same colour, seems to be made of a slightly firmer wood. The teeth are embedded in a canvas fabric, then glued and tacked to the wooden carder. Bernadette said she had a similar pair and that the stiff teeth are excellent for courser wool.

As I said the teeth are very stiff and have little flexibility. This doesn’t mean I don’t want to protect them.

second hand carders, wood is ruff on edges and teeth are very stiff handle of second hand carder, ruff with small dents (needs sanding)1-2 The new to me, carders before sanding

3 close up of Foam drying pad cut to cover carder teeth3 close up of Foam drying pad cut to cover the carder teeth

What you will need to make these carder covers

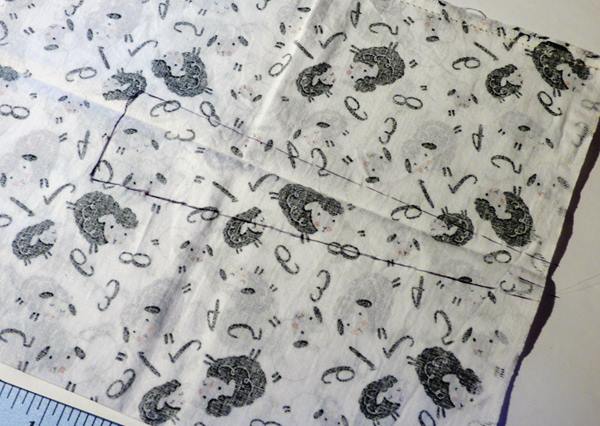
fome and microfiber dish drying mat elastic and velcro straps Quilt squares with sheep alpaca and mice foam sanding block (sandpaper would work too)4-7 Items used to make the carder’s covers

  • 1 Dish drying foam mat
  • 2 Elastic and velcro straps
  • Interesting fabric
  • (you may need a sanding block or sandpaper if your carder is a bit ruff)
  • A ruler, pen and sewing machine are also helpful.

When I made my first cover, I wanted to have something a bit softer than just the fabric cover to protect the teeth.  I found a bathroom soft scrubby pad, it said polyurethane foam covered by a “new” microfiber top. They were available at Walmart and then Dollarama, so picked a few up. Silly me I did not reserve all I had purchased for the hand carder protection as planned but used some for their original purpose of cleaning!!! they were available for about 3 years and then mysteriously disappeared from both my sources. They were replaced by a much larger, but similar, product called a “microfiber dish drying mat”. Its tag says Polyurothatin foam and 100% polyester cover. It is very much like the original pad but huge at 15” X19.5”! (I  could cover a large drum carder rather than just small hand cards with it!  ….HUM………NO! NO! That will have to be a later project!!) Luckily it is easy to cut to the correct size to fit the little carders with my cheap paper scissors. Ok, now I have the foam pads to protect the teeth.

For my newest set of carders, because the end grain is ruff, I will also need a sanding block to smooth it and prevent splinters. (Splinters are never good, they wind up in either your fingers or the wool.) I found a two-pack of foam sanding blocks at Dollarama. The local hardware store will have them or some old fashion sandpaper and a block of wood. In a pinch, a foam nail file will work as sandpaper too

  8 sanding the back of the hand carder taking out chips at edges ad little scratches and punctures8 sanding the back of the hand carder taking out chips at the edges and little scratches and punctures

half the hand carder handle is sanded the other half is still ruff 9 half the handle is sanded(lower half)

working at smothing the end grain of the carder, the wood is likly a soft pine10 working at smoothing the end grain

Now that I have the worst of the roughness smoothed and have pieces of foam to protect the teeth. now I can get the fabric and measure it out to make the covers.  The overall pattern is simply, a rectangle with long tabs attached at one end.  Depending on the shape of the fabric you have, changes where you will put your seams.  If you don’t have much of the fabric you like (say one with sheep), you can use a different fabric on the inside. luckily I have just enough!!

To make the cover closure you have a few options, sew-on Velcro is easy to use and seems to be common.  If you haven’t quite got around to sewing on the Velcro, you can try what I have been using  “Stretch utility straps” (elastic with Velcro on the ends.)I wrap the elastic over the tabs and connect the velcro to hold it closed.  I remember seeing closers made from ties, and even buttons, but I like the Velcro and strap closer the best.

Shark Boy has offered to help show you the old carder cover so we can make a pattern.

11 Sharkboy volunteers (his parents are cuddling in their project bag)11 Sharkboy volunteers (his parents are cuddling in their project bag so he offered to help)

This slideshow requires JavaScript.

12-21 Shark boy removing the cover and foam pads off my old carders

Now that Sharkboy has opened the carder cover,  we can look at the shape and make measurements.

This slideshow requires JavaScript.

22-28 measuring the original carder cover

29 size I am going with yours may be a bit different depending on your carders size29 This is the size I am going with, yours may be a bit different depending on your carders size

We should also notice you have three main options as to how you orient your carders for storage.  (the variations are more dramatic when viewing the curved cards than the flat ones but it’s still worth considering the options available for both styles.)

30 teeth to teeth (the handles now spread away from eachother)30 teeth to teeth

Option 1 stored teeth together – this leaves the teeth inter-meshing, while it may keep the teeth from snagging on any nearby object it is not great for the teeth. It also causes the handles to point outward if you have a curvature to the paddle part of the carders. This is the way most naked carders are stored.

31 Back to back/ teeth out (the teeth face out and are unprotected, the handles tuch at the end but dont ballance well on eachother)31 Back to back/ teeth out

Option 2 stored teeth out – this is a bit silly (but it is a possibility even if it’s silly), it will put the teeth in contact with anything in the vicinity (including your fingers) and give the carding cloth surface no protection. The only advantage is that the handles don’t stick out oddly. (I am trying to be positive.)

like the 3 bears looking for the perfect bed, this brings us to the final configuration.

 32 teeth to back (the handle fit together, so dose the curvature of the carder back. but teeth will be pressiung into the back of one carder) 32 teeth to back

Option 3 stored teeth in the same orientation – Since one carder sits above the other, this would cause the teeth to be stored against the back of the upper carder. Ah, this is where the foam pad comes in. There were masks on the backs of the new second-hand carders which suggested this was one of the ways they had been positioned. This orientation also alines the handles which makes them fit easily into a bag or basket when they need to travel.

Now let’s make the pattern.  There are two main rectangular shapes for carders; a shorter rectangle for wool carders and a longer rectangle for cotton carders. I have now seen “Student” carders which are smaller than the standard wool carders. Both shapes of carder require a very simple pattern so just adjust it to fit your size. If you are not trusting of numbers you can make a pattern using a couple taped together pieces of paper to check the fit.

I had been over at Walmart looking in their craft/sewing department. There was a selection of precut “quilting squares”, which were actually rectangles, that I looked through. They were not the finest of thread counts but they had 3 patterns with sheep, the odd cat/alpacas and one with mice.  The size works out to approximately 16” wide by about 20.5” long, close enough to what I had used last time!!  this is not like sewing an Elizabethan corset so if your fabric is a bit shorter in length it will still work, but with shorter tabs.  As long as you have fabric adequate to cover the width and enough length to wrap around the carders with their foam spacers protecting the teeth, the extra will be the tab length.  Two of my older carders have lived with a stretchy elastic with velcro and the foam pads for many years (they’re the ones that don’t get out much!) so you can fudge it if you are a bit tight on your favourite fabric.

Your other option is to make the cover out of 2 different fabrics if you’re short. This could be a fashion statement, flipping whichever side out that seems to fit your outfit that demo.

Let’s get sewing

 33 End and side seem in, laing the old cover over the new fabric for locating tab length 33 End and side seem in, locating tab length

Since I am folding on the long side, I will have a seam at the end and down the opposite side. (seam is on the left short side and at the top long side)

34 Making wider tab ends34 Making wider tab ends

35 Marked in pen on backside of fabric to sew in tabs35 marked for sewing

This time I wanted to try a wider end tab to give a bit more protection for the carder. I found the center on the unsewn end and estimated the seam placement.  I used the edge of the pressure foot to give a thin seam allowance. Remember to leave the center area between the tabs open so you can turn the cover inside out. (I almost didn’t on the first one! It has been a while since I have been sewing, I should practice more.)

 36 NO WRONG WAY!!! (leave the space between the tabs un-sewn) i put the presherfoot down in the rong spot! 36 NO WRONG WAY!!! (leave the space between the tabs un-sewn)

37 extra wide seem allowance along open section, about 1 inch with a diagonal cut into both corners

Trim the area between the tabs to about 1 inch from the end of the sewing line. clip back to the corner  (see the pictures). The flaps will get turned into the opening and the nail pressed down after the cover is turned inside out.

38 turn out body of carder through opening left between tabs38 Turn out the body of the carder through the opening left between tabs

39 turning out tabs39 turning out tabs

Turn the body out through the open space then turn each tab right side out.  Tuck in the extra wide seam allowance at the opening. If your iron is not handy you can nail-press the opening.

40 turn out corners with chopstick

Lastly, take a rounded-end chopstick and get the corners poked out. There are more expensive tools for sewers to get into corners but this works and was in with the felting tools.

The elastic straps with Velcro

41 Sharkboy shows you the two different lengths of velcro (short and long)41 Sharkboy shows you the two different lengths of velcro (short and long)

The elastic straps at Dollarama come in two sizes which are not always the same length. pick one that is not too tight and compressing the foam covers but not so loose it won’t hold the carder cover on. (I know that was obvious but some really are quite different small or large than the previous ones I have purchased.)

If you want to make yours extra fancy, top stitch along all the edges. You can add two strips of sew-on velcro to the tab and the main body of the cover (try it on your carder to get the best position. If you want a fashionable 2-sided carder cover I would go with the elastic and Velcro arrangement my first cover has. (so you can turn it either side up)

For odd-size carders, you need to add teeth protection and stack them as you would like to store them. measure the distance from the base of one handle (at the edge of the carder) going directly across the width of the carder down to the underneath carder, across it stopping when you reach the other handle base. Call that X. Now decide how long you would like your tabs (t). X+T+ seam allowance= the long side of your rectangle. The width plus seam allowance x 2 is your other dimension. When in drought just use a string with knots or make a mock-up in paper. (I have found numbers can be just as tricky as letters!)

I do hope this is somewhat clearer than mud! If you decide that this is all too much work or you can’t remember where you put your sewing machine or your hand sewing needles there are a number of people selling premade covers on etsey.

Lastly, Sharkboy got all the new covers on the carders and staked them up for me. He has been working very hard and needs a treat to reward him.

Sharkboy is trying to stack the carders he has wraped 43 he is determand to get the 4 newly covered carders neatly gathered

42-43 Sharkboy is determined to organize the newly covered carders

This weekend (back willing) Mrs. Mer and her son Sharkboy will be going to a fibre festival south of Ottawa in search of hair. I will let you know how all our shopping goes.

Sharkboy says goodnight he is standing on his tail-fin and leaning on a carder he has been trying to move.44 Sharkboy has had a busy day helping with this project and says goodnight

the local Gaming/Felting Convention is back – blending skin tones for Mrs. Mer

the local Gaming/Felting Convention is back – blending skin tones for Mrs. Mer

A break from all the felting machines!

We had a great day on Easter Monday testing out the felting machines. We added Ann’s new purple one from Georgia to the mix.  But since we have had non-stop machine chatting I think we need a break from the sound of needles impaling wool at high velocities. So why don’t you join me for a day trip out to the Kanata Games Club one day spring Gaming (and felting) convention?  Mr. and Mrs. Mer came with me, in hope of adding more detail and some skin tone to Mrs. Mer.


The Kanata Games Club used the same Church as before. It’s built on a hill and has two large halls one on the lower level with big windows. This time they were only in the upper hall since this is the first big gaming event since the pandemic restrictions. We all wore masks (the church is still masking) except the Mer’s who didn’t have masks of the correct size. I may have to make them some. Or maybe their fishy-er parts keep them immune. Can fish get covid? (better not think about that or I will never get to tell you about the day.)

We arrived and as soon as I was settled, he quickly wandered off to one of the big tables. The big round tables were full of people with brightly coloured games with many interesting little pieces.  I found one of the smaller unoccupied tables by one of the windows.

1) Shortly after 9 am, I was happily left at a rectangular table with a Tim Hortons bagel and my felting supplies in a small clear plastic box. Mrs. Mer is reclining with bits hand blended skin tone.

I got comfortable for a nice long day of felting!

2) Mr Mer was there to supervise and cheer on the gaming. Mr Mer leans ageist a blue bag on the table in front are the small wool pad, the wrong beige, my phone and audio book, and my small clear plastic box of tools.2) Mr. Mer was there to supervise and cheer on the gaming. Mr. Mer leans ageist a blue bag on the table in front are the small wool pad, the wrong beige, my phone and audiobook, and my small clear plastic box of tools.

It quickly became apparent that while I had packed almost everything I needed, there were two small problems.  I realized I had brought a slightly different shade of base tone for her skin tone. Well, That can be fixed with a bit of extra blending.  The second problem resulted from the ongoing rebuilding of my office into a fibre studio, which is messing with my ability to know where everything is (specifically my mini carders AKA small pet brushes have disappeared)!!!  Oh well, I can blend a bit of this nice yellowy-ness with this tiny bit of raspberry red to the new base tone and that should be just about right. Without carders, I was blending tiny bits by hand which is slow when you are both sculpting more detail and putting on a colour layer. I am not a fast felter, I like to putter, consider, add a bit more wool, and eventually decide whatever I am making is complete.  But hand-carding all that I wanted to work on today would be a bit slow even for me!

3) Skin tone base colour from blending white (re-carded world of wool core wool), beige and amber Coriodale  and a bit of red I think may be merino.3) Skin tone base colour from blending white (re-carded world of wool core wool), beige and amber Coriodale,  and a bit of red I think maybe merino.

4) Not fully homogenous blends one with a stronger white and one with a stronger beige under tone.4) Not fully homogenous blends one with a stronger white and one with a stronger beige undertone.

I spent a long time hand-blending bits of skin tone for Mrs. Mer. I used white, beige, amber and raspberry tones. The world is not made up of flat uniform colours, so not blending to a uniform colour will provide a more natural looking tone. Today I wanted to improve Mrs. Mer’s head shape and extend her skin tone.

Hubby came to check on me at the end of his first game and I explained the lack of carders. Luckily the Dollarama was just a bit farther up the hill at the closest mall, a bit far to walk, (there was still snow) but a very fast drive.  He returned with a set of carders (pet brushes), a plug to charge my phone (it was dead again….) a couple of drinks and some candy(that will keep me felting!!).

5)  Dollarama $4.00 carders (pet brush) with safety tips.5)  Dollarama $4.00 carders (pet brush) with safety tips.

Recently at one of the local guilds socials, one of the pet brushes was being used to tease out the ends of locks. This is sometimes called flick carding. (Bernadette can show you how to properly flick card some time if you are at a social). The locks were not very long and there seemed to be a lot of poking of fingers as well as combing of fibre.  The Carders/pet brushes, that I had just been given, have little white plastic tips on each wire, safety tips!!! The packaging says the covered tips are to protect the delicate skin of your pet, while it also makes it much safer for your fingers if you are flick carding locks.

Like full-size wool carders, these pet brushes have little wires embedded into a backing.  some carders have wires that are quite stiff and some are more flexible. The same applies to pet brushes.  For comparison Cotton carders (like the name implies are used with cotton which has a very short staple length compared to wool) have shorter more closely spaced wires and tend to be longer rectangular shapes than wool carders.

If you buy two of the little pet brushes you can use them exactly like you would a set of wool carders. It takes a bit of practice to get the movement of the carders to blend and mix the fibres but it’s worth the practice.

6-7) Close up of teeth on the comb. note the bend about 2/3rds up the wire 6-7) Close up of teeth on the comb. note the bend about 2/3rds up the wire6-7) Close-up of teeth on the comb. note the bend about 2/3rds up the wire

You can see that one wire has lost its safety tip. it may have been missing when I took it out of the package and I just didn’t notice. I did not seem to lose any others while carding. I have heard of small pet brushes that had longer wires and larger safety tips that can come loose and disappear into the wool. So far this brand seems to not have that problem. (it will be worth keeping an eye on these to see if the tips stay attached over time.)

starting to blend first blend with constituent colours in background a darker blend with Mrs Mer in the background the two blends showing the lighter and darker vertions8-11) Examples of blending fibre to create skin colours

It’s nice to have a pallet of blended colours pre-made to pick from when you’re adding the top layer of colour. I am also doing a bit more detailed sculpture of her head and neck so a general mid-tone is also helpful.

12) MRS Mer laying on her back, double needles working along angle of the jaw (Mandible)12) MRS Mer laying on her back, double needles working along angle of the jaw (Mandible)

13) New muscle development below the oxiput and above upper traps.13) New muscle development below the occiput and above upper traps.

As with Mr. Mer, I was concerned with her ability to see where she was going when swimming. Unlike a full fish whose eyes would be looking forward and to the sides, her eyes in anatomical position would be looking at whatever is below her as she swam. This could allow for painfully swimming into things or being attacked by a bigger fish that she didn’t see coming. To alleviate this anatomical problem of blending fish and human anatomy I added an extra muscle on top of the upper traps to help her hold up her head for prolonged swimming. I will also beef up her erector spini in the back so she can also tip her torso up to reduce potential neck stain. The things you have to consider when felting are just amazing!!!

I worked along the underjaw and corrected some of the asymmetries in her skull.

14) attachment of SCM mucle scluping along jaw and adding skin colour.14) attachment of SCM (Sternocleidomastoid) muscle, sculpting along the jaw and adding skin colour.

15) gaming tables with people playing board games

The gaming continued around us, with players switching tables as one game ended and a new one began.  A few came over to see what I was working on, but most have seen me at previous felting/gaming events. Someday I am sure I will get to share my table with another felter!!

I took a break from her head and neck and worked a bit down her arms and started adding a bit of skin tone on one of her hands.

16) Mrs Mer through her arm into the air while trying to stay modest and warm with the other arm/hand (I need to make her a shirt soon)16) Mrs. Mer through her arm into the air while trying to stay modest and warm with the other arm/hand (I need to make her a shirt soon)

17) Mrs Mer’s waves goodby as its time to pack up.17) Mrs. Mer waves goodbye as it’s time to pack up.

I was in the middle of working on Mrs. Mer’s hand when Glenn’s last game ended.  So it was time to pack up after about 9 hours of fun felting. We both had lots of fun and hope there will be another Felting ….errr …. Gaming convention soon!

If you do a lot of 2D or 3D needle felting and enjoy working with blended colour you may find one of the types of carders handy. Depending on how much fibre you need to blend at a time will give you an idea of which type of carder may be best for you. (carders give you a woollen preparation for spinning while combs give you a worsted preparation)

Here is a quick reference chart showing the amount of fibre needed and tool options to achieve that amount.

Amount of fibre Tools to consider Notes, Pros/Cons
Smaller than a handful Hand blending -(if the staple length is longer than you want you can tare it or use scissors to shorten it)

Pros: free!, quick and easy to do for small amounts

Cons: can stress wrists and fingers pulling fibre apart as you blend it.

A Handful or a couple of handfuls Pet brushes used like wool mini-carders -like mini carders quality varies by manufacture. Some teeth are very stiff some are very flexible.

Pros: cost $2.50 to 10.00 each (cheap)

Cons: some are not well made and don’t hold up to stronger wools or heavy use.

A double handful Wool carders -designed to work with wool. Comes in various teeth counts (fine/Medium/course).

Pros: You can sometimes find a set secondhand from spinners.

Cons: new hand cards can be pricey but not as pricey as a drum carder.New Around $100.00 Canadian with shipping.

A larger amount (a batt) Drum carder -designed to work with wool. Comes in various teeth counts (fine/Medium/course).

Pros: can create larger amounts of blended fibre than a hand carder.reasonably easy to use,

Cons: a bit harder to clean for some. Even second-hand 150.00 to 350.00, new; high 200s to much more for larger or electric versions. The smaller ones are moveable/ sort of portable. The bigger ones are better left in a work area)


18) 3 full size hand carders, pet brush carders (my real mini carders will turn up as I keep shuffeling things) and small combs; a set of Rodger Hockins and one bee decapping comb in the interm location in my ofice/studio18) 3  full-size hand carders, pet brush carders (my real mini carders will turn up as I keep shuffling things) and small combs; a set of Rodger Hockins and one bee de-capping comb in the interim location in my office/studio

If you do a lot of 2D or 3D needle felting and enjoy working with blended colour you may find one of the types of carders handy. Depending on how much fibre you need to blend at a time will give you an idea of which type of carder may be best for you.