Browsed by
Author: zedster66

Clasps, Closures and Fasteners

Clasps, Closures and Fasteners

You might remember my post a few weeks ago about sorting and using felt scraps, and the notebook cover I made with offcuts. Well, as much as I liked the button closure, I wanted something a little more secure. I had a hunt through my craft drawers and found a bag clip I’d salvaged from something I threw away (I recently discovered these are called Delrin Clips) and using some more felt offcuts, attached this instead of the button.

OLYMPUS DIGITAL CAMERA
One of my WIPs at the moment is a small shoulder bag, just big enough for a camera and purse. The closure I’ve used on this is a metal magnetic bag clasp. They’re quite easy to use: each half comes in two parts, you need to make a small cut in the fabric, push the metal ‘prongs’ through, then add the little washer and fold the prongs in. I haven’t decided yet whether to cover the top with more felt or maybe a large fimo button.

4 pics together
This got me thinking about all the different kinds of claps, closures and fasteners I have. I have the usual buttons, zips, poppers/snap fasteners, hooks and eyes etc, but I also like to salvage and collect any I find cheap. Not so long ago, I saw cheap packs of dog and cat collars and leads in Poundland (like a dollar store) and couldn’t resist buying a pack, which gave me a few Delrin clips and Trigger Hooks.

OLYMPUS DIGITAL CAMERA
These Delrin clips were either bought or salvaged from old bags. The small ones are slightly different, they take a cord type of attachment rather than a flat webbing or ribbon type of fixture.

OLYMPUS DIGITAL CAMERA
Most of the Delrin clips I have do take a flatter attachment though, so I just had to buy some nice braid for attaching them 🙂

OLYMPUS DIGITAL CAMERA
I’ve managed to add to my collection of fasteners while I’ve been doing a lot of clearing out and tidying up lately. I salvaged quite a few lobster style trigger hooks, D-rings, split rings and key rings from old or broken or unwanted items.

OLYMPUS DIGITAL CAMERA
Do you have any interesting clasps, closures or attachments? Do you have any tips for salvaging or buying them cheaply? We’d love to hear your ideas 🙂

Batch Editing Photos

Batch Editing Photos

One thing that a lot of us who share photos on the internet have in common, is that we can spend hours editing them. Almost every time I do a blog post, I have around 5 or 6 photos that I need to crop and shrink so they aren’t too big when they’re clicked on, and so they don’t take up all the storage memory.
A lot of the photo editing programs have ‘Batch Editing’, this allows you to open multiple photos and edit them all in exactly the same way very simply with just a few clicks, so you’re not having to sit there and manually alter every single one. It really saves a lot of time and effort. It is particularly useful if you have to shrink a lot of photos or have a batch that all need brightening up, or maybe you want to add a signature or apply an effect to create an abstract design….I found this really useful when working on photos for Ann’s abstract challenge a few months ago.


I’ve written a tutorial showing how to use the Batch Editing feature on Photoshop. I’ve only ever used Photoshop, so I can’t be sure that other programs do it the same way, but this should give you a good idea of what to look for on other programs. I’ve used shrinking as the example on the tutorial, because this is one I use most often. I know a lot of people like to add signatures or watermarks to their photos, batch editing is really good for this as long as you want the text to be exactly the same on each photo.

It’s always a good idea to have a practice first before recording an Action for batch editing. I usually keep notes for each effect applied, type size, or what the brightness and contrast levels were etc, then it’s easier to recreate. One thing that is important to point out, for certain effects, alterations or filters, for the results to be exactly the same, the resolution of the photos must be the same as each other and as the photo you originally worked out the Action on. If not, you could end up with type of different sizes for example.

I hope you find it useful and if you have any ideas for other tutorials, please let us know 🙂

PDF Tutorial: Batch Editing in Photoshop

Suggestions Please

Suggestions Please

I haven’t had much free time to felt or make things lately, but making the collage notebook cover made me realise I could have a sewing project on the go that I could spend 15 minutes on here and there when I feel like taking a break (instead of watching cat videos on youtube!) I still had my felt offcuts to hand so I made myself a glasses case to match the notebook. I needed a sturdy one for the glasses I keep in my bag, so they don’t get damaged by all the other useless stuff I pile in there 🙂

I got some nice fabric from Ikea a few years ago and used some to make a nice lining.

When I was sorting through my spare felt and offcuts, I came across a few pieces of felt that I made earlier in the year to use for stitching practice. You may remember a few of us said we were going to do the Take a Stitch Tuesday challenge? I did try and probably lasted about 10 weeks, but I found the instructions too hard to follow. Ruth kindly looked up videos to help us, but sometimes there wasn’t one available, so I lost interest when I was spending more time looking for understandable instructions than actually doing the stitch. So, now I have 4 spare pieces of felt and thought I would ask everyone for their suggestions what to do with them. These first two are both about 8 x 12 inches


And these two, made from all natural shades of Merino and Bluefaced Leicester are about 10 x 12 inches


I look forward to hearing your suggestions and I will post photos of what I finally decide to do with them 🙂

Felt and Fibre scraps

Felt and Fibre scraps

I thought it was time I tidied out my felt and wool scraps as the boxes and bags they were in were getting too full. I know it’s really geeky to categorise scraps but whenever I try to find the right size pieces for a project I seem to spend more time sorting and searching than anything else. I never throw anything felt, fabric or fibre away, everything is good for something. This is from my bag of scraps that aren’t usable for anything else, so I save them for using between layers of texture felt.

Often when I’m laying out a project for felting, I end up with a few wisps of wool or fibres here and there, so I put them in a bag and keep adding until it’s full, then card them together. I get some really nice heathery blends, and they always add a lot of interest to felt with such a variety of colours and fibre blends.

Sorting out my box of big spare pieces was fairly easy, I mostly sorted it into thick, regular and cobwebby pieces. The box of smaller spare pieces took a lot longer. In the end I had about 8 or 9 separate piles: thick, regular and cobwebby pieces, and, as shown in this next photo: long wide strips; medium regular strips;  thin strips; regular short strips and really thin and short strips.

I bought some water soluble stabiliser a while ago, so hopefully I’ll find time to use the really short thin strips for making a bowl using Ruth’s tutorial. The longish thin strips are great for making into loop fasteners. I wet them with soapy water and roll between my palms until they’re felted and sew them onto my project. If the piece is long enough I can leave the ends dry, fluff them out and the loop can be felted in with the project.

Once I’d finished sorting all my pieces, I chose some to use for my project-a collage book cover. I’d make a similar one a few years ago using felt pieces and ‘invisible’ thread, but I wanted to use my fancy new machine and zig zag stitch to sew strips and pieces.

This is the front of the finished cover:

And this is the back:

What do you do with all your felt and fibrey scraps and offcuts?

Giveaway Winner

Giveaway Winner

Thanks a lot to everyone who entered the Bits and Pieces Giveaway this week, it was really nice to see all the great comments 🙂  The lucky winner is …..

Congratulations, Isabell 🙂  Please can you leave a comment on this post so I can contact you for your postal address, thanks a lot 🙂

I’ve been having a clear out lately and have spent a lot of time going through smelly dusty bags and boxes from the loft. Most of them contain 20 years of birthday and Christmas cards, clothes I’ll never wear again but can’t bear to part with or cassette tapes from around 1983-1987 🙂  But I got a really nice surprise when I opened one of the bags and discovered 5 huge silk scarves, each about 43 inches square! I think I’ll be doing some nuno felting fairly soon!

I’ve been thinking about Karen’s 4th Quarter Studio Challenge about the Weather recently which isn’t hard being British, apart from tea it’s what we think about most 🙂  I saw this cloud this morning and thought I’d take a photo to add to my collection.

I haven’t quite decided what I’ll do yet, but we often have 4 seasons in a day here, so I’m spoilt for choice 🙂

Giveaway-Bits and Pieces

Giveaway-Bits and Pieces

I thought it was time I did another Giveaway 🙂  I’ve gone through my stash of embellishment fabrics, fibres and scraps and put together a package that should give you plenty of choices for adding extras to your felt creations. These are some gorgeous metallic novelty yarns/fancy fibres. There are 5 different ones each about 3 metres long.

There are also some shorter lengths of novelty yarns in all different colours and types.

These gorgeous crinkly fibres are from another novelty yarn that I unravelled. I used a lot of them in this piece here.


There are some pieces and scraps of silk:

Organza

Gratuitous supermacro of organza 🙂

and synthetic fabrics

There is also some Cotton Noil

And some natural fibres and top, Top L-R Egyptian Cotton fibre, Crimped Viscose fibre, Bamboo Fibre. Bottom L-R: Flax, Ramie, Banana top.


If you’d like to win this fabric and fibre giveaway, simply comment on this post. I’ll announce the winner Next Sunday, 21st October. Please can the winner comment on the announcement post within 2 days so I can contact you for your postal address, thanks a lot 🙂

FORUM
Most of our readers know about our Forum, but if you don’t, it’s a community of felting and fibre artists from around the world who get together to chat and ask each other questions about anything felt, fabric or fibre related…or chat about the usual things like the weather 🙂  We love reading the comments here on the blog and visiting the blogs of anyone who posts and has a link to theirs, and it’d be nice to be able to keep in touch more and build more community links. We’re all interested in the fibre arts, so if your interests are felting, mixed media, spinning, weaving, freeform crochet or something else we need to know about, come and join us, share photos of what you’re working on, ask for advice, give help to fellow fibre artists, meet friends and have fun!

Blue and Zig Zags

Blue and Zig Zags

I made another piece of felt just for fun recently, this time using blue shades of merino wool and blue, green and purpley shades of fabrics and fibres.

I really love this part, it’s synthetic fibres from a novelty yarn, but looks like curly wool.

For the last 25 years or so, I’ve been using an old Singer sewing machine. The electrics were too dangerous, so I removed them and worked it by hand. It was slow going and gave me Popeye forearms (or ‘arm’, just the one on the right!) but it worked well enough for what I needed it for. When I started felting and the world of fibres and fabrics opened up, I started to covet other people’s fancy machines, especially ones that could do zig-zag stitch. I did occasionally think about buying myself a new one, but it seemed a bit frivolous to spend money on something just to add zig-zags to things occasionally 🙂 And then a couple of weeks ago, my Mum gave me her machine. I was worried that now I had a fancy machine I wouldn’t even be able to thread it, but it was quite easy really. I started off by practising straight stitches and trying to control the speed-I still can’t do that, it seems my foot only has two speeds, full pelt or excrutiatingly slow. But I managed to add stitching to a nuno sample I’d made. Feeling a bit more confident, I added some shapes from scrap felt, and finally used the zig-zag stitch

I’ve got a big collection of felt off cuts, so I cut a few into strips and made some bookmarks too

I know I need to practise a bit more, especially using zig-zags to do edges, but I’m not as scared of it as I was a week ago! Have you tried anything new recently?

Australia Challenge

Australia Challenge

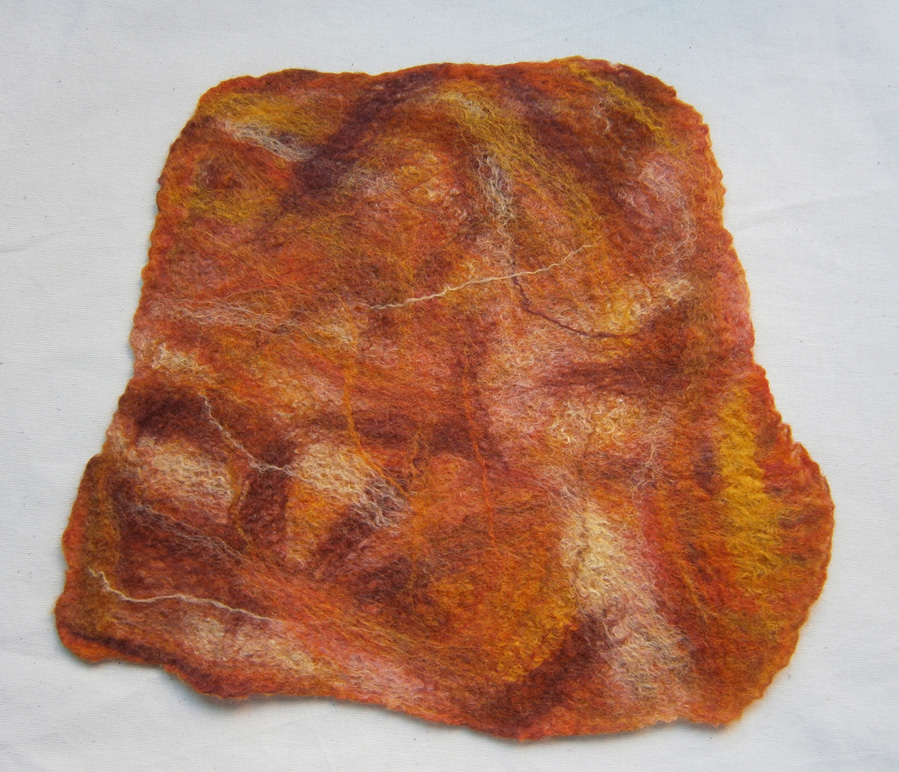
I recently spent a few days working on the Australia Challenge. There are so many gorgeous photos on flickr that it’s possible to lose quite a bit of time on there 🙂 I finally settled on a couple of photo sets from Arnhem Land and Kakadu for my inspiration. For this first piece, I was inspired by the photos with orange and red tones-the rock art, sunset, fire.

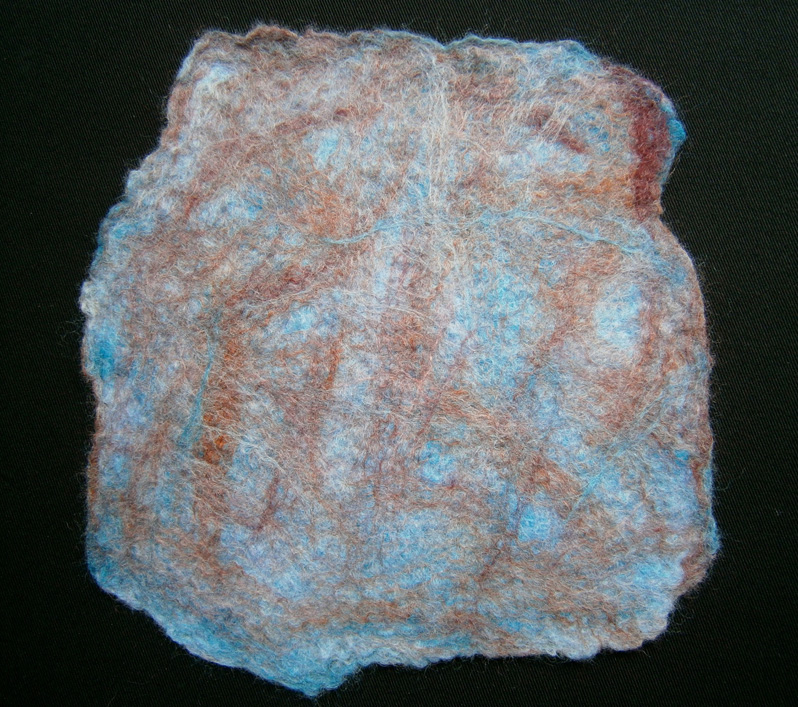
For this second piece I was inspired by a couple of photos from the Arnhem Land set with pale blue and red colours, particularly this photo of rock art.

The photographer, Jon Connell has lots of great photos from Australia on his photostream, if you get chance, do check them out.

My last piece was inspired by the Aboriginal Flag designed by artist Harold Thomas.

Harold Thomas was one of the Stolen Generations, taken from his parents at the age of 7. He won a scholarship to the South Australian School of Art and later worked at the South Australian Museum, the first aboriginal to be employed by a museum in Australia. He has been a campaigner for Aboriginal civil rights and land rights. If you don’t know about the stolen generations, Wikipedia has some information, and Doris Pilkington Garimara’s book ‘Follow The Rabbit Proof Fence’ is excellent. I should warn you that it’s heartbreaking.

Have you made anything for our Australia Challenge? If you have, we’d love to see it, join our Felting and Fiber forum or our flickr group to share it and anything else you’ve been working on. This is Lyn’s excellent piece.

Just For Fun

Just For Fun

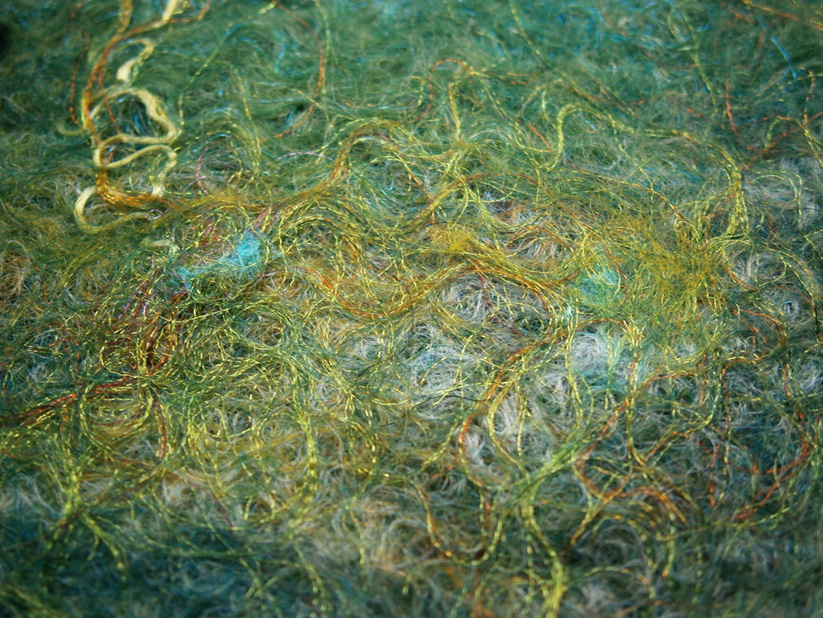
It’s been quite a while since I made a piece of felt just for the fun of it. And quite a while since I made a piece of felt without worrying about even layers, straight edges, nice corners etc 🙂  So it was a lot of fun making this piece of green felt. I got out all my greeny shades of wool, fabric and fibres and started laying it out.

I started with two plain layers of merino tops, then added a third layer of lots of different greeny shades of merino blended with fibres like plastic, viscose, silk, banana and bamboo. Then I started adding all the other fibres, fabrics and yarns. I unravelled some fancy fibres I had in green, yellow and blue shades.

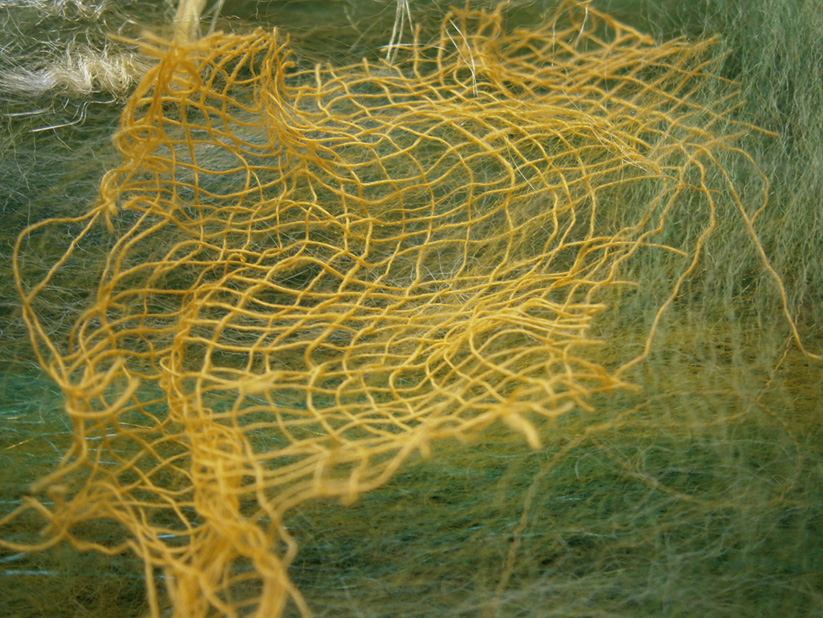
I used fabrics like organza, silk, tulle and a few shades of cotton gauze

There were a few sparkly bits

And lots of shiny bits too 🙂

What have you been working on just for fun lately?

Works In Progress

Works In Progress

I feel like I’ve been working on a production line recently, making lots of pieces of felt that will eventually be made into something. Some of the pieces were made with specific things in mind, some were just for the fun of it or to try things out. I never really enjoy making felt during the summer when it’s hot, so around about this time of year I start working through my stacks of felt, working out what I want to use them for, or having an idea and searching through to find the perfect piece. After measuring, cutting, pinning and sewing, I then have a nice pile ready to making a start on stitching and adding buttons etc.

One piece of felt that I found when I was searching through, was a sample I’d made using silk throwster’s waste, rainbow trilobal nylon and nylon fibre that I’d dyed. It wasn’t a pretty piece, but then it was only a sample 🙂 The first piece I started to make out of it is a pouch just the right size for holding a pack of cards, small notepad and a pencil-perfect for train journeys with young kids. There’s silk throwster’s waste on the left and dyed nylon on the right.

The second piece I started to make is a camera case. This has silk fibres at the top and rainbow trilobal nylon at the bottom.

Both the camera case and card pouch are lined with cotton fabrics. The 3rd piece is a pouch for earbuds. The front has trilobal nylon and the back has silk fibres. All 3 of these pieces have a loop of elastic on the top for using with a button to keep them closed.

These next two pieces are a camera case and an ipod case, made from a nuno felted piece using muslin. I added machine stitching in an uneven zig-zag pattern to the felt for the camera case, just for a little extra thickness. I’d made this for my new camera, but I’m torn between this and the one above. These pieces are the only ones I’ve finished with blanket stitches so far.

These last two pieces are coin pouches. I first made one of these a couple of years ago because I was tired of reaching into my back pocket and trying to find coins, but getting a handful of keys instead.

Now all I have to do is find a few films to watch while I get started on blanket stitching the edges of all of these! Do you have a particular way of working? Do you like to streamline your process, work on a few items at once or maybe complete a project before starting another one?