Browsed by
Category: Guest Artists

The magic of blocking your hand knits

The magic of blocking your hand knits

Hello, Leonor here guest-writing for this week’s post.

After reading the title, if you’re not a knitter, you’re probably wondering what I’m talking about. What on earth is blocking and why am I writing about it?

Simply put, blocking refers to the act of stretching a knitted item with the aid of specialised wires and pins, with the intention of making it look a certain way. Think of all those airy, lacy shawls you’ve seen people wear – those have been carefully and mercilessly blocked into submission.

leonor1leonor2

Above is my latest project, the Banana Leaf Shawl. It looks nice-ish, but it lacks that finesse that one usually finds in store-bought shawls. The stitches look limp and you can see the differences in my gauge. Let’s make it right.

Firstly, soak the item in room-temperature water (add a nice wool wash if you want; I used Eucalan, a no-rinse Grapefruit-scented one). Let it sit for about 15 minutes and then carefully extract the excess water. Your knit needs to be damp but not dripping.

leonor3

Now comes the fiddly part. Using blocking wires, you’ll need to catch the edges of your project so it’ll keep the shape you want (in my case, everything’s a straight line, but it can be crescent-shaped, for example).
I decided to do this just before going to bed, thinking it wouldn’t take me long – how wrong I was. After one hour, I was losing the will to live. I’d need another hour to finish getting the wire through all the edges.

Next, you’ll need to pin the wires to a surface. There are special fancy mats you can buy for that, but I got some for home gyms that are a fraction of the price and do the job nicely.

leonor4

Because I have cats, I couldn’t risk them getting hurt on the blocking pins, so I had to move my blocks vertically for the night. I then used my desk chair to keep everything upright.

Once your finished object is dry, you can take the pins out and because fibre has memory (like the mohair and silk of this shawl), it’ll keep its shape… until you wash it again. Yes, blocking needs redoing every time a knit gets wet! Don’t you have a newfound respect for all the people who knit delicate lacy shawls?

leonor5

And here’s the finished product. I hope you can see how different my Banana Leaf now looks, comparing it to the first photo – from a slightly misshapen piece to one with sharp, well-defined edges. It’s grown quite a bit, too.

leonor6

leonor7

The stitches look so much better, too, neater. They’re suddenly really well defined. This shawl now looks like something one would see in a shop front, if I do say so myself.

leonor8

Even if you’re not a knitter, I hope you’ve marvelled, like I do every time, over the magic of blocking knitwear. If you fancy reading the technical bits about this particular project, head on over to my Ravelry page.

Have you ever done blocking? Can you think of any ways this technique could be used for other fibre endeavours? I’d love to read (and steal) your good ideas.

Adventurous Colour

Adventurous Colour

I was fortunate enough to spend last weekend  drawing in the beautiful landscapes around West Dean with Mark Cazalet. He was an excellent tutor and the sun shone for us every day.

I signed up for this course hoping to come away using colour in a more considered way and Mark did not disappoint. He set us a number of exercises over the 3 days including using cool colours on warm grounds (papers) and vice versa, exploring the effects of black versus cream grounds and seeing the colours around us in a much less literal way.

The first drawing was made in the gardens, Mark suggested I redraw it from my original drawing without looking at the source.

It is interesting how the colours are so much more vibrant…

This one was a 10 minute sketch, playing with different colours to give and impression of depth, light and shade, the dark blue paper really made the yellows “pop”:


This drawing was exploring the combination of warm and cool colours together on a neutral ground:

enchanted forest.JPG

I had 10 minutes before we were expected to pack up and return to the studio so I did this one just for fun:

We were asked to create some sketches of abstract forms  from what we saw in the gardens, from those I repeated the same design several times on different coloured grounds, it is curious how the colour of the paper has such a an impact on the feel and tone of the drawing.


These last two drawings are my least favourite but it was an interesting exercise, the first was warm colours on a cool ground:

And cool colours on a warm ground:

Soft pastels on paper are a good media for exploring ideas you would like to develop in felt, the colour of the paper influences the colour of the pastels much like laying different coloured wools do, the colours mingle as the felt is fulled.

Now it is back to work for me! Enrolment for the new online felted bag class closes on the 22nd and the class starts in earnest on the 25th, I am still doing the final edits on the tutorials while trying to prepare for the Surrey Open Studios event beginning on June 2nd it is going to be a busy few weeks but both are projects I am really excited to be taking part in, if you would like to join in the fun please follow these links:

Felted bags online class: link

Surrey Open Studios: link


Tyvek Brooches

Tyvek Brooches

Later this month I will exhibiting at an arts and crafts event at the Baumber Walled Gardens near Horncastle so I’ve been making various small items, including these Tyvek Brooches, for the sales table.  Since it’s invention by DuPont, Tyvek has found uses in a huge range of situations. The fact that it is much stronger than paper and many fabrics, as well as totally waterproof, has led to it being used as a replacement for these materials in many applications.  It is widely used in the construction industry but you may be more familiar with seeing it used as packaging, FedEx envelopes are made from Tyvek paper.  If you don’t have the envelopes you can buy packs of Tyvek quite cheaply from Amazon.

Tyvek paper is extremely strong and durable and great for creative crafts as it can be easily cut, coloured using any paint medium, heat distressed with an iron and stitched by machine or hand.

I made my first brooch using this material when I was looking for a contrasting texture to use with my wet felted collars.

To make a brooch I normally cut out a piece of painted Tyvek in an oval shape approximately 4” x 3” and lay it between two pieces of tracing paper.  You can use baking parchment or copier paper but I find I get a clearer picture of what’s happening to the Tyvek when I use the tracing paper.  Once it starts to react to the heat things happen very quickly!

With the iron on its hottest setting I hover over the Tyvek, just touching the paper but with absolutely no pressure on it.  The heat causes the paper to shrink creating bubbles on the underside and ridges on the top side.

Bubble side

When the paper is peeled back you will find that it has stuck a little but it cools down quickly and can easily be peeled off.

Ridges are created on the top side
The underside of the Tyvek bubbles to create a pebble effect

The next step is to cut out a piece of felt slightly smaller than the brooch and attach it to the back using a hot glue gun.  This allows me to add the hand stitched knots

Another piece of felt is cut out and has a brooch back sewn onto it before being stuck in place, again using the glue gun.

I love the fact that each brooch is totally unique as this method of working means that non of the designs could ever be repeated. My only problem is letting them go as I love them all!

Making Socks from Start to Finish

Making Socks from Start to Finish

Our guest artist is Leonor  from Felt Buddies who is sharing a special sock story and process.

Today I’m sharing with you some sock making, from the dye pot to the finished product.

A few months ago, I got a new tattoo from my husband’s co-worker Jim (if you’re guessing my other half tattoos for a living, you’re guessing right). In exchange for his work, Jim asked me to knit him a pair of socks – he’d seen me knit whilst in the studio and was fascinated by the concept of having a garment made especially for someone. I happily obliged!

Because I own my own fibre business, I have a lot of sock yarn available to dye at my pleasure. After talking to Jim about his colour preferences, I got to work. I loved that he asked me for three of my favourite things in socks:

  • Mismatched colours with contrasting heels and toes;
  • Bright colours (you can’t get brighter than magenta and purple!)
  • Socks that glow under UV light.

I had some yarn I was keeping for a special occasion and this was the perfect time to use it. It’s a very soft alpaca/merino/nylon blend.

For some reason, at the time I thought it was a good idea to break down the yarn into four pieces – two for the main body, two for the heels and toes. I’ve no idea why I did this, since I was only using two colours, but hey. I simply weighed the skein and took out 15 grams for each foot to make the smaller parts.

I then soaked the fibre in some water and synthrapol in preparation for dyeing. Synthrapol is a wetting agent and helps the wool absorb more dye. It’s also excellent to rinse out fibres.

After the yarn was thoroughly wet, I made my dye stock using professional-grade acid dyes and to the pots I went.

After adding the colour to the water, I placed one little skein and one big one in the pot and let the fibre sit for a few minutes without any heat. Because this yarn isn’t treated to be superwash (non-felting), the dye takes longer to penetrate the fibre, so I wanted to give it some time to get to every bit of wool.

I then turned the heat on and once the water started simmering, let it be for about 10 minutes, turned it off and let the wool cool completely in the pot. This allows for the remaining dye to be soaked up, and also makes for a brighter finished colour work.


In order to turn my skein of yarn into a ball, I used an umbrella swift (pictured above, on the left) to hold the fibre whilst I pulled it onto a skein winder (above right) to make a neat ball. I have all the cool gadgets!

Once the yarn was dyed, washed, rinsed and dry, it was time for knitting. I had made an impression of Jim’s foot beforehand and used it as my template to make sure they’d fit. If you’re curious, this is a technique taught in a pattern called Fish Lips Kiss Heel that makes for fail-safe sock fitting (and heel-making). It’s available on Ravelry at a very low price and I highly recommend it.

And here’s the finished socks! I still had to weave in the ends in this picture, but I’m happy to report that’s been done since and I have presented this squishy pair to a very enthusiastic Jim.

Now, for a fun little extra: I asked for a photo of him wearing the socks for my social media. Be careful what you wish for! Jim took the picture, alright – he got down to his underwear and struck a hilarious sexy pose for me. If a bit of skin doesn’t offend you and you like a good laugh, hop on to my Instagram @feltbuddies and look for yourself. There’s a black and white photo with a disclaimer about the partial nudity, and after you swipe there’s Jim happily wearing my socks… J


Thanks Leonor!  If you’d like to follow more of her fiber adventures,  you can see her work here:  https://www.feltbuddies.co.uk/


Polar bear for the 150th Anniversary Art show

Polar bear for the 150th Anniversary Art show

Another exiting felting post by Jan Scott

This is the Guilds display for the 2017 Ottawa Valley Farm Show in March of 2017. Lynda is hiding behind her loom, Ann is about to spend the day making felted beads with the kids, and Merilyn is spinning beside the empty chair where I was working. We do put on an interesting demo!

The Farm show is a huge display of farm equipment, seeds, antique display, farm oriented venders, trappers, government department’s booths, the wool growers co-op, and various breed and rare breed associations. It is really a huge event drawing people not only form the Ottawa Valley but the rest of eastern Ontario. It’s always early March so weather can be an issue. We had a blizzard the second day of the show.

I was getting lots of interest in the pieces I had already completed for the 150th Art Show.
It was time to start the next project. So before the demo it was time to decide what to do next. After much debate between Moose bison and polar Bear I decided to continue with the arctic theme.

By now you are likely starting to guess my working process. So yes it was back to the internet to find reference photos and work out a composition likely from a composite of pictures. Working with a square is a lot more challenging. The eye naturally is drawn to shapes that feel comfortable, shapes that follow the golden mean or Fibonacci to figure out stripe progressions (Rectangles). Shape that have proportions you find in nature. Squares are definitely more of a challenge. But I’m use to a good challenge, you should see my un-spell-checked spelling!

So the quest was on find an image I could made square. but not be too static. So either intensity or dynamic composition was what I was looking for. So find images that cought my eye, then crop to square.

As I perused the inspirational options I thought about the talk Robert Bateman had given at Halliburton last summer. He spent some time discussing some of his earlier work mentioning his frustration painting a polar bear in a snow storm then the next painting was a black timber wolf at night in a dark forest. He had mentioned that white wasn’t just white. So to look carefully and not assume you know your subject just because it’s “white”.

This slideshow requires JavaScript.

Some images were very interesting but just didn’t want to be square.

Then I spotted this one. The intensity of the look was amazing. The shapes were simple but if I could get the eyes it would work really well. The image dew you in, there was such contemplation and stillness. It was like looking a momentary paws in the action. I liked it! Ok I had my inspiration.

Day one demo
I brought my large foam pad, core wool (Rideau Arcott), and various shades of white grey browns yellow red and blue. (I as optimistic but didn’t think I would get the understructure done in one day.) I got dropped off around 7ish, parking can be very crowded so it was better to get there unusually early and I could set up and get started. Glenn had over time so it was a late pick up as well so I was there for over 12 hours. I got a lot done.

I had premade my background felt layer at home using my wicked 10 needles in a row tool. It was again impressive how well it worked on flat felting.

For the understructure I mostly worked upside down to help get the general proportions correct. I could have made a graph over the photo to make a more exact copy but I wanted the photo to be more an inspiration than an exact likeness.

I was explaining the backing layer that the understructure would be attached to.

I got a lot of “what are you making” in the morning, then by afternoon it was “is that a dog?”
Most said they would come back later to see what I had accomplished on their way out.

A couple more quick shots of the demo in progress before we go on to day 2.

This is a very cool loom from around the 1970’s. It was fascinating to see it working.

Ann had a lot of help making felted beads using pencils. She is really amazing!!

Merylin was busy spinning some of her Sheep’s wool she had dyed herself. She has a beautiful painted wheel.

Day 2 demoing
I had booked off 2 of the 3 days of the demo. So again I got there unreasonably early, got help to get the display set up again.

Today we had Gord with one of his great wheels (he has several)

I had the understructure to my liking and started working from the top down
Amada was spinning on her Hitchhiker wheel. She dose amazing natural dyeing some of which was on display.


As you can see in the foreground of the picture I had progressed to adding colour to my under structure. By the time I hit the eyebrows I was starting to get comments of “is that a polar Bear?”
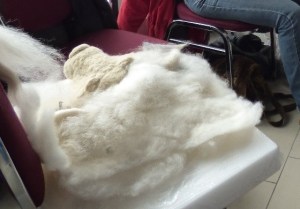
I chose blue face Lester since my memories of my Grandmothers Polar Bear rug is still vivid in my memory. Since I think the last time I slept on it was over 40 years ago it really did make an impression. It had a yellow tint to the white fur, the fur was stiff but not really course. It was smooth if you patted it in the direction the fur grew. It was a wonderful polar bear I don’t know what happened to it. I hope it is still being loved by small children sleeping on it.

This is the progress at about Âľ of the way through day 2. I was definitely felting faster on this one.

Day 3 of the Farm show demo.
I had a short day of work so rushed back for the final day of the demo. We had a pretty full demo team and the weather was a bit better than the previous days’ blizzard.

Laurie and Julie are Weaving, Merylin was spinning and I was still felting.

I got a lot more of the face done. But it was slow going due to hand blending each section I was working on. I was still finding the hand blending less uniform, which was what I wanted, than using the carders. Also with the different lengths of fibre I was blending with the blue face Lester it was a lot easier to work with it just by hand. I wound up with alpaca as well as wool to get the colours I had wanted.

I had a couple more evenings of touching up the colour and the Polar Bear was complete.

The pieces made another appearance at the demo for Dickenson day in Manotick Ontario.


This is my show and tell the meeting before the show.

Here are all the pieces I did for the 150th anniversary show.

While I was making Polar Bear I thought about my western Grandmother and about my brother who has done most of his work in the North so I am giving this piece to my brother Dave. This is his Bio so you will see why I was thinking of him.
(Dr. David J. Scott is the Executive Director of the Canadian Polar Commission in Ottawa. Prior to his current post Dr. Scott had a long career with the Geological Survey of Canada (GSC), finishing as Director, Northern Canada Division.
At the GSC he also served as acting Director General, Planning and Operations Branch, and led the GSC’s Gas Hydrates and Northern Resources Development programs. From 1999-2003, he was based in Iqaluit, Nunavut, as the founding Chief Geologist of the Canada-Nunavut Geoscience Office.
Dr. Scott holds a Bachelor of Science Degree in Geology (McMaster University, Hamilton, Canada) and a PhD in Geological Sciences (Queen’s University, Kingston, Canada) where his thesis research investigated the tectonic origin of two-billion year old oceanic crust in Arctic Quebec. He was a Research Associate in uranium-lead geochronology at the GEOTOP laboratories of the University of Quebec at Montreal. He has published and presented over 80 technical papers.
I am very proud of his many accomplishments. I wonder if he will put it in his northern office his southern office or keep it at home. Where ever he puts it I hope he enjoys it.

I have a PS to this Post Jan won the peoples choice award for her Polar Bear at our Canada 150 Show.

More From Jan Scott

More From Jan Scott

Canvas 3: arctic Fiber Gold, Qiviut!! Now that is Canadian

Now I was on to canvas 3. I had been looking and thinking of quintessential Canadian topics, I considered moose and had selected a couple reference photos that I may do at some other time but just wasn’t quite what I wanted. Then I started thinking about the arctic. Muskox!!

My brother Dave is a Geologist, he has worked up north most of his career. He told me of being on a mapping traverse and stopping to sit on a bolder. He had been innocently enjoying his lunch when he heard a Whiffling sound behind him. So he turned to see what it was. It was a muskox squinting at him. He seemed to be trying to figure out what Dave was, likely hoping for a sexy new female muskox and not an interfering male one. He got a little closer and seemed to realized it was only a geologist having lunch, did a snort, looked indignant, turned and left. INSPERATION!! I will do a muskox. (But without Dave and the rock).

I kept to the same work process as before, Research first; off to the internet to look at lots of muskoxen, eastern arctic, western arctic and Greenland. I looked for various pictures with details I wanted. Coloring, body shape, horns, feet, nose, eyes. I spent hours having fun surfing Google images. I made of folder of the ones I thought most helpful.

When I had a good selection of reference photos in my file, I grabbed a scrap of paper (which now I can’t find to show you) and did a quick composition sketch to fit the 12×12 square format. I wanted the muskox to be emerging from the background. So I would need the head and shoulders forward and land for the muskox to stand on. Ok I will need a background to work this from. I am not fond of getting wet if I don’t have to so needle felting is my preferred method of working. I made a gray brown back ground so I can add foliage and muskox to it. I used a felting tool I purchased at the fiber festival Twist. It is perfect for background work! You can get it here https://halcyonyarn.com/felting/68862190/10-needle-felting-tool-_-aluminum

For the background I used some of the leftover fin-wool form Miaka’s great fish cat cave https://feltingandfiberstudio.com/2016/02/25/the-great-fish-creation/ and some Shetland in a gray brown. I measured out the felt so that I had enough to rap around the stretcher bars of the canvas and secure it to the frame.

Next was to build up the core of the muskox and base. I had used an armature in the frog but here I was only working with part of a muskox, so the front legs and one back one have an armature, as well as the neck, head and horns. It was very handy to be able to tilt his head up so I could work on his chin!!!


I continued using Rideau Arcott for my core wool. It was free, unfortunately it was also dropping veggie matter all over the floor. But it made a good solid base for the muskox and the promontory he is standing on. I added the armatures in as I built up the structure. The flexy neck was really odd in this under layer form.

Next I went to the living room and started searching for the colours I would need, I used alpaca for some of the black and reddish brown as well as merino Shetland and assorted bits I wasn’t sure what they were anymore. The pull it apart over and over again blending technique really worked well here. I used the photos to try to get a realistic colour. I started adding the colour layer from the Hooves and nose first and working up the body. I blended only a bit at a time and re-blended to create more so there is uniformity in that I am using the same base colours but the exact percentages are changing as I mix each batch. I was not blending to the point of a uniform colour so the individual colours still showed as I used them which lets the eye blend them. I also considered the light source as above and slightly behind the muskox. So you have was lightening of the colours from both sun damage and visual lighting conditions to consider as I worked up the fur.

To create the fur effect I used a combination of securing the fibers at one end and the fold over technique to get the shaggy fur look. I used a single needle and a tiny bit of black blended alpaca for mouth and eye details. It was amazing how little fiber could create so much detail.

Mounting: With the canvas removed it was easy to use double sided Carpet tape to position the piece and then sew it around the stretcher bars. I again used the indentation of the stretcher bars to give myself more height for the piece. I carefully adjusted the foot and attached it to the promontory then adjusted the head down and made final adjustment to the horns. This is the show and tell presentation at the guild. Sorry that Froggy is giving you a cheeky butt view.


Needle felted pictures for the 150th anniversary of Canada art show –Jan Scott

Needle felted pictures for the 150th anniversary of Canada art show –Jan Scott

Today we have a guest post by Jan Scott she is a great needle felter.

The concept of the show.

As you likely read in Ann’s earlier posts the Ottawa Valley weavers and spinners guild was given a proposal to have an art show of 150 pieces of a uniform 12inX12in size to celebrate Canada’s 150th anniversary. The originally the idea had been discussed at socials to decide the rules for the submissions.


The rules were quite simple:

Rule #1 – the artwork could be any medium of fiber arts, spinning, weaving, felting, knitting, were all ok. But the rest of the rules quickly developed as I started to propose ideas I would like to try to Carlene who was going to present the idea at the meeting. My first thought at hearing the format was AH!! Cascading waterfall in felt over 3 canvases!Rule #2 – all 12×12 pieces must not extend past the canvas.                                                         My second question was can we do this in 3 dimensions?

Rule # 3 – nothing should extend above the canvas more than 3 inches.

I’m glad I dint ask any more questions.

Art show Piece 1:


So now with the parameters decided and 3 canvases purchased I started to consider ideas. I had to find something that was quintessentially Canadian to me. I thought of all the places I liked best in Canada and settled on my parent’s cottage and the summers spent with my giant bullfrog friends. So I started to plan frog on lily pad as art work #1 and Lilly pads in flower as my second piece.


My work process seems to have developed as; first research images on the internet. (or looking thorough my photographs no wonder I have been taking pictures of everything through most of my life!). Then decide the general composition with a couple sketches. Do more researching for details of the composition. I created a folder of frog pictures that had elements I wanted to work from. Toes from this picture and the profile of the head of that one. Coloring from another shot. I selected the best bits from various photos and printed out a few reference photos to work from. With the frog covered I looked into lily pads and flowers, did you know they have huge lily pads that are used to photograph baby’s floating on them? I think they were in Thailand definitely not the ones from the cottage so I mostly ignored those.

My next problem as I started to make an armature for the bullfrog (a bit smaller than the life size ones I had played with) was how to make sure he/she was under the 3 inch height limit? Ahhhh. I turned the canvas over and looked at it again. Working from the back gave me almost an extra inch so Froggy could still be crouched to spring and fit in the height restriction!!!


I worked on the armature using mostly pipe cleaners and light gage wire to make the framework. I made an upper and lower skull/jaw, dorsal lines in the back and all appendages with articulating tows. It was somewhat frog like!


I had gone over to Ann’s to get help with carding Free Fleece from agriculture Canada’s experimental farm flock. I had washed the excessively dirty and vary spongy fleece but wanted a really cores carding to make core wool. That is the wool you use for structure but don’t want anyone to see. She put it through her picker which helped immensely and then we carded it on her really impressive electric drum carder. Much bigger than the home use ones we normally see. Ann’s help was greatly appreciated she saved me a lot of time!

So I started with stuffing rolled up balls of core wool (likely a redo Arcott blend) into the center of the frog frame armature. Until I had the body formed and started rapping the legs and the first foot. It was quickly apparent I had miss judged the tow length and had to give Froggy finger extensions in pipe cleaner! After quick osteology surgery to repair his bone structure I continued giving him muscles until I was happy with the overall shape. Next I needed Froggy like colours. I started looking through my stash of spinning and felting wool. Hummm, Green does not seem to be my favorite colour. I have Lots of blue though! I had won at one of the guild auctions a bag of lime yellow green that I had planned to use as a core wool on something but hadn’t got around to it. I did a run to some of the local supply places, bought some more fiber at the Chesterville spin in and begged a bit from Ann’s stash and a bit from Bernadette too.


The horrid yellow green was perfect for the under colour for the lily pads, but I didn’t have quite the green I wanted for the frog colours so it was time to think like a painter and blend my colours.


Maybe now is a good time to tell you a bit about myself. I am severely dyslexic you likely have figured that out by the spelling or lack of it. From Pre-school on I wanted to be a paleontologist but decided you had to be able to spell your profession so gave up on that idea in grade 6 when I realized I still couldn’t spell paleontologist or most of the dinosaurs’ names. My other interest was Art (I can spell that!). I loved technical illustration, I was really bad at it but was good at layout and design and kept being told I should be a fine artist not a commercial one. So I wound up with 3 years of commercial art and 3 years of fine art and art history. With Dyslexia and all the commercial art background I tended to approach my fine art projects at school with a slightly different perspective then the rest of the class. As an example we had a large scale painting assignment. I asked if I could use un-stretched un-gessoed canvas with acrylics applied in watercolor like washes and was allowed. So I arrived each class with my painting folded in my smallest portfolio and some painters tape to tape it to the studio wall. While my classmates tried to figure how to get there monumental pieces on and off busses.

It has become apparent to me over the years that the dyslexic brain does not take a straight line to get to the solutions to a problem. Of the 150 pieces created by members of the guild only 6 canvases were turned and worked from the back. Froggy, Lilly pads, muskox, polar bare, the forge, were mine. The only other one was the Hudson’s bay blanket woven on nails attached to the back of the canvas. So problem solving tends to result in a nonlinear solution not usually arrived at by the majority of the group. This can be a good thing or not. In this case I think it worked out very well.


So now you know why I looked at little balls of coloured wool and was excited about colour blending like my long unused acrylic paints. As well as thinking about layering colours like washes of acrylic used like water colours. My third important concept was grisaille painting technique where you paint you’re under painting in gray scale and then overlay the colour over it. This is used to give amazing depth of colour at the end. I thought about the under structure of the armature and core wool as my underpainting then layered over the colour and shading as the final layer. This make it much easier to get a Froggly look to my Frog.

I tried two technique to bend the colours. The first was very traditional using dog brushes from the dollar store as if they were little carders. This tended to give more uniformity to the blend but dint look quite rite. So method 2; I took little bits (a bit longer than the staple length) of the constituent colours and started to bend them by holding the tips and pulling them apart. Over and over, this produced a more stripy colour which looked much more natural. It took a long time to get the colours blended in this way but I think it was worth the extra work. This blending technique which I practiced on Froggy I think really worked most effectively on Muskox and Pole bare.

I had purchased from Noble fiber last November at the guild exhibition and sail a piece of pre-felt to be used for the backing of a picture. I had chosen a large piece of blues and greens in colours that reminded me of both the cottage and Monet water colours. Unfortunately I should have bot 2 pieces. So I allotted the one to the lily pad background and started colour blending to make the second for Froggy and his lily pads to sit on. I made the background large enough to rap around the frame and attach to itself thus making a form base to work from.

The lily pads were the next to make. I used a mix of both wet and dry felting to create them. I discovered that pipe cleaners don’t shrink at the same rate that wool dose and had to do a bit of patching to cover up the differential shrinkage. I laid in stylized veining and darker edges to the leaves. Then started to bend the pipe cleaners to the shape I wanted the leaves to be. I used thread to attach the leaves to the felt backing.

Next step Froggy must grip the edge of the leaf with his little articulating fingers and prepare for his grate leap to the lily pads in the next picture. So I got to play with bending and posing Froggy until I was satisfied. Than he too was sewn to the lily pads and felt below.


Canvas #2 the lily pads


I created the lily pads as I had the first 2 Frogy is sitting on. Pipe cleaner armature sandwiched by 2 layers of wool on either side. Using again wet and needle felting to get the structure I wanted. Over laying the final colours to give a representation of a lily pad.

For the flowers I made a core that was sort of lozenge shaped with a point at one end. The base of the core wool had 2 entwined pipe cleaners for the stem. I then created triangles with the tip firmly felted and the base left unbelted. I added white over the core wool for the center of the flower then the triangles for the white petals that surrounded the core. The outer layer was triangle of the limey green I had used with the lily pads. I needle felted each petal onto the core and stem until I finally rapped the base of the flower and stem itself.

I made 3 flowers and 3 leaves. I split the pre-felt base and rapped it over the back of the canvas frame attaching it securely. Next I played a bit with the leaf composition, no draping off the frame or flowers poking up too high. When I was finally happy I used button hole thread (since it’s nice and strong) to sew it all down.


I started working on the Froggy/lily pad combination idea in November just after the exhibition and sail and was pleased with parts by the February meeting. Originally Froggy was going to get a lily flower too but it make him too high so all the flowers went on the second canvas frame.

Felting Soap with Guest Artist Leonor Calaca

Felting Soap with Guest Artist Leonor Calaca

Our guest artist today is Leonor Calaca from Felt Buddies shares her method for making felted soaps.  You can see more of her work at http://www.FeltBuddies.co.uk

Hello! Today I’ll teach you how to make your very own felted soap.

Before we start however, I’m sure a few of you are wondering, “What on earth is a felted soap?” Good question! Allow me to explain.

A felted soap is, as the name might reveal, a bar of soap that’s surrounded by felted wool. This means you’re basically getting a bar of soap and a washcloth in one product, making the former last longer, while using the latter as an exfoliating agent.

The wool around the soap also makes the soap last longer, and when the inside is all used up you can use the wool as compost material, or keep it as a decorative pebble.

Christmas is fast approaching, and this would make a great gift – it smells nice and it’s useful, what’s not to love? I actually sold out last holiday season!

Let’s get started, shall we?

1

First, you’ll need the following ingredients: warm soapy water in a clean container, a nice bar of soap with round corners (sharp corners may break through the wool), enough wool to cover the soap with, and some bubble wrap for friction.

A couple of good extra items are a felting needle (I’ll explain why in a moment), and a pair of kitchen gloves.

2

Begin by carefully wrapping the fibre around the soap. I used a lovely wool top with silk tweed here, but you can use roving or a batt – just make sure you’re using enough to cover the soap, but not so much so that it makes lathering hard!

You’ll need to wrap the fibre in two opposite directions. I like to start by wrapping it horizontally and then vertically because I think the end result looks nicer, but you can do it whichever way you prefer – just as long as you have two opposite layers.

3

Remember the felting needle I mentioned before? Here is where it can comes in handy: I like to needle felt the ends to make sure nothing comes apart when I’m wet felting. This isn’t absolutely necessary, but I find it keeps things neat.

4

Once your soap is all wrapped up, it’s time to dunk it in warm water.  I highly recommend you go slowly at this stage, as the fibre might fall off the soap or migrate if you haven’t secured it with a felting needle. Squeeze all the air bubbles out carefully in the water and, once you take the soap out of the water, gently squeeze out all the excess liquid and start rubbing the top layer lightly so the fibres start clinging to each other.

5

Once the fibre is secured, it’s time to help it shrink around the soap. I had a bubble wrap pouch from a mailing bag that I used to help create friction, but regular bubble wrap will work just fine.

Rub the bubble wrap against the soap, checking regularly if your fibre isn’t migrating, you don’t want to end up with bare patches (you can needle felt some extra fibre on those at this stage, and continue wet felting).

6

Once the fibres start contracting around the soap, you can use your bare hands to continue the felting process.  I like to create friction on the ridges of my sink; I sometimes also wear kitchen gloves because the rubber also helps, and I like to alternate hot and cold tap water so the fibre shrinks around the soap faster.

7

Once the fibre feels compact around the soap, you’re done!

Carefully rise out the lather under the tap, gently squeeze the soap and let it dry; after that, you can add some kraft paper around the soap to make a “belt,” or you can just place it inside an organza bag.

8

Don’t be surprised if, after gifting this to friends, they come back for more! You can always direct them to this tutorial so they can make their own…

Feel free to ask me questions about this in the comments section. Happy felting!

Thanks Leonor for sharing your method of felting soap.  I have a feeling a lot of people will be getting soap for the holidays.


Guest Artist Terri Simon on Dimensional Felt

Guest Artist Terri Simon on Dimensional Felt

Our Guest Artist today is Terri Simon aka Meterrilee on the forum.

Hello fellow fiber enthusiasts!    I’m originally from Detroit, Michigan but moved to Oregon in 2014. I have been felting for about six years, both needle felting and vessels, but my real love is painting with felt and exploring different textures.

Marilyn and I both recently participated in an online class from Opulent Fibers — Kristy Kun’s Texture Techniques with Needled Wool.  Marilyn asked me to  show my work and I am happy to do this.  In addition to telling you a bit about this class, which was excellent, I would like to generate a little discussion about inspiration and the artist equivalent of plagiarism.  First the class…

Kristy’s class centered on three sample projects; each project building on the techniques learned in the prior project.  The class fee included all materials for the class, instructions and videos demonstrating certain techniques.  Kristy set up chatrooms that allowed students to ask questions, post pictures of progress, comment on each other’s creations and get expert guidance, suggestions and commentary from Kristy.  You can check out the classes Kristy offers at her website, Opulent Fibers, here:  http://www.opulentfibers.com

Here is a link to her newest class:

http://www.opulentfibers.com/heavily-textured-felting-techniques-home-online-workshop/#.V9qWJa268e1

Kristy creates the most gorgeous 3D wall hangings (among other beautiful things) and I was so excited to learn how she fabricates them in this online class.  To see some of Kristy’s work, look here (just wonderful!): http://www.kristykun.com/gallery/   Now you understand why I wanted to learn this technique!

Below are the three sample projects I created in this class.  It’s a very interesting technique to attach pieces of heavy weight prefelt fabric to each other.  There is a lot of labor involved to ensure everything is tightly attached and felted to a very hard finish.   But well worth it! Our samples were a 12” square and each one took several hours to prepare before even before using water.  Many students were active in posting pictures of their creations and providing encouragement and feedback to others.  Overall, a very enjoyable and educational experience.

terri-1

Project one: learning to attach the prefelt vertically to a square of prefelt.  It’s a weird looking, but the purpose was to learn the technique.  J

terri-2

Project two: learning to attach prefelt vertically and to each other onto a square prefelt.  This was definitely much trickier.

terri-3

Project three: The flower.  This was the reason I took the class!  If you looked at Kristy’s gallery, you can see all the many possibilities for this technique.

Which leads me to the issue for which I hope to generate some discussion: artistic plagiarism.

I follow a few fiber artists’ blogs and have great admiration for many fiber artists; the moderators of this forum included.  To mention a few others that I greatly admire: Moy Mackay, Nicola Brown, Kim Winters, Lyn and Annie at RosiePink, Fiona Duthie, Sara Renzulli, and Andrea Noesk-Porada.  I love to look at the works by these artists and I’m so inspired by them.  I want to make everything they make!  There is a fine line here, however, and I’m mindful of trying not to cross it.  When I make something that is very similar (with felt, it is never EXACTLY identical), I certainly would give credit to the original artist if I were to do anything with that piece.

I’ve never sold anything yet—I give nearly everything I make away.  But, I hope to sell pieces soon.  Anything I intend to sell is going to be, hopefully, solely my creation, (not ones I’ve attempted to copy to learn a technique or just because I loved the item and wanted to duplicate it).

How do you address this?  I can needle felt a chipmunk or make a felt painting of a highland cow in the manner of Sara Renzulli and Moy Mackay, respectively.  They aren’t going to be identical to something either one of these artists produced, but I was inspired by them in the creation of my item.

Now that I know how to make lovely 3D wall hangings, taught by Kristy Kun, I intend to make larger pieces; similar of course due to material and technique, but they won’t be identical to Kristy’s work.  In fact, I will work hard to make sure they DON’T look like her work…but the idea was hers.

Do you mention the artist who inspired the work, when relevant, on items you sell?  Do you feel that since no piece is identical in size, shape, color, and texture, that items you sell are your creation and there is no need for mentioning the artist who inspired you?  This is a really important issue for me.  I would love to hear your thoughts on this subject.

Thanks!

Thank you Terri for sharing your class work and invoking this discussion.

Reuse of Scraps with Roots in History.

Reuse of Scraps with Roots in History.

My Friend Jan Scott took a great class at our guild a few weeks ago. It fit with our second quarter challenge ( http://wp.me/p1WEqk-3Mi ) so well I asked her to do a blog post about it. It was a two day workshop This is the post about day one. Day two will be my next post.

Tom Knisely  workshop on Sakiori and Zanshi: Weaving Japanese Rural Cloth

Ottawa Valley Weavers and Spinners Guild June 2016 Our Guild was very fortunate to arrange a workshop with Tom Knisely’s and guild meeting presentation in conjunction with a talk he gave at the Almonte Textile Museum.

TomKnisely1

Tom is an internationally known Spinning and weaving instructor. Starting his career with the Mannings School at the age of 14 and eventually becoming education director and working for them for over 30 years. He has written books on rag rugs, baby blankets and created weaving videos for interweave press. He was voted teacher of the year by handwoven magazine in 2011. It’s easy to see why, he was always positive, supportive and unflappable.

jan 2

He has an interest in recycled weaving in all its variations. Normally you think of rag rugs or cattalong, there are even shaker rug vertion similar to the Acadian twisted weft technique.

jan 1

When Tom finally saw a rural northern Japanese obi woven with very fine strips of cloth he got very excited. As he researched he discovered a second group of textiles that were recycled but not made of strips of cloth but from threads ether the ends of warps or threads picked from scraps of cloth.

Jan 4

Notice the pile of samples, each one came with a story!!

There are two techniques, day one we worked with Sakiori. “Saki,” which means to tear or rip up, stripping it into pieces, and “ori,” which means weave. So it is reweaving thin strips of originally old silk or cotton.  The second technique was Zanshi weaving / (sandhi orimono) is a Japanese for “vestige,” or “leftover”. Zanshi textiles were woven from the extra threads which remained after weaving. (Loom waste). The area these techniques come from are rather poor, tend to grow bass fibers and are rather cold in the winter. The source of the rags are Rag merchants traveled up the cost buying rags in the south (silk and cotton) and selling them in the north. Sometimes the rags were used like a patchwork to create a new fabric but others were stripped and rewoven or picked apart for the threads which were tied together with tiny knots then used usually as weft. This labour intensive practice makes much more sense when you remember Silk and cotton are much warmer and softer than linin or hemp.

Jan 5

The workshop was to introduce us to the two techniques and we would create a scarf from our samples. As you will likely have noticed from the fish episode of making cat caves, I don’t usually wind up with something that looks like the rest of the class. So let’s see what happened.

Jan 6

Day One; Sakiori .

Tom demonstrated and discussed preparing the strips for weaving. Originally torn in thin strips, he used circular cutters and a cutting mat. Then we got to give it a try. He also demonstrated how to lash on to the front beam of a loom and to hemstitch without difficulty. One of the students had brought a very large quilters cutting guide which worked well for a lot of our fabrics.

Jan 7

We had pre-class instructions to seek out silk or polyester colourful scarves or men’s ties at Value villages and Salvation Army thrift stores. I brought a couple of my old silk saris and decided on one of them and a couple of the scarves I had found. Since Tom had found that 2 large lady’s silk scarves made one new scarf I cut up a lot of the sari and all the scarves. I over estimated as usual and have enough to left over to get a serious start on another project!

Jan 8 Jan 9 Jan 10 Jan 11

Sakiori was originally woven as a 2 harness weave structure. So we had a ridged heddle loom (with 2 heddles to get the warp spacing and my little 2 harness table loom in the class. In the second class there was a 2 harness saori loom.

Jan 12 Jan 13Jan 15

Often when you weave with rags you are making rugs. So you expect stiff cloth with little drape or flexibility. Because the strips are very thin and you have a second weft thread (most of us used Tensell-looks like silk but not as expensive) in between the cloth strips you get a very drapy silk cloth. You can sample with I 2 or 3 shots of tensell between the silk and see what you think. Or you can try it without any and just use the strips! I was enjoying my first sample so much I just kept going and did my whole warp in sari and scarf. I had enough to make a little sleeveless jacket! See it’s not really a scarf.

I think this might be interesting with strips of nuno felt or very thin strips of wool felt. I would love to see what you can remake with scarps and left over ends of felt!!

To inspire us further he showed a 4 harness vertion and the scarf it had been made from. There is a definite change in the colours from the original scarf to the newly woven one!

Jan 16

The blue and gold one is threaded similarly to an inkle pattern. Notice the really cool macramé fringe. See its coming back!!! Better dust off your books from the 70’s!!

jan 17 Jan 18

Although Sakiori is not a difficult technique to grasp it was absolutely enjoyable to spend time listening to the stories and gentle suggestions from Tom. He is extremely knowledgeable and vary gracious. If you ever get the opportunity as one of my classmates said she “would take a workshop on how to boil water” with him!

Jan 20 Jan 19

Ok Now for what my scarf looked like. (Considering what my cat cave looked like this is a bit closer)

Jan 21 Jan 22 Jan 23

The inside

Jan 25 Jan 24

AND it sort of fits my husband. He didn’t think it went with his Canada post shirt.

Jan 27 jan 26

Thank you Jan! It almost makes me want to weave.  Maybe If I could get the loom already warped LOL.