Wet Felting for Beginners Online Course
Wet Felting – A Step By Step Introduction is an online 3 part beginner’s guide to Wet Felting. This class is for total beginners who have not done any wet felting before. All coursework is online and is not “live” so can be accessed at any time. You can access the class information at any time and the class is open continuously so that you can return at any time to review the information and videos. You will have unlimited access to course information after registering and completing payment so there is no pressure to complete the class on a certain schedule. There are no specific start dates for this class as it can be taken at any time during the year.
Part 1
Learn the basics of wet felting, with step by step instructions for laying out wool tops neatly and evenly; positioning embellishments; wetting, rubbing, rolling and fulling the felt; and how to get neat edges, so that even an absolute beginner should feel confident trying it for the first time. The piece of felt being demonstrated in the instructions is a large piece of felt. It will make a firm, durable piece big enough to make an A5 book cover, or any number of alternative projects. There’s no pressure to make a piece as large though. If you think you will feel comfortable making a smaller piece to start, please do 🙂
Part 2
Learn how to work out shrinkage rates and calculate measurements to account for the shrinkage. There will be a series of exercises to try which demonstrate the kinds of things which affect the way felt shrinks, information which will take some of the mystery out of felting and equip you with important knowledge for success in your future felting endeavors.
Part 3
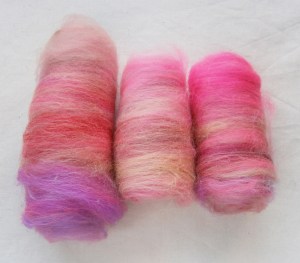
Learn about the way wool is processed to produce a variety of felting fibres; look at some different felting methods, tools and techniques; and learn some tips for blending wool by hand. There will also be a gallery of felt pieces made from different wool and animal fibres.
Supplies you will need:
The piece of felt being made in the demonstration in Week 1 is 17 x 31 inches (43 x 80cm). This is so you will have a good sized felt piece to use in a project or projects of your choice.
You will need approximately 80 – 100g (2.8 – 3.5 oz.) of wool tops for a piece of felt the same size. We recommend Merino wool tops (Roving can be substituted for Tops), as they are inexpensive, commonly available and a nice wool to start learning felt-making with.
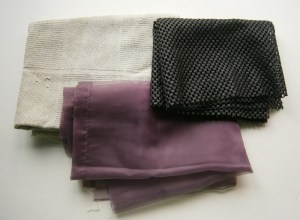
If you’d like to embellish your felt piece, you probably won’t need to buy anything in particular, but if you have some lightweight or open weave fabrics, such as organza, silk, cotton scrim or cheesecloth, you can use those. Yarns make good embellishments too, anything fluffy or tassley, you don’t have to buy embellishment fibres especially but if you have some, you might want to use those too. Save some of your embellishments for one of the exercises in Week 2, a few pieces of fabric and lengths of yarn.
The other supplies needed for Week 2 are: approximately 30g (just over 1 ounce) of Merino wool tops, you can use a different breed if you’d prefer, but 3 of the exercises must have the same type of wool; you will also need roughly 15g-20g (½ to ¾ ounce) of different wool tops. Again, it doesn’t matter which as long as they’re different to the type for the other three.
You will also need felting equipment:
If you don’t have a work area suitable for wet felting and/or something to protect your surfaces, you’ll need something such as a waterproof shower curtain, tablecloth or child’s play-mat. You’ll also need bubble-wrap to cover an area 20 x 35 inches (51 x 89cm); a tub for water which holds about a litre/4 cups/2 pints; some soap and a sponge.
We’d also highly recommend a rubber shelf liner or bamboo place-mat for rolling, some old towels and some netting.
‘Netting’ can be any type of thin, floaty fabric, as long as the weave isn’t too open. Netting stops wool sticking to your hands. Sheer curtain fabric is really good.
A few other things which would be helpful are, a length of dowel rod or old broom handle; some microfibre towels and some absorbent cloths.
Here’s a link to a simplified list of supplies: Supplies
Course work will be supplied on the Class website. You will be given the link to the Class website and all the information needed to register, and also a guide to navigating the site. Course work will be in PDF format, a link to view the PDF online will be provided on the class website, where you can then download it to keep. Videos will be available on the website but not available to download. The class website will have sections for students to show their work and ask questions, and also a section specifically for asking the tutors questions. Tutors will visit the website daily, if you feel like you need real-time advice, please PM one of the tutors to arrange this.
The cost is US$20 for the continuously available course. $20 US =£14, €18.55, CA $28.50, AUD $28.50, NZD $31, SEK 172, NOK 175, DKK 138 You will be billed/invoiced by PayPal and the vendor name on the bill will be Green Enterprises Inc. To sign up for this class, please use the Contact Form below, please include the email address you use for PayPal (it won’t be published on the site). Invoices for the course will come from ‘Green Enterprises’. Thanks.


