Browsed by
Category: Community

A Trip to the Australian Sheep and Wool Show

A Trip to the Australian Sheep and Wool Show

Today we have a guest post from Felicity of flicstarstudios who is a keen fibre crafter from Melbourne, Australia.

Last weekend I went to the Australian Sheep and Wool Show  which is held in Bendigo, Victoria every year. It is a highlight on the calendar for farmers and fibre lovers. There is sheep and wool judging, sheep dog trials and shearing, but the other half of the show is all about wool craft. They hold a wool fashion parade, craft competitions and many fibre vendors sell their wares. There were wood turners (with lots of crafty tools like spindles, crochet hooks and yarn gauges) as well as representatives from the Spinners and Weavers guild and Feltmakers guild of Victoria.

I left Melbourne at 8am in this:

001badweather

But on the way up, Bendigo turned on the weather and I arrived to a glorious sunshiny day. This is my third year of going to the show so I know the layout now and straight away made a bee-line for the good stuff. I had a pocket full of cash and every intention of spending up big!

It wasn’t long before I made my first purchase: a sari silk batt for spinning. I am excited to try it.

There was a display of knit, crocheted and felted poppies for the 5000 poppies project which is a community tribute to the ANZACS. The poppies will be on display at Federation Square, Melbourne in 2015. Anyone can get involved to make and donate some poppies to the cause.

006redpoppies

Next I headed to the sheds to check out the livestock. Smell the country! (A potpourri of straw, manure and sheep.) There was a mix of international and Australian breeds of sheep including Merino, Corriedale, Finn, Border Leicester as well as Angora goats and many more.

It was really interesting to see the different sheep breeds, the judging and the classed wool. The trophies looked pretty impressive, and it was all a very serious business.

One shed displayed all the place winners of the craft competitions in embroidery, felt, knitting and weaving. Unfortunately no photography was allowed in that shed but I can tell you the finished pieces were amazing. After seeing all the sheep I’d built up a farm-sized hunger. What else do you have for lunch at the sheep and wool show – barbecued lamb from the spit!

018lunch

I watched the sheep dog trials out on the oval while I ate. There are a variety of tests on the course that the dog has to herd the sheep through, over and into. The owner has to stand with their hand on a pole and just call out the commands – most of them sounded like “go beyond”, “get around”, “to me”, etc. There is a time limit and if the dog doesn’t herd the sheep in time they have to give up. Like a fresh deck of cards in poker, each new dog gets a fresh set of sheep. These guys looked a bit pedestrian compared to the blue ribbon winners I’d seen in the shed. It was great fun to watch because it was clear that the dogs loved it and were very good at their job. The sheep didn’t seem too impressed though.
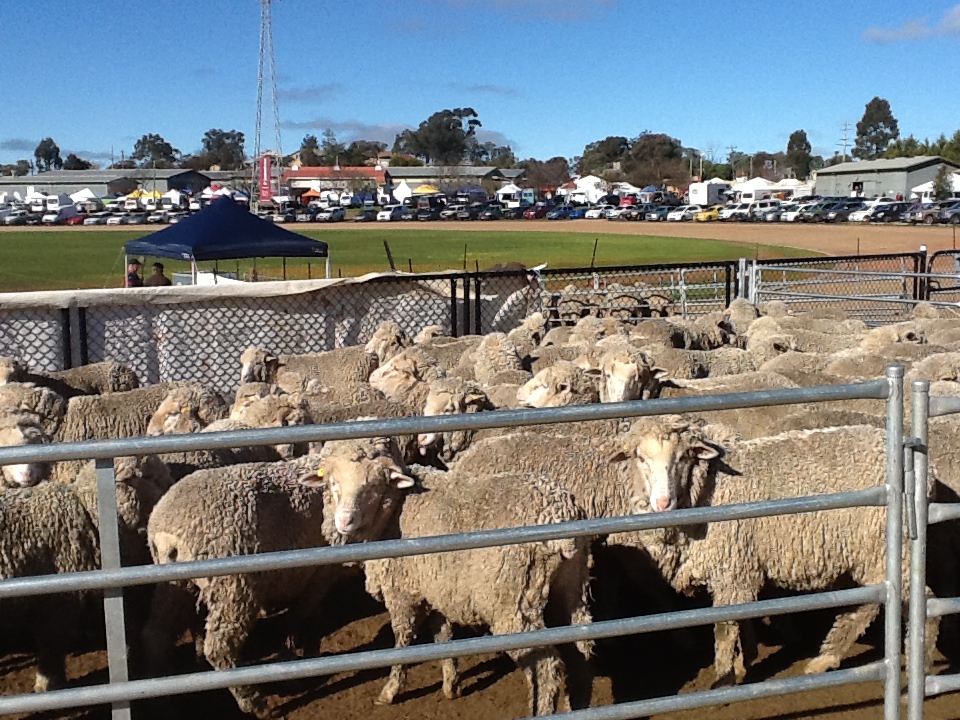
019sheeppen

After lunch I chatted with a boutique wool farmer (Bennett and Gregor) who was selling natural coloured wool tops and yarn. He was saying that unfortunately it is becoming much harder these days for smaller operations like theirs to get their wool processed in Australia. Luckily there are still woollen mills in New Zealand they can use – their only other choice is to ship to China. I suppose this is a sign of the times. There was still loads more to see and I had more money to spend so on to the next shed.

Check out these big needles:

020bigneedles

Amazing felt balls and knick knacks from Papoose:

This felting machine will set you back a cool $7,000. It made lovely smooth finished felt.
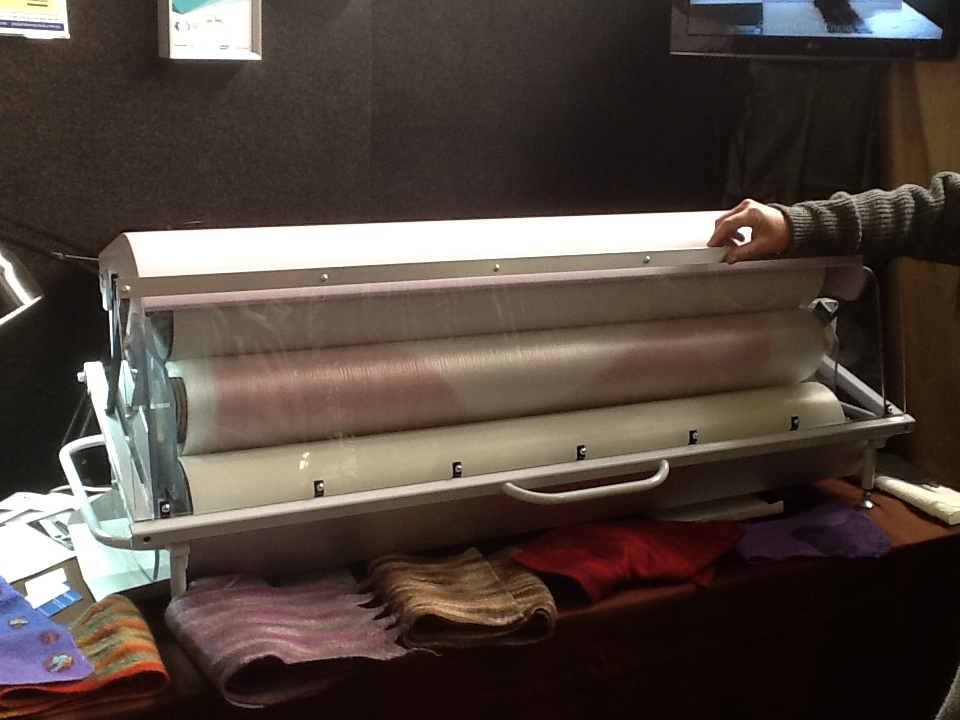
023feltmachine

The Ashford stall is always worth a look because they have demo spinning wheels and blending boards.

It was a great day out and I was pretty tired by the end of it. I came home with enough yarn and fleece to keep me busy for a while. The most unusual fleece I bought is “Gra trondersau” which is from the Grey Troender a very rare Norwegian sheep (apparently there are only 50 of them!).

Thanks Felicity! It was a wonderful armchair trip you gave us and I’m sure everyone will enjoy the journey 🙂

Meet The Supplier and a Giveaway

Meet The Supplier and a Giveaway

Meet the Supplier

Banner
Fibre 3, 2, 1

Q-3 Three types of fibre you can’t live without?
Angelina fibres, I did not think I would like this fibre until I started using it and now love the bit of sparkle it adds. Also merino pre felt, and wool tops, especially dyed merino.

Q-2 Two tools you use all the time?
Twisted felting needles because they felt evenly throughout your piece and leave a smoother finished surface. The other tool has to be my Janome sewing machine, I love to be able to make practical but beautiful things like blinds and bags with cotton and linen fabrics.

Q-1 One fibre art technique you love the most?
Wet felting, both pictures and 3D forms. I enjoy the creating, and rinsing off the soap to see the final piece is great. Even if it’s not quite how you expected there is always something a little bit lovely about what has been made.

PrefeltB
General Questions

What is your business?
heidifeathers is an online felting supplies business

What kind of items do you sell?
We sell wool bundle mixes, needle felting kits, wet felting kits and drop spinning kits, pre felt bundles, nepps, glass eyes, felting needles, dyes, dyed tussah and mulberry silk fibres, scarves, angelina fibres and other felting tools, basically we are a one stop shop for felting.

mulberry tops 3What do you think makes your business different from similar ones?
We offer lots of colour! Lots of mixed items such as wool bundles, silk bundles, and pre felt bundles, giving you variety so you don’t have to choose. We stock a lot of felting related fibres, tools (including an extensive range of felting needles). We offer all the supplies you need so you can experiment with felting. We care about the customer and are always willing to offer help and also care about stocking good quality items.

merino playful2What can you make with your kits?
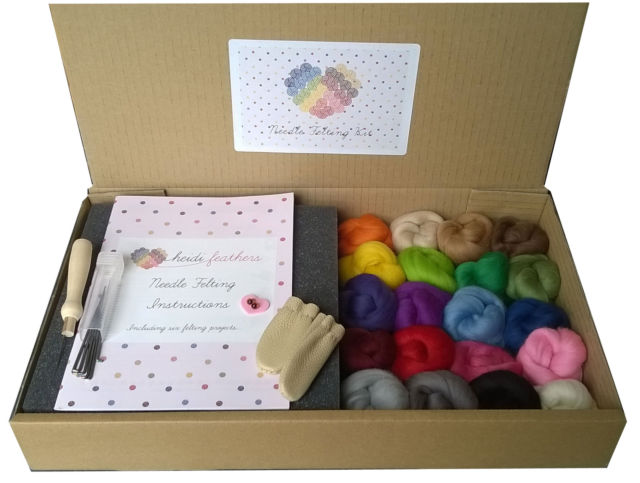
Our kits all come with instruction. The needle felting kits come with a 24 page booklet with 6 projects and wool for plenty more. The wet felting kit has 3 projects and some other basic information about wet felting, again there is wool for lots of other ideas and we include a template and instruction for making a purse. The spinning kits explain how to spin wool tops in to two ply yarn using a drop spindle.

kit2Where are you located?
We are an online business based in the Cotswolds

Where can we find you on the internet?
www.heidifeathers.com, also on etsy at www.etsy.com/uk/shop/sweetgorgeousthings  and ebay http://stores.ebay.co.uk/heidifeathers

GIVEAWAY:
Heidi Feathers is offering a very generous prize for a giveaway. Because of the size and subsequent postage costs, this giveaway is only available for postage within the UK. That doesn’t mean you have to live in the UK to enter though, feel free to enter as long as the recipient is in the UK 🙂

giveaway Kit2 The prize is a complete Wet Felting Kit. Zoe from Heidi Feathers says “The kit is a high quality wet felting kit which is fun and easy to use for any age, with everything you need to start wet felting (besides warm water)” The kit contains: 200g of the finest soft merino tops (21 Micron) in 20 beautiful colours including pinks, blues, greens, orange, yellow, greys, browns, purples, reds, black and white; one large piece of bubble wrap; one large piece of voile; one light weight rolling pin; one small cloth; one block of pure olive oil soap, and one bamboo rolling mat 45cm x 30. It also includes a 3D re-useable template for making a purse and instructions for three felting projects to make:  A bead, a picture and a purse.

All you have to do to enter, is leave a comment to this post. Check back on Thursday 5th June for the winner to be announced, and please leave a comment on the announcement post so your details can be passed on to Zoe.

Thanks a lot to Heidi Feathers for answering our questions and for the very generous giveaway 🙂 Please have a look at the sites and the great variety of products.

Dyeing Fabric and Fibres – Guest Post

Dyeing Fabric and Fibres – Guest Post

Today we have another guest post from Cathy Wycliff (luvswool) who has recently been experimenting with different dyes.

***

Dyeing is one of the popular topics on the Felt & Fiber Forum, but I admit I was very reluctant to give it a try.  I read about the chemicals involved, the need for rubber gloves and a face mask, and I admit that scared me away.  But after I ordered 10 pounds of white wool (Domestic 56s), I realized I needed to do something, so–being the chicken that I am when it concerns “dangerous chemicals,” I opted for food colors, which are non-toxic and “easy to use.”  The Wilson icing gels I used met both of those criteria, so I happily dyed my wool in the microwave.  However, once I started wet-felting with the wool, I realized the colors bleed, even though I had followed the instructions (vinegar rinse).
That’s what led me to acid dyes, as I witnessed the beautiful results Forum members achieved through their use of acid dyes.  I went ahead and ordered Dharma yellow and blue (figuring I could make my own green), and began my dyeing journey.  I gathered my materials using Ruth Lane’s book “Complete Photo Guide to Felting,” even though Dharma offers instructions on their website.  I just do better with photos. Not pictured are the rubber gloves and mask I wore throughout the process.

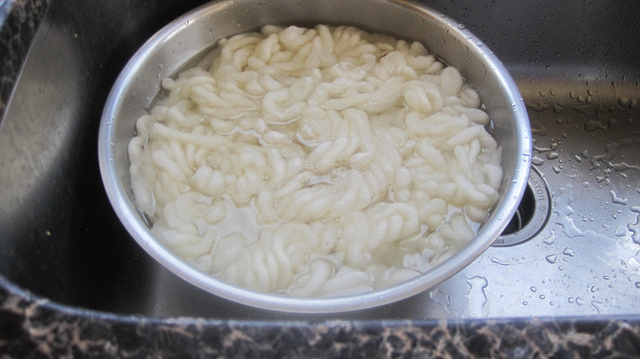
5549Preparing to dye, I soaked the wool and silk according to the instructions.

5550While the wool was soaking I laid out the plastic as protection for my kitchen countertops.

5551I mixed the acid dyes according to Dharma instructions on the labels, double-checking with Ruth’s instructions.  I used glass jars, which are fine, but I have since ordered those squirt bottles for easier and more direct application of the liquid dyes.

5554 Here you see the wet wool and silk, ready to be dyed and steamed.

5555I poured the dyes on the wool and silk, first batch, and then repeated for two other colors, mixing the blue and yellow to make green).

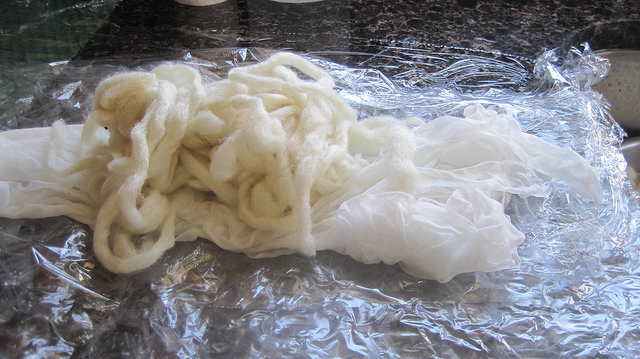
5556Each different color of wool was wrapped separately in plastic wrap and stacked in a stainless steel vegetable steamer. Here you see my designated stainless steel large pot, never to be used again for pasta!  I put in an inch of water in the pot and covered.

5557I steamed according to instructions, used a soaking solution again …

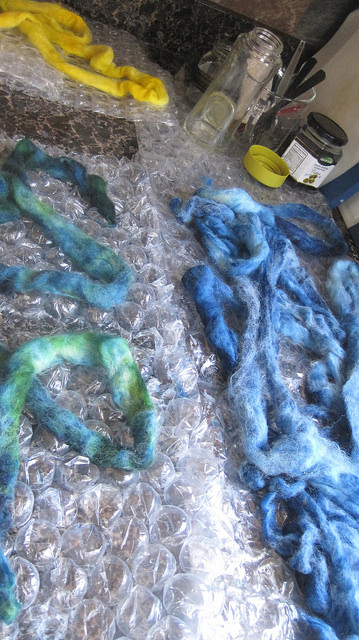
5559… and rinsed well — and there you see my first packet of wool (green) laid out on plastic to cool.

5561bI continued the process with the blue and yellow packets of wool.

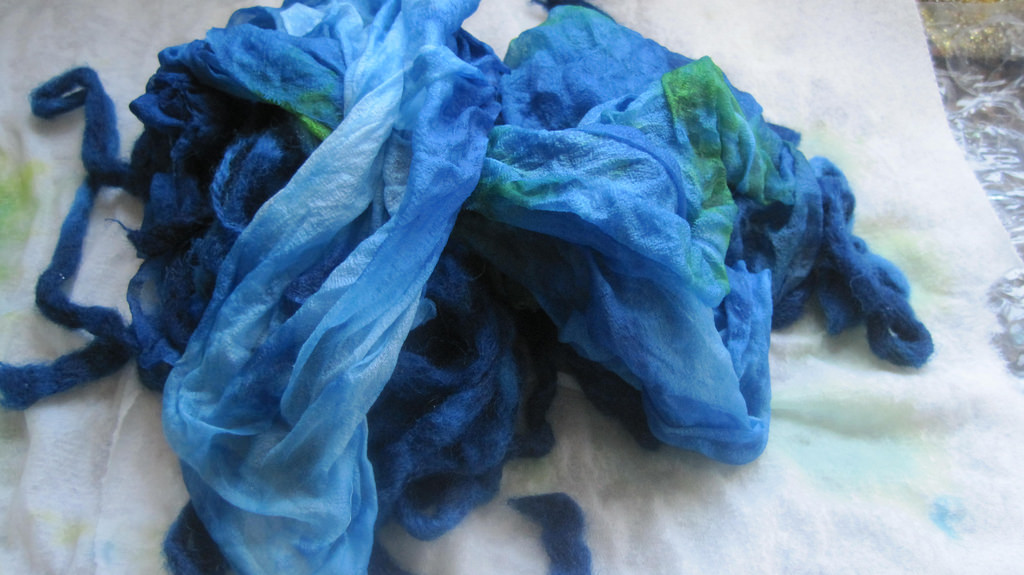
5563bHere you see all of the dyed, wet wool laid out to dry.

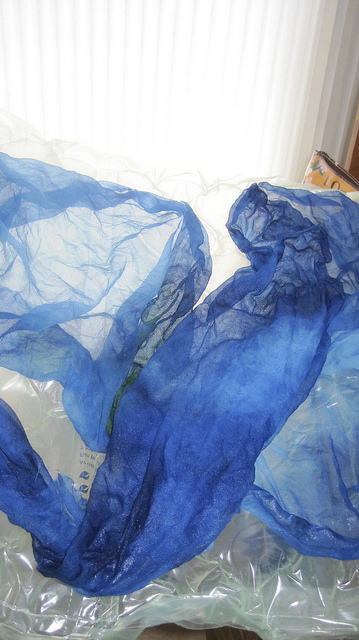
5564Here you see the beautiful blue habotai silk scarf stretched to dry…

5569… and the larger green silk habotai shawl as well.

5570bI now have a good supply of green, blue and yellow standard wool roving and pencil roving, along with a couple of silk pieces ready to be nuno-felted.  Would I do this again?  Absolutely!
Just received my new colors of Dharma dyes, ready to go again!

Cheesecloth Meets Merino Wool

Cheesecloth Meets Merino Wool

Today we have a guest post from Lyn.

***

I was lucky to win some of Ruth’s hand-dyed cheesecloth in a recent giveaway post – scrummy isn’t it?

hand dyed cheesecloth - Ruth Lane - small image

I really liked the pattern in the dark green piece, top left, so I cut a 27cm circle from it, then placed it on top of 2 layers of white merino wool fibres that had been laid out to form a rough, slightly larger circle.

I used white merino so that after the nuno process the colours of the cheesecloth would remain the same, although they would be slightly muted because of the migration of the white fibres.
To reduce the dulling effect of the white fibres,  I very carefully shaved the superfluous fibres from the top of the dry nuno felt. Shaving is a tricky process as the ruched fabric can easily be damaged.

shaving the felt - small image
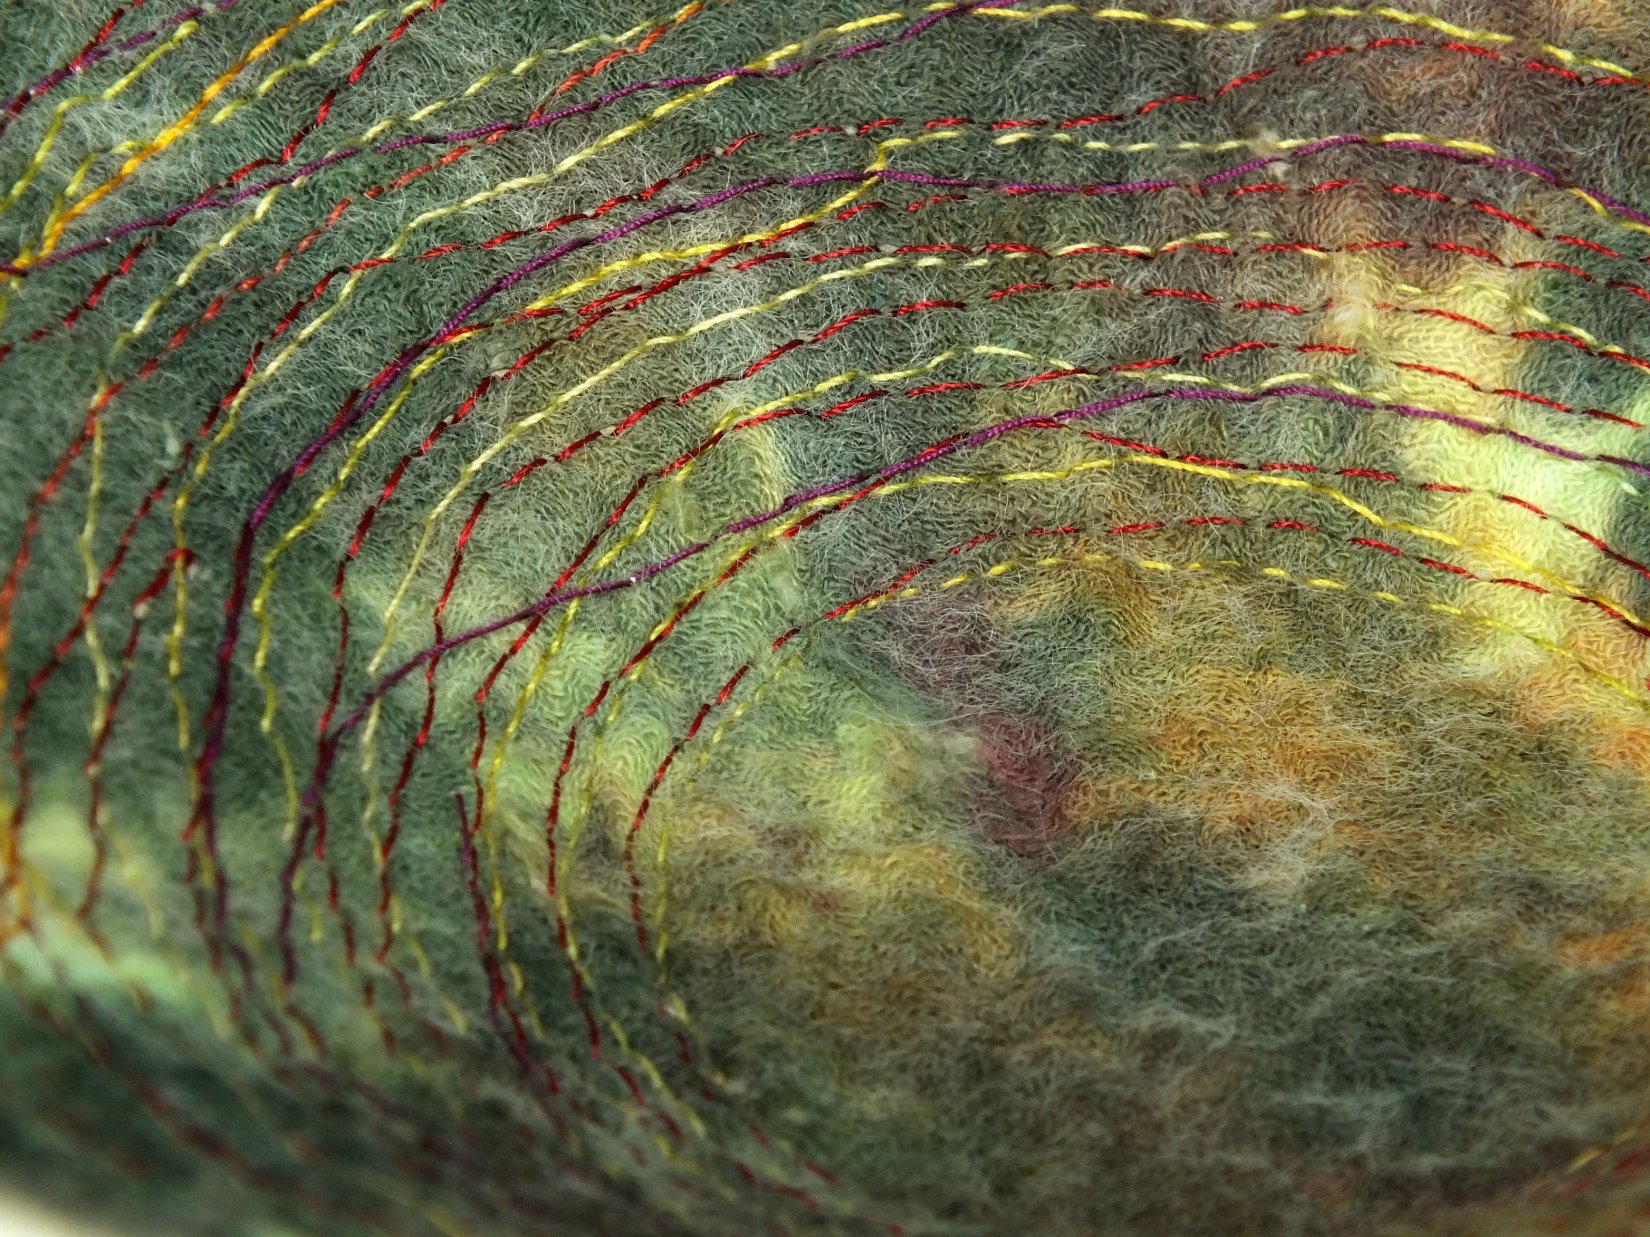
I then messy-stitched the piece of flat felt into a rustic bowl.  I love this kind of stitching and it’s best described as stitching done with your eyes shut – different coloured threads, short stitches, long stitches and rows of stitches that meander wherever they choose.

rustic stitching - small image
I thought the centre of the bowl looked pretty without stitches, but it wanted to buckle a bit, so I cut a circle of stiff, iron-on interfacing – the exact same size as the centre of the bowl – then ironed it to the underneath of the bowl.  I used the base of an upturned tall glass tumbler as an ironing board.

The finished rustic bowl:

rustic nuno and stitch bowl - small image

Nuno felting is an easy way to add interest to a plain item.  This pod was made with a 20cm circular resist.

pod with cheesecloth - small image
I used four layers of merino wool on each side of the resist, then placed a circle of cheesecloth on the top of the side that would have the hole cut into it.

cheesecloth on last layer of pod - small image
The cheesecloth added colour and texture to the top of the pod.

pod with cheesecloth close-up - small image
Thank you Ruth.  I’ve now got two lovely items and plenty of cheesecloth leftover for my stash.

Cathy’s Nuno Felt 2

Cathy’s Nuno Felt 2

Today we have another guest post from Cathy about Nuno Felting. If you’d like to read the previous post and all the comments, please click here.

***

Recently, I posted for the blog my first experience with nuno-felting, which was not too successful.  Many of you replied with terrific advice and tips on nuno-felting.  I used those tips, along with Zed’s e-book on Nuno Felt, to make another attempt.  I am happy to report success!
I began with a pale green silk gauze scarf, hemmed, measuring 56″ x 20″.  This was purchased on Etsy, as was the orange scarf used in my first nuno-felt experience.

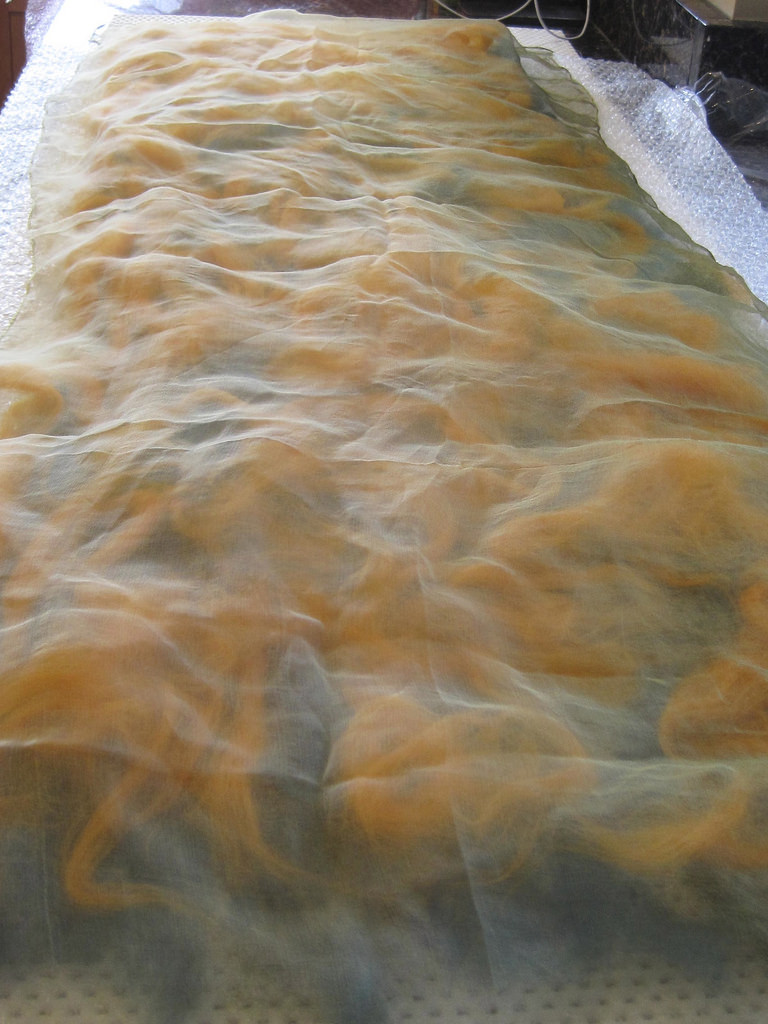
Pic 1Armed with my new knowledge, I laid out merino roving in green, teal and gold, covering one side with 3 layers.  This time I used a rubbery rug mat as my base, covered by bubble wrap,  then wool.

Pic 2…and then flipped the package over…

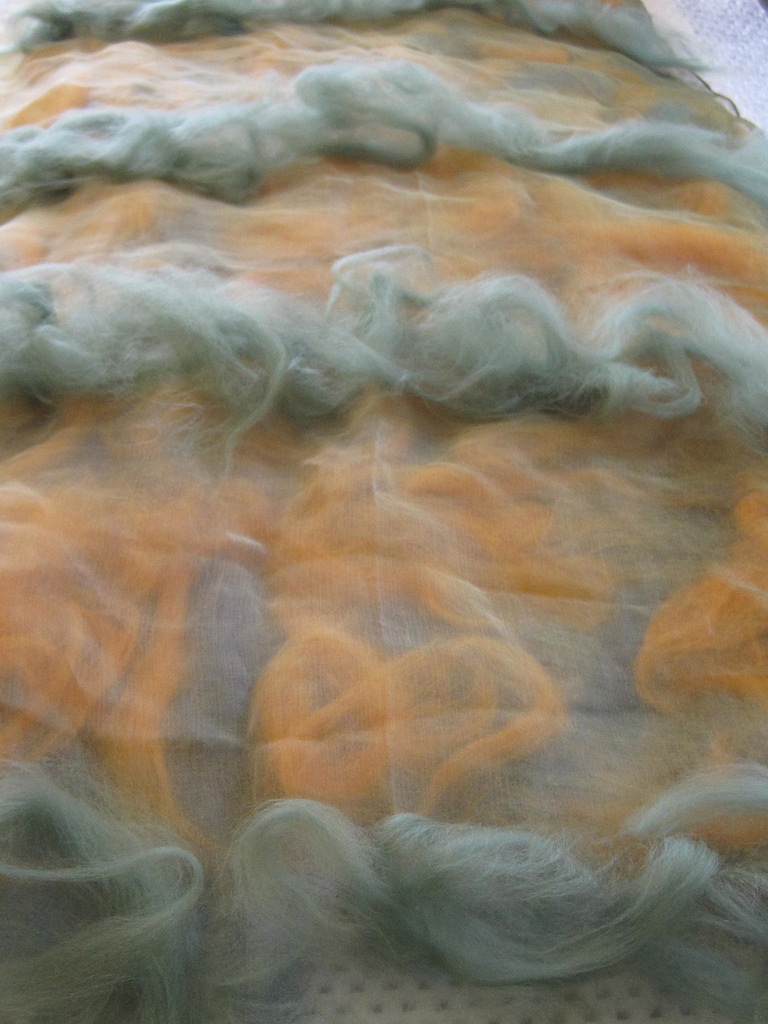
PIC 3and laid out pale green merino in bands, about every 6 inches.

PIC 4This time I covered with a white polyester curtain sheer and began spraying using a Brauser ball and olive oil soap water–COOL this time–I began hand rubbing, spreading the water and continually rubbing GENTLY.    I lifted the sheer to make sure fibers were not coming through (but they were!)  Repeated process on underside of scarf, replacing bubble wrap with curtain sheer.

PIC 5After sufficient felting by hand rubbing, I laid on bubble wrap…

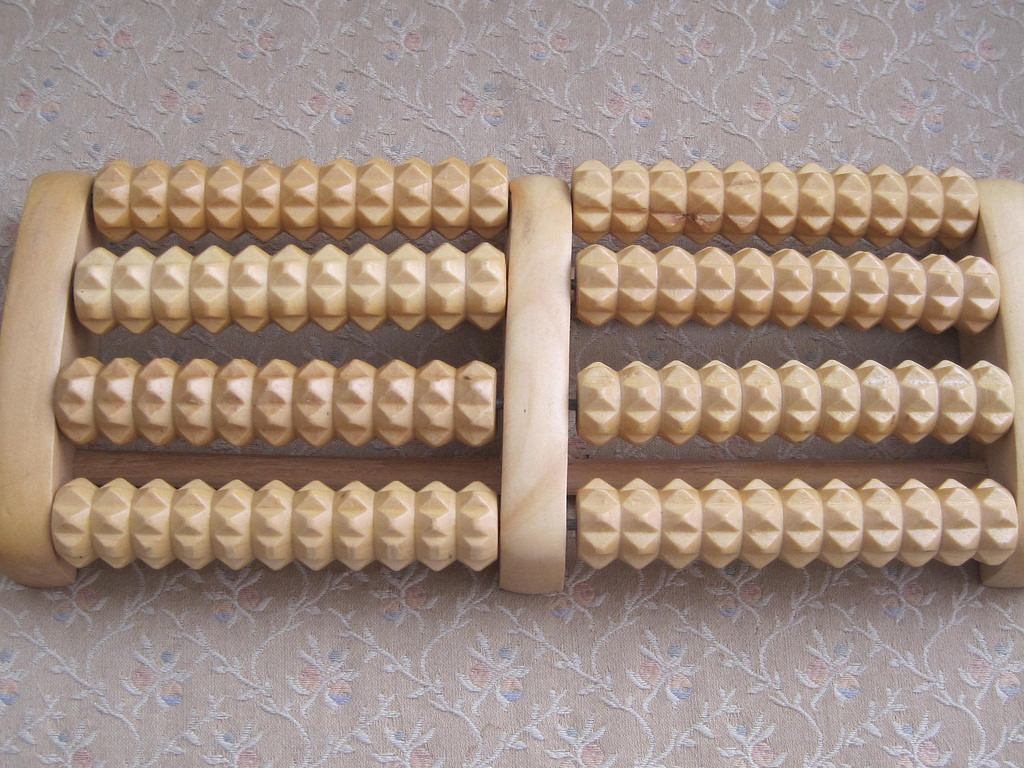
PIC 6… and began rolling my wooden foot massager over the nuno-felt package.

PIC 7I remembered to turn several times, so as to cover all angles.  Repeated the process on underside. I forgot to time myself.  After sufficient rolling, checking first side … then second side … I now felt ready to try the washer spin method of felting/fulling.  So I rolled the package in a wet towel, leaving bubble wrap inside and tied shoelaces around it.
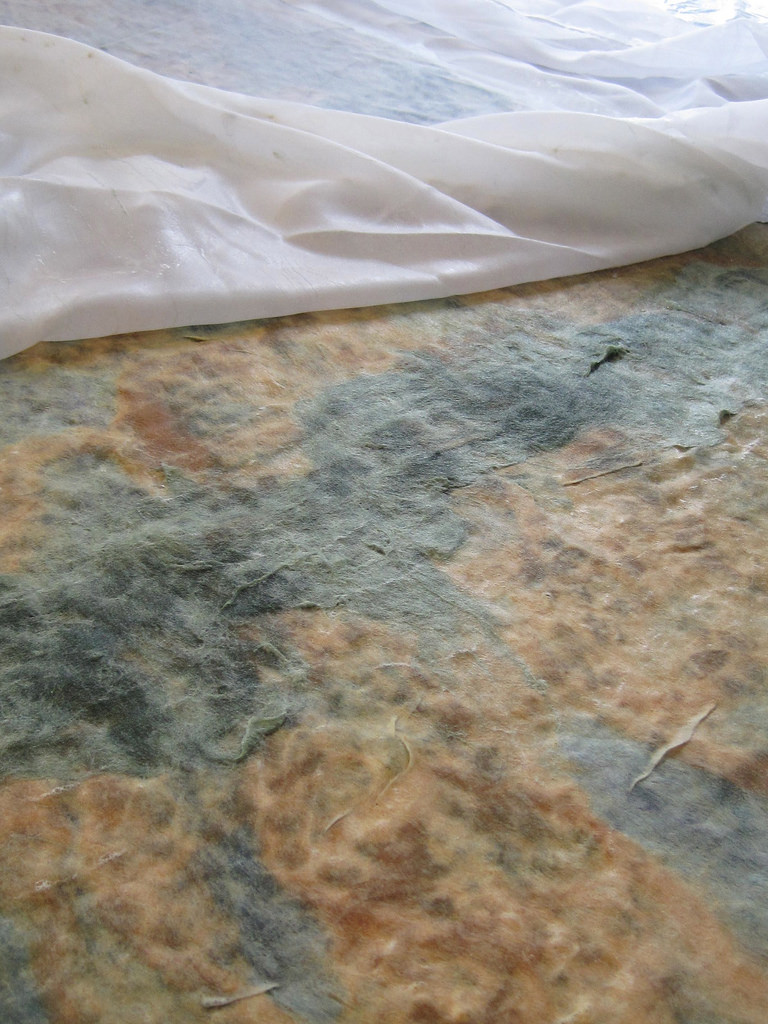
Four minutes in washer spin cycle, then popped the scarf only into a lingerie bag and put in dryer for 4 minutes.  Good thing I looked after 4 minutes, because the scarf jumped out of the lingerie bag and was folded in half.  I carefully peeled it apart (phew!) and there you go!
Long view:

pic 8Close up:

Pic 9Underside, see prominent green bands:

pic 10Close up of underside:

pic 11There was a little shrinkage (finished scarf measures 49″ x 15″) but I would have liked to see more ruching or ruffling effects. I consider this a success and am ready to try my third scarf, hopefully improving along the way!
Many thanks to all of you who wrote in and provided sound advice to a newbie nuno-felter!

First Quarter Challenge 2014 – Lyn’s Entry

First Quarter Challenge 2014 – Lyn’s Entry

Our Guest Post today for the First Quarter Studio Challenge, is from Lyn.

***

I’ve enjoyed this challenge and I’ve learnt a little about one of America’s most influential artists. Some of Jackson Pollock’s art is interesting, yet some pieces remind me of kitchen counter tops – for example, ‘Lavender Mist’:

lavender-mistI wanted to find a Jackson painting to inspire me so I hit ‘Google images’ and quickly found one I liked.
It was headed ‘Abstract art by Jackson Pollock, oil painting on canvas’.
Enthusiastically I chose my colour palette:

Jackson Pollock merino wool paletteAt this point, I would like to have shown you the painting that was my inspiration, but (blushing ever so slightly) I can’t.
I have since discovered that it’s really a ‘Pollock-style’ painting that’s mass produced in Asia.

So, moving swiftly on, here is my Pollock-style felt picture – finished size is 18″ x 15″.

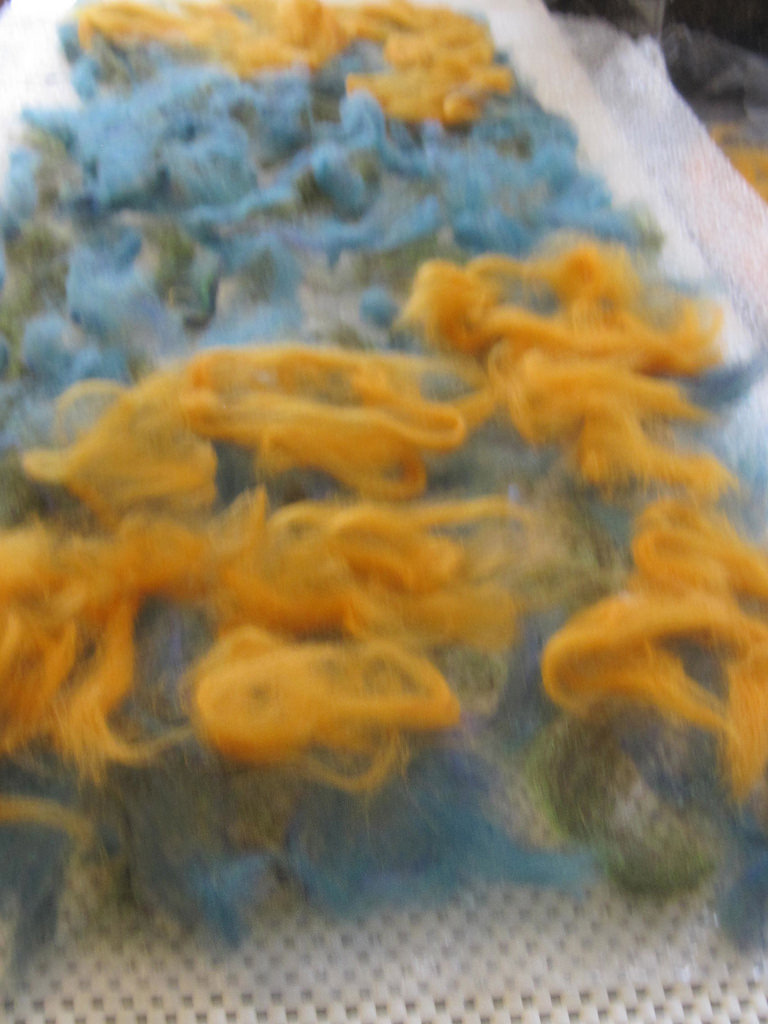
felt in the style of Jackson PollockI made a base of two layers of white merino topped with one layer of rusty-red.  I started the fourth layer by making a border all around with the same red, then working inwards with ever decreasing ovals, I put down dusty orange,  gold, yellow then white in the middle.  The fifth layer was a repeat of the fourth.  On top I placed strips of blue, rusty-red and slate in a representation of broad brush strokes then drizzled some strands of silk tops along some of them.  Finally, I dotted on wool nepps to represent drips of paint.

After ten minutes of agitating the wool fibres, I folded the edges under because I wanted the finished piece to have quite straight edges, as a painting on a canvas would.  They were looking good and straight during the felting but they warped during the fulling because of the uneven layers.

Happy though I was with finished piece, I decided to cut it up with a rotary cutter and re-arrange the slices.  I stuck the slices to a board, took a photo, then added a border to make it look like a painting.

framed felt in the style of Jackson Pollock - mk iiNow, where did I put the phone number for the Tate Modern……

Meet the Supplier: Dreamspin Fibres

Meet the Supplier: Dreamspin Fibres

We would like you to meet one of our sponsors and a friend of mine Maureen Harding of Dreamspin fibres.  We met a few years ago at a fiber conference and became friends. We live far enough apart that we only get together a few times a year but we always have a great time felting and trying new things. She doesn’t mention it here but she has a sale on select fibers at the moment.

m silly


Q-4 Three types of fibre you can’t live without?

Merino, silks, silk fabric but other fibres depending on the project

Q-3 Have you always been a felter?

I’ve been felting for 15 years, before that I was spinning and knitting.

Q-2 Two tools you use all the time?

Pool noodle and plastic window screening. (and ball brause)

Q-1 One fibre art technique you love the most?

I have to say felting. But also enjoy spinning and knitting

store room

What is your business?

We sell wools, prefelts, fabrics for nuno felting, a few felting tools, mostly for felters.

Why and when did you start selling fiber?

It was an outgrowth of my interest in sheep and wools.  Initially I raised sheep, learned to spin, learned to felt, and started buying other fibres wholesale for my own purposes. After a while I started selling fibres at fibreart venues and would make up articles to show what can be done with the fibres. People started asking me if I would teach them how, and this led to doing workshops in felting.

What kind of items do you sell?

As well as fibres for felters, I also sell felted articles such as nuno scarves, felted hats, and felted bags at various shows throughout the year.

dreamspin prefelt


What do you think makes your business different from similar ones?

We pride ourselves on our fast service, orders are made out the same or the next day. We offer free shipping on orders over $100 in North America. And we are always happy to offer assistance and advice over the phone, or email.

Where are you located?

Near Campbellford in Ontario

Where can we find you on the internet

Dreamspinfibres.ca

This slideshow requires JavaScript.

Cathy’s Nuno Felt Projects

Cathy’s Nuno Felt Projects

We have a guest post today from Cathy (Luvswool on the forum) about Nuno Felting.

***

CATHY’S NUNO FELT PROJECTS:

Following are my three attempts at nuno felting, none of which has been very successful.  I am posting here, hoping to get some recommendations.  Any advice offered will be welcome.  While I understand it’s difficult to compare processes–you will not know exactly what kind of wool I used, what temperature the water was, the quality of my silk–still I hope the photos will help explain.

After having watched numerous videos and studying books on nuno felting, I purchased some silk scarves (silk gauze) from an Etsy shop.  These scarves were approximately 12 x 57 inches and particularly recommended by the shop owner for nuno felting.  I wanted to make a scarf that looked light and lacy with some silk showing, so I used wisps of Merino wool and some silk hanky pieces which I lightly placed on top of the peachy/orange silk scarf, just one layer. (Sorry, no “before” photos)

photo 1bphoto 2After following the nuno felt instructions carefully, I ended up with some of the pieces felted and some not, as you can see from above photos.  Not a good start.  Figured it could be the silk quality or the water temperature?  Not enough wool?  I set the project aside.

Project #2 – I had some silk scraps from vintage Japanese kimonos, and thought I should do some samples before attempting another “real” project.  So I used white and red Merino wool on top of silk, lightly nuno felted to make “pre felts”.  Silk scraps literally peeled away when I lifted the corners to check on my progress.

photo 3photo 4Project #3 – I purchased a remnant of beige silk chiffon from a nearby shop, Vogue Fabrics, which has an amazing selection of fabric, including lots of gorgeous silks.  Huge remnant section so I did not need to break the bank.  Clerk did a “burn test’ so I was assured to be purchasing silk, not synthetic fabric.

photo 5I used three layers of wool, not being sure this was actually Merino, since I bought this on ebay and the seller was unsure what type of sheep’s wool.  It felt a bit rougher than the soft Merino I usually use, but nothing to lose, right?  Although I did not photograph my first go-around, there were approximately 20 “holes,” that is, I could see the beige chiffon through the wool (nickel to quarter size holes), and it did not look good. Underside after nuno felting:

photo 7Next I needle-felted the same wool, along with some light green Merino wool, onto the holes.

photo 8Then I wet-felted the entire piece. After rolling, I rinsed in hot and cold water, fulling (throwing in sink), vinegar dip & cold water rinse.

photo 9Now it looks better, but I still do not consider it to be a successful nuno felt project.

photo 10bProject #4 — Here is my piece of light green silk gauze (as purchased from Etsy shop mentioned in Project #1) ready to be nuno felted.  Awaiting your suggestions and comments!

photo 11

Indigo and Shibori by Kim Winter

Indigo and Shibori by Kim Winter

Today’s post is by Kim Winter of Flextiles. Kim lives in London, UK and has been blogging about her textile experiments since 2011 after taking creative and experimental textiles at Morley College. I follow Kim’s blog and have found it very interesting so I asked her to write an article for us.

Type “tie dye” into Google and a mosaic of fluorescent spirals and sunbursts leaps out of the screen.

tie dye - Google Search

But try “shibori”, and the results are more subtle, largely (but not entirely) blue and white.

shibori - Google Search

Yet both are similar techniques – folding, binding, twisting or compressing the cloth so that parts of it are not exposed when it is dyed, resulting in very distinctive patterns.

shibori-close-up-001

The Japanese, as with so many craft forms, have developed the techniques even further, wrapping the fabric around poles before binding, using special devices for looping the thread around the cloth, or pulling up rows of stitching very tightly to resist the dye. And the dye often linked with shibori is indigo, which explains the dominance of blue and white designs.

“Like old men’s pee”

I was introduced to shibori and indigo dyeing at my local adult education college in London when I signed up for evening classes in textiles a few years ago. It was a great course, providing an introduction to different techniques over three terms, including wet felting, hand and machine embroidery, and soft basketry.

In the summer term our tutor heaved a large black plastic vat into the room, removed the lid, and I got my first glimpse of an oily, shimmering surface with flecks of froth. It didn’t appeal to everyone – one student described it as “smelling like old men’s pee”. But after a couple of dips, I was hooked.

I’m not going to go into the detailed chemistry here, but a well-maintained indigo vat is not blue – it’s greenish-yellow. Indigo turns blue only when it is exposed to oxygen, so when you remove a piece of fabric from the vat, it changes colour from green to blue before your eyes. It’s quite magical – and very addictive!

It also has the advantage that you don’t need a mordant, so it’s relatively quick compared with some other forms of dyeing. However, to build up colour fastness it’s best to dip several times and leave the fabric to oxidise well between dips.

Shibori obsession

I started off with conventional shibori techniques:

• stitching (nui shibori)

screen-shibori-010-resized

shibori cushion 001

• binding (kumo shibori)

shibori samples 003

• pole wrapping (arashi shibori)

shibori samples 013

• clamping with a resist (itajime shibori)

cd-itajime

And pretty soon I became obsessed – the experiments in a Kilner jar by the kitchen sink graduated to an increasing number of blue-stained buckets and bowls cluttering up the garden and kitchen, provoking gripes from (otherwise) Ever Supportive Partner!

home-indigo-001

oct2013 scarves4

Then I started experimenting with shibori in other processes.

• Shibori and screenprinting – stitching the fabric before screenprinting over it, then opening the stitching.

screen-shibori-007-resized

shibori-screenprints-large-translucent

moon-print-open

• Shibori and felting – binding or wrapping the felt or nuno felt before shrinking in a washing machine or steaming it.

marble-flask-tied

marble-flask-after

nuno-net-shawl-flowers-front

• Shibori on paper – taping the paper to a pipe, wrapping string around the paper, dipping, then adding more string and dipping again.

shibori-bound-paper

• Shibori in a heat press – stitching a pattern in synthetic fabric, then putting it with a sheet of disperse dye paper in the heat press.

heat-shibori-003

I also signed up for shibori indigo courses with specialists – an online course with Shibori Girl and a summer school in Norfolk with Jane Callender – where I learnt an incredible amount.

But, as with most textile techniques, there is still so much to learn and experiment with – one day I hope to grow indigo from seed, and produce a naturally fermented indigo vat (not easy in a cold London house). And ultimately I would like to spend some time in Japan, learning more about the whole culture and tradition that surrounds this entrancing dye.

Sustainable scarves

In the meantime, I’ve taken to upcycling scarves from charity shops and vintage sales using shibori and indigo dyeing. This has several advantages:

• It’s more interesting for me, as each scarf is different (colour, size, fabric, pattern) – so I don’t get bored.

• It’s obviously more sustainable – around 500,000 tonnes of clothes get sent to landfill every year in the UK alone, yet many of them are perfectly wearable.

• Because the cost of my raw materials is lower, the price buyers pay is lower too – whether the scarf is made of silk or cashmere. What’s not to like? 🙂

oct2013-scarves1

Some of these scarves are available from my Etsy shop; others I sell at various markets around London.

I’ve also started experimenting with natural dyes such as onion skins, coffee and tea.

onion-scarf2

But I think that indigo will always be my first love. It can be a bit temperamental to work with – the alkalinity has to be quite high, and you mustn’t slosh it around too much in the vat or the dye will oxidise and you have to recharge it too frequently.

Yet every time I unstitch, unclamp or unbind a new piece is like the first time – the sense of wonder at the range of blues I can get from a single vat, the colours changing and developing in front of me.

I even like the smell! 😉

fq-spiral-angleKim Winters

You can find Kim at her blog Flextiles or at her Etsy shop. Thanks for sharing with us Kim!

Meeting Sara From Sara’s Texture Crafts

Meeting Sara From Sara’s Texture Crafts

We have something  different for you today. We have a very special post in our Meet the Community category. Sara from Sara’s Texture Crafts has kindly done an excellent video for us telling us all about how she became interested in  textiles, felt, fibres and wool and what led her to becoming a supplier. She also describes what goes on behind the scenes in a typical week at Sara’s Texture Crafts and what inspires her.

Thank you so much for doing this, Sara, it was great to meet you and a fascinating insight into your passion and business 🙂

Please visit Sara’s website to see the wonderful products she has for us fibre addicts 🙂