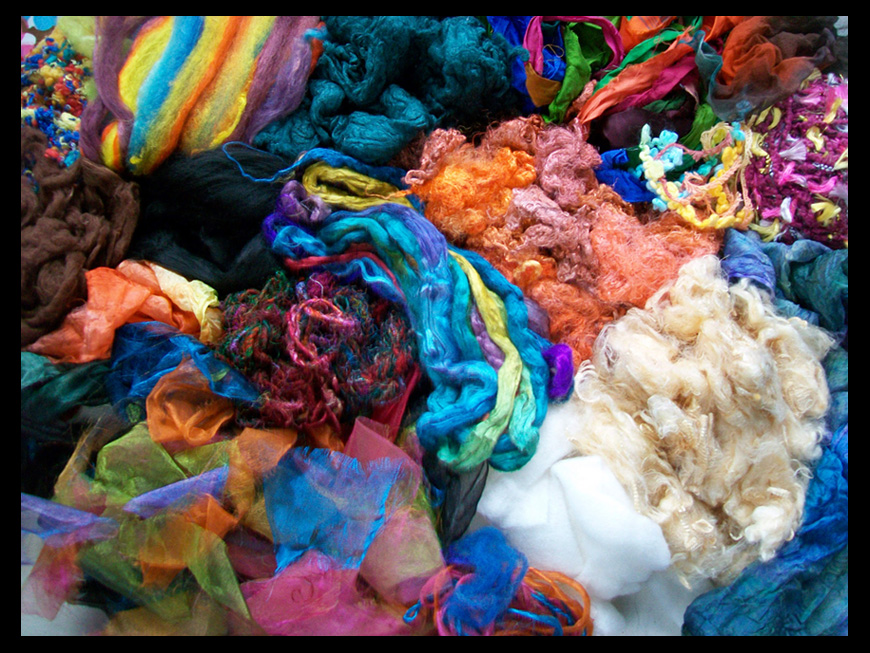
Another Nylon fibre I’ve been using recently is Rainbow Trilobal nylon tops. Trilobal nylon is incredibly bright and shiny, sparkly even. Just like other nylon, it can be dyed with acid dyes. The Rainbow top I used was from World of Wool. I’ve used it ‘as it comes’ for surface design on a few felt pieces, but for this piece, I separated the individual colours and blended the nylon with merino of similar shades.
It felts really nicely, and gives an interesting texture to the felt, aswell as a shiny, sparkly look. Like other nylon fibres it is really inexpensive and a great way for adding interest to felt.
I hadn’t used Nylon fibres in felting until I bought a few different types earlier last year. Recently, I’ve been playing around with them again. Nylon was developed as an alternative to silk and can be dyed with acid dyes the same way as wool or silk, so when I dyed some silk throwster’s waste recently, I also dyed some nylon. I’d only dyed the nylon in red, yellow and blue, so I stuck to using just red, yellow and blue merino aswell.
I layed out a couple of layers of the merino, then I blended different amounts of the nylon and merino colours to give more shades. It felt very fluffy to lay out, and I expected it to be spongy like the plastic fibre or at least be thick, but it wasn’t, and it felted really nicely, and feels very soft. There’s a shininess and ‘synthetic’ look to it if you tilt it in the light, it’s not obvious enough in this piece for the camera to pick it up though. It’s a nice fibre to work with, and the crimped parts can be used to good effect.
Here are some photos of the finished felted piece, and the lay out before felting. If you use nylon fibres in any kind of fibre arts/crafts, I’d love to see the results 🙂
I never really have a plan for what I’d like to do in the coming year. There are a few things I’d like to do, though.
Karen sent me a package of gorgeous fibres that I can’t wait to try, and Ruth sent me a package of lovely hand dyed threads to use and some lace-weight yarn to dye myself. I don’t know many stitches but Mariana was telling us on the forum about Take a Stitch Tuesday, so hopefully I’ll learn some new ones from that.
I really enjoyed experimenting with direct dyeing on felt, I’d like to explore that some more, try some different techniques and use more colours to get interesting patterns and designs, and maybe even try some stitching on it. Wrapping leaves in felt and steaming to get the pattern interests me too, it looks gorgeous when it works well.
Early last year, I made a couple of Huacaya alpaca fibre felted samples, with the intention of making a scarf. I wanted to see whether 1 layer or 2 worked best (I decided that 2 made a more even felt without losing the curly cobwebby effect). I then bought some Suri alpaca fibre with the intention of making similar samples. I’d like to make the samples and hopefully make the scarf too.
I mentioned in my 2011 review that I’d bought a lot of new ‘other’ felting fibres and made samples. It always fascinates me how adding different fibres to wool can alter the way it felts or looks so much. I’d like to do something with what I’ve learned from using lots of different fibres over the years, maybe write some tutorials or an e-book for the Studio site. I’d also really like to be able to make felting fibres more accessible and affordable to people through the site. There seems to be a misunderstanding that these fibres are hard to find or expensive, they’re not. I hate to see people being ripped off and misled.
I’ve had a few ideas for projects in my notebook for a couple of years, hopefully I’ll get chance to try them out this year. The ‘trouble’ with felt is, it always seems to teach you something new with each piece you make, so it’s very easy for plans to get derailed as other ideas are explored. Sometimes it’s nice to go back and rework old ideas.
I can’t wait until Ruth’s book is published. It was a real privilege being asked to help out with it. I know just how much work she put into it, and what a wealth of information is in there. I also know just how clear the instructions are because I have no idea what any of it looks like, none of us have seen any of the photos, so I really can’t wait to see how all the projects look.
One thing I’m really looking forward to in 2012 is continuing to learn and be inspired by the great felting and fibre community we’re part of. I really like the way people have joined in with the spirit of the site and helped each other out through comments, passed on links and information. I don’t think I’d have tried direct dyeing on to felt if it hadn’t been suggested in a comment. I’m also looking forward to the Studio Challenges and seeing what Karen, Ruth and Ann work on this year.
Looking back on what I’ve done in 2011, I was surprised to find it was a lot more than I originally thought. I have a hard time felting when it’s warm, I can’t bear to get too hot and the wool always seems extra staticy, so I only really felt for half the year. At the beginning of the year I finished making a series of lampshade covers from felt and fabric. I really enjoy making felt for book-covers and coasters and made quite a few of these. A lot of the felting I did this year was just samples. I treated myself to a whole load of ‘other’ felting fibres from World of Wool, things like plastic fibre, Milk protein fibre, Ingeo, Flax, and different nylon fibres. I also gave myself a refresher course in nuno felting and discovered that pink isn’t that bad, really. I ended up making quite a few things from felt that I had in my ‘spare felt’ box, like book-covers, purses, coasters, glasses cases and bookmarks, which was fun.
I wrote a few more tutorials this year: How to make a zipper purse from felt; Using the textured felt method to make a bag; How to degum silk; Direct Dyeing and How to make a website banner using Photoshop. While I was looking for a button for one of my textured felt bags, I came across some old Fimo buttons I’d made a few years ago and realised that having a good stash of original buttons would be great. It seems a waste to put the oven on for just a few buttons, so I ended up making a lot more than I’d planned to 🙂
Starting the Felting and Fiber Studio with Karen, Ruth and Ann was probably the last thing I expected to do this year. What started as a comment from Ruth about us all keeping in touch, quickly evolved into a website with lots of photos and information. We all worked really hard in a very short space of time adding the content to the site, which wasn’t easy as we soon realised there were limitations to how we can present photos, and a major feature of the site was changed on us as we’d almost finished, and we’d used that feature a lot. It’s been great to be part of a community though, especially since we got the forum up too and have been joined by so many great friendly and generous fibre enthusiasts 🙂
I think the thing I was most proud of this year was the felt scarf I made for my girlfriend. It was made from 18.5 micron merino with Milk protein fibre. It was the first full length, non nuno scarf I’d made and though it’s always a pleasure to make something for her because she genuinely loves what I make; I really wanted to make something special because she’s so supportive and makes it all worthwhile.
I was having a look round my garden last week to see if I could find things to felt with. One of the things I tried was dried bamboo leaves. I did a small sample with 3 leaves between 2 thin layers of 23 mic Merino, and was quite pleased with how it turned out. This morning, bored to tears by Christmas telly, I got my sewing machine out and did some simple stitching on the sample. I think it took longer to get the machine set up and put away than it did to sew, but it killed some time and I liked how it turned out 🙂
I adore crimpy and curly locks. My favourite curly wools are Gotland, Wensleydale and Teeswater and I love the shiny fibres from Angora goats and soft fibres from Alpacas. Inspired by the Twists, Twirls and Spirals challenge (and my recent obsession with Egyptian cotton top), I pulled out some of my favourite fibres and made a couple of cobweb-type pieces of felt. The main fibre I used was Wensleydale, laying down rows of raw Wensleydale locks, adding some locks of raw mohair, and Suri and Huacaya Alpaca and adding a few wisps of cotton top between the two layers and on the top. There were a few tight crimpy curls of Bluefaced Leicester too.
One of my favourite fibres to use in felting recently is Egyptian Cotton. It smells, looks and feels gorgeous. Egyptian cotton top is soft and silky, but it has a short staple length. I realised when I was making some blends of wool and other fibres for a recent project, that for blending, cotton works well if it is fluffed up or carded first. The soft fluffy wisps of carded cotton reminded me of clouds and sea foam on waves, so I blended some of the cotton fibre with a few different blue shades of merino and made an abstract wet felted piece in sea and sky colours.
Egyptian cotton top and merino wool
I have a nice wooden picture frame and cream photo mount that I think this would look good with. Have you tried cotton fibre? We’d love to hear about your experiences with cotton fibre, whether it be dyeing, spinning, felting, weaving or anything else. Post a link in the comments, or if you’ve joined our flickr group, add your photos there. Photos added to the Flickr group show up on the main page of the blog. Clicking on a picture in the flickr widget takes you to the owner’s photostream.
Our first Guest Artist to be featured is Judith from North Yorkshire in England.
This is Nebula 1, one of Judith’s entries for the Twists, Twirls and Spirals Challenge.
It was wet felted with Merino wool and dyed silk throwster’s waste.
You can see more of Judith’s work on her flickr page
Felting 3, 2, 1
Q-3 Three types of fibre you can’t live without?
I can’t live without merino wool, it’s so fine and soft.
Then there’s silk, I just love its rustle its lustre and it takes dyes so well.
I also like bamboo, lustrous and soft.
Q-2 Two tools you use all the time?
The tools I use most are very simple; my fulling roller, made by my son-in-law from an old wooden rolling pin. I use it as a roller with bubble wrap or the bamboo blind for the rolling stage and as a finishing tool at the fulling stage.
My other favourite is the Tupperware star lid – of ‘Shepherdess’ fame. So useful at the rubbing stage, especially if hands have become dry and rough. Just goes to prove that expensive equipment is not a necessity.
Q-1 One fibre art technique you love the most?
It’s difficult to decide which technique I love most, but cobweb felt comes high on my list. I love the challenge of laying out the fibre very finely, resulting in such a delicate fabric. Perhaps it’s just that I’m a bit miserly and hate to waste my beautiful fibre, but I find I have to really try hard to lay it out more thickly for heavier projects! 😉
Felt Hats
How did you get into fiber arts?
I’ve always been a ‘crafter’, whether it be sewing, knitting, lace making, batik, patchwork, quilting – this list is not exhaustive!
Some years ago, I saw some amazing felted ‘paintings’ in a local gallery, they were monochrome and mostly of sheep and our local Yorkshire Dales landscape. I decided I’d like to give it a try – although I was well aware that I wouldn’t be able to produce anything approaching the same standard.
The years went by and last Christmas my husband bought me a bag of wool fibre, a mixture of Merino and Corriedale and a couple of books and I was hooked!
Did you study art at college?
The only art study I’ve done are a couple of City and Guilds – Soft furnishing and Decorative Paint Techniques. I particularly enjoyed the design elements of these courses.
What do you like to do when you aren’t creating art?
When I’m not creating art, I like to walk in the Dales, play Bridge, cook, read, join friends for French conversation and spend time with my four small grandchildren. However, spending time with the grandchildren involves a lot of creative play, they just love grandma’s boxes of things to cut, stick, paint etc. The 3 year old tells me I’m just like ‘Mr Maker’ on TV, which I think is meant as a compliment! They also like to felt and the 4 and 5 year olds have made themselves a couple of splendid hats.
I sometimes wonder how I found the time to go to work, then I realise that when I was working I just didn’t have the time to do all the things I enjoy most.
Many thanks to Judith for taking the time to answer our questions and share her work and enthusiasm with us 🙂
A few days ago, on the Direct Dyeing post, Shana was asking whether the same method could be used to dye felt pieces. I hadn’t tried it, but I had a couple of white sample pieces of felt that I thought would be good to try it with, so I did that yesterday. The first piece I tried it with was a sample made from two layers of 23 micron merino with wisps of egyptian cotton top between the layers and on the top. It started out roughly 9 x 12.5 inches, and after steaming for 30 minutes, it was 7.5 x 11.5 inches. The interesting thing with this piece was how the cotton took the dye, in some parts where I’d used a colour made from two shades of dye, the cotton took just ones of the shades
The second sample piece was made from two layers of 18.5 micron merino with milk protein fibre tops between the layers and on top. This piece started out 7 x 14.5 inches and ended up 6.5 x 13 inches. Both pieces were soaked in water and vinegar before dyeing.
merino and cotton sample
merino and cotton front
merino and cotton back
merino and milk protein fibre sample
The front of merino and milk protein fibre sample
merino and milk protein fibre sample back
I probably should have rolled the pieces instead of folding, from the photos of the backs, it’s easy to see where they have been folded. They didn’t take the dyes as well as wool tops or silk does, and there was still dye in both pieces that had to be rinsed out. The results were interesting though, both pieces felt the same afterwards, they didn’t feel extra fulled or less soft. Thanks for the idea, Shana 🙂
Click ‘Permalink’ under each photo in the carousel to see larger pictures.
Direct dyeing is a method where the dye is applied directly to the fibre. This can be done with very small or fairly large amounts of fibre depending on what utensils are available to you, but it is particularly good for smaller amounts. One advantage is that the fibres don’t move around so there is less tangling or felting. Another advantage is that very small amounts of dye can be made up, reducing the risk of waste.
Dyed Silk Throwster’s waste
I have written a step by step tutorial with lots of photos and a table to help work out very small amounts of dye/solution. I apologise to anyone more familiar with imperial measurements, the quantities used are so small that the tiniest measuring spoons are used and they are metric, so it was easier to stick to one measurement. And also US and UK fluid ounces differ, and even cups have metric, US and Canadian versions 🙂 If anyone needs a converter I find online conversion is excellent for everything.