

I personally like the feel of silk. So, I decided to learn to make a silk ruffled edge on a scarf. This was an experiment for the ruffle and using a few other techniques with different fabrics and yarns. While I’m not a pink person, I thought if this turned out well I’d give it as a gift or sell it.
Before starting, I decided to make the scarf two-sided. So, I had to use flipping boards which I marked off with two colors of tape. Blue to show the outside lines of the ruffle and regular masking tape for the place to join the edge of the silk ruffle and the inside design area.
I used a piece of hand dyed pink chiffon. The chiffon shrank a little with the dyeing process, so I allowed for some more during felting. The piece measured 20 1/2′ by 86″ (52 cm x 218.44 cm) to start with before folding over 2″ (5.08 cm) on each side for the ruffle. I used a ruler and iron as I went along . To make sure the silk edge stayed down, I used fabric glue along the edge. This dissolved during the felting.

The flipping boards are from insulation board I bought from the local hardware store. They were kind enough to cut it in half lengthwise for me. I covered the edges in duct tape to protect them from water damage.
I carefully laid the silk open edge up following the lines on the board. I put wisps of pink and white roving lengthwise along the ruffle edges careful to have a little over each side of the raw edge. Because the wool will shrink lengthwise it gathers up the material on both sides creating the ruffle. I used some pink mohair yarn in a design down the middle and left fringe hanging on both ends. I covered the raw edges with wisps of wool.
I used some tencel in addition to random wisps of wool for ruching and two different yarns to decorate the first side.

I covered the plastic with bubble wrap bubbles down. Then I placed the second board on top being careful not to disturb the design. I secured the boards with panty hose tied tightly in three places along the board. Then I carefully flipped the boards. It’s best to do if you have help, but not necessary if you have enough room to do so without juggling it around. Any kind of ties would work as long as you can secure them tightly without disturbing the design. I just had an abundance of old pantyhose.

On the second side, I used pieces of silk gauze and a sparkly open weave fabric (different shapes with wool under and along the edges) and a pin/gold mohair yarn along the center of the ruffle seam on each side leaving fringes on each end. I covered the raw edges of the ends with wool and used some of the pink/gold yarn across.

Then I began rolling, starting at one end using a foam pool noodle cut to size. I rolled for ten minutes, unwrapped and started the roll from the opposite end. I did this several more times check to see how well the fibers were starting to felt on both sides and everything was evenly wet. I started with light pressure and increased a little more with each roll. When I thought the fibers were starting to felt, I flipped it over, removed the plastic wrap and started again alternating the direction of the rolling and increasing pressure.
There were a few spots of the dark pink yarn in the center that weren’t sticking, so I re-wet those areas with soapier water and continued to roll. Now, I would just run the soap bar over the netting and rub.
After I finished rolling, I used hot slightly soapy water to full on the glass bead board rubbing in all directions, but particularly lengthwise along the ruffle lines. I flipped it over and repeated the process. Then I took it to the sink and ran it under hot then cold water while scrunching it up and throwing the wet scarf in the sink. (I can’t help myself, I love that part.) I let it sit in a vinegar water bath for 15 minutes, then rinsed and laid it out on towels to dry.
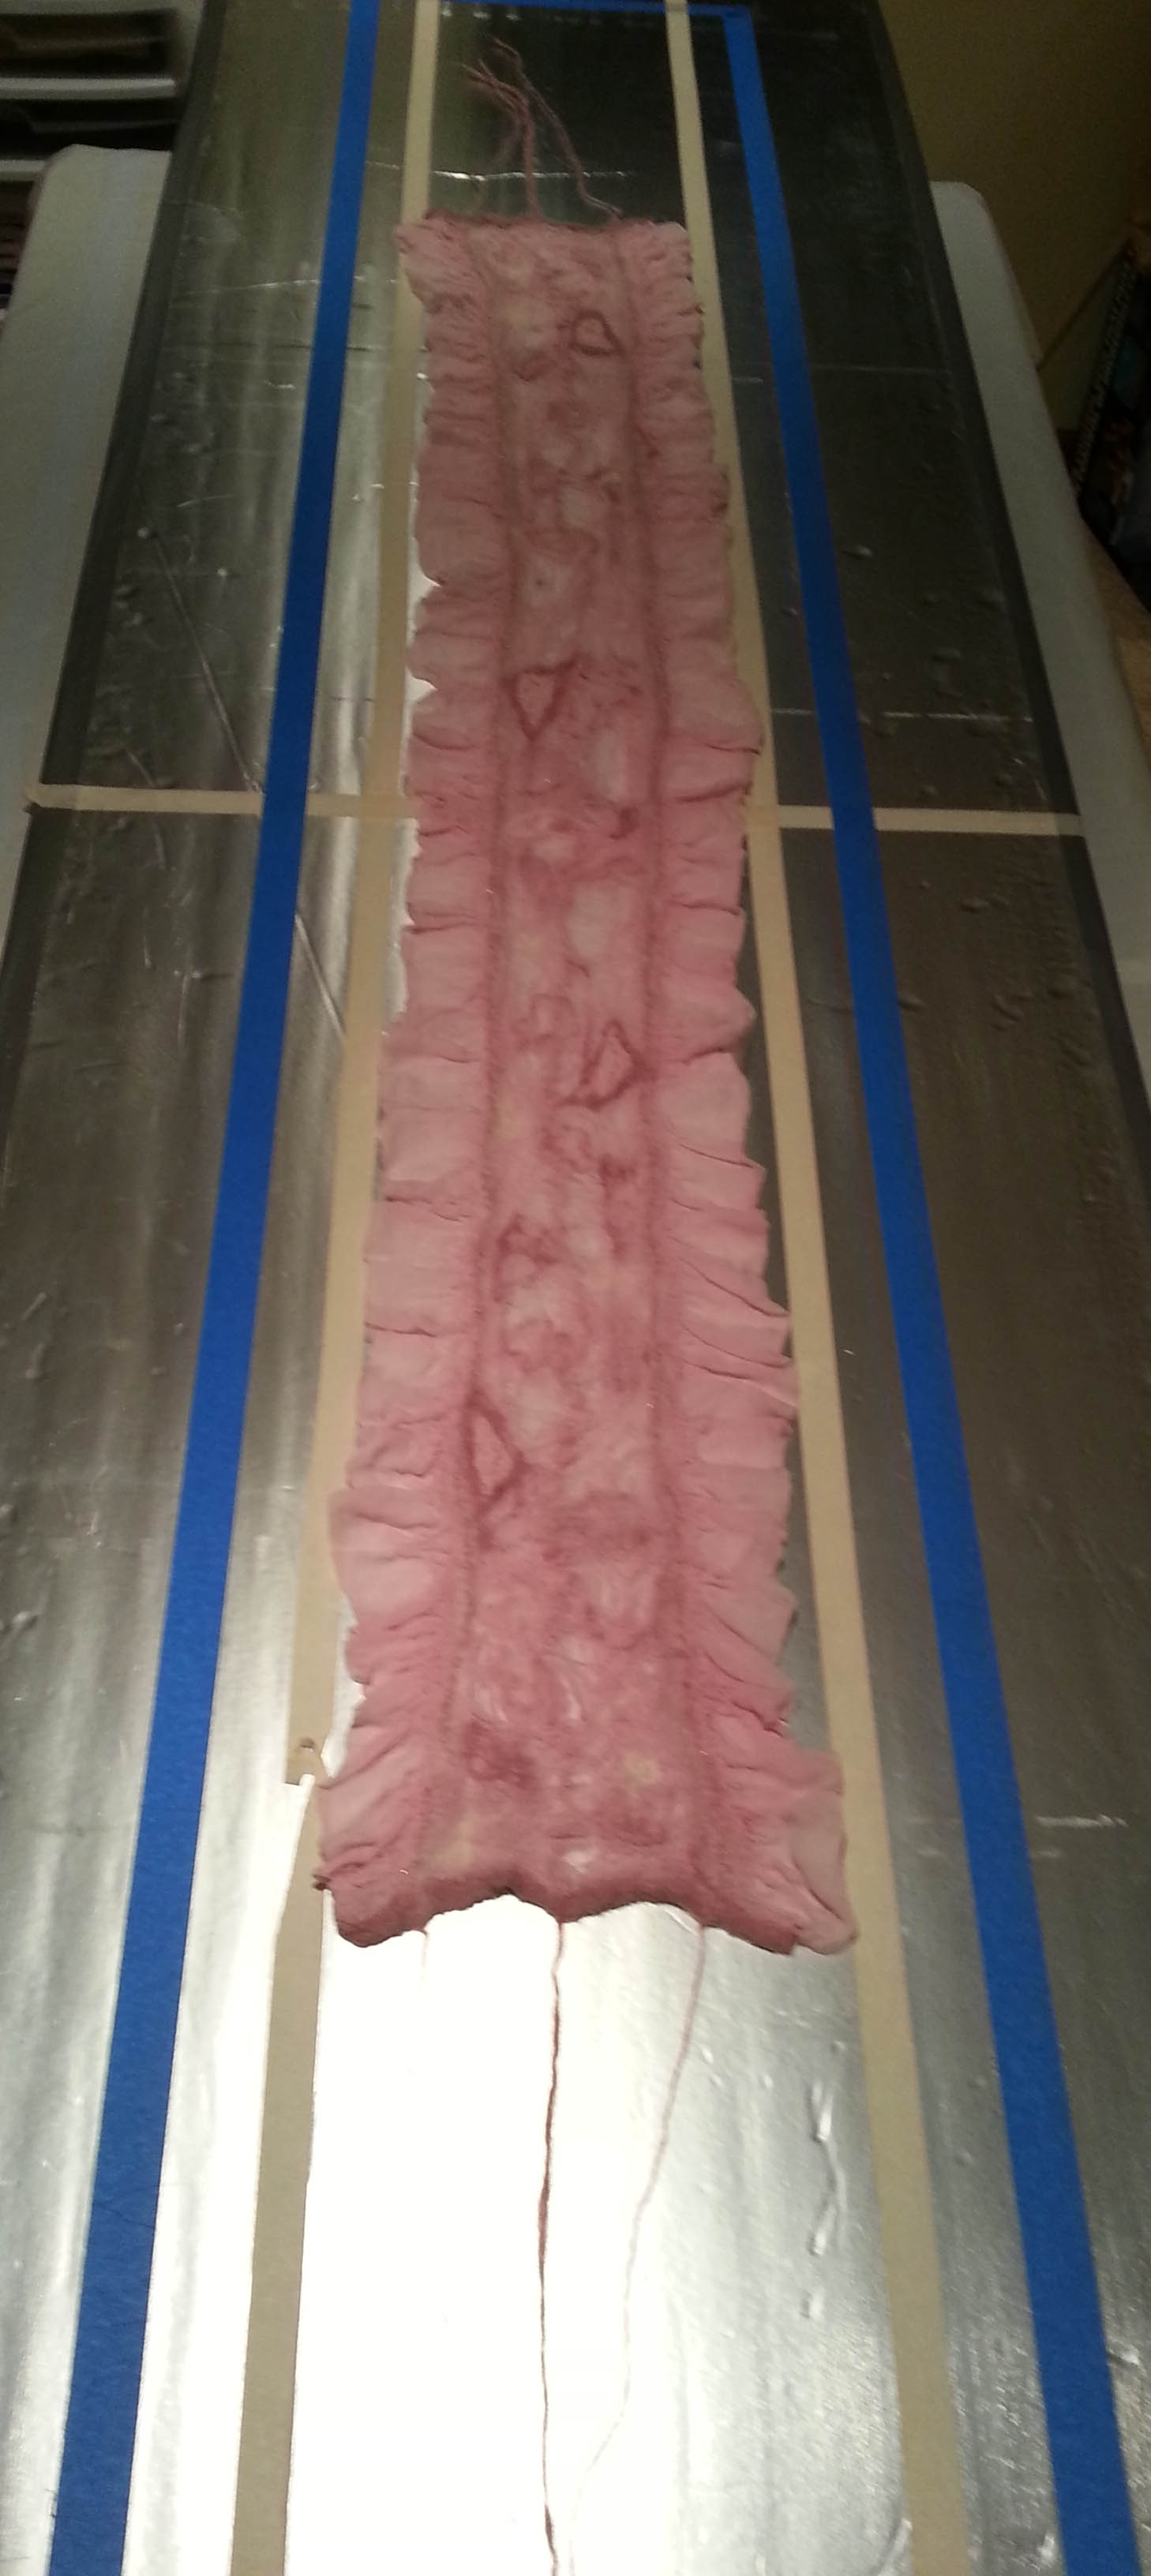

The next day I measured the scarf. It was 9″ x 55″ (22.86 cm x 139.7 cm) without the fringe. The shrinkage was approximately 36-38% in each direction. There were a couple of spots that needed attention so I needle felted them down.


I learned several things with this project. The more wool you use along the ruffle line, the more ruffles you’ll get. The ruffle didn’t shrink much, so the next one I made used a narrower ruffle and more wool along the ruffle seam and I got a much better ruffle. I didn’t use that as an example because it was black and it would have been hard to see. The pink was good to use for a first time because I could see where I had the design on the back side. While I was satisfied with the ruffles and ruching, I wasn’t in love with the scarf. But it was an excellent learning experience. I hope this process will help those of you who would like to try a ruffled silk scarf.
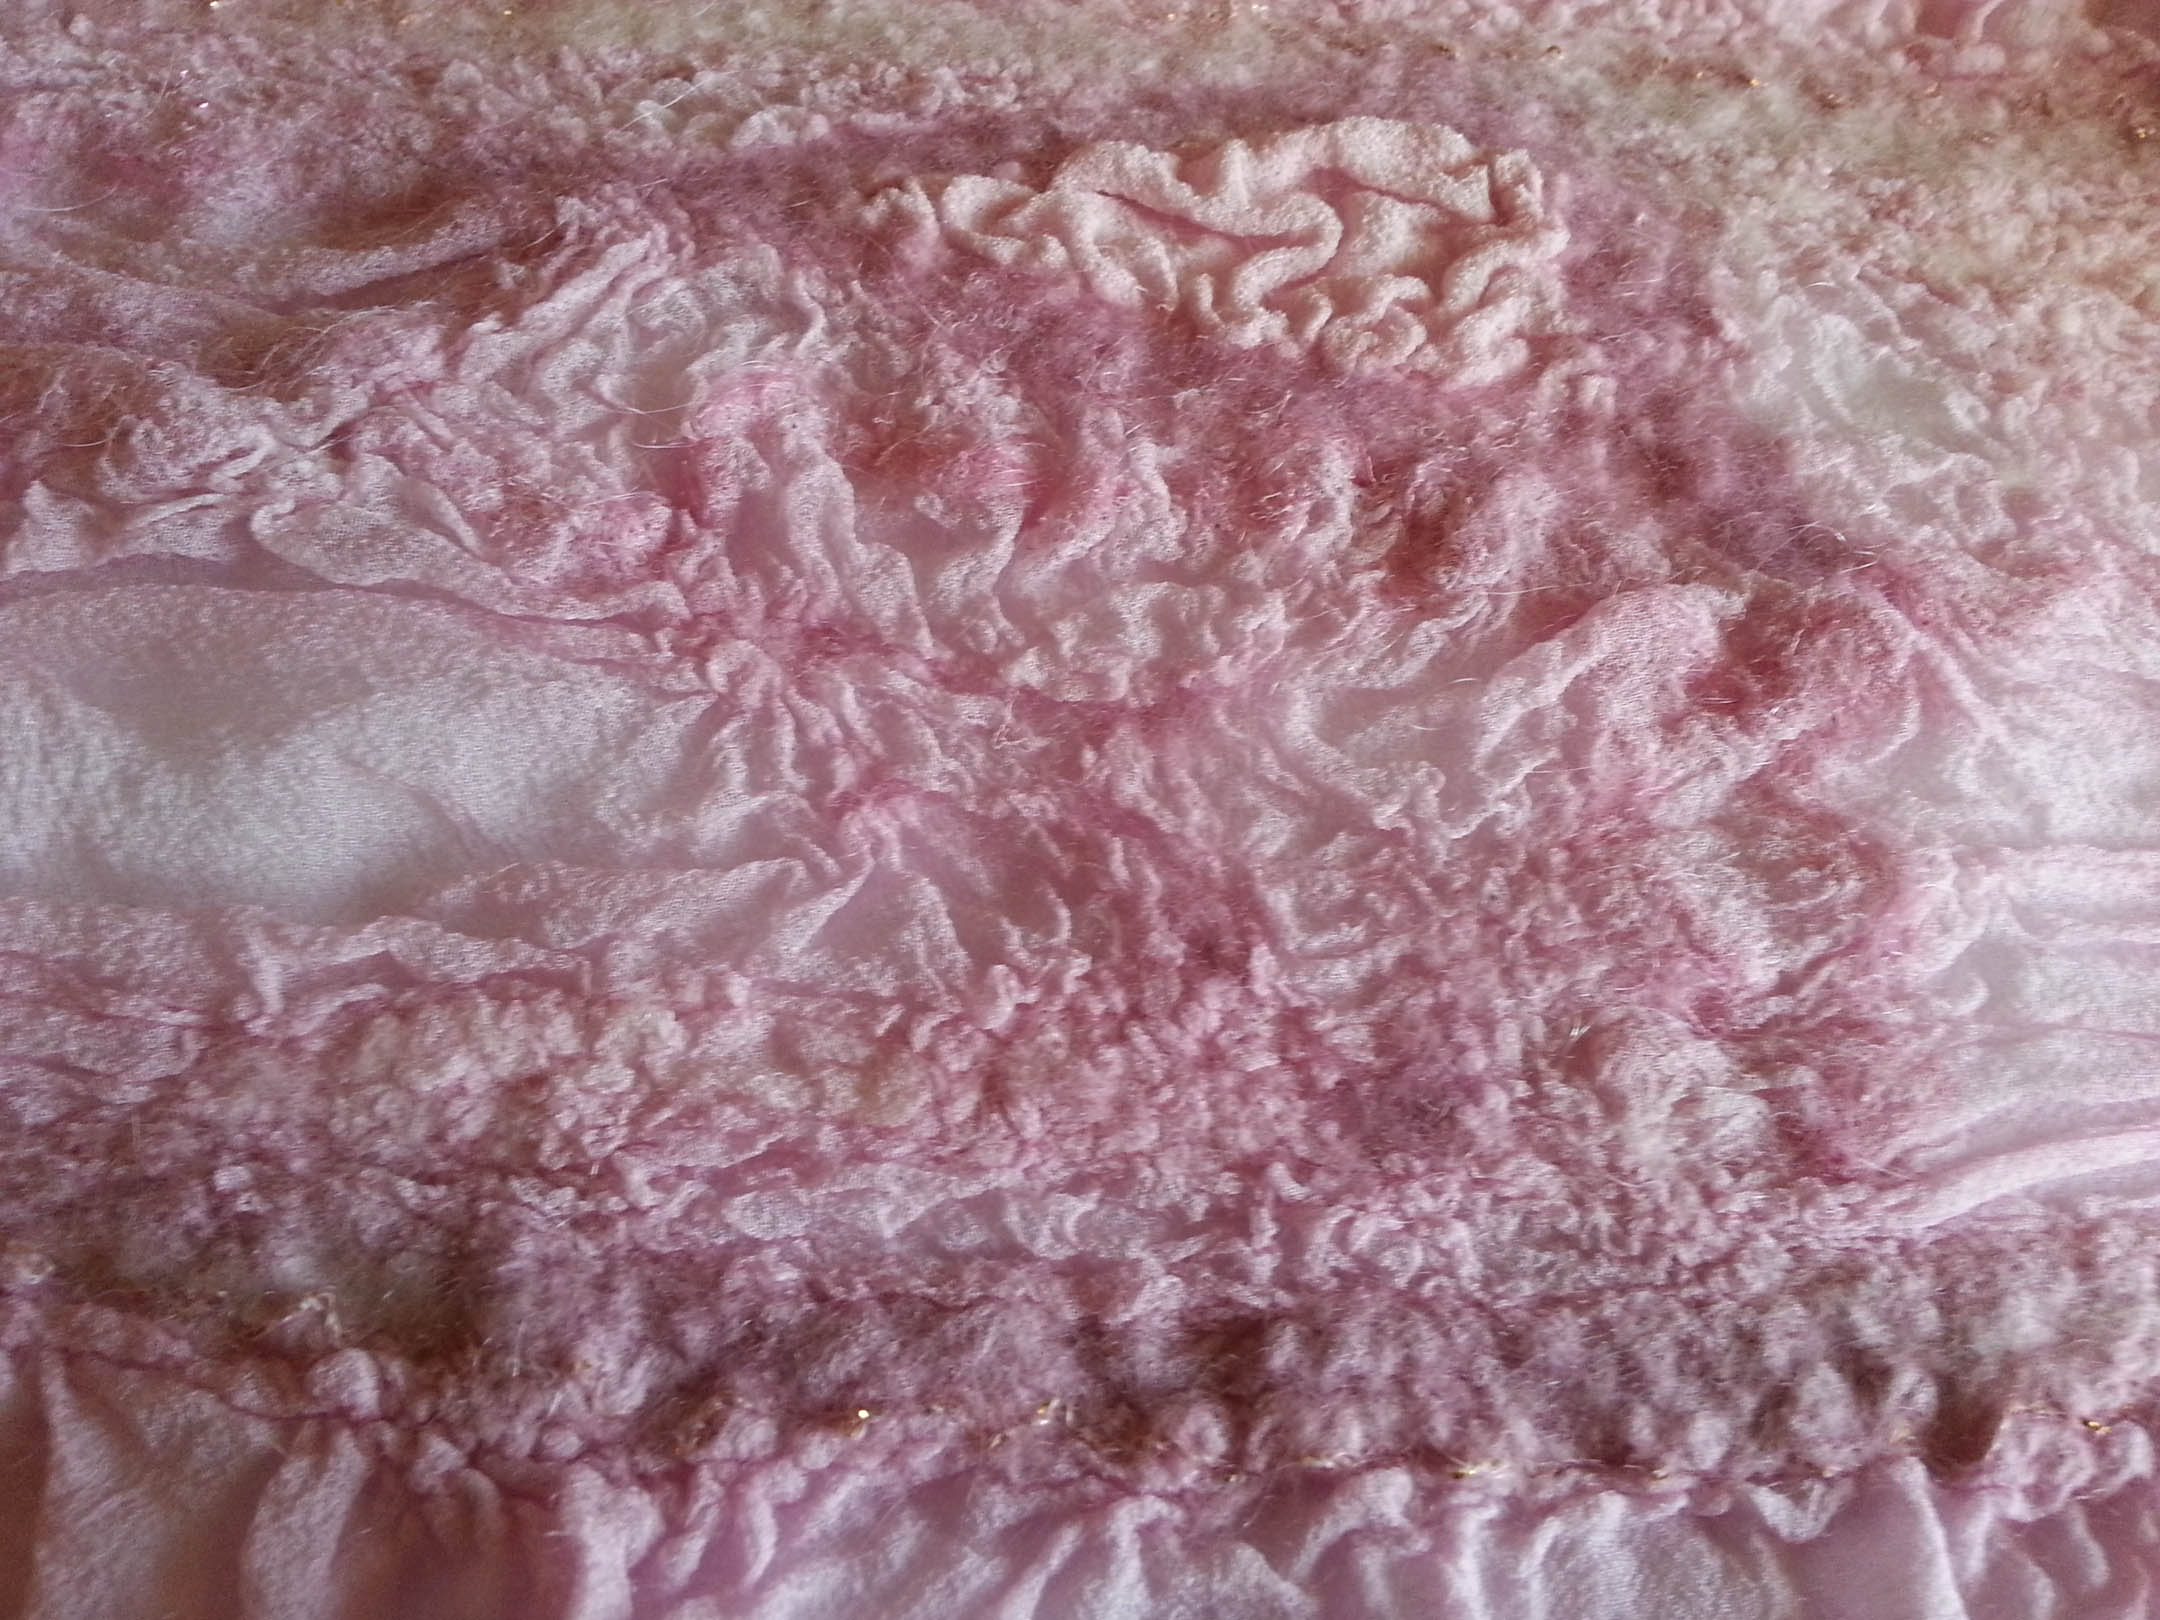
Closeup