

Following a workshop I did with Helen Walsh, I left you all hanging….with an acetate tracing over Barnie’s face to ensure perfect placement of his eyes.


Now, I will explain how he got his distinctive features….
Having decided at the very outset on a cropped image, Barnie’s face was going to be the most important element in the overall picture. Um-ing, ah-ing and generally ruminating, I finally decided that to achieve the measure of importance he deserved, his face needed to be 3D. Then came more ruminating, and a good sprinkle of cogitating, to work out the best way to achieve said 3D effect.
I finally settled on padding out his nose using some cotton quilt wadding. Placement, particularly vertically, was critical and took various trial & error attempts….


Completely covering the wadding with the same fabric as his head gave the correct amount of ‘lift’ – tiny dabs from a glue stick worked perfectly as it was very fiddly! This was then stitched and blended into place with more fly stitches.

We all know the eyes are the window to the soul and importantly what makes a crafted being come alive. Sadly, you may recall, the original photo was not ideal in terms of eyes or beak.


Fortunately, October owl was blessed with great ‘wide open’ eyes, so I simply interpreted them in stitch and fluffed out the fabric to create his nostril feathers.


So far, so good – with everything relatively easy and going according to my new plan, which I must admit had now moved very significantly away from first intentions of the workshop….Stop thinking 🤔….Yep, you are now getting ahead of me in my story 😜
Since his face was now 3D, his beak could no longer be the fabric I’d first trialled for use.

This is where suddenly something very simple became very difficult and very time consuming….trying to find the right beak material and how to achieve the right colour. Barnie was no longer a flat appliqué piece having become more representational, so it all had to be ‘right’.
Easy….plastic!
But try curving plastic in 2 directions especially when it is so small!!! Think….coiled spring! ’Ping’….’Where has the blooming thing (or similar 😜) gone this time?’ Hair dryer = no, heat gun = no (total distortion) etc, etc. Hours, of ruminating, later….maybe cutting the piece from the corner of the plastic container would help?….Taadaa.
In the meantime, attempting to get the right colour match to October owl beak, using supplies available in the house, were unsuccessful….even nail varnish was tried! Problem – whilst I was easily able to mix the colour with paint, it just wouldn’t stick permanently to the plastic, neither on the outside nor the inside, and it always looked streaky and way too shiny….totally wrong!

Finally (a couple of weeks have elapsed by this point, with way too much ruminating having gone on….just for….a BEAK!!!) I hit on 2 simple ideas – chocolate and sandpaper. The sandpaper I carefully used to roughen both the inner and outer surfaces….Barnie has certainly lived and been scratching around for his food!
Chocolate?….it was the image from a cardboard box – yes, I did happily enjoy the Chocolate eclairs (shared of course)! Soaking the back, I carefully finger-rubbed all the cardboard away (a great way to hide one’s identity as it stripped my fingerprints away for days) leaving only the very thin printed paper image, which I then successfully glued to the inside of Barnie’s beak. All this time and trouble….I can already hear your cries, echoing mine earlier…. for just a……..BEAK!


It was then onto stitching the very distinctive barn owl feather ‘spots’ (open chain & seed) before auditioning supplies for the snow.


I finally settled on two very different materials, crystal organza and viscose staple fibres which I needle-felted into the linen edge. The organza was too shiny and the colour just wasn’t right. I much preferred the subtle sheen of the viscose which also allowed me to make full use of the interesting ‘matted’ bits. Some might argue that if I wanted to be more authentic my white colours should be swapped – the snow to be more blue and the owl more off white! I’ll just content myself by saying that it is a trick of the lighting.


Finally – mounting time….
After ironing/steaming out the circles left by the embroidery hoop which was an ‘oh boy!’ nightmare….any advice is welcome here!….I did not lace the picture as would be traditional but adopted a newer stretching technique I have learned.
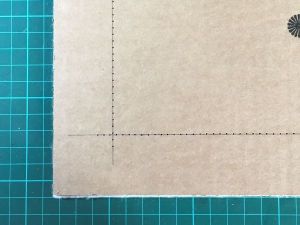
The linen picture was laid, in its exact position for the mount aperture, onto some thin cotton wadding suitably cut to my 37x37cm (14.5×14.5in) frame size. I wanted the finished picture to feel softer rather than tautly stretched, hence the wadding.
Together this was laid onto thin cardboard (again cut to frame size), through which I had machine stitched (largest stitch length, no thread) a square. The sandwich of cardboard, wadding and linen were then hand stitched together. I even pencilled a line on the linen warp & weft to ensure accuracy….ooops perfectionism struck again!


I hope you have enjoyed Barnie’s journey into being. He is now quietly bemused watching my activities, and he won’t be leaving my side any time soon!


Have you had small niggly details that just needed to be right? Or are you more ‘Laissez faire’?