I don’t make New Year Resolutions, there’s absolutely no point as I have the attention span of a puppy at that time of year. Instead, I opt for trying new things around my birthday. It’s a good way for me to treat myself to supplies that I normally would not try. There is a bit of a downside in that I soon won’t be able to open presses without an avalanche of goodies hitting me but we will push that thought aside and bury it, along with the passing years (under the goodies at the back of the press).
This year, I decided that I wanted to try tear away stabilizer. It’s one of those products I had heard about but it is not stocked locally. As a result it had fallen into that category of ‘mmmm that looks interesting’. Followed by a long period of totally forgetting it existed. So, when I finally happened upon it on Amazon, I decided I should make the purchase before I forgot all about it again!
I opted for 8 inch square sheets which came in a packet of 100 and cost less than Stg£9.00 (less than $10.00).
I love my sewing machine! It’s a huge heavy yoke from Janome that I bought comparatively recently. Like many machines these days, it has the facility for free motion embroidery. As a sewist, I have lots of coloured threads so I was ready to get to work.
Next, the design. I opted for copyright free doodles that I sourced on Shutterstock. I was attracted to two designs which are achieved without lifting the pen too often. This meant that there would not be too many gaps when it came to the free motion work.


I printed off my chosen designs and then transferred them onto the tear away stabilizer using a permanent marker. I decided to use some white linen from my stash as my background. I washed one of these pieces and left the other two alone.


I then pinned cotton batting to the back of two of the pieces of linen – the third piece of linen was left with no backing on it. I wanted to see if I needed the batting for extra structure. After this I pinned the pre-traced design/stabilizer onto the fabric and used the free motion embroidery function on the sewing machine to transfer the designs across. I worked my way slowly along the lines of the drawing going back and forward a number of times to get a thicker outline. Here are some photos of the back and front sides of my pieces:


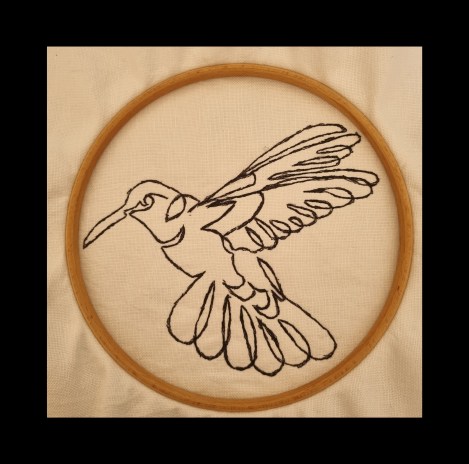
I was very pleased with the resulting ‘embroidery drawings’. The tear away stabilizer came away quite easily on the ‘face’ although I did use a pin to raise the paper on some of the smaller sections of the drawing. The ‘bird’ (more in Part 2 of this post) was a bit more of a challenge as there were a lot of small areas where the stitching crossed over the design so I needed a bit of patience to make sure these were all removed. The back of the pictures were quite neat too.


So, I had to make a decision on what to do next. I don’t have any embroidery thread but I have lots of cotton perle thread so I chose this.


I meant to take photos of my progress but got carried away. I stitched the eye with the free motion embroidery function. It is my first attempt at an eye and I am pretty pleased with the result.
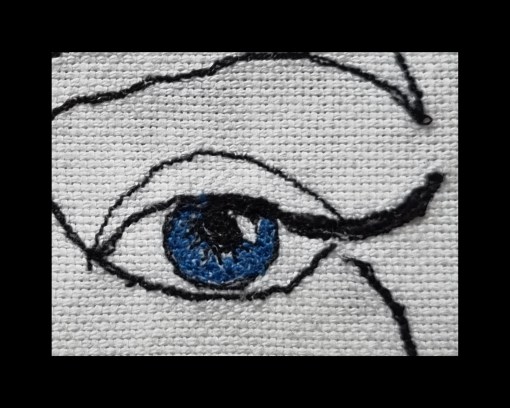

Here is the finished piece.


So far, the second face – the one that is backed with the cotton backing, is not filled in. I would welcome your suggestions on what approach I should take.


Thanks in advance!
I will show you how I finished the bird in Part 2 (November 20th). Here’s a preview of what he looked like ‘naked’.