Browsed by
Tag: display

Last Show of the Year Done.

Last Show of the Year Done.

I am not sure how it got to be this late in the year but the calender doesn’t lie. I have finished my last show of the year. I had a bigger booth than usual it was 10×20. Usually I want a 10×15 and have stuffed myself into a 10×10. The small booth is really to small but 10 x20 is huge. I also had to adhere to a strange rule, nothing above table height in the first 5 feet of the depth of the booth.  It is very restrictive.

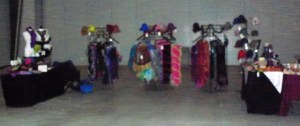
When I first set up I had my long table on one end to define the booth and then put the small one at the other end.

stall original

before

This left the boot feeling wide open and not very inviting. I moved the small table to the make an L shape so I could stand behind it and needle felt some sheep and talk to customers.

stall rearainged

It was more inviting to get people to stop and then they felt comfortable going  into the scarf and hat area of the booth.

after

Of course as soon as one person is in the booth looking at something others will join them. All in all it wasn’t a bad show.

The next couple of will fly by getting ready for Christmas ( how did the house get this messy) and having guests for Christmas (10) and then sorting things out afterwards in time for New Years.

So in case I don’t get another post in before Christmas I will wish you a Merry Christmas. If you don’t celebrate Christmas I hope you have a great time this holiday season no matter what you are doing or celebrating.

One last thing; as I was writting this post I got text from my some from the barn to say we have a new unexpected lamb.

lamb 2

Fleece Navidad. Sorry couldn’t help myself.

Exhibition and Sale

Exhibition and Sale

The guild I belong to, the Ottawa Valley Weavers and Spinners Guild, had its annual exhibition and sale this last weekend. I had a booth selling scarves and wraps and flowers and cuffs and hats etc. The guild does a display on a theme and has demos and promotes our classes. It’s our big event for the year. The venue is beautiful it is a community center now but used to be a church and has a huge domed center.

Here are some pictures of my booth and me explaining what nuno felt is to a customer.


This is one of the organisers wearing an exquisite shawl she knit using her own hand spun alpaca.

This my friend Judy,http://www.facebook.com/l.php?u=http%3A%2F%2Fwww.jumaka.com%2Fspinning%2Fpetfur.html&h=fAQGCIXhy , she not only likes to spin yarn, including dog and cat fur she also likes to spin wood on a lathe to make nostepinne for manually making a center pull ball) and  drop spindles in several styles and weights including supported spindles like she is using in the picture. This is her booth, she shares it with another friend who is more camera shy.


The Guild display had the theme around the house  and of course we had spinners and weavers demonstrating.


Lastly here are pictures of some of the many booths that where there. We had a good variety with both finished goods and supplies.


All in all it was a good show with not as many people as usual but the ones that came were buying. I hope everyone’s upcoming sales are good.

Demo at the Fair

Demo at the Fair

I belong to the Ottawa Valley Weavers and Spinners Guild. Every year we do demos at various fairs and events. This last week end we where at the Carp fair, http://carpfair.ca/ It is a typical fair with rides and concerts but it is in the country so there are horse shows, both western and english, as well as competitions for cattle, pigs and sheep. There are the quilt competitions and other domestic arts and the best corn, squash and forage contests. After you’ve seen all of that and you make it to the back on the fair there is the antique section with old cars and farm machinery on display and being demonstrated. That’s where we are, in a tent with the antiques. We don’t mind, the men who run the machinery are a great bunch. The only other woman we see demonstrating is the blacksmith.

Here are our display tables. You can see tractors through the windows.


 That’s our demo loom on the end. Lots of people give it a try. It has some very interesting patterns on it.

Here I am demonstrating  how to make a needle felted sheep. That’s my coffee in the foreground with its wool felt cozy. You will notice I am wearing long sleeves, my felt vest, my wool cape and some fingerless gloves. When we set up in the morning it was about 10 degrees celsius, or 50 fahrenheit. Once the sun came around to shine on me I started to warm up and shed layers. You can just see the tip on my drop spindle on the table. That’s the other thing I demonstrate.

Here are the ladies spinning.

Jan is out guild librarian and she handles the demo loom and is spinning on a road bug spinning wheel. It is designed to fit on the floor in the front of a van so you can spin while your driver whisks you down the highway.

Here is Linda first carding and then spinning from the rolags she made. She has  a Louet copy she bought second hand.


Last but not least is Bernadette who has a very pretty wheel but I don’t know what type it is.

We had a great day together. We met lots of new people , we handed out lots of bookmarks about the guilds up coming exhibition and sale.  We answered lots of questions and got a few people interested in joining the guild and learning more about fiber arts. Do any of you belong to a guild or go our demonstrating to promote fiber? I think next  year we should yarn bomb a tractor what do you think?

Book Review: Creating Felt Artwork

Book Review: Creating Felt Artwork

Creating Felt Artwork: a step by step guide

This is an excellent, information packed, 60 page, full colour e-book by Rosiepink fibre artists Annie and Lyn. Using one of their own pieces, ‘The Meadow’ as a guide, they show you a step by step process and give you all the information you need to make your own beautiful, unique felt artwork. There are lots of nice, clear photos throughout, and simple but detailed instructions with lots of excellent tips and advice. Before the main part on how to create your felt wall hanging, there is a great section about finding inspiration, how to interpret your ideas into a design and planning your artwork.

The information in the main step by step guide is excellent. It starts with a detailed equipment list with lots of hints for using inexpensive items you’d find around the house, and advice about preparing your work area. The instructions for how to lay out the wool for your design are very clear and detailed, and there are lots of photographs to illustrate each stage. There’s a very detailed explanation of the whole felting process and valuable information about choosing other fabrics and fibres to add to your design.

The next section teaches you how to enhance and embellish your artwork with simple machine embroidery. This part is packed with information and advice too. There’s everything you need to know about stabilising your felt artwork and choosing the right colours and types of thread to work best with your design. There’s information about techniques to create the effect you want and how to add detail. This section also has advice about adding hand stitching and how to use machine and hand stitching to create effects and texture and also about using other fibres for adding extra texture and detail.

Once you’ve finished your felt art wall hanging, you’ll want to display it. There is a great section on how to back and hang your artwork simply and effectively, with clear instructions and photos. But if you’d like to display your artwork a different way, there is also a separate section on alternate ways to display your artwork and how to care for it.

There’s information and tips throughout the book for techniques to help you realise your own design and create your own unique artwork. This includes how to make and use prefelt for more control over your design; how to re-use spare felt in the same way; using yarn and small drafted sections of wool for design, and adding other fabrics and needlefelting to enhance your artwork.

So, what if you’ve followed all the instructions and you’re not happy with the way it turned out, or maybe you made a few sample pieces to try out your colour choices and don’t know what to do with them? There’s even a section for that, with some great ideas on what to do with spare pieces of felt.

And don’t worry if you’re an absolute beginner and have never tried felting before, or don’t really know what all the felting terms mean, there’s a glossary at the end with everything you need to know and an appendix with a complete step by step guide to making felt, with lots of clear photos.

This really is excellent value for money. It’s an invaluable source of information and advice about creating beautiful feltwork and enhancing it simply with easy tips and techniques. And the great advantages about being an e-book is you can have it instantly and zoom into the photos for even more detail 🙂

If you’d like to own a copy, visit Annie and Lyn’s website http://rosiepink.typepad.co.uk/rosiepink/creating-felt-artwork-ebook.html   It’s also available on Craftsy http://www.craftsy.com/project/view/Creating-Felt-Artwork/43696

The Top Ten Ways to Improve Your Booth Displays

The Top Ten Ways to Improve Your Booth Displays

I’m sure there are more than 10 ways you can improve your booth display but these are some major issues that you should address when displaying your products. You will be amazed at the difference a little change in your display will have on increasing your sales. It is worth your time and effort to create the most eye-catching and welcoming booth to attract more customers to take a closer look at your work.

  1. Neatness – Make sure that everything is neat and tidy. You should have table coverings that reach all the way to the ground so that you can use the space under the tables for storage. Make sure all boxes, gear and anything that isn’t a display or your product is hidden from sight.
  2. Warm and Welcoming – Your booth should be welcoming to your customers. Try to avoid the “cave” appearance.  Do you have room to add any cozy touches such as a floor lamp? You should also have some type of flooring, even if it is an indoor show. For someone who has been on their feet for a while, it is nice to have something soft and cushy underfoot. For outdoors, you  might try the interlocking foam squares and for indoors perhaps a piece of remnant carpet or carpet squares.
  3. Full Displays – The displays in your booth should be full but not overcrowded. Avoid cramming pieces in but you also don’t want only one or two pieces alone. Bring enough product to refill your displays immediately after making sales. If you run out of something, then remove that display or shelf entirely or fill the lower displays with silk flowers or driftwood so the displays don’t appear empty.
  4. Group Products – Have enough of each type of product that you carry so that you can group them together. If you have a choice of colors, make sure that the group of products shows these color choices. Grouping products also helps with your signage so that if a product needs explanation, then one sign can be placed by that group.
  5. Match Displays to Products – Everyone has different products and so no one type of display will work for all. The display should show the product to its best advantage. Does it need light shining on it? Should the item be propped up? Does the product need to be filled with paper to give it shape? The key to the right display is visibility. If it can’t be seen right away, then the customer won’t see it. Can you display your work vertically? What type of display makes your work the most visible?
  6. Bring Products Forward – The less distance the customer has to travel to be able to touch your products, the better. If you are selling small items such as jewelry, perhaps all the display cases need to be at the front of the booth. Use shelves that are shallow and avoid deep cabinets. With deep shelves, the products towards the back will be less visible and in the shadows.
  7. Eye Level Displays – Put as many of your products at eye level as possible. Things on the floor/ground will be missed. Make it easy on the customer, so that they can see all of your beautiful work without having to work at it. Also use different levels in your displays to give interest.
  8. Branding Banner – Use a large banner in the back of your booth with your “brand” on it. Make sure it is easy to read from a distance and includes an eye-catching color or photo.  The banner will help to draw customers from a distance. If you are selling small products, it would be wise to invest in posters with blown up photos of your work that can be seen from a distance.
  9. Improve Lighting – Color sells. If a customer can’t see the colors or details in your work, you will lose sales. Lighting is the key. Be creative with your lighting. There are many types of battery-powered lights these days. Perhaps your products would look good with under lighting. Use a piece of plexiglass with a battery-powered light underneath to add light to your displays.
  10. Tell the Customer What to Do – Use simple signs to let your products speak for themselves. Perhaps your sign will say “Felted merino scarves, the softest scarf you’ll ever feel”.  Or it could be “Scented felt soaps – Smell me!” Get the customer to use some of their other senses besides sight. Encourage them to pick up the product and you will see more sales.

Once your made your improvements, continue to tweak your booth displays and designs. See what works and what doesn’t. Look at what other artists do that works. Can that be adapted in some manner to improve your displays?

I’d love to see some photos of your booth at a craft fair. If you have some, please feel free to add it to our Flickr group or start a post on the forum.