Browsed by
Month: March 2013

Bird Houses are Done, and A Nuno Felt Pouch for Visa

Bird Houses are Done, and A Nuno Felt Pouch for Visa

I got the bird houses stung and ready to hang. The big round one ended up with a very big hole. I am not sure how I managed to stretch it so much.  I think it will be better as a bird feeder or just a decoration. The purple and orange one ended up with its hole to big and to low down so I made it into a bird feeder for my Mother in Law.

bird house and chickadee 2 bird house and chickadee

I Hung it up near the other bird feeders and despite the wind there was a chickadee in it before I could get back in the door. You have to love chickadees, they are so brave and curios. I will have to make some more like that on purpose.

Here they are all hanging up for their picture.

finished birdhouses 1 finished birdhouses 2

Those are my sons helping hands. The wind saw what we where doing and kept blowing the houses around.

We got a new way of taking visa recently. It’s called square https://squareup.com/ca?gclid=CNP5zKDWmLYCFe5AMgodClkAQw and it works with your smart phone. It’s not very big and I am afraid of loosing it so I put it in a mint tin. Well that is really ugly, no matter how practical. Time to make a pouch for it.

square pouch before felting square pouch after felting

I decided to do a simple sewn pouch so I know it would be the right size when I was done.

square pouch after sewing back square pouch after sewing front

square pouch after sewing closed

I did as second one in green. We have two squares, one for me and one for my husband. Sometimes we are both selling in different places on the same day.

square pouch green back square pouch green front

square pouch green closed

This one was made form a bigger pouch I wasn’t using.

First Quarter Challenge Drawing to a Close

First Quarter Challenge Drawing to a Close

A Daily Dose of Fiber challenge is coming to an end. I challenged everyone to take at least five minutes a day and do something creative. I personally had been doing this for a while but I wanted to add increased blogging on my personal blog. So I blogged every day during the challenge and I do have to say it was a challenge especially when I was traveling. I don’t own a “smart” phone and I don’t seem to be very mobile when it comes to online stuff. But I got a lot of creative stuff done and creating every day has been fun. Many times when I didn’t really feel like doing anything, I made myself get started because I had to do my 5 minutes a day. Once I got started, I ended up spending much more than 5 minutes because I quickly became involved in what I was doing.

Beaded Book
Beaded Book

So what did I accomplish with at least 5 minutes a day? In January, I spent the first half of the month completing my beaded book and making a beaded tassel for it. I also made three felt appliques, two turned edge appliques, two shadow appliques and a felt applique book. I researched broderie perse, the Bronze age, Kyrgyz design and reverse applique. I made a couple of pieces of flat felt, painted some commercial felt and finished the slipper bottoms for my husband’s slippers.

Applique Felt Book with Hand Stitching

February was my travel month so I wasn’t quite as productive since I had to go to the Buyers Market for the store and attend my last stitch class. But I did manage to frame some of my work for a mini exhibition, do a little machine applique, learn some new types of bindings for books including hand stitching and machine stitching, make a machine stitched book page, felt some cat toys, work in my sketchbook/studio journal, do a little Kantha stitching while traveling, finish up the last of the felt appliques, make a shadow applique card for hubbie for Valentine’s Day, try out a new painting technique, carve some linoleum stamps and make some stitched greeting cards.

Felt Applique with Couched Cording

In March I have been finishing up the last of my stitch class homework. I have almost completed two machine stitched cut back applique pieces, I practiced some new hand stitches, I completed my 5 page machine stitched book, I went and picked up 200# of wool and took it to the processing mill, I started reading up on yurt building, I did very tiny blanket stitch around one of the book pages mentioned above, had a painting party at my house, learned new insertion stitches for small book bindings, laced my Kantha bird in preparation for mounting, matted several of my print to stitch pieces and made some grey scale croppers.

MINOLTA DIGITAL CAMERA

Whew… I think I need to take a nap!

More Progress

More Progress

Another progress report on my mixed media journal for Rainy

So we’ve gone from here last week

book2

I played around with the colors that much it wasn’t funny lol  but when i was sort of happy with it

rainys1 I  covered the whole thing Bitumen and waited for it to dry

rainys3

 then its rubbed back with white spirits to reveal the colors underneath and some foil

Once it was wiped back I still played with the colors but all in all im generally happy with it

The bits that look like little white pieces are actually the foil coming through, in person it looks so much better and the foil showing makes it look pretty cool, I wish i could take a better photo so it would show up better,  I really hope she likes it !!

rainys2

Then of course I had to try another one, so this is the first parts of laying out something, still no design as I was just playing,

1piece

I also added folded up foil like a pleat and some fibre, then paint in greens and blues with a bit of white and yellow.

After the bitumen was rubbed back this one revealed so much more foil that it looks pretty cool, and I really like the colors . but which way is up lol  ???

which way2

I know it doesn’t really matter right now. but i do want to make something with a purpose soon 🙂

which way1

This next one is for another very close friend ( Mary) to record her dreams  and called Dream Time ( orginal hey !  )  I’ve added those colored stips to see what will happen when I use the paint, bitumen and spirits, i’ll do much brighter colors for our  colorful Mary lol  and  i’d like to try to add some silk in with this one as well so we’ll see how it turns out. So far i’ve use foil !  tiny little bells, it might give a tinkle now and then lol, some foam and other beads and of course a key 🙂 i’ll try to add some silk over the butterfly.

marys

So that’s my week,  I really hope your all enjoying yours !!!

Latest Projects

Latest Projects

I decided to take the plunge and open an Etsy shop. Don’t worry, that doesn’t mean I’m going to start making sticks with feathers and crystals stuck to them or adding ironic moustaches to all my notebooks 😉  Lyn was telling me that etsy have started doing instant downloads, but it appears to be in the trial stage at the moment. I added a digital download to my shop and applied to join their ‘team’ in the hope I can try it too, but I’m still waiting to hear.

I don’t have much in there at the moment, mostly some silk fibre packs and a felted notebook cover. But on Friday I was having a rummage through my fabric and with 3 large boxes and 5 shoe boxes open and contents all over, I thought it might be nice to put together a fabric sample pack of the different fabrics I used in my e-book. How long could it take? About 20 minutes or so? Ha! 2 hours later I was still cutting and measuring, taking photos, making piles on the floor, standing on the tape measure and almost slicing my neck open, getting sidetracked with a pile of fabric perfect for this, that or the other! And then I had to edit the photos and do the listing. I don’t know how people find the time! Of course, I’m pretty sure my fabric supply is dangerously low now, so I’ll probably have to re-stock 🙂

fabricsYesterday I found a bit of time to go through my box of felt pieces to make things with. I had quite a large piece I’d made with black merino and strips of coloured cotton gauze. The back was blues and greens with silk embellishments. I thought it’d make a nice purse or wallet, with two sections. I’ve almost finished it, I just need to add the button and button hole.

OLYMPUS DIGITAL CAMERATrying a button:

OLYMPUS DIGITAL CAMERAThe back:

OLYMPUS DIGITAL CAMERAI still had quite a big piece of the felt left, so I cut the pieces out for another one:

OLYMPUS DIGITAL CAMERAThe other project I found time for was sewing a notebook cover. I made a piece of nuno felt a while back from a patterned pink, green and blue silk scarf. I had always intended to make a notebook cover out of it but really liked it and didn’t want to cut it up! I think time has made it a little easier though 🙂

OLYMPUS DIGITAL CAMERAThe texture is really nice:

OLYMPUS DIGITAL CAMERAI had a few ideas for making things with some of the natural white felt pieces I have spare. I started to cut them up, but you’ll have to wait and see what I make from these 🙂

OLYMPUS DIGITAL CAMERAHave you had time for making anything lately or is everyone battling the weather, it seems like half of us are under feet of snow. I’m glad it’s cooled off a bit down under though, only about 32C now in Victoria, Kaz has probably got her woolly jumpers out and the fire on 😉

Bird Houses are Moving Along

Bird Houses are Moving Along

Bird houses are moving along. After I cut the holes I rolled them a little I put them in to some pantyhose tops for a trip through the dryer to get some of the fulling done.

bird houses in pantyhose They have balloons inside them.

They tumble for about 20 minuets without any heat. Then it’s back to hand fulling to finish them. I did some with merino and some with romney. Here you can see the shrinkage difference between the wool. The merino ones are on top.

shrinkage comparison 2 shrinkage comparison

Next is they get rinsed and more balloons inside to get them to dry the right shape.

drying with balloons for shape

You will notice that the green ones are not in this picture, this is why:

bird houses bleeding

This is their 10th soak so the next step is to boil them to see if that stops the bleeding.

I will do the finishing work on the bird houses this weekend. Why is the finishing always the hardest part. I will add the hanging sting and hang them up for one final picture for  you.


Wool Gathering

Wool Gathering

This past weekend, my husband and I went to pick up 200# of wool and took it to the processing plant. This is the wool that I will be using to build a yurt this summer. It was really exciting to get started on this project.

MINOLTA DIGITAL CAMERAWe got up early on Saturday morning and drove to Florence, MT which is about 3 hours from our house. We arrived and the little white trailer is where the wool we were buying was stored. We loaded it on to our trailer and strapped it all down.

MINOLTA DIGITAL CAMERAHere are a few of the sheep that were on Suzanne’s farm.

MINOLTA DIGITAL CAMERAMost of the wool is this dark color. This is either a Targee or Black Welsh breed of sheep.

MINOLTA DIGITAL CAMERAThe dogs wanted to get in on the act, so here is Suzanne trying to calm them down a bit.

MINOLTA DIGITAL CAMERA

All of the bags of wool were labeled with the sheep name for the fleece. This is Sophie and there was also Elmo and Ernie and a few others I have forgotten.

MINOLTA DIGITAL CAMERA

Here’s some of the darker wool. I got a mix of Targee, Black Welsh, Romney and BFL.

MINOLTA DIGITAL CAMERAThen we took off for Hall, MT. We had to make a stop for a cargo net to go over the tarp as we were afraid all the wool was going to blow away. Once it was strapped down more tightly, we were back on the road to Hall. After another one and half hours of driving we arrived at Sugar Loaf Wool Mill.

MINOLTA DIGITAL CAMERA

Here I am helping to unload the wool from the trailer. It was cold and windy.

MINOLTA DIGITAL CAMERA

Once we got inside, Ed weighed all the bags of wool. We had 206#.

MINOLTA DIGITAL CAMERA

Here’s Sue and her assistant adding up the wool amounts.

MINOLTA DIGITAL CAMERA

Here is the carder and it is really huge. Ed was really nice and turned on the carder to make a batt that will be similar to the ones I will be getting back. The videos below show the carder at work. I wasn’t able to edit the videos because I need a better editing program but I think they are worth watching if you haven’t seen a big carder running before. The videos are fairly short and the last one shows Ed cutting the batt off the carder.

MINOLTA DIGITAL CAMERA

This is a rolling felting machine that Ed built himself. I need one of these 🙂

Mixed Media Report !!

Mixed Media Report !!

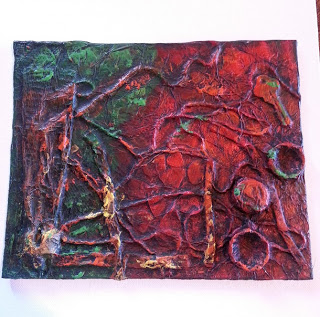
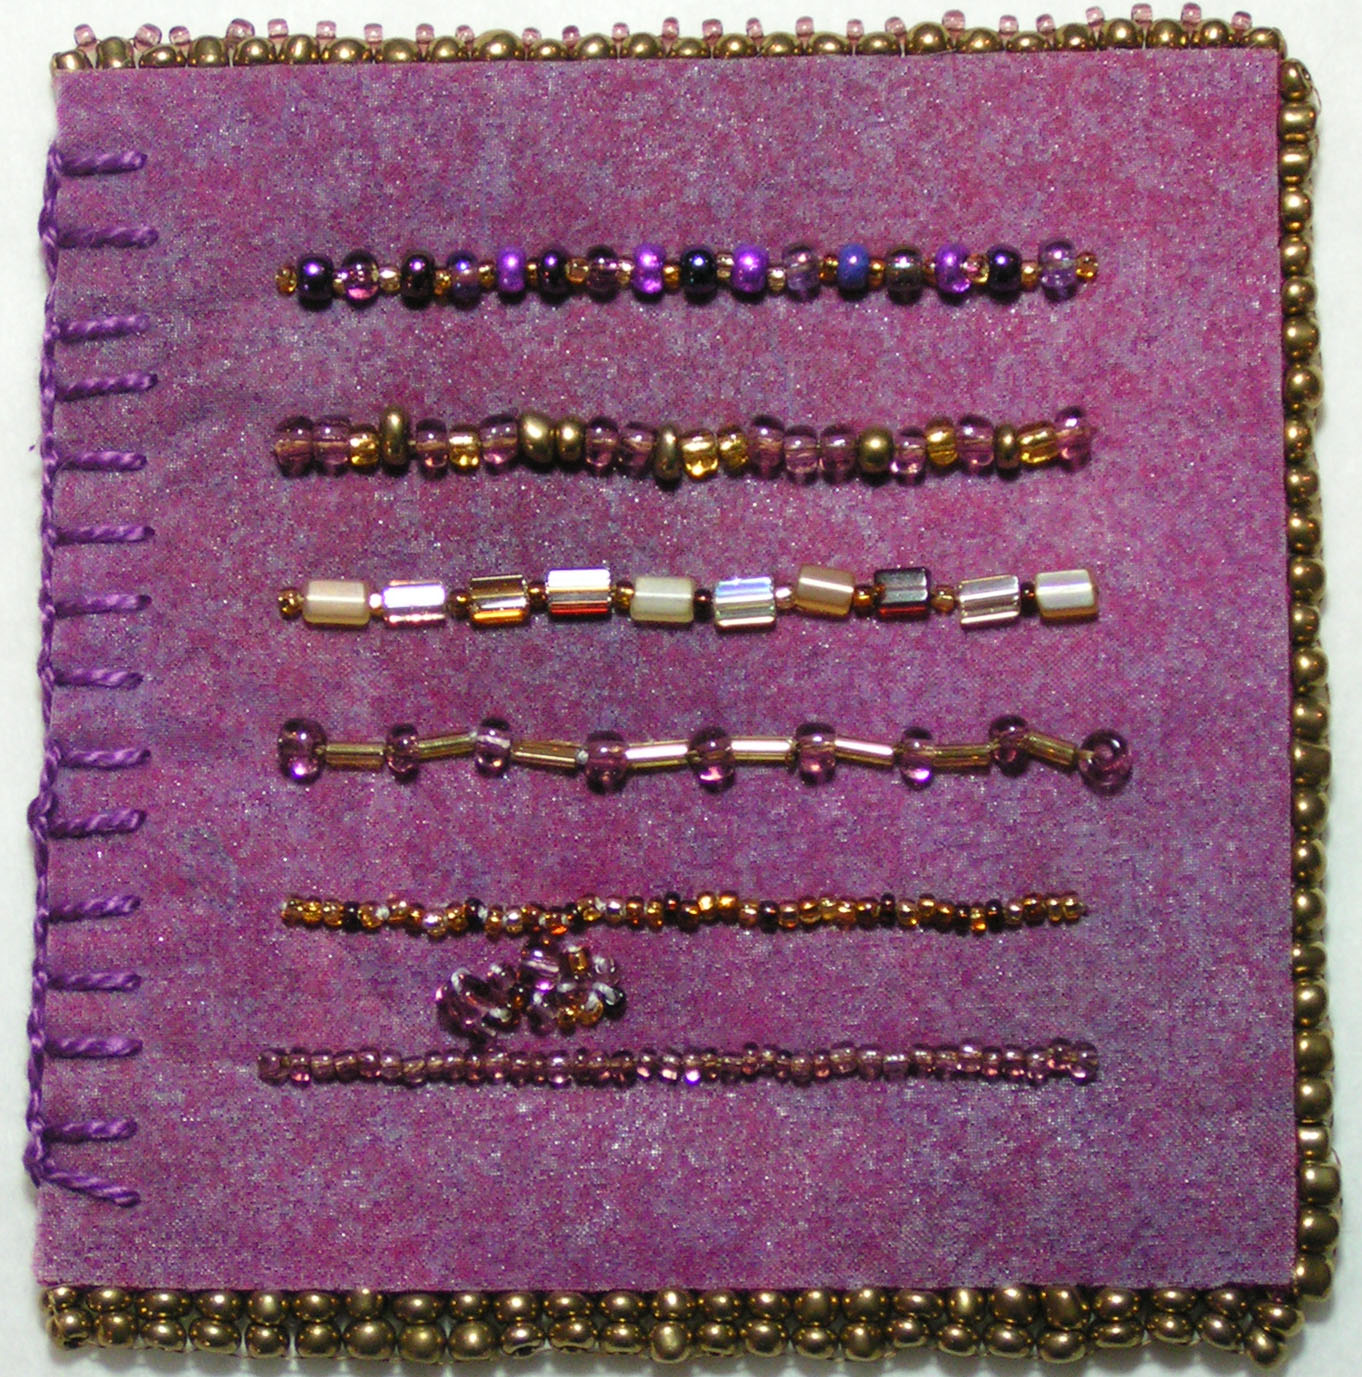
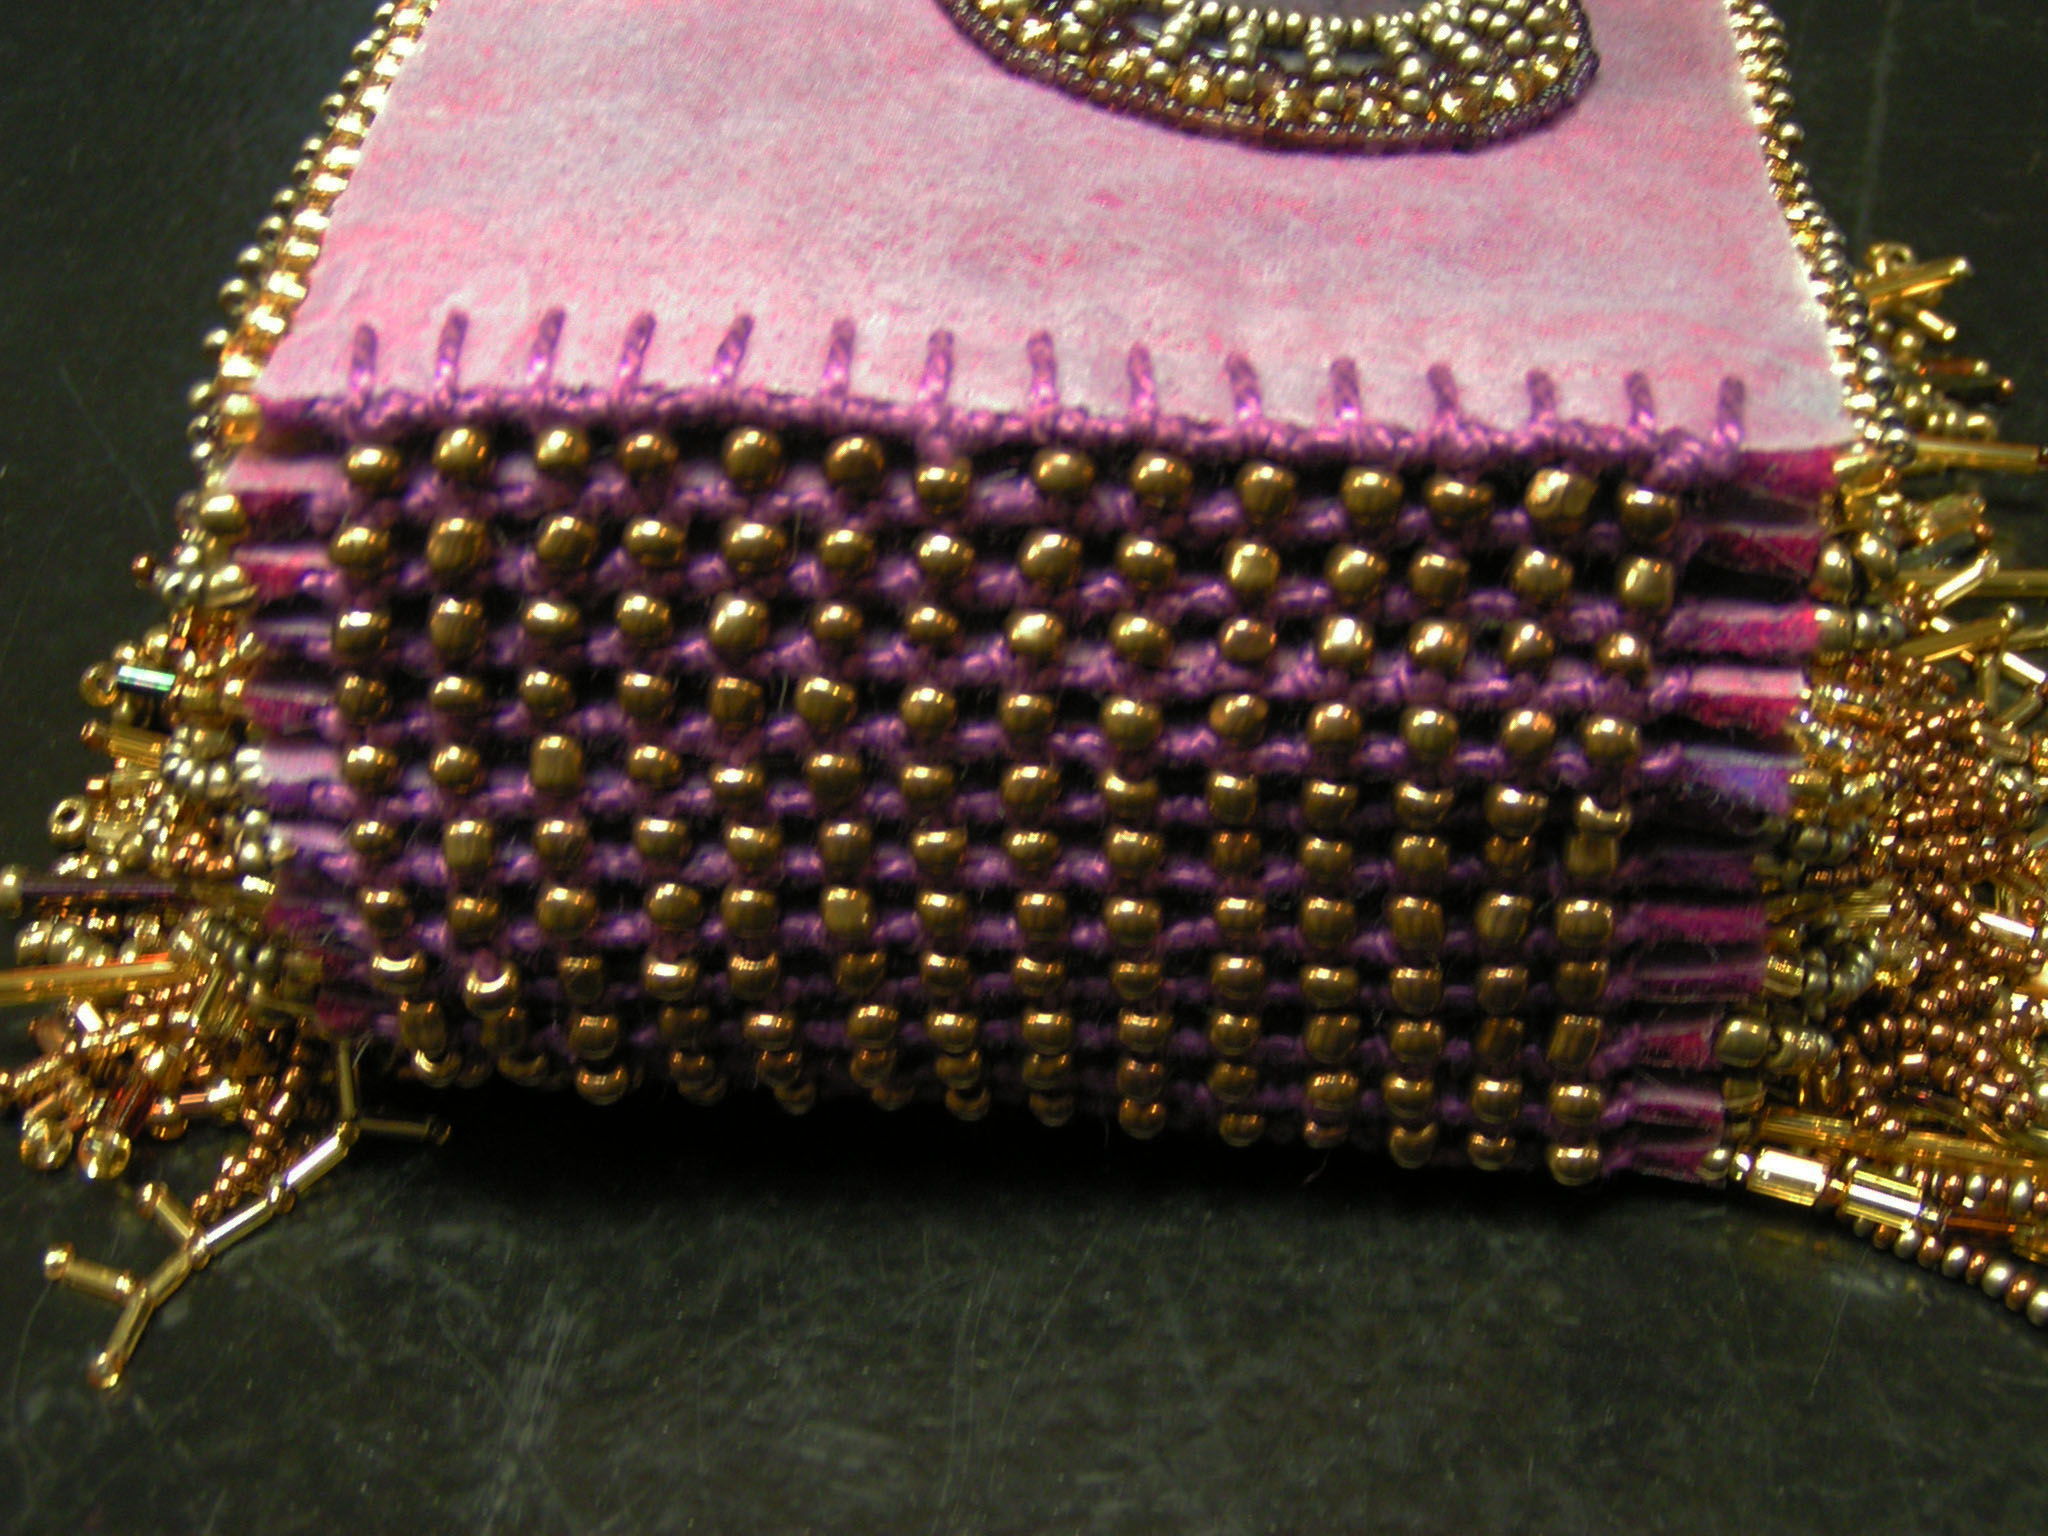
I thought I’d give you a progress report on the things I’m doing and loving, I think you’ve seen these first 2 but im adding them in to show the firsts ones in mixed media that I was playing with. These are foil art and I’m thoroughly enjoying playing around.

mixed

mixed m2

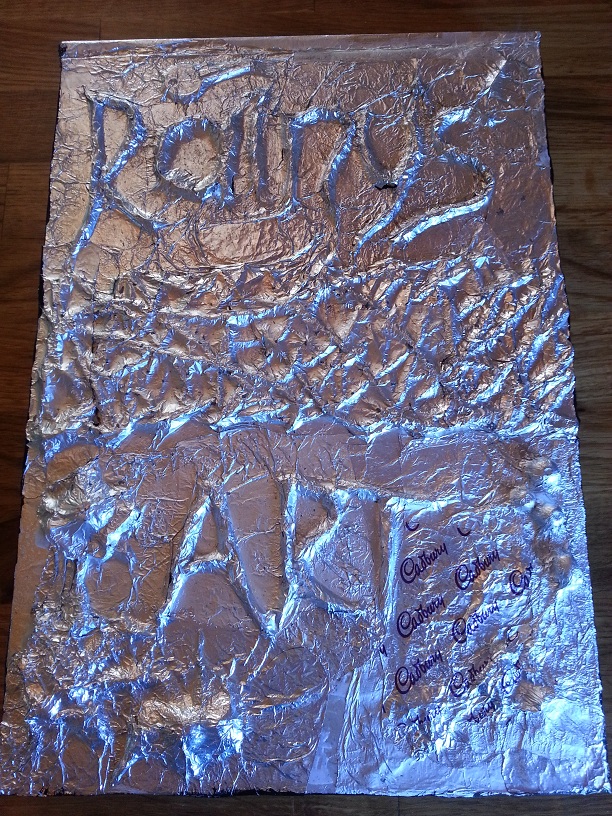
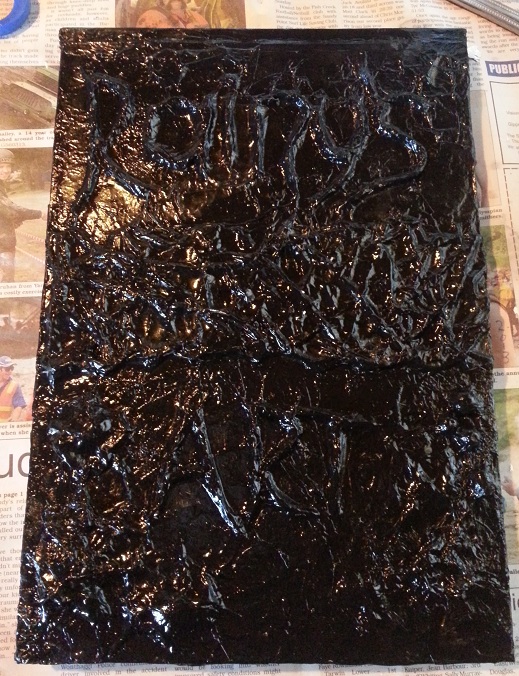
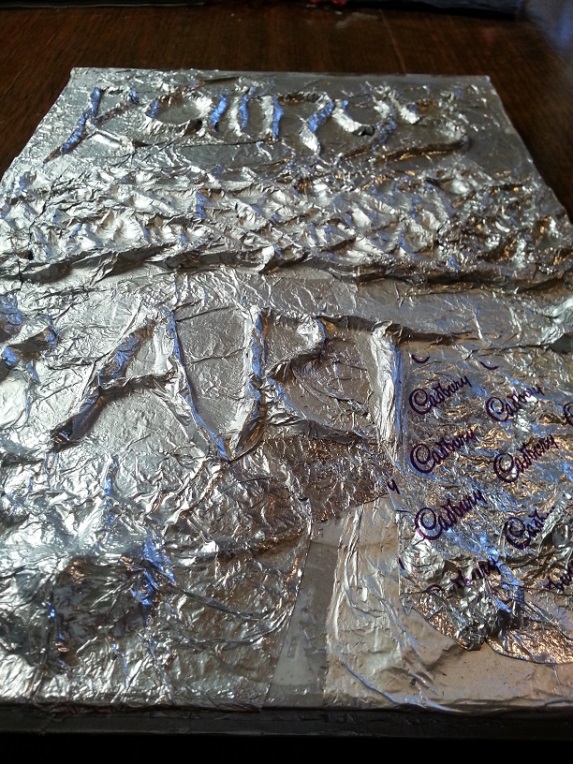
My current project im working on is for a friend of mine that loves to draw and paint but unfortunately hasn’t picked up her brushes or pencils for a long time. We’ve had so many conversations about this and I’ve been trying to encourage her to get going, well its not working yet although I think I’m getting close lol  So I decided to make her something that in the hope of inspiring her to move.  This is a blank journal that she can use to draw, paint or just do art and I really hope she likes it.  Her name is Loraine but we all call her rainy.  So this is another foil art project and I still wasnt sure  what I was doing so silly my didn’t take any pics until now,  But I’ve added in rolled up pieces of foil strips to make her name, in a pic below there is a red and black mat, I cut a strip from the red one and attached it along of middle of book,  there’s a key, some beads, dried flowers in the left bottom corner and as I devoured a block of chocolate the other night,( in the name of art)   I also attached a small portion of the wrapper lol  the whole book is then covered in many layers of foil, I’ve glad wrapped the inside pages so I don’t get any mess on them.  I used a small dry stiff brush and paverpol to carefully press the foil into all the nooks and crannies so as to have all the things I added in, raised up and standing out.  This has taken me the better part of the week to do so far as I wanted it to be all attached properly and not have any loose bits, last night I went over the entire surface with pva and paverpol to make sure that as its being used, nothing will come off.

rainy's1

Today I’ll be adding the paint and starting to sand it back until I get the effect I’m after before using an ageing medium and then sealing completely with a varnish.  I’ll make sure at least a small part of the Cadbury wrapper is shown so she knows that I had to eat chocolate, for her sake lol

rainy's2

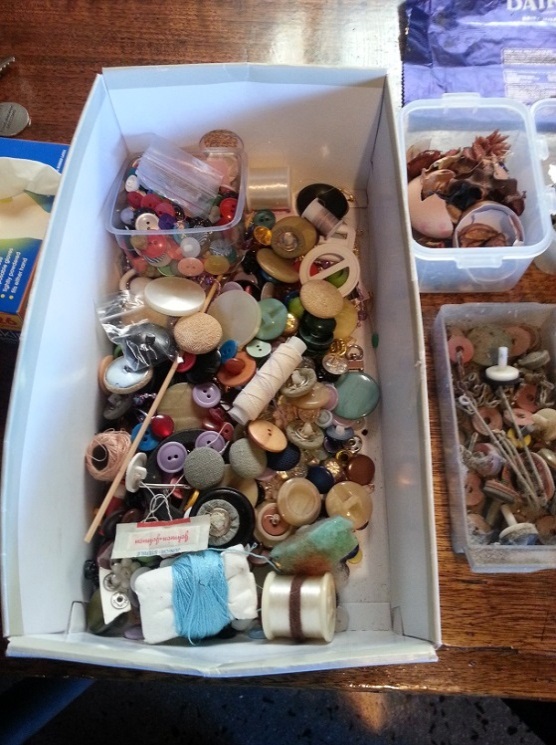
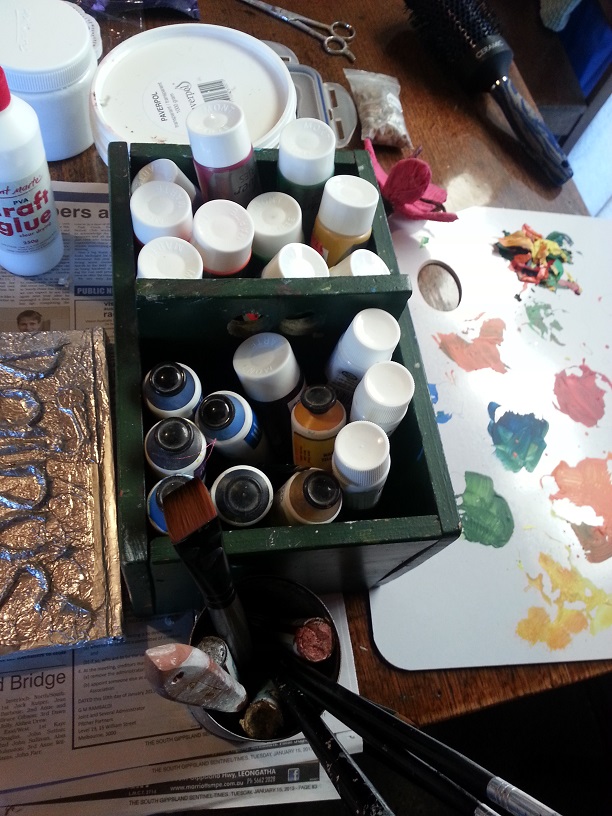
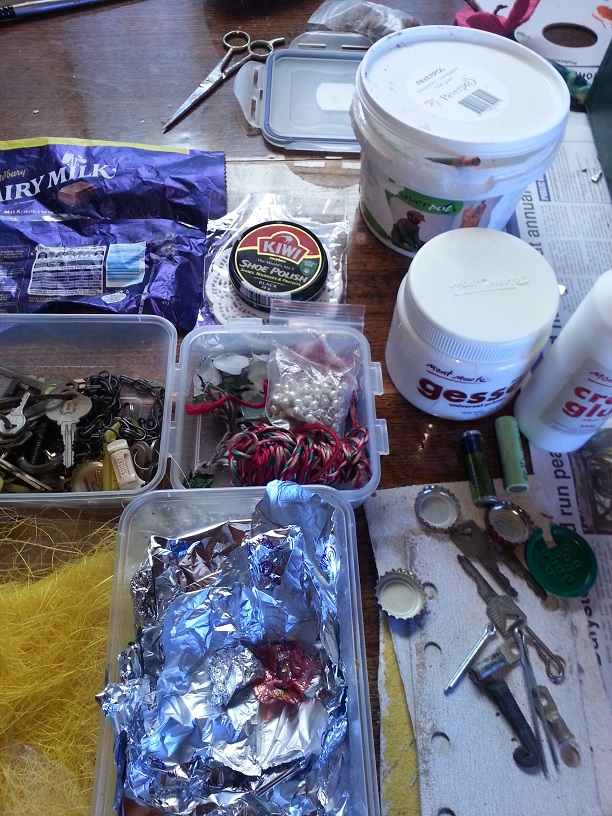
This next lot of pics is to show you what I’ve been collecting as part of my mixed media rampage, and yes there are egg shells in there ready and waiting for me to break them up and add them in to something lol  Ive also been raiding hubby’s shed for any small bits and pieces, he has no idea that’s he’s missing a few small things yet lol

things1

things2

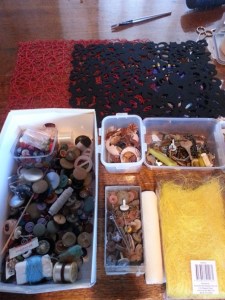
I’ve even thought that if I have any built up paint bits left I let them go dry so I can peel them off and maybe add them into something.  on the right

things3

things4

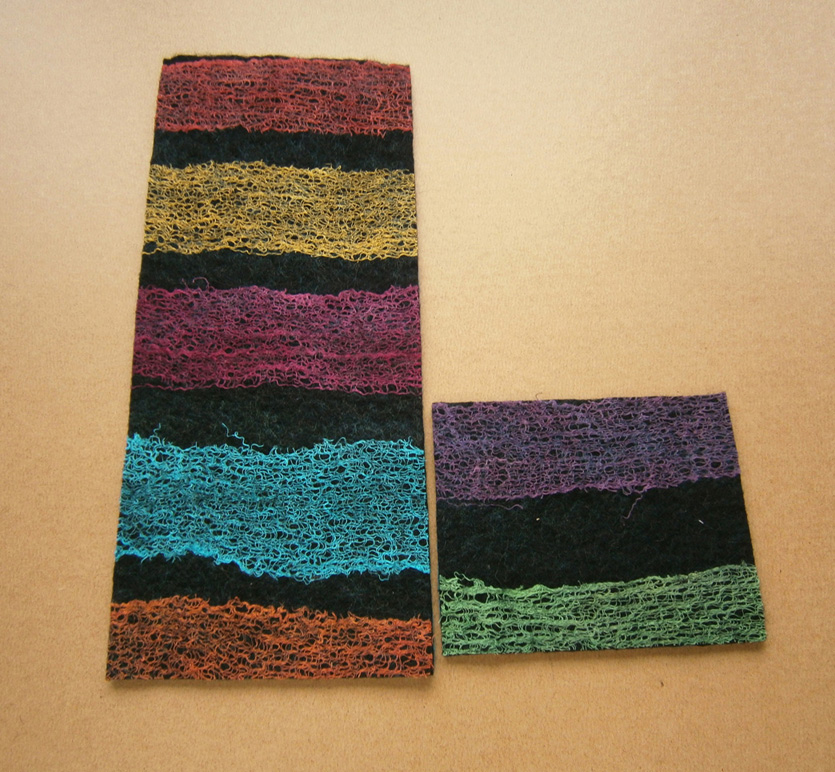
My daughter has also been in a creative mood and made this melted crayon piece, shes not really happy with as she said she over melted and they blended a bit to much, but she had fun anyway !

 shaynas1

And I think ive said that she loves Tim Burton so this is one of his that she did as well.  I really love this one

shaynas2

So  as you can see I haven’t been sitting idle and I’ve also been helping my son with Charlie while her mums away at work back in the mining industry.  I forgot what running after a 14 month old does to you,  I was pooped on Sunday lol  she so dam gorgeous though its all worth the extra exercise I’m getting  haha

I hope your all enjoying any projects your working on and dont forget to come and join in our forum by clicking on the following link.  xo

http://feltandfiberstudio.proboards.com/index.cgi?

My Beaded Book

My Beaded Book

One of the things I wanted to start doing was adding more video tutorials to the site. So I thought I would give making a video a try. My husband is running the camera and I am turning the pages of my beaded book. This is very primitive and we obviously have a long way to go. But it’s a start and I learned the very basics about how to edit and upload a video. I hope you’ll be able to see a few details on my beaded book.

MINOLTA DIGITAL CAMERA

The front page has a beaded cabochon and a single “zipper” beaded edge.

MINOLTA DIGITAL CAMERA

This page shows various ways of attaching rows of beads singly. The top edge is another “zippered” edge, the side is a single bead and the bottom is two stacked beads.

MINOLTA DIGITAL CAMERA

This page has various ways of stacking beads on top of each other. I have already forgotten what this edge is called but it makes a kind of diamond or vee shaped pattern.

MINOLTA DIGITAL CAMERA

This page is covered with brass washers. The ones on top are covered with buttonhole stitch and one is even beaded. The edge is a rope edge.

MINOLTA DIGITAL CAMERA

This page is various pieces of metal couched down with beads. The top and middle rows are couched down using raised chain band stitch. The edge is one I made up with two stacked beads and then connecting them with three smaller beads to make a “dome”.

MINOLTA DIGITAL CAMERA

This page I designed myself and is supposed to be an iris. It is a solid layer of beads. The edge is another one I have forgotten the name. I would definitely need to reread the instructions to remember how to do these all again.

MINOLTA DIGITAL CAMERA

This is the sequin page. A bit hard to get a good photo due to the shininess. The edge is a “wave” edge.

MINOLTA DIGITAL CAMERA

This is another page I designed myself. I wanted to use another cabochon and the long bugle beads. It looks like an Egyptian eye but the original design was from a birch tree if you can imagine that! The edge is two chains interlaced.

MINOLTA DIGITAL CAMERA

This is the scattered beads page. This is a “lacey” edging.

MINOLTA DIGITAL CAMERA

This page is making patterns with bugle beads. Again, a poor photo due to the reflection of the glass beads. The edge is a connecting type of short fringe.

MINOLTA DIGITAL CAMERA

This is the first fringe page. It shows a variety of ways to make fringe. The edge is a branched fringe edge. This edging took nearly a full tube of seed beads.

MINOLTA DIGITAL CAMERA

This is the last page and is another showing different fringes. The edge is made up of all different kinds of fringe and is a bit extravagant.

MINOLTA DIGITAL CAMERAAnd here is the binding which is done with raised chain band and I added a bead between each stitch for spacing. The book weighs over a pound and I did add a beaded tassel after this photo was taken. You can see it in the video above. I enjoyed making this book but it is probably the only one I will ever make. I hope you enjoyed seeing it closer. It was part of my homework for my Level 2 Stitch Class at the Gail Harker Creative Studies Center.

Felt bird houses are coming along and a fun demo.

Felt bird houses are coming along and a fun demo.

Slowly the bird houses are coming along. They are now decorated, wet down.

birdhouse 1 birdhouse 2 birdhouse 3 birdhouse 4 birdhouse 5 birdhouse 6

They have been rubbed and rolled and stuffed into the tops of pantyhose. They are ready to full. With some luck that will be tomorrows job.

Two days this week I was at the Ottawa Valley Farm Show. I was demonstrating spinning with a few friends. I took some mixed batts I made buy collecting my odd bits together and running them through the carder. They have lots of colour and neps.

spinning batts

On day one I spun up 2 very bulky singles and one medium weight single in pinks.

wheel spun spools

Today I plied the 2 bulkies together. My wheel is not designed for such bulky yarn but with perseverance  and a few choice words under my breath I got it plied.

bulky being plied bulky plied

After that I was tired of pink so I switched to my drop spindle and the blue green batt.

sinndle spun blue spoindle spinning

I am afraid I don’t have anymore pictures that turned out. We were right in front of a big picture window that was a very nice spot but not good for taking pictures as you can see from the picture of me spinning.

I think I’ve done really well with working and playing with fiber this week. I hope I can keep it up.


Threads and Yarns

Threads and Yarns

Around this time last year I was still doing the Take A Stitch Tuesday challenge. I struggled with it, and didn’t always enjoy it, but I did like what I produced when I used some felt offcuts from a piece I’d made with natural wools for placemats and coasters. I used my own handspun thread to sew the stitches. This is one I made using chain stitch, and this is one using cretan stitch. I hadn’t used my threads in a while, but recently I’ve been inspired by my flickr-friend, Marchi Wierson, a sculptural fibre artist who uses a variety of techniques in her work, such as wet felting and crochet, and loves working with natural wools and fibres. Her recent vessel commission and some gorgeous natural fibre yarns had me rummaging through my wools and fibres and getting my spindles out to spin more thread and yarn. I decided to use three shades of Shetland Wool.

shetlandI pulled off some of the tops from each shade.

tops

Then I looked through my embellishment fibres for some I thought would make a nice match. I chose Soybean top, viscose top and flax.

fibresI added some of each fibre to the Shetland tops.

fibreThen I blended them by hand.

blend
I got a couple of my spindles out, this is one I made and painted a few years ago.

spindleI made a small amount of thread, though even a small amount of wool and fibres goes a long way when spinning thread. This is it wound around the spindle.

threadThen I blended up some more Shetland and fibres and spun a thicker yarn. I will probably use the yarn in a wet felting project, though I have used them for needlefelting before.

OLYMPUS DIGITAL CAMERADo have a look at Marchi’s photostream if you have time, her work is amazing and inspiring 🙂

You might have noticed a few changes to the site recently. We’ve been updating it and adding more photos to the galleries. We’ve also added a new page for Fabrics, and Ann’s ever popular Cat Cave ‘how to’ is now listed on the Wet Felting Tutorials page.